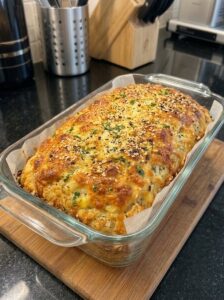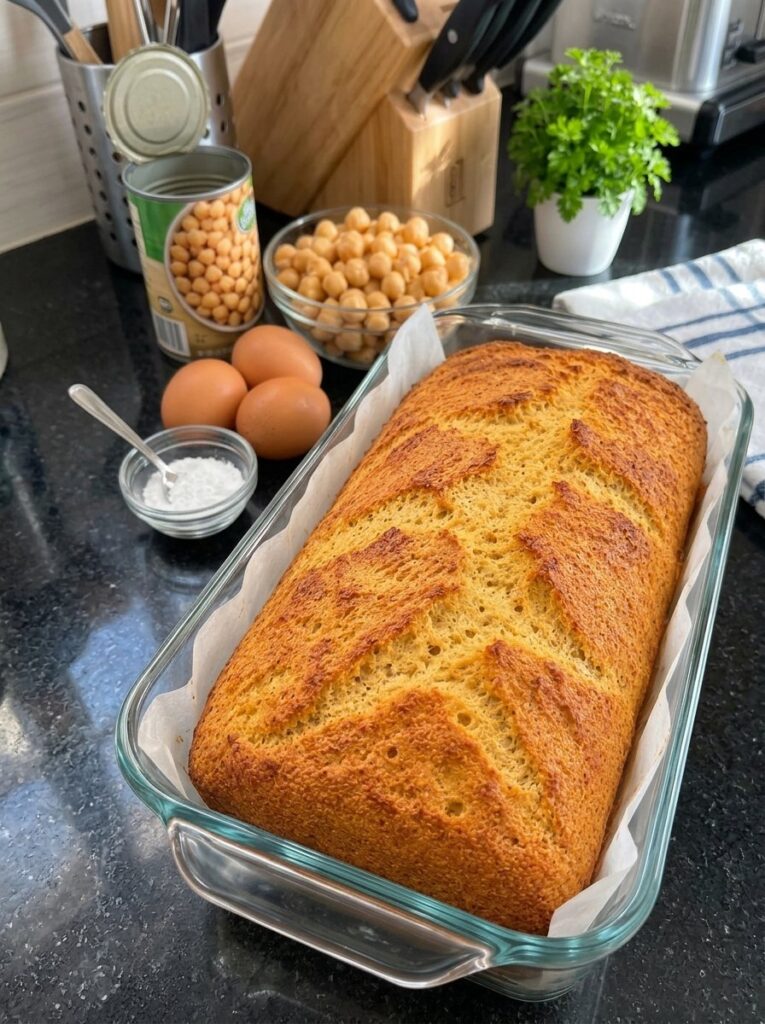
Homemade Bread Without Flour, Yeast, or Fuss
If you have ever wanted to bake your own bread but felt put off by proofing times, kneading, and a pantry full of specialty flours, this recipe is for you. This 3-ingredient chickpea sandwich bread uses a can of chickpeas, three eggs, and a teaspoon of baking powder. That is the entire ingredient list. There is no flour to measure, no yeast to activate, and no dough to knead. You blend, pour, bake, and cool.
The result is a golden, tender, hearty loaf that slices well and works for everything from avocado toast to a packed lunch sandwich. Because it is built on chickpeas and eggs, it is also naturally higher in protein than many conventional sandwich breads, which makes it a popular choice for people who want a more filling slice without relying on grains.
In this guide, you will find the full recipe, an explanation of how and why it works, ingredient notes, step-by-step instructions, troubleshooting help, creative variations, serving ideas, storage and freezing advice, and answers to the most common questions about chickpea bread.
Why You Will Love This Chickpea Bread Recipe
There are plenty of bread alternatives online, but this one stands out for a handful of practical reasons.
It truly uses three ingredients. Chickpeas, eggs, and baking powder are all you need. Most people already have baking powder and eggs at home, and canned chickpeas are one of the most reliable pantry staples there is.
It is flourless and yeast-free. There is no waiting for dough to rise and no wheat flour involved. That removes the most time-consuming and technique-heavy parts of traditional bread making.
It is beginner friendly. If you can use a blender and a loaf pan, you can make this bread. There is no kneading, shaping, or scoring.
It is high in protein. Chickpeas supply plant protein and fiber, and eggs add more protein plus the structure the loaf needs to hold together.
It is versatile. The mild, savory flavor works with sweet and savory toppings alike, so one loaf can cover breakfast, lunch, and snacks.
It is quick. With about 10 minutes of prep and 35 to 45 minutes in the oven, you can have a fresh loaf cooling on the counter in under an hour.
How Does Chickpea Bread Work Without Flour?
Traditional bread relies on gluten, the protein network that forms when wheat flour is mixed with water and worked. That network traps gas from yeast and gives bread its chew and rise. Chickpea bread takes a completely different route.
When you blend canned chickpeas, they break down into a thick, smooth puree. The starch and protein in the chickpeas give the batter body. The eggs do the heavy lifting for structure: as they heat in the oven, the egg proteins set and form a network that holds the loaf together, much like in a custard, a frittata, or a flourless quick bread. The baking powder releases gas as the batter heats, giving the loaf a little lift and a lighter crumb than it would otherwise have.
Because there is no gluten, the texture is different from wheat bread. Expect a moist, tender, slightly dense crumb with a mild, savory flavor, closer to a soft savory quick bread than a fluffy white sandwich loaf. That is not a flaw; it is simply what this style of bread is, and it is delicious when you know what to expect. Toasting the slices brings out a sturdier surface and a more bread-like bite.
Ingredients You Will Need
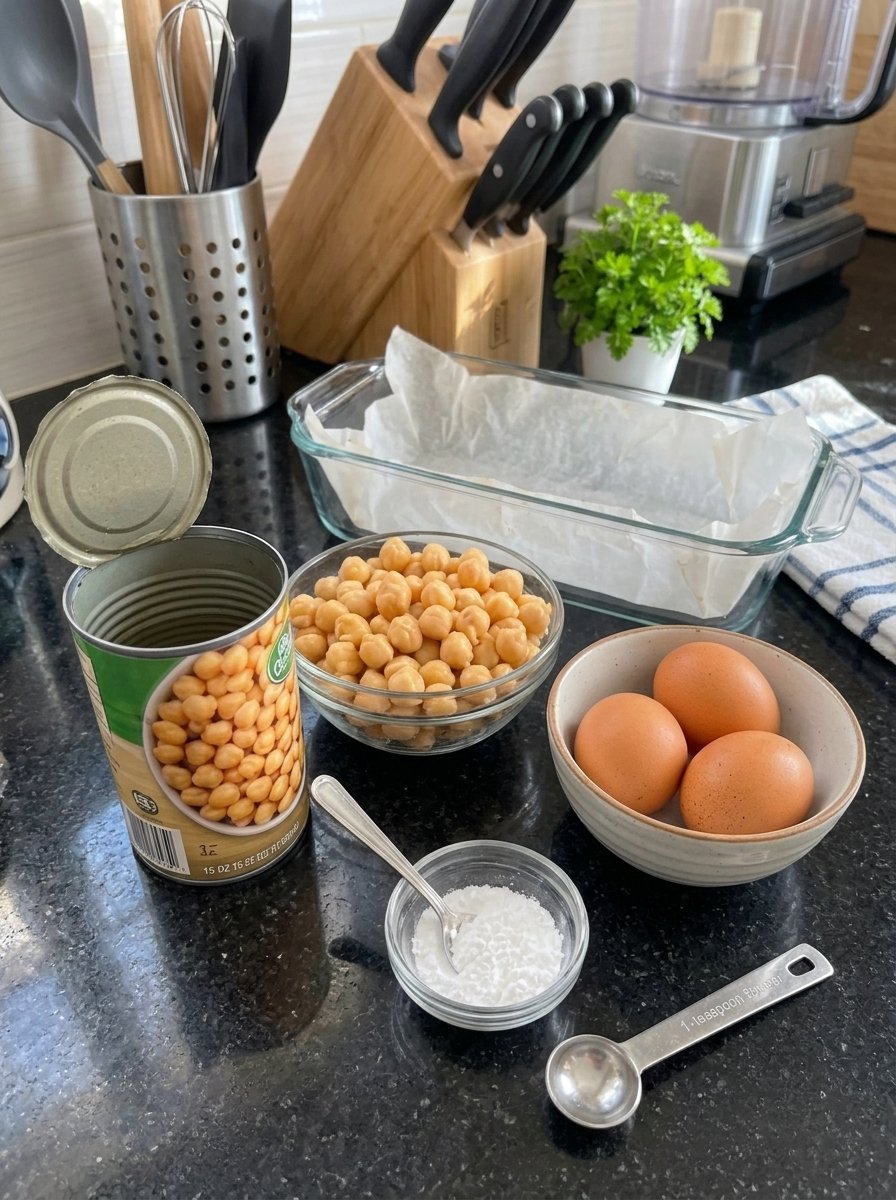
The full ingredient list is short:
- 1 can (15 oz / 425 g) chickpeas, drained and thoroughly rinsed
- 3 large eggs
- 1 teaspoon baking powder
You will also want a little oil, butter, or parchment paper to prepare the loaf pan. A tiny pinch of salt is a common optional addition if you like your bread more seasoned, though it is not required for the base recipe.
Ingredient Notes
Canned chickpeas. Use a standard 15 oz (425 g) can. Drain them completely, then rinse them under cool running water. Rinsing removes the briny canning liquid, which can add an overly salty or metallic flavor, and it helps reduce excess moisture. After rinsing, let the chickpeas sit in the strainer for a few minutes so they drain well. If you prefer a lower-sodium option, look for cans labeled no salt added.
Large eggs. Eggs provide structure, richness, and protein. Use large eggs at room temperature if possible, since they blend more evenly into the chickpeas. If you only have medium or extra-large eggs, the recipe will usually still work, but large eggs give the most consistent result.
Baking powder. One teaspoon provides the lift. Make sure your baking powder is fresh. Old baking powder loses strength and can leave you with a denser loaf. A simple freshness test is to stir a little into hot water; if it fizzes actively, it is good to go.
Equipment
- A blender or food processor (a high-speed blender gives the smoothest batter)
- An 8 x 4-inch loaf pan
- Parchment paper or a little oil or butter for greasing
- A spatula
- A wire cooling rack
- A sharp or serrated knife for slicing
How to Make Chickpea Sandwich Bread: Step by Step
The full process takes about 10 minutes of hands-on time. Here is exactly how to do it.
Step 1: Prepare the Chickpeas and Preheat the Oven
Preheat your oven to 350°F (175°C). Open the can of chickpeas, drain them, and rinse them thoroughly under cool running water. Let them drain well in a strainer so that as little excess liquid as possible makes it into the blender. This matters more than it seems, because too much water can leave the center of the loaf wet.
Step 2: Blend the Ingredients Until Smooth
Add the drained chickpeas, the three eggs, and the baking powder to a blender or food processor. Blend until the mixture is as smooth as you can get it. Stop and scrape down the sides once or twice so that no chunks hide near the edges. The finished batter should be thick but pourable, with no visible pieces of chickpea.
A smooth batter is the secret to an even crumb and a loaf that is easy to slice. If you are using a food processor and see small bits, keep blending, scraping, and blending again.
Step 3: Prepare the Loaf Pan
Lightly grease an 8 x 4-inch loaf pan, or line it with parchment paper. Parchment makes lifting the loaf out much easier, so it is a good idea even if you also grease the pan. Pour in the batter and spread it evenly with a spatula. Gently tap the pan on the counter a few times to release any large air bubbles.
Step 4: Bake Until Set
Bake in the preheated oven for 35 to 45 minutes. The loaf is done when the top is golden brown, the center feels firm, and a toothpick inserted into the middle comes out without any wet batter on it. Ovens vary, so if the center still looks undercooked, continue baking for a few more minutes and check again.
Step 5: Cool Completely
Remove the pan from the oven and let the loaf rest in the pan for 10 to 15 minutes. Then carefully transfer it to a wire rack and let it cool completely before slicing. This step is important. Chickpea bread is naturally moist, and cooling allows the interior to firm up so that you get neat, clean slices instead of a crumbly or gummy middle.
Step 6: Slice and Enjoy
Use a sharp knife to slice the cooled loaf into 6 to 8 slices. Eat it as is, or lightly toast the slices for a firmer texture and a crisp edge. Then add your favorite toppings or sandwich fillings.
Recipe Snapshot
- Prep time: 10 minutes
- Bake time: 35 to 45 minutes
- Cooling time: 30 to 45 minutes
- Total time: about 1 hour 15 minutes to 1 hour 40 minutes
- Yield: 1 small loaf, about 6 to 8 slices
- Oven temperature: 350°F (175°C)
- Texture: moist, tender, and hearty
- Flavor: mild and savory
- Difficulty: easy and beginner friendly
Pro Tips for the Best Chickpea Bread
Small details make the difference between a good loaf and a great one. Keep these tips in mind.
Drain the chickpeas well. Excess moisture is the number one reason chickpea bread turns out too wet or fails to set properly. After rinsing, shake the strainer and let the chickpeas sit for a few minutes. You can even pat them gently with a clean kitchen towel.
Blend until completely smooth. A silky batter creates an even texture throughout the loaf. Lumpy batter can create uneven spots and makes slicing harder.
Prepare the pan properly. Grease the loaf pan or line it with parchment paper. A moist, egg-based loaf can stick, so do not skip this step.
Check the center before removing. The loaf should feel firm in the middle, and a toothpick should come out clean. Pulling it out too early is the most common cause of a gummy center.
Cool completely before slicing. It is tempting to cut into warm bread, but chickpea bread continues to set as it cools. Patience gives you better slices.
Toast for a firmer texture. A quick trip through the toaster or a hot skillet makes the slices sturdier, which is especially helpful for loaded sandwiches or toppings like avocado and tomato.
Use a serrated knife. A bread knife glides through the crust without compressing the soft crumb.
Troubleshooting: Common Chickpea Bread Problems
Even simple recipes can have hiccups. Here is how to fix the most common issues.
My bread is gummy or wet in the middle
This usually means one of three things: the chickpeas were not drained well enough, the loaf was not baked long enough, or it was sliced before it cooled. Next time, drain the chickpeas more thoroughly, bake until a toothpick comes out clean, and let the loaf cool completely. If you already have a gummy loaf, slice it and toast the slices; toasting dries them out nicely.
The bread tastes eggy
A mild egg flavor is normal because eggs make up a large part of the structure. If you are sensitive to it, toast the slices and pair them with bold toppings such as hummus, pesto, avocado with lemon, or tomato with fresh herbs. A pinch of salt in the batter can also make the flavor taste more balanced.
The loaf did not rise much
This bread is not meant to rise like yeasted bread. It will puff slightly and then settle as it cools. If it seems especially flat, check that your baking powder is fresh and that your batter was well blended and evenly spread in the pan.
The top browned too quickly
Ovens run hot or cold. If the top is getting very dark before the center is set, loosely cover the loaf with a piece of foil and keep baking. An oven thermometer can help you check whether your oven is accurate.
The loaf is crumbly or falls apart when sliced
This usually points to slicing too early or a batter that was not smooth enough. Let the loaf cool fully on a wire rack and use a serrated knife with a gentle sawing motion.
The bread stuck to the pan
Use parchment paper and leave a little overhang on the sides so you can lift the loaf out. If you only grease the pan, be generous and run a thin knife around the edges after the loaf has rested for 10 to 15 minutes.
Flavor Variations to Try
Once you are comfortable with the base recipe, you can make small additions to change the flavor. Keep additions modest so you do not throw off the balance of moisture and structure. These are ideas to experiment with, and results may vary from loaf to loaf.
- Savory herb: Add a pinch of dried oregano, thyme, or Italian seasoning to the blender.
- Garlic and onion: A small amount of garlic powder or onion powder adds a savory, bakery-style note.
- Everything topping: Sprinkle everything bagel seasoning over the batter just before baking.
- Seeds on top: Scatter sesame, sunflower, or pumpkin seeds on the surface for crunch.
- Cheesy twist: Sprinkle a little shredded cheese on top during the last 10 minutes of baking.
- Spice it up: Add a pinch of paprika, cumin, or black pepper for extra warmth.
- A pinch of salt: Salt is optional in the base recipe, but a small pinch can help the flavor come through.
Delicious Ways to Serve Chickpea Bread
The mild, savory flavor makes this loaf a flexible canvas. Here are some of the best ways to enjoy it.
Avocado toast. Toast a slice, spread it with mashed avocado, and finish with black pepper and a squeeze of lemon.
Breakfast sandwich. Layer scrambled eggs, cheese, and sliced tomatoes between two slices for a hearty morning meal.
Fresh vegetable sandwich. Build it with lettuce, cucumber, tomato, and your favorite spread for a light lunch.
Creamy chickpea toast. Top a slice with cottage cheese or cream cheese and fresh herbs for a protein-rich snack.
Hummus and vegetables. Spread on hummus and add roasted peppers or cucumber slices. It is a natural pairing with the chickpea flavor.
Savory snack with soup or salad. Toast a slice and serve it alongside a bowl of soup or a fresh salad, using it the way you would use any crusty side bread.
Open-faced melts. Top a slice with tomato and cheese, then broil briefly until bubbly.
Lunchbox sandwiches. Slice, fill, and wrap. Lightly toasting the slices first helps them hold up better until lunchtime.
How to Store Chickpea Bread
Because this loaf is moist and contains eggs and chickpeas, storage matters for both quality and food safety.
Refrigerator. Once the bread has cooled completely, store it in an airtight container in the refrigerator for up to 3 to 4 days.
Freezer. Slice the loaf first, then separate the slices with small pieces of parchment paper so they do not stick together. Place them in a freezer-safe bag and freeze for up to 2 months. This is the best way to keep a steady supply on hand, since you can pull out one slice at a time.
Reheating. Toast refrigerated or thawed slices in a toaster or skillet until warmed through. Toasting also restores a pleasant texture.
Food safety. Refrigerate the loaf within 2 hours of baking rather than leaving it out at room temperature for long periods. Moist, egg-based breads are best kept cold.
Nutrition and Dietary Notes
Chickpea bread is often chosen because it is flourless and rich in protein, but it helps to know what it is and what it is not.
Protein and fiber. Chickpeas contribute plant protein and fiber, and eggs add more protein. Together they make a slice that tends to be more filling than a slice of many standard white sandwich breads. Exact nutrition values depend on the brand of chickpeas, the size of your eggs, and how thickly you slice the loaf, so use a nutrition calculator with your specific ingredients if you need precise numbers.
Flour-free. The recipe contains no wheat flour. If you are avoiding gluten for medical reasons such as celiac disease, check that your canned chickpeas and baking powder are labeled gluten-free, since cross-contamination and added ingredients can vary by brand.
Not vegan. The structure of this loaf depends on eggs, so it is not suitable for vegan diets, and the recipe has not been developed with egg substitutes.
Lower in refined carbohydrates. Because it is made from legumes rather than refined flour, many people consider it a lighter option for carbohydrates. It is still a starchy food, so if you are following a specific medical diet, check with your healthcare provider.
Allergens. The recipe contains eggs. Always check labels on canned chickpeas and baking powder for allergen statements if you have food allergies.
Frequently Asked Questions
Can I make chickpea bread without eggs?
This recipe relies on eggs for structure, and egg-free versions behave very differently. Substitutes such as flax eggs or aquafaba may change the texture and are not part of this tested recipe, so expect to experiment if you want a vegan version.
Can I use dried chickpeas instead of canned?
Yes, in principle, as long as the chickpeas are fully cooked until soft and drained very well. One 15 oz can contains roughly 1½ cups of drained chickpeas, so aim for a similar amount. Overly wet cooked chickpeas will make the batter too thin, so drain and pat them dry.
Does chickpea bread taste like hummus?
Not really. The flavor is mild and savory with a gentle nuttiness from the chickpeas, and the eggs add richness. Most people find it neutral enough to pair with both sweet and savory toppings.
Can I make it in a food processor instead of a blender?
Yes. A food processor works well, but you may need to stop and scrape the sides more often to reach a completely smooth batter. A high-speed blender usually produces the silkiest result.
Why is my chickpea bread so dense?
This style of bread is naturally denser than yeasted wheat bread. If yours feels heavier than expected, make sure the baking powder is fresh and that the batter was blended until smooth. Using a slightly smaller loaf pan can also produce a taller, lighter-looking loaf.
How do I know when the loaf is done?
Look for a golden-brown top, a firm center, and a toothpick that comes out without wet batter. If it still looks wet inside, bake for a few more minutes.
Can I double the recipe?
You can, but use a larger pan or two pans, and expect the baking time to change. Check for doneness with a toothpick rather than relying on the clock.
Can I freeze the whole loaf?
You can, but slicing first is more convenient. Separate slices with parchment paper, freeze in a freezer-safe bag, and use within 2 months.
Is this bread good for meal prep?
Yes. It keeps for 3 to 4 days in the refrigerator and freezes well, which makes it a handy option for weekly lunches and quick breakfasts.
What size pan should I use?
An 8 x 4-inch loaf pan is recommended. A larger pan will produce a flatter loaf that bakes faster, so check the center a little earlier.
Final Thoughts
This 3-ingredient chickpea sandwich bread proves that homemade bread does not have to be complicated. With just chickpeas, eggs, and baking powder, you can bake a golden, hearty, protein-rich loaf with no flour, no yeast, and no kneading. It is a practical, satisfying choice for busy days when you want something homemade with minimal effort.
Start with the base recipe, follow the tips on draining, blending, and cooling, and then make it your own with herbs, seeds, or your favorite toppings. Once you have made it once, it is likely to become a regular in your kitchen.
Print
3-Ingredient High-Protein Chickpea Sandwich Bread
Ingredients
The full ingredient list is short:
- 1 can (15 oz / 425 g) chickpeas, drained and thoroughly rinsed
- 3 large eggs
- 1 teaspoon baking powder
You will also want a little oil, butter, or parchment paper to prepare the loaf pan. A tiny pinch of salt is a common optional addition if you like your bread more seasoned, though it is not required for the base recipe.
Ingredient Notes
Canned chickpeas. Use a standard 15 oz (425 g) can. Drain them completely, then rinse them under cool running water. Rinsing removes the briny canning liquid, which can add an overly salty or metallic flavor, and it helps reduce excess moisture. After rinsing, let the chickpeas sit in the strainer for a few minutes so they drain well. If you prefer a lower-sodium option, look for cans labeled no salt added.
Large eggs. Eggs provide structure, richness, and protein. Use large eggs at room temperature if possible, since they blend more evenly into the chickpeas. If you only have medium or extra-large eggs, the recipe will usually still work, but large eggs give the most consistent result.
Baking powder. One teaspoon provides the lift. Make sure your baking powder is fresh. Old baking powder loses strength and can leave you with a denser loaf. A simple freshness test is to stir a little into hot water; if it fizzes actively, it is good to go.
Instructions
The full process takes about 10 minutes of hands-on time. Here is exactly how to do it.
Preheat your oven to 350°F (175°C). Open the can of chickpeas, drain them, and rinse them thoroughly under cool running water. Let them drain well in a strainer so that as little excess liquid as possible makes it into the blender. This matters more than it seems, because too much water can leave the center of the loaf wet.
Add the drained chickpeas, the three eggs, and the baking powder to a blender or food processor. Blend until the mixture is as smooth as you can get it. Stop and scrape down the sides once or twice so that no chunks hide near the edges. The finished batter should be thick but pourable, with no visible pieces of chickpea.
A smooth batter is the secret to an even crumb and a loaf that is easy to slice. If you are using a food processor and see small bits, keep blending, scraping, and blending again.
Lightly grease an 8 x 4-inch loaf pan, or line it with parchment paper. Parchment makes lifting the loaf out much easier, so it is a good idea even if you also grease the pan. Pour in the batter and spread it evenly with a spatula. Gently tap the pan on the counter a few times to release any large air bubbles.
Bake in the preheated oven for 35 to 45 minutes. The loaf is done when the top is golden brown, the center feels firm, and a toothpick inserted into the middle comes out without any wet batter on it. Ovens vary, so if the center still looks undercooked, continue baking for a few more minutes and check again.
Remove the pan from the oven and let the loaf rest in the pan for 10 to 15 minutes. Then carefully transfer it to a wire rack and let it cool completely before slicing. This step is important. Chickpea bread is naturally moist, and cooling allows the interior to firm up so that you get neat, clean slices instead of a crumbly or gummy middle.
Use a sharp knife to slice the cooled loaf into 6 to 8 slices. Eat it as is, or lightly toast the slices for a firmer texture and a crisp edge. Then add your favorite toppings or sandwich fillings.