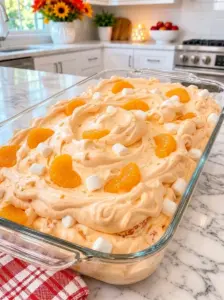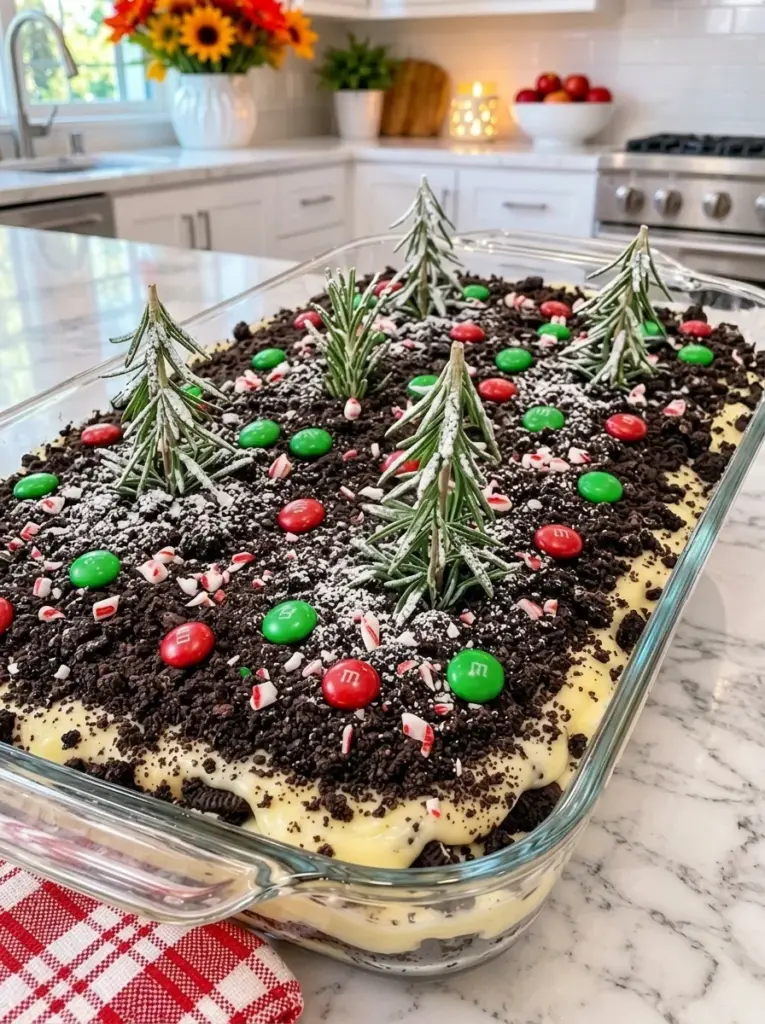
Christmas Dirt Cake layers dark chocolate sandwich-cookie crumbs with a fluffy vanilla pudding and cream cheese filling, then finishes the dessert with whipped cream, holiday sprinkles, and cookies. It is a festive version of the familiar American potluck dessert: creamy, sweet, and easy to serve from a chilled baking dish.
The dark crumbs create the “dirt” layers, while vanilla pudding keeps the filling mild enough to contrast with the chocolate cookies. Cream cheese brings a little tang, softened butter adds richness, and whipped cream lightens the texture. Red and green decorations give it a holiday appearance without requiring baking or elaborate cake decorating.
A glass 9-by-13-inch dish shows the alternating layers, but individual dessert cups are another serving option. Either way, the important steps are mixing the cream cheese base until smooth, using instant pudding, folding in the whipped cream gently, and allowing enough refrigerator time before serving.
Recipe note: This article expands the supplied recipe and clarifies ingredient measurements, assembly, and serving options. The formulation has not been independently kitchen-tested. Cookie packages, pudding brands, cream whipping volume, and container size can change the final yield and firmness.
What to Expect
This is a rich, spoonable layered dessert with a cheesecake-inspired flavor. It does not contain a baked cheesecake layer, and it should not be expected to cut into rigid bakery-style squares. A thorough chill improves serving, but the filling remains creamy.
The bottom crumbs are mixed with melted butter and pressed into a base. The middle crumbs stay loose during assembly and soften as they absorb moisture from the filling. The upper crumbs can be added with the layers or held back until closer to serving for a fresher texture.
Whipped cream swirls and whole cookies are best added near serving time. Sprinkles can bleed color into moist dairy, especially small nonpareils, so the prettiest decorations go on last rather than spending the night in the refrigerator.
Recipe at a Glance
- Active preparation: About 35–45 minutes
- Cooking: None
- Chilling: At least 4 hours, preferably overnight
- Total time: Approximately 4 hours 45 minutes with minimum chilling
- Pan: One deep 9-by-13-inch baking dish
- Servings: About 12–16 rich dessert portions
- Method: No-bake, refrigerated layering
The individual-cup yield depends on cup size and how much filling each contains. This is a full party-size batch, not a practical recipe for only four to six ordinary dessert cups. Have roughly twelve to sixteen cups available and fill them according to their actual capacity, leaving room for toppings; you may need more small cups.
Ingredients
Chocolate Cookie Layers
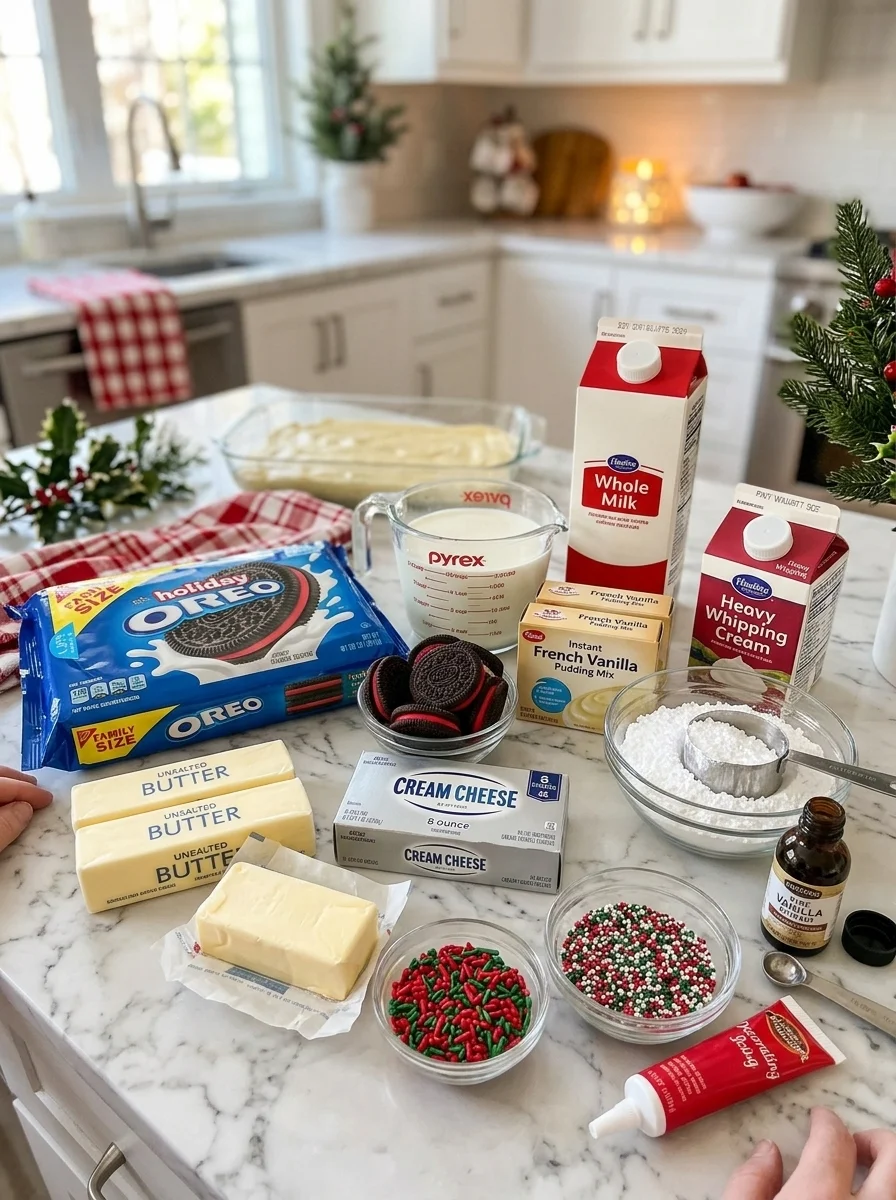
- About 18.7 ounces regular chocolate sandwich cookies, including their filling, finely crushed
- Aim for approximately 4½ cups crumbs, divided
- 6 tablespoons unsalted butter, melted
- Up to ⅓ cup red and green holiday jimmies, optional for folding into the filling
Vanilla Cheesecake Pudding Filling
- 8 ounces full-fat cream cheese, softened
- ½ cup unsalted butter, softened, equal to 1 stick
- 1 cup powdered sugar
- 2 teaspoons vanilla extract
- 2 packages instant French vanilla, vanilla, or white chocolate pudding mix, approximately 3.4 ounces each
- 3 cups cold whole milk, total for both pudding packages
- 1½ cups cold heavy whipping cream, measured before whipping, whipped to firm peaks
Whipped topping alternative: One 8-ounce tub of thawed whipped topping may replace the whipped cream in the filling. It is a convenient alternative, not an exact equivalent by volume, sweetness, or texture.
Festive Topping
- 1 cup cold heavy whipping cream, measured before whipping
- 3 tablespoons powdered sugar
- ½ teaspoon vanilla extract
- 2 tablespoons red decorating icing, optional
- Up to 2 tablespoons red and green holiday sprinkles
- 9–12 holiday sandwich cookies or regular chocolate sandwich cookies, for garnish
The garnish cookies are additional to the cookies crushed for the layers. If making sixteen individual portions and you want a whole cookie on every one, provide more garnish cookies or use cookie halves.
Important Measurement Clarifications
Cookie Packages and Counts Vary
Package weights and cookie counts change, and “family size” is not a precise measurement. Use the weight and actual crumb volume as guides rather than expecting exactly forty-five cookies in every package.
Crush the cookies with their cream filling intact. Measure the crumbs, then allocate two cups for the bottom, one and a quarter cups for the middle, and one and a quarter cups for the top. If the package produces slightly less, use thinner loose layers rather than running out midway through assembly.
Cream Is Measured Before Whipping
The filling calls for one and a half cups of liquid heavy cream, which expands substantially when whipped. It does not mean one and a half cups of already whipped cream. The separate topping uses another cup of liquid cream.
For the all-whipped-cream version, you therefore need two and a half cups of heavy cream in total. Keep the two portions separate because the filling and topping are prepared at different times. Buying a little extra is helpful if your package sizes do not match these quantities conveniently.
Use Instant Pudding
Choose instant pudding, not cook-and-serve pudding. The method depends on the powder thickening in cold milk without heating. Package sizes differ by brand and flavor, so check that you are using the standard small instant-pudding packages intended for a comparable amount of milk.
Three cups of milk is the combined amount for both packages in this recipe. Do not prepare each package separately with three cups. The reduced milk relative to many standard pudding directions helps create a thicker filling for layering.
Ingredient Notes
Full-fat block cream cheese provides a firmer base than a soft whipped spread. Let it soften enough to beat smoothly, but do not leave it warm for an extended period. Cold cream cheese tends to leave small lumps that become harder to remove once the pudding and whipped cream are added.
The softened butter in the filling is separate from the melted butter in the crust. Together they make a particularly rich dessert. Do not accidentally melt the filling butter or combine all the butter into the cookie base.
Cold whole milk supports the intended pudding texture. Plant-based milks do not always set instant pudding in the same way, so avoid a direct substitution unless the pudding manufacturer provides suitable directions.
For sprinkles inside the filling, sturdy jimmies generally hold their appearance better than tiny nonpareils. Even jimmies can streak or soften. Leaving the internal sprinkles out and decorating the top at serving time is a good option when appearance matters more than flecks throughout the filling.
Equipment
Use a food processor or sturdy food bag and rolling pin for crushing cookies. You will also need a large mixing bowl, a separate pudding bowl, a bowl for whipping cream, measuring tools, an electric mixer, a whisk, and a flexible spatula.
Choose a deep 9-by-13-inch dish that can accommodate the filling and crumb layers without reaching the rim. A shallow dish may require reserving some mixture for small cups. Do not force the entire batch into a container that leaves no room to cover it without touching the surface.
A piping bag and large star tip are optional. A spoon can make attractive whipped cream dollops just as easily. If transporting the dessert, a covered carrier with enough clearance for the topping is useful, or decorate at the destination.
How to Make Christmas Dirt Cake
1. Crush and Divide the Cookies
Pulse the chocolate sandwich cookies, filling included, until they form fine crumbs. A few small pieces are fine, but large chunks make the bottom less even and the middle layer harder to spread over.
Measure and divide the crumbs into three portions: two cups for the bottom and one and a quarter cups each for the middle and top. Keep the top portion covered if holding it until serving time.
2. Make the Bottom Layer
Mix the two cups of bottom-layer crumbs with six tablespoons melted butter. Stir until the crumbs look evenly moistened, then distribute across the dish and press into a flat layer.
Use the bottom of a measuring cup or a spoon to press gently but firmly. Excessive compression can make a very hard base once chilled. Refrigerate while making the filling so the butter can begin to firm.
3. Beat the Cream Cheese Base
Beat softened cream cheese and the separate half cup of softened butter until smooth. Scrape the bottom and sides of the bowl, then add the powdered sugar and two teaspoons vanilla.
Beat until creamy and free of visible lumps. Start slowly when adding powdered sugar to avoid scattering it. The mixture should be cohesive, not oily or melted.
4. Prepare the Instant Pudding
In another bowl, whisk both packages of instant pudding mix with three cups cold whole milk for about two minutes. Let stand for roughly three minutes, or until thickened according to the product’s behavior.
Check the bottom of the bowl for dry powder. The pudding should be thick but still easy to fold into the cream cheese base. If it remains thin, confirm that the product is instant pudding and that the milk quantity was measured correctly.
5. Whip the Filling Cream
Beat one and a half cups cold heavy cream in a chilled or cool bowl until firm peaks form. Stop when the cream holds its shape but still looks smooth. Overbeating can make it grainy and eventually turn it toward butter.
If using the whipped topping alternative, thaw it in the refrigerator and fold it in directly. Do not beat thawed topping as though it were liquid cream. The alternate version may be sweeter and have a different yield.
6. Combine the Filling
Add the pudding to the cream cheese base gradually, stirring or mixing gently until smooth. Fold in the whipped cream with a flexible spatula, lifting from the bottom and turning the bowl as you work.
Use enough strokes to combine thoroughly without beating away the air. If adding internal holiday jimmies, fold them in briefly at the end. Save delicate nonpareils for decoration.
7. Build the Middle Layers
Spread half the filling over the chilled cookie base. Add small dollops across the surface, then connect them gently with a spatula instead of dragging one large mound from the center to the edges.
Sprinkle one and a quarter cups dry crumbs evenly over the filling. Spoon the remaining filling on top in several places and spread carefully. It is fine if a few crumbs move into the cream; the dessert does not require perfectly sharp stripes to taste good.
8. Add or Reserve the Top Crumbs
For a softer, fully melded dirt layer, add the remaining one and a quarter cups crumbs now. For a fresher, looser surface, reserve them in a covered dry container and sprinkle on shortly before decorating.
Choose one approach and allocate the crumbs accordingly. Do not use the reserved top crumbs in the middle and then expect to have another full layer available later.
9. Cover and Chill
Cover the dish without pressing wrap into the filling and refrigerate at 40°F or below for at least four hours. Overnight chilling is convenient and gives the crumb and pudding layers more time to settle together.
This rest is part of the recipe, not an optional shortcut for the same texture. If served immediately, the mixture will be much softer and the layers less distinct.
10. Whip the Topping
Near serving time, beat the separate cup of cold heavy cream with three tablespoons powdered sugar and half a teaspoon vanilla until it holds firm peaks. Pipe or spoon onto the chilled dessert.
If the top crumbs were reserved, add them first. Make nine to twelve larger swirls or smaller dollops according to your planned servings. For more portions, use less cream per dollop or offer some pieces without individual swirls.
11. Decorate and Serve
Add holiday sprinkles, optional red icing, and garnish cookies close to serving. Press cookies into the cream only enough to support them. Heavy cookies can tip tall, narrow whipped cream cones, so a broader swirl is often easier to manage.
Serve cold using a dessert spatula or spoon. Wipe the utensil between portions if you want cleaner edges. Expect a creamy layered scoop rather than a rigid slice.
Individual Dessert Cups
Use the same layers in small clear food-safe cups: a modest amount of buttered crumbs, filling, loose crumbs, more filling, and a final crumb topping. Press the bottom lightly so it remains easy to eat with a spoon.
This full batch produces far more than four to six standard dessert cups. Set out approximately twelve to sixteen cups, then adjust based on their actual capacity and your desired portion. Leave room for whipped cream and a cookie rather than filling to the lid.
For an exact event count, portion the filling evenly before final assembly or use a scoop. If you have extra, make a few small tasting cups instead of overfilling the planned servings. Refrigerate all portions promptly and keep lids clear of decorations.
Tips for Attractive Layers
Make sure the cream cheese mixture is smooth before adding pudding. Small lumps do not disappear when whipped cream is folded in, and aggressive mixing later can reduce the filling’s lightness.
Use dollops to distribute each cream layer over the crumbs. A clean offset spatula makes spreading easier, but gentle pressure matters more than a special tool. Avoid pressing loose crumbs deeply into the layer below.
For a clear glass presentation, wipe accidental smears from the inside edge as you assemble. Decorate after chilling, when the filling is less likely to shift under the weight of the topping.
Troubleshooting
The Filling Is Lumpy
The cream cheese or butter may have been too cold. Beat those ingredients smooth before adding pudding. If already combined, small lumps are usually a texture issue; avoid prolonged high-speed beating once whipped cream has been folded in.
The Filling Is Too Loose
Check that instant pudding was used, the total milk was three cups, and the cream was whipped before folding. Give the dessert its full chilling time. Whipped topping and freshly whipped cream may produce different results, so the versions are not exact structural matches.
The Sprinkles Bleed
Moisture dissolves their surface coloring. Use internal jimmies sparingly and add nonpareils near serving. Red and green streaks do not necessarily mean the dessert failed, but last-minute decoration gives a cleaner appearance.
The Crust Is Very Hard
The crumbs may have been compressed too firmly or the bottom may be too thick for the dish. Let an individual serving stand briefly if needed for easier spooning, while keeping the main dessert chilled. Next time, press just enough to form a cohesive base.
The Cookies Turn Soft
Cookies in contact with pudding and whipped cream naturally soften. That is part of the dirt-cake texture. Reserve whole garnish cookies and some top crumbs until serving if you want a crisper contrast.
Variations
Chocolate pudding: Use a comparable instant chocolate pudding for a deeper chocolate dessert. Sweetness and thickness may differ by product.
Golden cookie version: Replace chocolate cookies with vanilla sandwich cookies for a lighter-colored holiday dessert. It will have a different flavor and lose the dark “dirt” appearance.
Peppermint accent: Add a small amount of peppermint extract carefully, replacing part of the vanilla if desired. Extract strength varies, so taste gradually. Keep crushed peppermint candy for the top near serving because it can dissolve into moist filling.
Simple decoration: Skip icing and piped shapes. A blanket of crumbs, spooned cream, and a few cookies makes an appealing finish with less handling.
Whipped topping filling: Use the stated thawed topping alternative for convenience, remembering that its volume and sweetness differ from whipped liquid cream. Keep the separate topping plan consistent with the ingredients you actually purchase.
Make-Ahead Planning
Assemble the base, filling, and middle crumbs the day before serving. Decide whether to add the top crumbs then for a soft finish or reserve them for later. Keep the dish covered and refrigerated.
Whip the topping and add the whole cookies and sprinkles near serving time. If decorating several hours early, expect some softening and possible color transfer. A low, broad whipped cream swirl usually travels more reliably than a tall cone.
For transportation, keep the dish in an insulated cooler with ice packs and refrigerate at the destination. Bring garnish cookies and sprinkles separately when practical. The dessert should remain chilled rather than being treated like a room-temperature cookie platter.
Storage and Freezing
Store covered at 40°F or below and use within three to four days, subject to the freshness and storage limits of the dairy ingredients. Texture is generally best earlier, especially with freshly whipped cream and decorative cookies.
Return the dish to refrigeration promptly after serving. The usual maximum time out is two hours, or one hour above 90°F. Keep exposure shorter when practical; there is no need to aim for the maximum. Serve from a chilled dish and replenish small portions when entertaining.
Freezing is possible for a trial portion or an undecorated batch, but instant pudding and whipped dairy can release moisture or change texture after thawing. If freezing, wrap well, use within one month for quality, and thaw in the refrigerator. Add fresh topping and decorations afterward. Do not promise the same clean layers as a never-frozen dessert.
General handling guidance is available from the USDA Food Safety and Inspection Service. Keep track of the original preparation date; adding fresh decorations does not restart the storage period.
Serving Size and Nutrition
This recipe includes a full package of cookies, two separate butter additions, cream cheese, pudding mix, sugar, and whipped cream. It is a rich celebration dessert, so twelve to sixteen portions is a useful serving range for a party.
A precise calorie figure requires the specific cookie and pudding products, the chosen cream or whipped topping version, garnish quantities, and the actual number of servings. Whole garnish cookies and large whipped cream swirls add noticeably to each portion. Avoid attaching a small-dessert calorie estimate to a very large cup simply because it is individually portioned.
The standard recipe contains wheat, milk, and typically soy through packaged cookies or mixes; check all labels for the actual products used. School-party suitability depends on the school’s food and allergen policies, not just the recipe name.
Quick Recipe Reference
Crush the cookies with their filling and divide approximately four and a half cups crumbs into two cups for the buttered base and one and a quarter cups each for the middle and top. Beat cream cheese, softened butter, powdered sugar, and vanilla until smooth. Prepare both instant pudding packages with three cups cold milk total, then combine with the cream cheese base and fold in the whipped filling cream. Layer, cover, and refrigerate at least four hours. Add freshly whipped topping, sprinkles, and garnish cookies near serving time, and keep the dessert refrigerated.
Christmas Dirt Cake
Description
- Active preparation: About 35–45 minutes
- Cooking: None
- Chilling: At least 4 hours, preferably overnight
- Total time: Approximately 4 hours 45 minutes with minimum chilling
- Pan: One deep 9-by-13-inch baking dish
- Servings: About 12–16 rich dessert portions
- Method: No-bake, refrigerated layering
The individual-cup yield depends on cup size and how much filling each contains. This is a full party-size batch, not a practical recipe for only four to six ordinary dessert cups. Have roughly twelve to sixteen cups available and fill them according to their actual capacity, leaving room for toppings; you may need more small cups.
Ingredients
Chocolate Cookie Layers
- About 18.7 ounces regular chocolate sandwich cookies, including their filling, finely crushed
- Aim for approximately 4½ cups crumbs, divided
- 6 tablespoons unsalted butter, melted
- Up to ⅓ cup red and green holiday jimmies, optional for folding into the filling
Vanilla Cheesecake Pudding Filling
- 8 ounces full-fat cream cheese, softened
- ½ cup unsalted butter, softened, equal to 1 stick
- 1 cup powdered sugar
- 2 teaspoons vanilla extract
- 2 packages instant French vanilla, vanilla, or white chocolate pudding mix, approximately 3.4 ounces each
- 3 cups cold whole milk, total for both pudding packages
- 1½ cups cold heavy whipping cream, measured before whipping, whipped to firm peaks
Whipped topping alternative: One 8-ounce tub of thawed whipped topping may replace the whipped cream in the filling. It is a convenient alternative, not an exact equivalent by volume, sweetness, or texture.
Festive Topping
- 1 cup cold heavy whipping cream, measured before whipping
- 3 tablespoons powdered sugar
- ½ teaspoon vanilla extract
- 2 tablespoons red decorating icing, optional
- Up to 2 tablespoons red and green holiday sprinkles
- 9–12 holiday sandwich cookies or regular chocolate sandwich cookies, for garnish
The garnish cookies are additional to the cookies crushed for the layers. If making sixteen individual portions and you want a whole cookie on every one, provide more garnish cookies or use cookie halves.
Instructions
1. Crush and Divide the Cookies
Pulse the chocolate sandwich cookies, filling included, until they form fine crumbs. A few small pieces are fine, but large chunks make the bottom less even and the middle layer harder to spread over.
Measure and divide the crumbs into three portions: two cups for the bottom and one and a quarter cups each for the middle and top. Keep the top portion covered if holding it until serving time.
2. Make the Bottom Layer
Mix the two cups of bottom-layer crumbs with six tablespoons melted butter. Stir until the crumbs look evenly moistened, then distribute across the dish and press into a flat layer.
Use the bottom of a measuring cup or a spoon to press gently but firmly. Excessive compression can make a very hard base once chilled. Refrigerate while making the filling so the butter can begin to firm.
3. Beat the Cream Cheese Base
Beat softened cream cheese and the separate half cup of softened butter until smooth. Scrape the bottom and sides of the bowl, then add the powdered sugar and two teaspoons vanilla.
Beat until creamy and free of visible lumps. Start slowly when adding powdered sugar to avoid scattering it. The mixture should be cohesive, not oily or melted.
4. Prepare the Instant Pudding
In another bowl, whisk both packages of instant pudding mix with three cups cold whole milk for about two minutes. Let stand for roughly three minutes, or until thickened according to the product’s behavior.
Check the bottom of the bowl for dry powder. The pudding should be thick but still easy to fold into the cream cheese base. If it remains thin, confirm that the product is instant pudding and that the milk quantity was measured correctly.
5. Whip the Filling Cream
Beat one and a half cups cold heavy cream in a chilled or cool bowl until firm peaks form. Stop when the cream holds its shape but still looks smooth. Overbeating can make it grainy and eventually turn it toward butter.
If using the whipped topping alternative, thaw it in the refrigerator and fold it in directly. Do not beat thawed topping as though it were liquid cream. The alternate version may be sweeter and have a different yield.
6. Combine the Filling
Add the pudding to the cream cheese base gradually, stirring or mixing gently until smooth. Fold in the whipped cream with a flexible spatula, lifting from the bottom and turning the bowl as you work.
Use enough strokes to combine thoroughly without beating away the air. If adding internal holiday jimmies, fold them in briefly at the end. Save delicate nonpareils for decoration.
7. Build the Middle Layers
Spread half the filling over the chilled cookie base. Add small dollops across the surface, then connect them gently with a spatula instead of dragging one large mound from the center to the edges.
Sprinkle one and a quarter cups dry crumbs evenly over the filling. Spoon the remaining filling on top in several places and spread carefully. It is fine if a few crumbs move into the cream; the dessert does not require perfectly sharp stripes to taste good.
8. Add or Reserve the Top Crumbs
For a softer, fully melded dirt layer, add the remaining one and a quarter cups crumbs now. For a fresher, looser surface, reserve them in a covered dry container and sprinkle on shortly before decorating.
Choose one approach and allocate the crumbs accordingly. Do not use the reserved top crumbs in the middle and then expect to have another full layer available later.
9. Cover and Chill
Cover the dish without pressing wrap into the filling and refrigerate at 40°F or below for at least four hours. Overnight chilling is convenient and gives the crumb and pudding layers more time to settle together.
This rest is part of the recipe, not an optional shortcut for the same texture. If served immediately, the mixture will be much softer and the layers less distinct.
10. Whip the Topping
Near serving time, beat the separate cup of cold heavy cream with three tablespoons powdered sugar and half a teaspoon vanilla until it holds firm peaks. Pipe or spoon onto the chilled dessert.
If the top crumbs were reserved, add them first. Make nine to twelve larger swirls or smaller dollops according to your planned servings. For more portions, use less cream per dollop or offer some pieces without individual swirls.
11. Decorate and Serve
Add holiday sprinkles, optional red icing, and garnish cookies close to serving. Press cookies into the cream only enough to support them. Heavy cookies can tip tall, narrow whipped cream cones, so a broader swirl is often easier to manage.
Serve cold using a dessert spatula or spoon. Wipe the utensil between portions if you want cleaner edges. Expect a creamy layered scoop rather than a rigid slice.