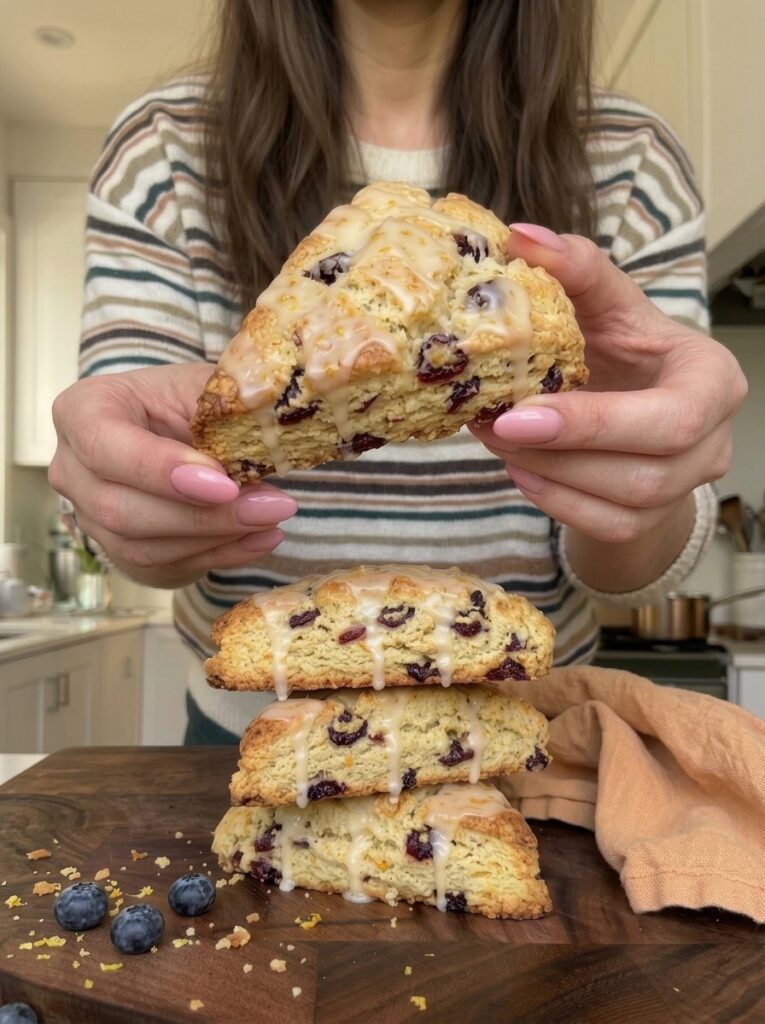
There is something deeply comforting about a warm scone with a cup of coffee or tea. Now picture that scone with lightly crisp, golden edges, a soft and tender center, pockets of sweet-tart cranberries, and a shimmering drizzle of fresh orange glaze on top. That is exactly what these cranberry orange glazed cream scones deliver.
If you have ever bought a scone from a bakery and wished you could recreate it in your own kitchen, this recipe is for you. It uses simple pantry ingredients, a handful of easy techniques, and about an hour and ten minutes from start to finish. The result is a batch of eight bakery-style scones that look impressive but are surprisingly easy to make.
In this guide, you will find the full recipe, a clear step-by-step method, the science behind why each tip works, serving ideas, storage and freezing instructions, and answers to the most common scone questions. Let’s get baking.
Why You’ll Love These Cranberry Orange Cream Scones
Before we get to the ingredient list, here is why this recipe deserves a spot in your regular rotation:
- Tender and flaky texture. Very cold butter and heavy cream create a rich, crumbly interior with lightly crisp edges.
- Bright, balanced flavor. Fresh orange zest in the dough and orange juice in the glaze make the citrus taste vivid, while dried cranberries add a pleasant sweet-tart contrast.
- Simple ingredients. Everything here is likely already in your kitchen or easy to find at any grocery store.
- Beginner-friendly. There is no yeast, no kneading, and no complicated shaping. You simply pat the dough into a round and cut it into wedges.
- Perfect for any occasion. These scones suit a lazy weekend breakfast, a holiday brunch, a baby or bridal shower, an afternoon tea, or a thoughtful homemade gift.
- Freezer-friendly. You can bake a batch now and enjoy the scones weeks later.
Recipe Overview
| Detail | Time |
|---|---|
| Prep time | About 20 minutes |
| Chilling time | 10–15 minutes |
| Baking time | 16–22 minutes |
| Cooling and glazing time | About 20–25 minutes |
| Total time | About 1 hour 10 minutes to 1 hour 20 minutes |
| Yield | 8 scones |
Ingredients for Cranberry Orange Glazed Cream Scones
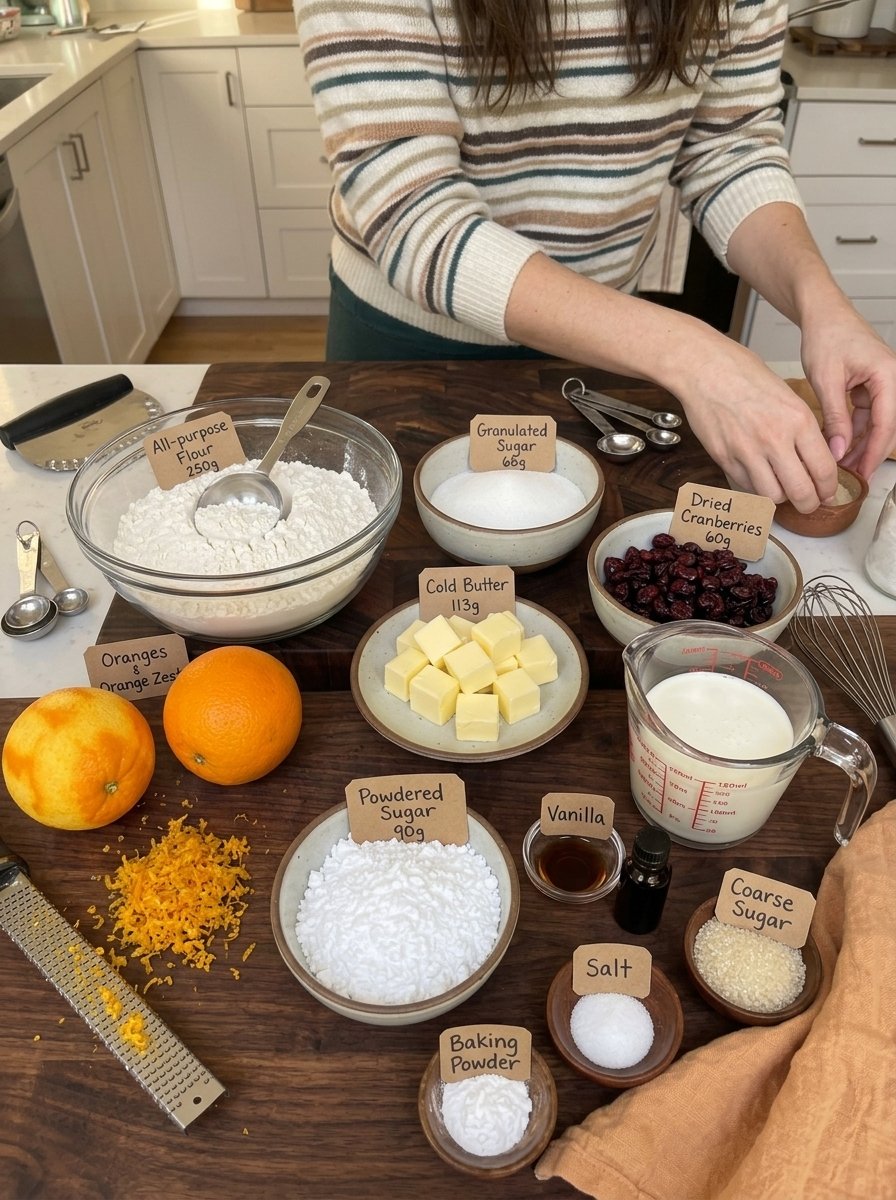
For the Scones
- 2 cups (250 g) all-purpose flour
- ⅓ cup (65 g) granulated sugar
- 2 tsp baking powder
- ¼ tsp salt
- ½ cup (113 g) unsalted butter, very cold and cut into small cubes
- ½ cup (60 g) dried cranberries
- 1 tbsp finely grated fresh orange zest
- ¾ cup (180 ml) heavy cream, plus 1–2 tbsp more if needed
- 1 tsp vanilla extract
For the Orange Glaze
- ¾ cup (90 g) powdered sugar
- 1–2 tbsp fresh orange juice
- ½ tsp finely grated orange zest (optional)
For Brushing
- 1 tbsp heavy cream or milk
- 1 tsp coarse sugar (optional)
Ingredient Notes: What Each One Does
Understanding the role of each ingredient helps you bake with confidence and troubleshoot if something goes wrong.
All-purpose flour. This gives the scones their structure. Measure it carefully. The best method is to spoon the flour into your measuring cup and level it off, or even better, weigh it at 250 grams. Packing flour into the cup can lead to dry, heavy scones.
Granulated sugar. Beyond sweetness, sugar helps the tops brown and keeps the crumb tender. With only ⅓ cup in the dough, the scones stay balanced, since the glaze adds extra sweetness.
Baking powder. This is the leavening agent that lifts the scones. Make sure yours is fresh. If your baking powder has been open for more than six months, consider replacing it for the best rise.
Very cold unsalted butter. Cold butter is the secret to flaky scones. As the scones bake, the small pieces of butter melt and release steam, which creates tiny pockets of air and a tender, layered crumb. Unsalted butter lets you control the salt level.
Dried cranberries. These provide the signature sweet-tart bite. Look for plump, soft cranberries for the best texture.
Fresh orange zest. Zest contains the fragrant citrus oils of the orange, and it delivers far more flavor than juice alone. Whisking it into the dry ingredients spreads those oils evenly through the dough.
Heavy cream. Cream is what makes these cream scones. Its fat content creates a rich, soft interior without the need for eggs, and it makes the dough easy to bring together.
Vanilla extract. A small amount rounds out the flavor and pairs beautifully with orange and cranberry.
Powdered sugar and orange juice. Together these make a simple, glossy glaze that sets into a delicate sweet-citrus finish.
How to Make Cranberry Orange Cream Scones: Step by Step
Step 1: Preheat the Oven
Preheat your oven to 400°F (200°C). Line a baking sheet with parchment paper to prevent sticking and make cleanup easier. A hot oven is important because the initial blast of heat helps the scones rise quickly and develop golden, slightly crisp edges.
Step 2: Combine the Dry Ingredients
In a large mixing bowl, whisk together the flour, granulated sugar, baking powder, and salt until evenly combined. Add the freshly grated orange zest and mix again. Distributing the zest throughout the flour mixture allows its fragrant citrus oils to flavor every bite.
Step 3: Cut in the Cold Butter
Add the cold butter cubes to the flour mixture. Using a pastry cutter, two forks, or your fingertips, work the butter into the flour until the mixture resembles coarse crumbs with a few pea-sized pieces of butter remaining.
Resist the urge to mix until the butter completely disappears. Those small pieces are what create a tender, crumbly texture as the scones bake. If your kitchen is warm or your hands run hot, work quickly or pop the bowl into the freezer for a few minutes.
Step 4: Add the Cranberries
Stir the dried cranberries into the flour and butter mixture until they are evenly distributed. Spreading them throughout the mixture means every scone gets a delicious balance of fruity sweetness and citrus flavor.
Step 5: Add the Heavy Cream and Vanilla
Pour the heavy cream and vanilla extract into the bowl. Gently stir with a fork or spatula until a soft, shaggy dough begins to form. If the mixture seems too dry, add another tablespoon of cream at a time until the dough holds together when pressed.
Avoid overmixing. The dough should look slightly rough rather than completely smooth. A smooth, elastic dough means too much gluten has developed, which leads to tough scones.
Step 6: Shape the Scones
Transfer the dough to a lightly floured work surface. Gently bring it together with your hands, pressing just enough to form a cohesive dough without kneading it. Pat the dough into a round about ¾–1 inch (2–2.5 cm) thick.
Using a sharp knife or bench scraper, cut the round into 8 equal wedges. Cut straight down rather than sawing back and forth, which helps the edges rise properly. Carefully transfer the wedges to the prepared baking sheet, leaving about 2 inches (5 cm) between each scone.
Step 7: Brush and Chill
Lightly brush the tops of the scones with heavy cream or milk. If desired, sprinkle a little coarse sugar over the tops for a delicate crunch and a lightly golden finish.
Place the baking sheet in the refrigerator for 10–15 minutes. Chilling lets the butter firm up before baking, so the scones hold their shape instead of spreading.
Step 8: Bake Until Golden
Bake the scones for about 16–22 minutes, or until the tops are lightly golden and the edges are set. The bottoms should be lightly browned, while the centers remain soft and tender.
Remove the baking sheet from the oven and let the scones cool on the pan for about 5 minutes before transferring them to a wire rack. Allow them to cool for another 10–15 minutes before adding the glaze.
Step 9: Prepare the Orange Glaze
In a small bowl, whisk together the powdered sugar and 1 tablespoon of fresh orange juice until smooth. Add the optional orange zest for an extra burst of citrus flavor.
If the glaze is too thick, add more orange juice a few drops at a time. If it is too thin, whisk in a little additional powdered sugar. The finished glaze should be smooth and thick enough to drizzle over the scones while slowly settling into the surface.
Step 10: Glaze and Serve
Once the scones have cooled slightly, drizzle the orange glaze generously over the tops using a spoon. Let the glaze set for about 10–15 minutes before serving.
Tips for the Best Cranberry Orange Cream Scones
These small details make a big difference between good scones and great ones:
- Keep the butter cold. Cold butter creates a tender, flaky texture with lightly crisp edges. If the butter softens while you work, chill the bowl for 10 minutes.
- Use fresh orange zest. It adds a bright citrus aroma and enhances the sweet-tart cranberry flavor. Zest the orange before juicing it, since zesting a squeezed orange is much harder.
- Don’t overwork the dough. Mix gently until the ingredients come together to prevent dense, tough scones.
- Choose plump cranberries. If your dried cranberries feel very firm, soak them in warm water for 5 minutes, then drain and pat them completely dry before adding them. Dry cranberries pull moisture from the dough, so softening them helps, but excess water would make the dough wet.
- Chill before baking. Refrigerating the shaped scones for 10–15 minutes helps them hold their shape in the oven.
- Adjust the cream gradually. Add extra cream only if the dough is too dry to come together. It should be soft but not wet or sticky.
- Let the scones cool before glazing. This helps the orange glaze stay on top instead of melting away.
Common Scone Mistakes and How to Fix Them
My scones turned out dry. This is usually caused by too much flour or overbaking. Weigh your flour if possible, and start checking the scones at the 16-minute mark. Pull them out when the tops are lightly golden and the centers are still soft.
My scones spread out flat. Warm butter or skipping the chilling step is the most common reason. Keep the butter cold, chill the shaped scones for 10–15 minutes, and make sure your baking powder is fresh.
My scones are tough. Overmixing or kneading develops gluten. Stir only until the dough comes together and looks slightly shaggy.
The glaze melted into the scones and disappeared. The scones were probably still too warm. Wait the full 10–15 minutes on the wire rack, then glaze.
The dough is too sticky. Add a light dusting of flour to your work surface and hands. Next time, add the extra cream a tablespoon at a time and stop as soon as the dough holds together.
Flavor Variations to Try
Once you have mastered the base recipe, there are plenty of ways to make it your own:
- Swap the fruit. Try dried cherries, chopped dried apricots, or golden raisins in place of the cranberries.
- Add crunch. Fold in a few tablespoons of chopped pecans or walnuts for added texture.
- Make it extra citrusy. Add the optional zest to the glaze, or use lemon zest and lemon juice for a different citrus twist.
- Go mini. Pat the dough into two smaller rounds and cut each into 8 wedges for bite-sized scones, shortening the baking time slightly and watching them closely.
- Brush and sparkle. Use the optional coarse sugar on top for a sparkling, bakery-style finish.
What to Serve with Cranberry Orange Scones
These scones are delicious on their own, but they also shine as part of a larger spread:
- Serve with freshly brewed coffee, a latte, or a cup of black tea.
- Pair with Greek yogurt and fresh fruit for a simple breakfast.
- Add them to a holiday brunch spread alongside eggs, fruit salad, and other pastries.
- Serve with orange slices or fresh berries for a bright, fruity accompaniment.
- Arrange them on a dessert platter with a little extra orange zest for a beautiful finishing touch.
How to Store Cranberry Orange Scones
Allow the scones and glaze to cool completely before storing.
- Room temperature: Keep them in an airtight container for up to 2 days.
- Refrigerator: Store them for up to 5 days.
- Reheating: To refresh the texture, warm the scones in a 300°F (150°C) oven for about 5–8 minutes. If they are already glazed, use gentle heat and avoid overheating the icing.
Can You Freeze Cranberry Orange Scones?
Yes, and they freeze beautifully. For the best results, freeze the cooled scones unglazed in a freezer-safe container or bag for up to 2–3 months. Thaw them at room temperature and warm them briefly before serving. Prepare a fresh batch of orange glaze after thawing for the best finish.
A helpful make-ahead approach is to shape the scones, freeze the unbaked wedges on a tray, and then transfer them to a bag. Keep in mind that this recipe was developed for baking from chilled dough, so if you try baking from frozen, add a few extra minutes and watch the color closely.
Frequently Asked Questions
What makes a cream scone different from a regular scone?
Cream scones use heavy cream as the main liquid instead of milk or buttermilk. The extra fat gives a richer, softer crumb and makes the dough easy to handle.
Can I use milk instead of heavy cream in the dough?
Heavy cream gives the best texture and richness in this recipe. Milk has less fat, so the scones would be less tender. For brushing the tops, however, either heavy cream or milk works well.
Why do I need to use cold butter?
Cold butter stays in small pieces in the dough. In the oven, those pieces melt and create steam, which forms flaky, tender layers. Warm butter blends into the flour and produces a denser scone.
Can I use fresh or frozen cranberries instead of dried?
This recipe is written for dried cranberries, which add sweetness and don’t release excess liquid into the dough. Fresh or frozen cranberries are much more tart and wetter, so they would change the texture and flavor.
Do I have to chill the scones before baking?
It isn’t strictly required, but chilling for 10–15 minutes helps the butter firm up and the scones keep their shape in the oven. It is a small step that noticeably improves the result.
How do I know when the scones are done?
Look for lightly golden tops and set edges, with lightly browned bottoms and soft centers. This usually takes 16–22 minutes, depending on your oven.
How can I get my glaze to the right consistency?
Start with 1 tablespoon of orange juice and the powdered sugar. If it is too thick, add juice a few drops at a time. If it is too thin, whisk in more powdered sugar. It should be thick enough to drizzle while slowly settling into the scone.
Can I make the dough ahead of time?
You can shape the scones and refrigerate them briefly before baking, as the recipe directs. For longer storage, bake the scones, cool them completely, and freeze them unglazed.
Should I glaze the scones while they are warm?
No. Let them cool on the wire rack for 10–15 minutes first. Glaze applied to hot scones melts and soaks in rather than staying on top.
Final Thoughts
These cranberry orange glazed cream scones prove that bakery-quality baking doesn’t need to be complicated. With cold butter, heavy cream, fresh orange zest, and a simple glaze, you get scones with lightly crisp edges, tender centers, and a bright sweet-tart flavor in every bite.
Whether you are planning a holiday brunch, hosting friends for tea, or simply treating yourself on a quiet morning, this recipe delivers. Keep the butter cold, handle the dough gently, let the scones cool before glazing, and you will be rewarded with a batch you’ll want to make again and again.
If you try the recipe, share your results and your favorite variations. Happy baking!
Print
Cranberry Orange Glazed Cream Scones
Ingredients
For the Scones
- 2 cups (250 g) all-purpose flour
- ⅓ cup (65 g) granulated sugar
- 2 tsp baking powder
- ¼ tsp salt
- ½ cup (113 g) unsalted butter, very cold and cut into small cubes
- ½ cup (60 g) dried cranberries
- 1 tbsp finely grated fresh orange zest
- ¾ cup (180 ml) heavy cream, plus 1–2 tbsp more if needed
- 1 tsp vanilla extract
For the Orange Glaze
- ¾ cup (90 g) powdered sugar
- 1–2 tbsp fresh orange juice
- ½ tsp finely grated orange zest (optional)
For Brushing
- 1 tbsp heavy cream or milk
- 1 tsp coarse sugar (optional)
Ingredient Notes: What Each One Does
Understanding the role of each ingredient helps you bake with confidence and troubleshoot if something goes wrong.
All-purpose flour. This gives the scones their structure. Measure it carefully. The best method is to spoon the flour into your measuring cup and level it off, or even better, weigh it at 250 grams. Packing flour into the cup can lead to dry, heavy scones.
Granulated sugar. Beyond sweetness, sugar helps the tops brown and keeps the crumb tender. With only ⅓ cup in the dough, the scones stay balanced, since the glaze adds extra sweetness.
Baking powder. This is the leavening agent that lifts the scones. Make sure yours is fresh. If your baking powder has been open for more than six months, consider replacing it for the best rise.
Very cold unsalted butter. Cold butter is the secret to flaky scones. As the scones bake, the small pieces of butter melt and release steam, which creates tiny pockets of air and a tender, layered crumb. Unsalted butter lets you control the salt level.
Dried cranberries. These provide the signature sweet-tart bite. Look for plump, soft cranberries for the best texture.
Fresh orange zest. Zest contains the fragrant citrus oils of the orange, and it delivers far more flavor than juice alone. Whisking it into the dry ingredients spreads those oils evenly through the dough.
Heavy cream. Cream is what makes these cream scones. Its fat content creates a rich, soft interior without the need for eggs, and it makes the dough easy to bring together.
Vanilla extract. A small amount rounds out the flavor and pairs beautifully with orange and cranberry.
Powdered sugar and orange juice. Together these make a simple, glossy glaze that sets into a delicate sweet-citrus finish.
Instructions
Preheat your oven to 400°F (200°C). Line a baking sheet with parchment paper to prevent sticking and make cleanup easier. A hot oven is important because the initial blast of heat helps the scones rise quickly and develop golden, slightly crisp edges.
In a large mixing bowl, whisk together the flour, granulated sugar, baking powder, and salt until evenly combined. Add the freshly grated orange zest and mix again. Distributing the zest throughout the flour mixture allows its fragrant citrus oils to flavor every bite.
Add the cold butter cubes to the flour mixture. Using a pastry cutter, two forks, or your fingertips, work the butter into the flour until the mixture resembles coarse crumbs with a few pea-sized pieces of butter remaining.
Resist the urge to mix until the butter completely disappears. Those small pieces are what create a tender, crumbly texture as the scones bake. If your kitchen is warm or your hands run hot, work quickly or pop the bowl into the freezer for a few minutes.
Stir the dried cranberries into the flour and butter mixture until they are evenly distributed. Spreading them throughout the mixture means every scone gets a delicious balance of fruity sweetness and citrus flavor.
Pour the heavy cream and vanilla extract into the bowl. Gently stir with a fork or spatula until a soft, shaggy dough begins to form. If the mixture seems too dry, add another tablespoon of cream at a time until the dough holds together when pressed.
Avoid overmixing. The dough should look slightly rough rather than completely smooth. A smooth, elastic dough means too much gluten has developed, which leads to tough scones.
Transfer the dough to a lightly floured work surface. Gently bring it together with your hands, pressing just enough to form a cohesive dough without kneading it. Pat the dough into a round about ¾–1 inch (2–2.5 cm) thick.
Using a sharp knife or bench scraper, cut the round into 8 equal wedges. Cut straight down rather than sawing back and forth, which helps the edges rise properly. Carefully transfer the wedges to the prepared baking sheet, leaving about 2 inches (5 cm) between each scone.
Lightly brush the tops of the scones with heavy cream or milk. If desired, sprinkle a little coarse sugar over the tops for a delicate crunch and a lightly golden finish.
Place the baking sheet in the refrigerator for 10–15 minutes. Chilling lets the butter firm up before baking, so the scones hold their shape instead of spreading.
Bake the scones for about 16–22 minutes, or until the tops are lightly golden and the edges are set. The bottoms should be lightly browned, while the centers remain soft and tender.
Remove the baking sheet from the oven and let the scones cool on the pan for about 5 minutes before transferring them to a wire rack. Allow them to cool for another 10–15 minutes before adding the glaze.
In a small bowl, whisk together the powdered sugar and 1 tablespoon of fresh orange juice until smooth. Add the optional orange zest for an extra burst of citrus flavor.
If the glaze is too thick, add more orange juice a few drops at a time. If it is too thin, whisk in a little additional powdered sugar. The finished glaze should be smooth and thick enough to drizzle over the scones while slowly settling into the surface.
Once the scones have cooled slightly, drizzle the orange glaze generously over the tops using a spoon. Let the glaze set for about 10–15 minutes before serving.