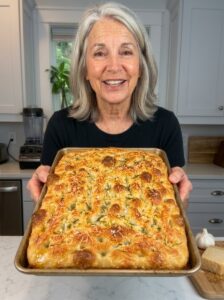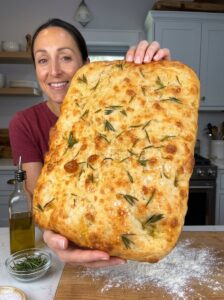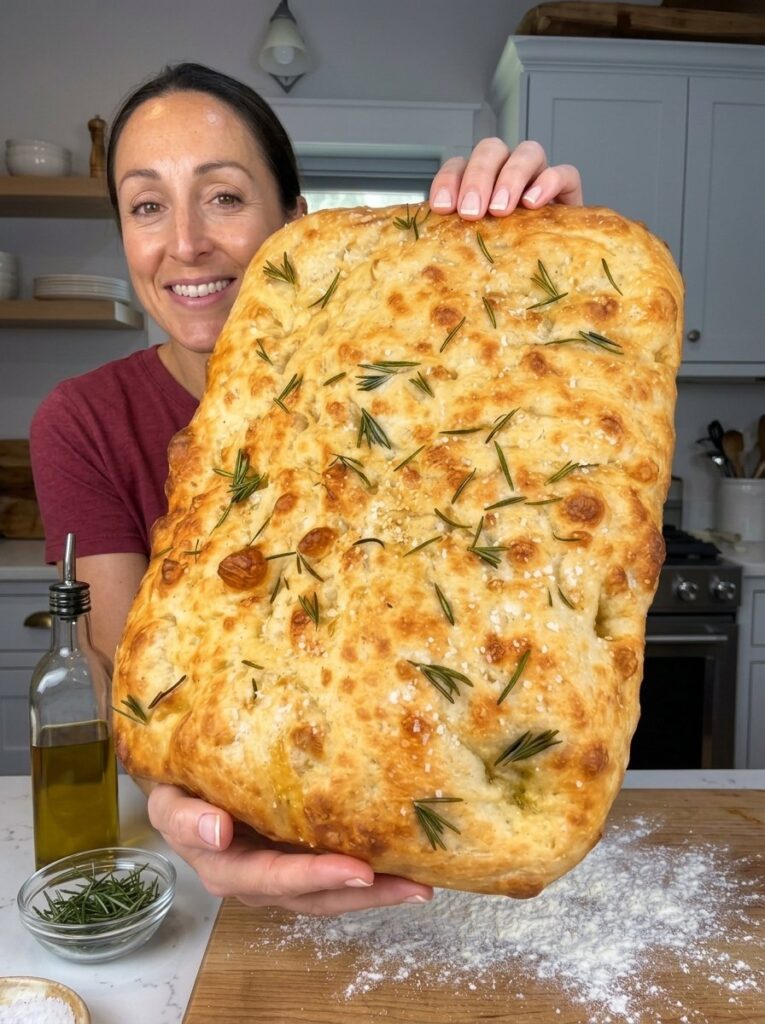
There is something almost magical about pulling a pan of homemade focaccia out of the oven. The edges are crisp and golden, the top is dotted with glistening pools of olive oil, and the aroma of fresh rosemary fills the kitchen. The best part? You do not need a mixer, a starter, or any bread-baking experience to make it.
This easy focaccia bread recipe uses just a handful of pantry staples and requires no kneading at all. You stir everything together in one bowl, let time do the work, and end up with a loaf that tastes like it came from an Italian bakery. Whether you are a complete beginner or a seasoned home baker looking for a reliable go-to recipe, this no-knead focaccia delivers a soft, chewy, airy crumb and a gloriously crisp bottom crust every single time.
In this guide, you will find the full recipe, step-by-step instructions, expert tips, troubleshooting advice, topping ideas, serving suggestions, and storage instructions so you can bake with confidence.
What Is Focaccia Bread?
Focaccia is a flat, oven-baked Italian bread that is closely related to pizza dough but much thicker, softer, and richer in olive oil. It is traditionally associated with Liguria, the coastal region of northwestern Italy, though variations exist all over the country. The name comes from the Latin word focus, meaning hearth, a nod to the way early versions were baked in the ashes of a fire.
What makes focaccia special is its texture and its finish. A well-made focaccia has a golden, slightly crunchy crust (especially on the bottom, where the olive oil fries the dough as it bakes), and an interior that is open, tender, and chewy. The surface is covered in dimples, those signature fingertip impressions that catch olive oil, salt, and herbs.
Because the dough is simple and forgiving, focaccia is one of the best breads for beginners. There is no shaping, no scoring, and no special equipment required. A mixing bowl, a spoon, and a baking pan are all you need.
Why You Will Love This Focaccia Recipe
- No kneading required. You simply mix until no dry flour remains. The long, slow rise develops gluten for you.
- Only a few ingredients. Flour, water, yeast, salt, and olive oil are all it takes to make the dough.
- Beginner friendly. The wet, sticky dough is very forgiving, and there is no complicated technique to master.
- Crisp outside, soft inside. Generous olive oil in the pan creates a golden, crunchy base while the interior stays light and airy.
- Endlessly versatile. Serve it as a side, slice it for sandwiches, turn it into pizza, or cut it into squares for an appetizer board.
- Make-ahead option. You can refrigerate the dough overnight for even deeper flavor.
Focaccia Bread Ingredients
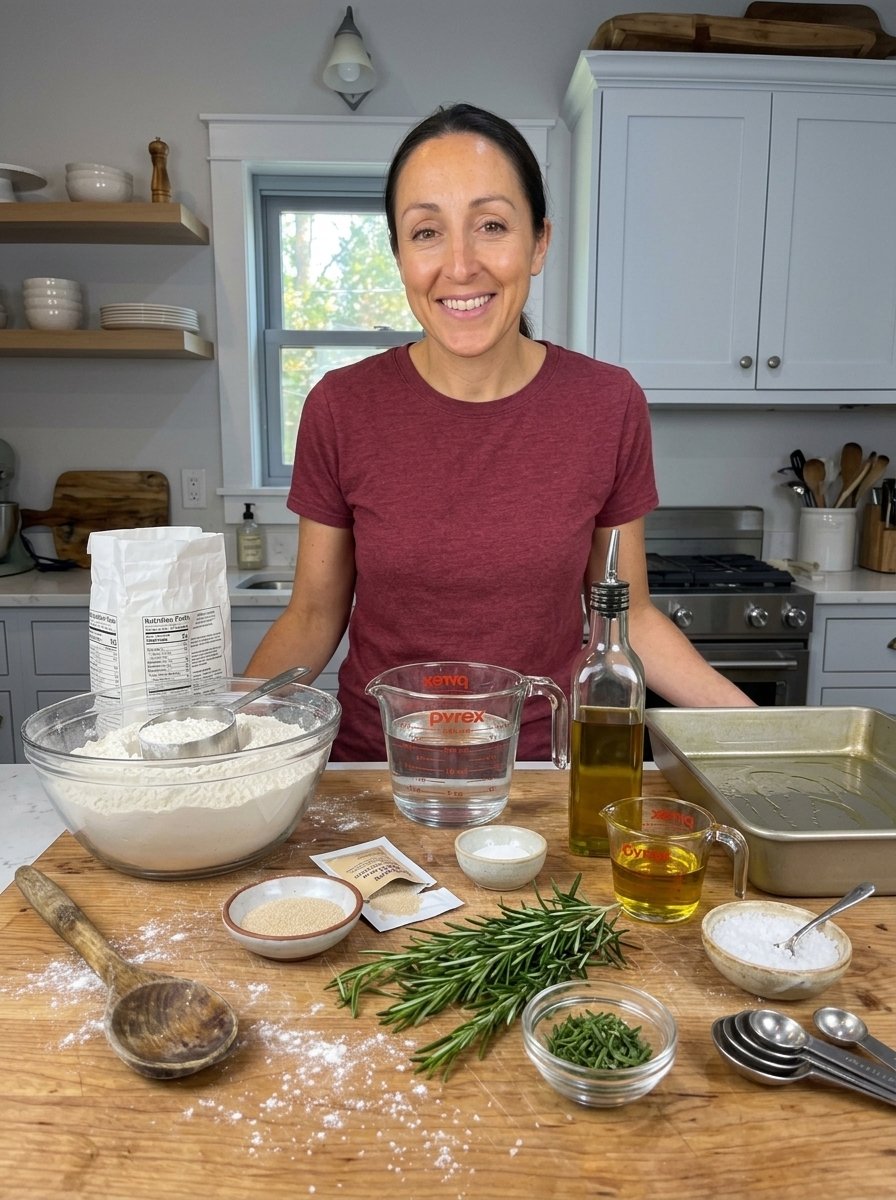
Here is everything you need to make one large 9×13-inch focaccia, which yields about 12 to 16 pieces.
For the Dough
- 4 cups (500 g) all-purpose flour
- 1¾ cups (420 ml) lukewarm water
- 2 tsp (7 g) instant yeast
- 2 tsp salt
- ¼ cup (60 ml) olive oil, plus more for the pan and topping
Optional Toppings
- 1 to 2 tbsp fresh rosemary, finely chopped
- Flaky sea salt, for sprinkling
- Extra olive oil, for drizzling
Ingredient Notes
Flour: All-purpose flour works beautifully here and is easy to find. Bread flour will give a slightly chewier crumb, but it is not necessary for great results.
Water: Use lukewarm water, which should feel comfortably warm to the touch but not hot. Water that is too hot can damage the yeast and prevent the dough from rising properly.
Yeast: This recipe uses instant yeast, which can be mixed directly with the water. If you only have active dry yeast, it will still work, though the rise may take a little longer.
Olive oil: Because olive oil is a major flavor in focaccia, use a good-quality one. It contributes taste, helps the crust turn golden, and creates the crisp, almost fried bottom that makes focaccia so addictive.
Salt: Fine salt goes into the dough, while flaky sea salt is sprinkled on top right before baking for a pleasing crunch.
How to Make Focaccia Bread: Step-by-Step Instructions
Step 1: Mix the Dough
In a large mixing bowl, combine the lukewarm water and instant yeast. Stir briefly to distribute the yeast. Add the flour, salt, and olive oil.
Mix with a wooden spoon or sturdy spatula until all the flour is incorporated and a soft, sticky dough forms. There is no need to knead. Simply mix until no dry patches remain. The dough will look shaggy and wet, and that is exactly what you want.
Step 2: Let the Dough Rise (First Rise)
Cover the bowl loosely with plastic wrap or a clean kitchen towel. Place it in a warm, draft-free spot and let the dough rise for about 1 to 1½ hours, or until it has doubled in size and looks bubbly and airy.
Pay attention to the dough rather than the clock. Visible bubbles on the surface and along the sides of the bowl are the best signs that the dough is ready.
Overnight option: For deeper flavor, cover the dough and refrigerate it overnight. The following day, let the chilled dough warm slightly at room temperature before stretching it into the pan. The slow, cold fermentation gives the bread a more complex, slightly tangy taste.
Step 3: Prepare the Baking Pan
Generously coat a 9×13-inch (23×33 cm) baking pan with olive oil, covering the bottom and the sides. Then pour a little extra olive oil into the center of the pan.
Do not be shy with the oil. This is the secret to a crisp, golden base and a beautifully browned bottom crust.
Step 4: Transfer and Stretch the Dough
Drizzle a little olive oil over your hands so the sticky dough does not cling to them. Gently transfer the risen dough into the prepared pan. Using your fingertips, carefully stretch the dough toward the edges of the pan.
If the dough springs back, do not fight it. Let it rest for 10 to 15 minutes, then try again. Resting allows the gluten to relax so the dough stretches naturally without tearing.
Step 5: Second Rise
Cover the pan loosely and let the dough rise for another 30 to 45 minutes, or until it looks noticeably puffy and airy. While it rises, preheat your oven to 425°F (220°C).
Step 6: Dimple the Focaccia
Drizzle the surface generously with olive oil. Using well-oiled fingertips, press deep dimples all over the dough, gently pushing down toward the bottom of the pan without completely deflating it.
These dimples create the classic focaccia look and give the olive oil a place to pool, which results in flavorful, golden pockets across the top.
Step 7: Add the Toppings
Scatter chopped fresh rosemary evenly over the dough. Drizzle with a little more olive oil, allowing some to settle into the dimples. Finish with a sprinkle of flaky sea salt.
For a plain focaccia, skip the rosemary and use only olive oil and sea salt.
Step 8: Bake
Place the pan in the preheated oven and bake for about 22 to 28 minutes, or until the focaccia is puffed, golden brown, and crisp around the edges. The bottom should be nicely browned while the inside stays soft, chewy, and airy. If needed, bake a few extra minutes until the top reaches your preferred color.
Step 9: Cool and Serve
Remove the focaccia from the oven and let it rest in the pan for about 10 minutes. Carefully transfer it to a cutting board and slice it into squares or long pieces. For extra olive oil flavor, drizzle a little more over the warm bread before serving.
Enjoy it warm, while the edges are crisp and the center is soft and tender.
Recipe Timing at a Glance
- Prep time: About 15 minutes
- First rise: 1 to 1½ hours
- Second rise: 30 to 45 minutes
- Bake time: 22 to 28 minutes
- Total time: About 2½ to 3 hours
- Yield: 1 large 9×13-inch focaccia, approximately 12 to 16 pieces
Most of that time is hands-off, so you can go about your day while the dough does the work.
Tips for the Best Homemade Focaccia
Keep the Dough Sticky
Focaccia dough should be soft and slightly tacky. It is tempting to add extra flour when the dough feels wet, but resist the urge. A wetter dough, known as a high-hydration dough, is the key to a light, airy crumb with big, irregular holes. Oil your hands instead of flouring them.
Use Good-Quality Olive Oil
With so few ingredients, each one matters. A flavorful extra-virgin olive oil adds richness, helps form the signature crisp bottom, and gives the golden edges their depth of flavor.
Give the Dough Enough Time to Rise
Look for visibly puffy dough with bubbles rather than relying only on the clock. Kitchen temperature affects rising time. A cool kitchen may need extra time, while a warm one may speed things up.
Let the Dough Rest if It Springs Back
If the dough resists stretching into the pan, leave it alone for 10 to 15 minutes. Forcing it can cause tearing and result in a dense loaf. A short rest makes stretching effortless.
Dimple Generously
Press your fingertips deep into the dough so the olive oil settles into the classic focaccia pockets. Do not be afraid of pressing too far; the dough will puff back up in the oven.
Experiment with Simple Toppings
Rosemary and flaky sea salt are classic and delicious, but you can also leave the bread plain for sandwiches or use it as a base for focaccia pizza.
Troubleshooting Common Focaccia Problems
My dough did not rise. The most common culprits are expired yeast or water that was too hot or too cold. Check the date on your yeast and make sure the water is lukewarm. Also give the dough extra time in a warm, draft-free place.
My focaccia is dense. This usually means the dough was under-risen or too much flour was added. Wait until the dough is puffy and bubbly, and keep it sticky.
The dough keeps shrinking back when I stretch it. That is normal. Let it rest for 10 to 15 minutes and stretch again. The gluten needs time to relax.
The bottom is not crisp. Use more olive oil in the pan, and make sure the pan is well coated. A metal pan generally gives a crispier bottom than glass.
The top is browning too fast. Move the pan to a lower rack or loosely tent the top with foil for the last few minutes of baking.
The top is pale. Bake a few additional minutes until it reaches your preferred golden color. Drizzling a little extra oil before baking also helps with browning.
Focaccia Topping Ideas
This rosemary and sea salt version is a timeless favorite, but focaccia is a wonderful canvas for creativity. Once you have mastered the basic recipe, try these ideas:
- Garlic and herb: Add thinly sliced garlic and a mix of thyme and oregano before baking.
- Cherry tomato and basil: Press halved cherry tomatoes into the dimples and top with fresh basil after baking.
- Olive and lemon: Scatter pitted olives and thin lemon slices over the dough for a bright, briny flavor.
- Parmesan and black pepper: Sprinkle grated Parmesan and freshly cracked pepper in the last few minutes of baking.
- Caramelized onion: Top with sweet, jammy onions for a rich, savory bread.
- Everything-style: Add sesame seeds, poppy seeds, and dried onion for a bagel-inspired twist.
If you are adding wet toppings such as tomatoes, press them in gently so they stay in place and do not make the surface soggy.
What to Serve with Focaccia
Focaccia is incredibly versatile. Here are some of the best ways to enjoy it:
- Serve warm with extra-virgin olive oil and balsamic vinegar for dipping.
- Pair it with tomato soup, vegetable soup, pasta, or a hearty stew.
- Slice it horizontally and use it for sandwiches filled with cheese, vegetables, or your favorite proteins.
- Top it with sauce and cheese for an easy focaccia pizza.
- Cut it into small squares and serve as an appetizer with olives, cheese, and roasted vegetables.
- Toast leftover slices and enjoy them with scrambled eggs or your favorite breakfast toppings.
How to Store Focaccia
Store completely cooled focaccia in an airtight container at room temperature for up to 2 days. Avoid storing it while it is still warm, as trapped steam can make the crust soft.
For longer storage, wrap individual pieces tightly or place them in a freezer-safe bag and freeze for up to 2 to 3 months.
How to Reheat Focaccia
Thaw frozen pieces at room temperature, then reheat them in a 350°F (175°C) oven for about 5 to 8 minutes to restore some of the crispness. The oven is better than the microwave, which tends to make the bread soft and chewy.
Make-Ahead Focaccia Dough
If you want to plan ahead, this recipe is perfect for it. After mixing the dough and letting it sit briefly, cover the bowl and refrigerate it overnight. The cold, slow fermentation builds more flavor and gives the bread a subtle depth that is hard to get in a short rise.
When you are ready to bake, take the dough out of the fridge and let it warm slightly. Then continue with the pan, stretching, second rise, dimpling, and baking steps. This is a great strategy for entertaining, since the hands-on work on baking day takes only a few minutes.
Frequently Asked Questions About Focaccia
Do I need to knead focaccia dough?
No. This recipe is completely no-knead. Mixing until no dry patches remain is enough, and the long rise allows the gluten to develop on its own.
Can I use bread flour instead of all-purpose flour?
Yes. Bread flour has a higher protein content and will produce a slightly chewier texture. All-purpose flour still gives a soft, airy result and is perfectly suited to this recipe.
Why is my focaccia dough so sticky?
Focaccia dough is meant to be sticky. The high water content is what creates the open, airy crumb. Use oiled hands rather than extra flour when handling it.
Can I make focaccia without rosemary?
Absolutely. Plain focaccia with olive oil and flaky sea salt is delicious, and it is also a great base for sandwiches or pizza.
How thick should focaccia be?
In a 9×13-inch pan, the dough will stretch to fill the pan and puff up to roughly an inch or slightly more after the second rise and baking.
Can I freeze focaccia?
Yes. Wrap cooled pieces tightly or place them in a freezer-safe bag and freeze for up to 2 to 3 months. Reheat in a 350°F oven for 5 to 8 minutes.
How do I get a crispy focaccia crust?
Use plenty of olive oil in the pan, bake until the edges are deeply golden, and let the bread rest in the pan for about 10 minutes before transferring it to a cutting board.
How long does focaccia last?
Stored in an airtight container at room temperature, it stays good for up to 2 days. For longer storage, freeze it.
Final Thoughts
Homemade focaccia is proof that the simplest recipes are often the most rewarding. With just flour, water, yeast, salt, and olive oil, you can create a bread that is crisp, golden, fragrant, and deeply satisfying. There is no kneading, no fuss, and no need for special skills. All it takes is a little patience while the dough rises, a generous hand with the olive oil, and a final sprinkle of rosemary and flaky sea salt.
Once you have tried this easy focaccia bread recipe, you will likely find yourself making it again and again, whether for a weeknight soup dinner, a weekend sandwich, or a gathering with friends. Bake a pan, tear off a warm piece, and enjoy.
If you try the recipe, leave a comment and let us know your favorite toppings, and do not forget to share a photo of your golden, dimpled loaf!
Print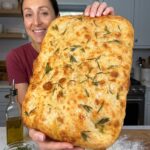
Focaccia Bread
Ingredients
Here is everything you need to make one large 9×13-inch focaccia, which yields about 12 to 16 pieces.
For the Dough
- 4 cups (500 g) all-purpose flour
- 1¾ cups (420 ml) lukewarm water
- 2 tsp (7 g) instant yeast
- 2 tsp salt
- ¼ cup (60 ml) olive oil, plus more for the pan and topping
Optional Toppings
- 1 to 2 tbsp fresh rosemary, finely chopped
- Flaky sea salt, for sprinkling
- Extra olive oil, for drizzling
Ingredient Notes
Flour: All-purpose flour works beautifully here and is easy to find. Bread flour will give a slightly chewier crumb, but it is not necessary for great results.
Water: Use lukewarm water, which should feel comfortably warm to the touch but not hot. Water that is too hot can damage the yeast and prevent the dough from rising properly.
Yeast: This recipe uses instant yeast, which can be mixed directly with the water. If you only have active dry yeast, it will still work, though the rise may take a little longer.
Olive oil: Because olive oil is a major flavor in focaccia, use a good-quality one. It contributes taste, helps the crust turn golden, and creates the crisp, almost fried bottom that makes focaccia so addictive.
Salt: Fine salt goes into the dough, while flaky sea salt is sprinkled on top right before baking for a pleasing crunch.
Instructions
In a large mixing bowl, combine the lukewarm water and instant yeast. Stir briefly to distribute the yeast. Add the flour, salt, and olive oil.
Mix with a wooden spoon or sturdy spatula until all the flour is incorporated and a soft, sticky dough forms. There is no need to knead. Simply mix until no dry patches remain. The dough will look shaggy and wet, and that is exactly what you want.
Cover the bowl loosely with plastic wrap or a clean kitchen towel. Place it in a warm, draft-free spot and let the dough rise for about 1 to 1½ hours, or until it has doubled in size and looks bubbly and airy.
Pay attention to the dough rather than the clock. Visible bubbles on the surface and along the sides of the bowl are the best signs that the dough is ready.
Overnight option: For deeper flavor, cover the dough and refrigerate it overnight. The following day, let the chilled dough warm slightly at room temperature before stretching it into the pan. The slow, cold fermentation gives the bread a more complex, slightly tangy taste.
Generously coat a 9×13-inch (23×33 cm) baking pan with olive oil, covering the bottom and the sides. Then pour a little extra olive oil into the center of the pan.
Do not be shy with the oil. This is the secret to a crisp, golden base and a beautifully browned bottom crust.
Drizzle a little olive oil over your hands so the sticky dough does not cling to them. Gently transfer the risen dough into the prepared pan. Using your fingertips, carefully stretch the dough toward the edges of the pan.
If the dough springs back, do not fight it. Let it rest for 10 to 15 minutes, then try again. Resting allows the gluten to relax so the dough stretches naturally without tearing.
Cover the pan loosely and let the dough rise for another 30 to 45 minutes, or until it looks noticeably puffy and airy. While it rises, preheat your oven to 425°F (220°C).
Drizzle the surface generously with olive oil. Using well-oiled fingertips, press deep dimples all over the dough, gently pushing down toward the bottom of the pan without completely deflating it.
These dimples create the classic focaccia look and give the olive oil a place to pool, which results in flavorful, golden pockets across the top.
Scatter chopped fresh rosemary evenly over the dough. Drizzle with a little more olive oil, allowing some to settle into the dimples. Finish with a sprinkle of flaky sea salt.
For a plain focaccia, skip the rosemary and use only olive oil and sea salt.
Place the pan in the preheated oven and bake for about 22 to 28 minutes, or until the focaccia is puffed, golden brown, and crisp around the edges. The bottom should be nicely browned while the inside stays soft, chewy, and airy. If needed, bake a few extra minutes until the top reaches your preferred color.
Remove the focaccia from the oven and let it rest in the pan for about 10 minutes. Carefully transfer it to a cutting board and slice it into squares or long pieces. For extra olive oil flavor, drizzle a little more over the warm bread before serving.
Enjoy it warm, while the edges are crisp and the center is soft and tender.