Crispy Double Bacon Cheeseburger Pickle Taco Cups
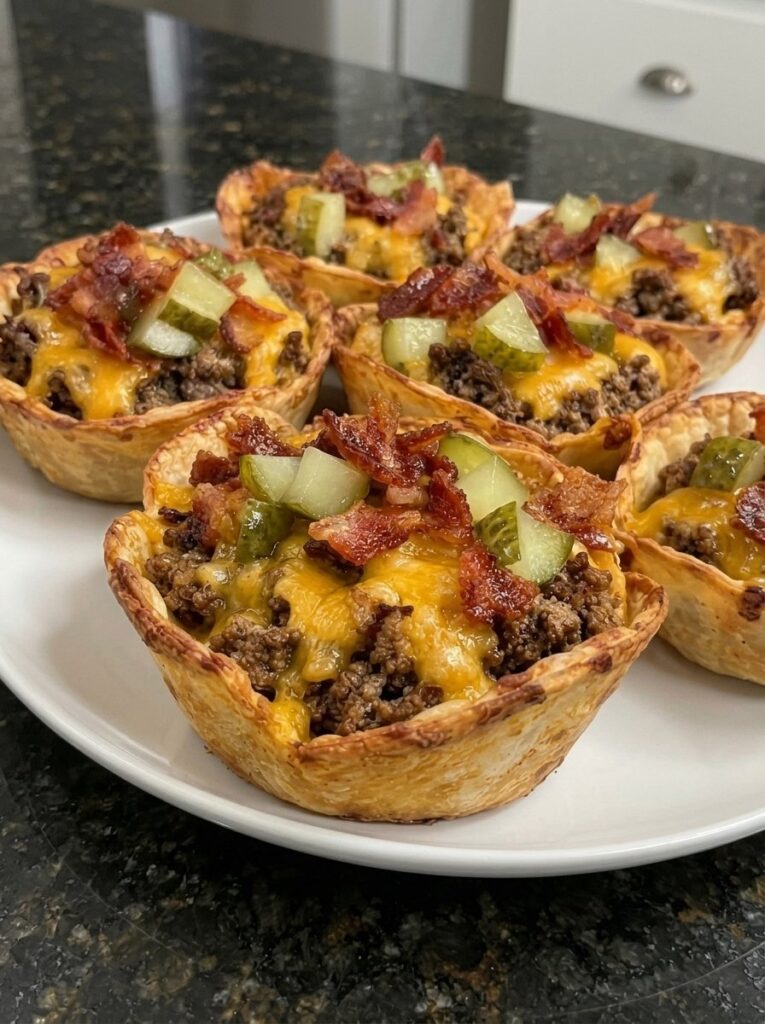
If you could shrink a loaded bacon cheeseburger down to one crunchy, handheld bite, it would look a lot like these Crispy Double Bacon Cheeseburger Pickle Taco Cups. Juicy seasoned ground beef, smoky bacon, gooey cheddar, and tangy dill pickles all sit inside a golden tortilla shell baked in a muffin pan.
They taste like a classic cheeseburger but are far less messy than the real thing. There’s no bun to fall apart, no sauce running down your wrist, and no knife and fork. Just crispy edges, melty cheese, and a pop of pickle in every bite.
This bacon cheeseburger taco cup recipe works for game-day spreads, birthday parties, potlucks, and busy weeknight dinners. Kids like them, adults like them, and the pan comes out empty every time.
In this guide you’ll find the full recipe, tips for crispy tortilla cups, topping ideas, make-ahead and storage instructions, and answers to common questions.
Why You’ll Love These Cheeseburger Taco Cups
Here’s why this recipe earns a permanent spot in your rotation:
- All the cheeseburger flavor, none of the mess. You get the beef, bacon, cheese, pickles, and burger sauce in a cup you can hold in one hand.
- Crispy tortilla shells. Pre-baking the cups keeps them crunchy instead of soggy, even with juicy filling.
- Ready in about 45 minutes. Most of the time is hands-off baking.
- Made with simple ingredients. Everything is easy to find at any grocery store, and you may already have most of it.
- Great for feeding a crowd. One muffin pan makes 12 cups, and the recipe doubles easily.
- Easy to customize. Swap the cheese, change the toppings, or turn up the heat.
- Good for any occasion. They work as an appetizer, a snack, or a fun family dinner.
Ingredients for Bacon Cheeseburger Taco Cups
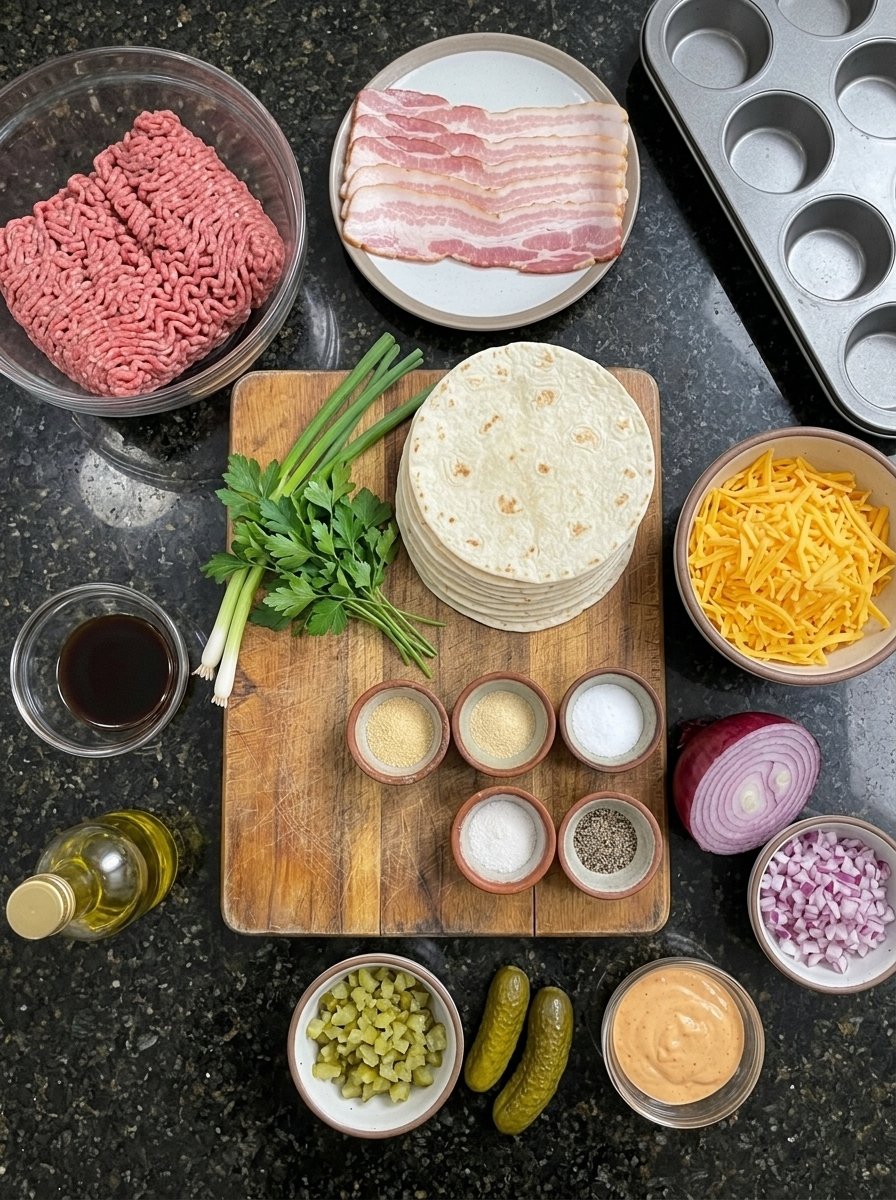
Here’s what you need and why each ingredient matters.
For the Cheeseburger Filling
- 1 pound ground beef (80/20 blend for the best flavor and texture)
- 1 teaspoon garlic powder
- 1 teaspoon onion powder
- ½ teaspoon salt
- ¼ teaspoon black pepper
- 1 tablespoon Worcestershire sauce
For the Tortilla Cups
- 12 small flour tortillas
- 1 tablespoon olive oil or nonstick cooking spray
For Assembling and Topping
- 1½ cups shredded cheddar cheese
- 6 slices bacon, cooked until crispy and crumbled
- ½ cup dill pickles, finely chopped
- ¼ cup finely diced red onion
- ¼ cup burger sauce or Thousand Island dressing
- 2 tablespoons chopped fresh parsley or green onions (optional)
A Closer Look at the Key Ingredients
Ground beef (80/20): The fat content keeps the filling juicy and flavorful. Leaner beef works, but it can taste dry in a small cup, so if you use 90/10, add an extra splash of Worcestershire sauce.
Worcestershire sauce: This gives the beef its savory, slightly tangy, grill-style flavor. Together with garlic and onion powder, it makes the meat taste like a seasoned burger patty.
Flour tortillas: Small “taco size” tortillas, about 6 inches across, fit a standard muffin cup best. They get crisp at the edges and stay slightly chewy at the base.
Cheddar cheese: Sharp cheddar melts well and stands up to the pickles and bacon. Shredding your own from a block gives you a creamier melt than pre-shredded bags, which contain anti-caking agents.
Bacon: The “double bacon” comes from bacon in the cups plus extra crumbled over the top if you like. Cook it until truly crisp so it stays crunchy against the juicy beef.
Dill pickles: Pickles are what make these taste like a real cheeseburger. Chop them small and pat them dry with a paper towel so they don’t water down the toppings.
Burger sauce or Thousand Island: A drizzle on top adds creamy tang, and it’s the finishing touch that makes it taste like a drive-thru favorite.
How to Make Crispy Double Bacon Cheeseburger Pickle Taco Cups
Step 1: Prepare the Oven and Muffin Pan
Preheat your oven to 375°F (190°C). Lightly grease a standard 12-cup muffin pan with olive oil or nonstick cooking spray. Don’t skip the grease, because it helps the tortillas crisp and release cleanly.
Step 2: Shape the Tortilla Cups
Gently press one small flour tortilla into each muffin cup. Fold the edges slightly so they form a bowl shape with a little ruffle on top. If your tortillas are too large, trim them to fit. Brush the inside of each tortilla lightly with olive oil.
Step 3: Pre-Bake the Tortilla Cups
Bake the empty cups for 5–7 minutes, until they firm up and turn lightly golden around the edges. This is the step that keeps your taco cups crispy instead of soggy. Remove the pan from the oven and set it aside.
Step 4: Cook the Ground Beef
Heat a large skillet over medium heat. Add the ground beef and cook for 6–8 minutes, breaking it into small crumbles with a wooden spoon, until it’s browned and cooked through. Drain any excess grease so the filling doesn’t turn the cups greasy.
Step 5: Season the Beef
Add the garlic powder, onion powder, salt, black pepper, and Worcestershire sauce. Stir well and cook for another 1–2 minutes, until the beef is evenly seasoned and fragrant.
Step 6: Fill the Taco Cups
Divide the beef evenly among the pre-baked tortilla cups. Top each one with crumbled bacon, then sprinkle generously with shredded cheddar.
Step 7: Bake Until Cheesy and Golden
Return the pan to the oven and bake for 5–8 minutes, until the cheese is completely melted and bubbly and the tortilla edges are deep golden and crisp.
Step 8: Add the Pickle Toppings
Let the cups rest for 3–5 minutes after baking. This helps them set so they hold together when lifted. Top each with chopped dill pickles and diced red onion, then drizzle with burger sauce or Thousand Island dressing.
Step 9: Garnish and Serve
Carefully lift the cups out of the muffin pan. Garnish with chopped parsley or green onions if you like, and serve warm while the shells are crunchy and the cheese is still melty.
Pro Tips for the Crispiest Taco Cups
A few small adjustments make a big difference.
- Never skip the pre-bake. Baking the shells empty first sets the structure so they stay crunchy under the beef and cheese.
- Drain the beef well. Extra grease is the main cause of soggy bottoms. For very fatty beef, blot the cooked crumbles with a paper towel.
- Keep the pickles dry. Pat the chopped pickles with a paper towel before topping. Adding them after baking keeps them crisp and bright.
- Cook the bacon until crispy. Chewy bacon can get lost in the cup. Oven-baked bacon at 400°F for 15–20 minutes gives even, crisp results with little effort.
- Warm the tortillas first. Microwave the stack for 10–15 seconds so they’re pliable and don’t crack when pressed into the pan.
- Use a muffin pan, not a mini muffin pan. A standard pan makes cups big enough to hold a generous scoop of filling.
- Rest before removing. A few minutes of cooling lets the cheese set so the cups hold their shape.
- Use a small spoon or thin spatula to release the cups. If one sticks, run the edge around the tortilla before lifting.
Delicious Variations to Try
The cheeseburger flavor is a great base for other ideas.
Different cheeses: Try pepper jack for heat, American cheese for a true diner-style melt, Colby Jack for a mild, creamy bite, or smoked gouda for a deeper flavor.
Extra burger toppings: Add diced tomato, shredded lettuce, or a sprinkle of sesame seeds on top for a classic burger look. Fresh toppings go on after baking.
Spicy cheeseburger cups: Mix diced jalapeños into the beef or use pepper jack. A dash of hot sauce in the burger sauce adds a kick.
Ground turkey or chicken: Use lean poultry for a lighter version. Add a little extra oil or Worcestershire to keep it moist.
Breakfast version: Skip the pickles, add a small spoonful of scrambled egg to each cup, and top with bacon and cheddar for a handheld brunch.
Plant-based version: Use crumbled plant-based ground and a dairy-free melting cheese. The seasonings work the same way.
Mini versions: Cut tortillas into smaller rounds and use a mini muffin pan for party-sized bites. Reduce the baking time by a couple of minutes.
Low-carb option: Use low-carb tortillas or press shredded cheese into the muffin cups to bake into “cheese cups” before filling.
What to Serve with Cheeseburger Taco Cups
These cups are a complete bite on their own, but a few sides make them a full meal or party spread.
- Crispy french fries or sweet potato fries for the full burger-joint effect
- Coleslaw or a crisp green salad to balance the richness
- Dill pickle spears or pickle chips for more tang
- Extra burger sauce, ketchup, or ranch for dipping
- Potato wedges or onion rings for a game-day platter
- Fresh veggie sticks with dip for something light alongside
For a game-day or party spread, pair them with wings, loaded nachos, and a big bowl of chips and dip.
Make-Ahead, Storage, and Reheating Instructions
Make Ahead
You can prep the components ahead of time and assemble when ready:
- Cook the seasoned beef and bacon up to 2 days ahead and refrigerate them in airtight containers.
- Pre-bake the tortilla cups up to 1 day ahead, cool completely, and store in an airtight container at room temperature.
- Chop the pickles and red onion the day before and keep them refrigerated.
When it’s time to serve, fill the cups, add cheese, and bake as directed.
Storing Leftovers
Place cooled taco cups in an airtight container in the refrigerator for up to 3 days. Store the pickle, onion, and sauce toppings separately if possible so the shells stay crisp.
Reheating
For the crispiest results, reheat in the oven or air fryer. Bake at 350°F (175°C) for 8–10 minutes, or air fry at 350°F for 4–5 minutes, until hot and crisp. The microwave will warm them quickly but makes the shells soft.
Freezing
Freeze the baked, untopped cups on a tray until solid, then transfer them to a freezer bag for up to 2 months. Reheat from frozen in the oven at 350°F for 12–15 minutes, then add the fresh toppings.
Why These Taco Cups Are Perfect for Parties
Hosting is easier when your food is simple, shareable, and crowd-pleasing. These cheeseburger taco cups check every box:
- Easy to serve: Set them on a platter and guests can grab one with their hands.
- Fully customizable: Set up a topping bar with pickles, onions, tomatoes, sauces, and hot sauce so everyone builds their own.
- Make-ahead friendly: Most of the prep can be done the day before.
- Budget-friendly: A pound of beef and a few pantry staples feed a crowd.
- Kid-approved: Kids love anything that tastes like a cheeseburger, and the handheld shape makes them easy to eat.
They’re also a great fit for Super Bowl parties, summer cookouts, birthday celebrations, tailgates, and casual family movie nights.
Nutrition Notes
Exact nutrition varies by brand and portion, but as a rough guide, one taco cup contains about 250–300 calories, with protein from the beef, bacon, and cheese. To lighten them up, you can use lean ground beef or turkey, reduced-fat cheddar, turkey bacon, and whole-wheat tortillas. For precise numbers, enter your specific ingredients into a nutrition calculator.
Frequently Asked Questions
Can I make these without a muffin pan?
Yes. You can drape tortillas over the backs of an upside-down muffin pan, or use oven-safe ramekins or foil-lined cups to hold the shape. A muffin pan is the easiest and gives the most consistent shape.
Why did my tortillas crack when I pressed them into the pan?
They were likely cold or dry. Warm the tortillas in the microwave for 10–15 seconds so they’re flexible before shaping.
How do I keep the taco cups from getting soggy?
Pre-bake the shells, drain the beef thoroughly, pat the pickles dry, and add wet toppings like pickles and sauce just before serving.
Can I use corn tortillas?
Corn tortillas are more brittle and often crack when shaped. If you use them, warm them well and brush them with oil first, and expect a slightly different texture.
Can I use pre-cooked bacon or bacon bits?
Yes, they save time. Real bacon cooked until crisp gives the best texture and flavor, but precooked slices crisped in the microwave or oven work in a pinch.
What can I use instead of burger sauce?
Thousand Island is the easy substitute. You can also mix mayonnaise, ketchup, mustard, and a little pickle juice for a quick homemade version.
Are these taco cups spicy?
Not as written. They’re mild and savory. Add jalapeños, pepper jack cheese, or hot sauce if you want heat.
Can I double the recipe?
Absolutely. Use two muffin pans, or bake in batches. Keep the finished cups warm in a 200°F oven while you finish the rest.
Can I make them gluten-free?
Use gluten-free tortillas that are flexible enough to shape, and check that your Worcestershire sauce and burger sauce are gluten-free.
Should I use a cooking spray or olive oil?
Either works. Spray is faster, while brushing with olive oil gives a slightly richer, crispier finish.
Quick Recipe Card
Crispy Double Bacon Cheeseburger Pickle Taco Cups
- Prep time: 15 minutes
- Cook time: 25–30 minutes
- Total time: About 45 minutes
- Servings: 12 taco cups
- Course: Appetizer, dinner, snack
- Cuisine: American
Ingredients: 1 pound ground beef, 1 teaspoon garlic powder, 1 teaspoon onion powder, ½ teaspoon salt, ¼ teaspoon black pepper, 1 tablespoon Worcestershire sauce, 12 small flour tortillas, 1½ cups shredded cheddar, 6 slices cooked and crumbled bacon, ½ cup chopped dill pickles, ¼ cup diced red onion, ¼ cup burger sauce or Thousand Island, 1 tablespoon olive oil or cooking spray, and 2 tablespoons parsley or green onions (optional).
Instructions:
- Preheat the oven to 375°F and grease a 12-cup muffin pan.
- Press tortillas into the cups and brush with oil.
- Pre-bake for 5–7 minutes until lightly golden.
- Brown the beef for 6–8 minutes and drain the grease.
- Add the seasonings and Worcestershire, and cook for 1–2 minutes.
- Fill the cups with beef, bacon, and cheddar.
- Bake for 5–8 minutes until the cheese is melted and the edges are crisp.
- Rest for 3–5 minutes, then top with pickles, red onion, and sauce.
- Garnish and serve warm.
Final Thoughts
Crispy Double Bacon Cheeseburger Pickle Taco Cups take everything people love about a bacon cheeseburger and put it in a fun, crunchy, shareable form. The seasoned beef is juicy, the bacon is smoky, the cheddar is gooey, and the pickles add a bright tang, all inside a tortilla shell that stays crisp from the first bite to the last.
They’re simple enough for a weeknight and impressive enough for a party. Make a batch for your next game day, family dinner, or get-together, and watch them disappear. If you try them, leave a comment and a rating, and share your favorite topping combinations. Enjoy!
Print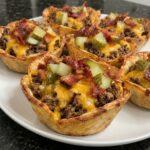
Crispy Double Bacon Cheeseburger Pickle Taco Cups
- Total Time: 45 minutes
Ingredients
Here’s what you need and why each ingredient matters.
For the Cheeseburger Filling
- 1 pound ground beef (80/20 blend for the best flavor and texture)
- 1 teaspoon garlic powder
- 1 teaspoon onion powder
- ½ teaspoon salt
- ¼ teaspoon black pepper
- 1 tablespoon Worcestershire sauce
For the Tortilla Cups
- 12 small flour tortillas
- 1 tablespoon olive oil or nonstick cooking spray
For Assembling and Topping
- 1½ cups shredded cheddar cheese
- 6 slices bacon, cooked until crispy and crumbled
- ½ cup dill pickles, finely chopped
- ¼ cup finely diced red onion
- ¼ cup burger sauce or Thousand Island dressing
- 2 tablespoons chopped fresh parsley or green onions (optional)
Instructions
Preheat your oven to 375°F (190°C). Lightly grease a standard 12-cup muffin pan with olive oil or nonstick cooking spray. Don’t skip the grease, because it helps the tortillas crisp and release cleanly.
Gently press one small flour tortilla into each muffin cup. Fold the edges slightly so they form a bowl shape with a little ruffle on top. If your tortillas are too large, trim them to fit. Brush the inside of each tortilla lightly with olive oil.
Bake the empty cups for 5–7 minutes, until they firm up and turn lightly golden around the edges. This is the step that keeps your taco cups crispy instead of soggy. Remove the pan from the oven and set it aside.
Heat a large skillet over medium heat. Add the ground beef and cook for 6–8 minutes, breaking it into small crumbles with a wooden spoon, until it’s browned and cooked through. Drain any excess grease so the filling doesn’t turn the cups greasy.
Add the garlic powder, onion powder, salt, black pepper, and Worcestershire sauce. Stir well and cook for another 1–2 minutes, until the beef is evenly seasoned and fragrant.
Divide the beef evenly among the pre-baked tortilla cups. Top each one with crumbled bacon, then sprinkle generously with shredded cheddar.
Return the pan to the oven and bake for 5–8 minutes, until the cheese is completely melted and bubbly and the tortilla edges are deep golden and crisp.
Let the cups rest for 3–5 minutes after baking. This helps them set so they hold together when lifted. Top each with chopped dill pickles and diced red onion, then drizzle with burger sauce or Thousand Island dressing.
Carefully lift the cups out of the muffin pan. Garnish with chopped parsley or green onions if you like, and serve warm while the shells are crunchy and the cheese is still melty
- Prep Time: 15 minutes
- Cook Time: 25–30 minutes