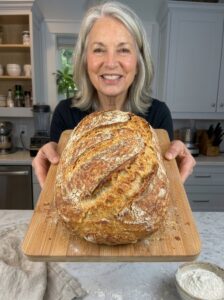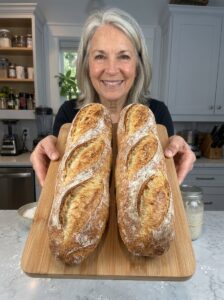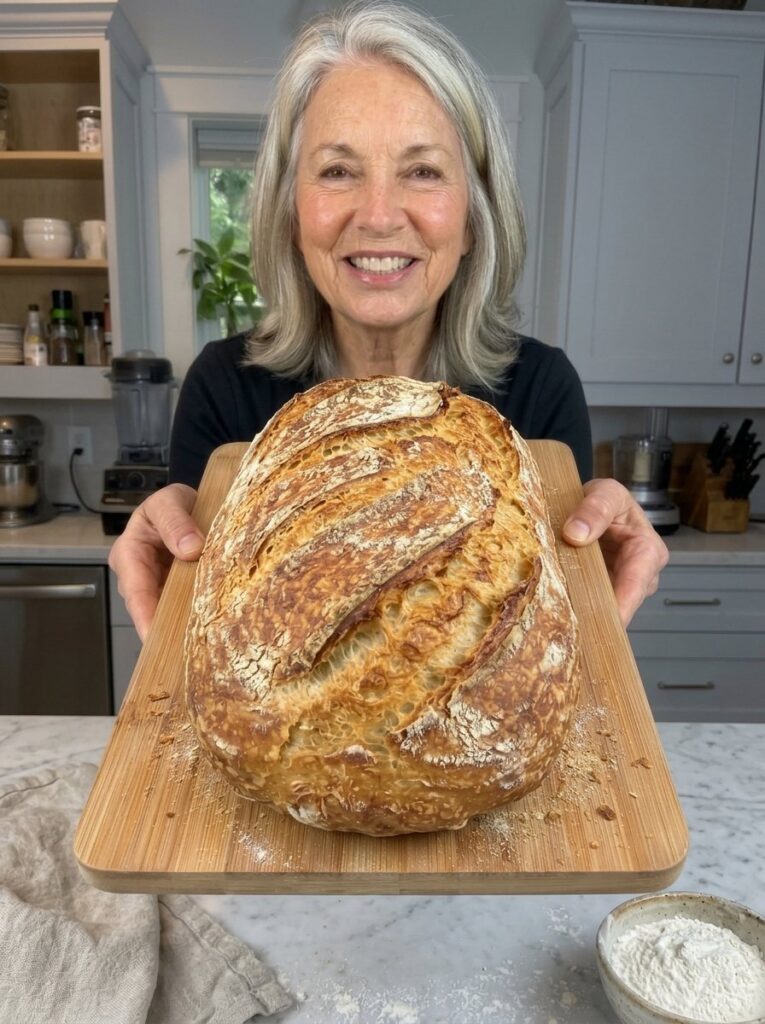
There are few kitchen smells as comforting as a loaf of bread coming out of a hot oven. The crackle of the crust as it cools, the steam rising from the first slice, the way butter melts into a soft, chewy crumb: it is the kind of simple pleasure that makes baking at home so rewarding. If you have ever wondered how to bring a bakery-style loaf into your own kitchen, this crunch bread recipe is the place to start.
This homemade crunch bread has a crisp, golden crust and a soft, chewy center that makes every slice delicious. It uses just a handful of pantry ingredients, needs no special equipment, and gives you a loaf that is perfect for serving alongside soups, dipping in olive oil, or enjoying warm with butter. In this complete guide, you will find the full ingredient list, detailed step-by-step instructions, troubleshooting advice, serving ideas, storage tips and answers to the most common questions about baking crusty bread at home.
What Is Crunch Bread?
Crunch bread is a rustic, oven-baked yeast loaf defined by its contrast in textures. The outside is thin, crackly and deeply golden. The inside is soft, airy and pleasantly chewy. It belongs to the same family as country loaves, boules and artisan-style breads, but it is designed to be approachable for everyday home bakers.
What makes it “crunch bread” is the emphasis on the crust. A very hot oven, a well-hydrated dough and a little steam at the start of baking work together to create that satisfying shatter when you slice into the loaf. Unlike soft sandwich bread, which is baked in a tin at a lower temperature, crunch bread is baked free-form on a hot surface so the crust can develop fully on every side.
Why You Will Love This Crunch Bread Recipe
There are plenty of bread recipes out there, so what makes this one worth your time?
- Simple ingredients. You need bread flour, water, yeast, salt, sugar and an optional spoonful of olive oil. Nothing hard to find.
- Beginner-friendly. The recipe is rated easy to intermediate. The steps are straightforward, and the dough is forgiving.
- Bakery-style results. A hot oven and a little steam give you a crisp, golden crust that rivals a loaf from your local bakery.
- Versatile. It works as a soup companion, a base for garlic bread, a sandwich loaf, or a centerpiece on a cheese board.
- Freezer-friendly. One loaf yields 10 to 12 slices, and any leftovers freeze beautifully for up to three months.
- Hands-on or hands-off. You can knead by hand or use a stand mixer, so you can choose the method that suits your kitchen.
Crunch Bread Ingredients
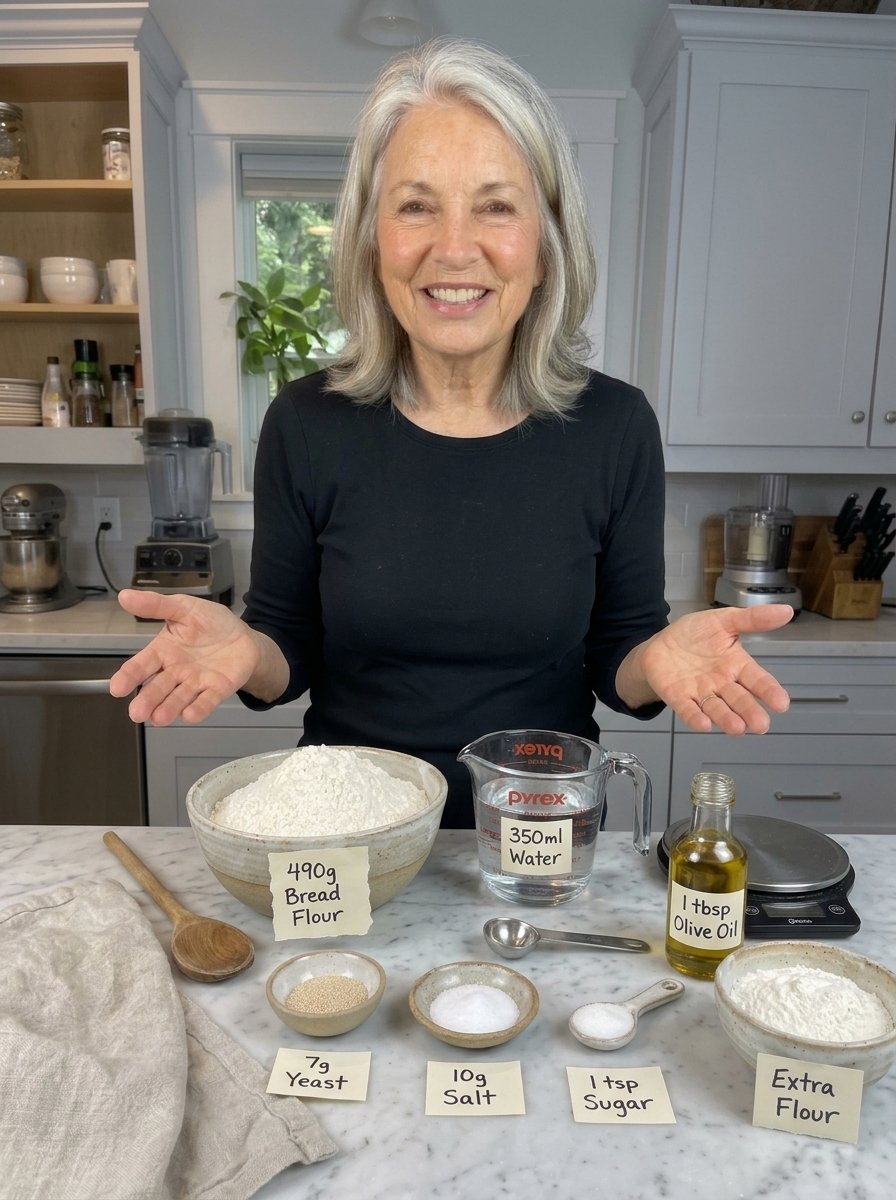
Here is everything you need to make one medium-large loaf:
- 490 g bread flour
- 350 ml lukewarm water
- 7 g instant yeast
- 10 g salt
- 1 tsp sugar
- 1 tbsp olive oil (optional, for a slightly softer crumb)
- Extra flour, for dusting
Why These Ingredients Matter
Bread flour. Bread flour has a higher protein content than all-purpose flour. When mixed with water and kneaded, those proteins form gluten, the stretchy network that traps gas from the yeast and gives bread its chew and structure. For a loaf with a chewy center and good oven spring, bread flour is the best choice.
Lukewarm water. Water temperature matters more than most people realize. It should feel comfortably warm to the touch, not hot. Water that is too cold slows the yeast down, while water that is too hot can damage or kill it. Lukewarm water wakes the yeast gently and helps the dough rise on schedule.
Instant yeast. Instant yeast is the easy option because it can be mixed straight into the dough. Here it is stirred into the water with the sugar to distribute it evenly before the flour goes in.
Salt. Salt does more than add flavor. It strengthens the gluten structure, controls the speed of fermentation and helps the crust brown beautifully. Do not skip it.
Sugar. Just one teaspoon gives the yeast a little food to get going and supports golden browning on the crust. It will not make the bread taste sweet.
Olive oil (optional). A tablespoon of olive oil produces a slightly softer crumb and adds a subtle richness. If you want the crispest possible crust, you can leave it out.
Equipment You Will Need
You do not need a professional bakery setup. Gather these basics:
- A large mixing bowl and a wooden spoon
- A kitchen scale (strongly recommended for accurate flour measurement)
- A clean kitchen towel or plastic wrap
- A stand mixer with a dough hook (optional)
- Parchment paper and a baking tray, or a baking stone
- A sharp bread lame, razor blade or very sharp knife for scoring
- A sturdy metal tray for steam, if your oven setup allows it safely
- A wire cooling rack
- A serrated bread knife
- An instant-read thermometer (optional, but the most reliable way to check doneness)
How to Make Crunch Bread: Step-by-Step Instructions
Total time is approximately 3 to 4 hours, but most of that is hands-off waiting while the dough rises and the loaf cools.
Step 1: Mix the Dough
In a large mixing bowl, combine the lukewarm water, instant yeast and sugar. Stir briefly to distribute the yeast.
Add the bread flour and salt. If you are using olive oil, add it now as well. Mix with a wooden spoon or your hands until a rough dough forms and no dry flour remains.
At this stage the dough should feel soft and slightly sticky. Cover the bowl and let it rest for 10 to 15 minutes. This short rest allows the flour to fully absorb the water, which makes the dough easier to knead and improves the final texture.
Step 2: Knead Until Smooth
Transfer the dough to a lightly floured work surface. Knead for approximately 8 to 10 minutes, stretching and folding the dough until it becomes smoother and more elastic.
If you prefer to use a stand mixer, fit it with a dough hook and knead on low to medium speed for about 6 to 8 minutes.
You will know the dough is ready when it holds together well and feels stretchy when gently pulled. Resist the temptation to add large amounts of extra flour. A slightly tacky dough produces a more tender, chewier loaf, while too much flour makes the finished bread dry and heavy.
Step 3: Let the Dough Rise
Shape the dough into a ball and place it in a lightly greased bowl. Cover with a clean kitchen towel or plastic wrap.
Leave it in a warm, draft-free place for approximately 60 to 90 minutes, or until it has roughly doubled in size. If your kitchen is cool, the dough may need additional time. Look for a noticeably expanded, airy dough rather than relying only on the clock. Room temperature has a big effect on how quickly yeast works, so trust what you see over what the timer says.
Step 4: Shape the Bread
Gently press the dough to release some of the larger air pockets, then transfer it to a lightly floured surface.
Shape it into a round boule or an oval loaf, depending on your preference. Fold the edges toward the center, turn the dough seam-side down, and gently tighten the surface by drawing it toward you across the work surface. This surface tension helps the loaf hold its shape and rise upward in the oven instead of spreading flat.
Place the shaped loaf on parchment paper or a lightly floured baking tray. Cover loosely and let it rest for another 25 to 40 minutes, until slightly puffy.
Step 5: Preheat the Oven
During the final part of the second rise, preheat your oven to 230°C (450°F). If you are using a baking stone or a heavy baking tray, place it inside while the oven heats so it gets thoroughly hot.
For an extra-crispy crust, prepare a separate sturdy metal tray for steam if your oven allows it safely. Do not pour water onto glass cookware or directly onto the oven’s heating elements, as this can cause cracking or damage.
Step 6: Score the Loaf
Dust the top of the loaf lightly with flour if you like a rustic, bakery-style appearance.
Using a sharp bread lame or razor, make one or two shallow slashes across the surface. These cuts give the dough a controlled place to expand during baking and create an attractive finish. Carefully transfer the loaf to the hot baking surface, keeping the parchment underneath if needed.
Step 7: Bake Until Golden and Crunchy
Bake at 230°C (450°F) for approximately 15 minutes. If you are using a safe steam method, introduce the steam at the very beginning of baking. Steam keeps the surface of the dough flexible so the loaf can expand fully before the crust sets.
Carefully remove the steam tray if you used one, then reduce the oven temperature to 210°C (410°F). Continue baking for another 15 to 20 minutes, until the crust is deeply golden and crisp.
There are two ways to check that the bread is done. First, tap the bottom of the loaf: it should sound hollow. Second, and more reliably, use a thermometer. The center of the loaf should reach approximately 96 to 99°C (205 to 210°F).
Step 8: Cool Before Slicing
Remove the loaf from the oven and transfer it to a wire rack. Let it cool for at least 45 to 60 minutes before slicing.
This waiting period is not optional. As the bread cools, the crumb finishes setting and the crust develops its signature crunch. Slicing too early can leave the inside gummy. When the time comes, use a serrated bread knife to cut clean slices without crushing the soft interior.
Tips for the Best Crunch Bread
Small details make the difference between a good loaf and a great one. Keep these tips in mind:
- Use lukewarm water. It should feel comfortably warm, not hot, so it activates the yeast without damaging it.
- Measure flour accurately. Weighing your flour gives you a far more reliable dough consistency than measuring by cups and helps prevent a dense loaf.
- Allow enough rising time. Wait until the dough is noticeably puffy before shaping and baking. A cooler room means a longer rise.
- Create a crisp crust with steam. Bake in a thoroughly preheated oven and introduce steam at the start of baking using a safe oven-steam method.
- Do not overdo the flour. The dough should be slightly tacky. Too much extra flour makes the bread dry and heavy.
- Score the loaf. A few shallow cuts help the bread expand beautifully in the oven.
- Cool on a wire rack. Air circulation keeps the bottom crust from turning soggy as the loaf cools.
Troubleshooting: Common Bread Problems and Fixes
Even experienced bakers run into trouble now and then. Here is how to diagnose the most common issues.
My bread did not rise. The most likely culprit is the yeast or the water temperature. Check that your yeast is fresh and within its date, and make sure the water was lukewarm rather than hot or cold. A cold kitchen can also slow the rise significantly, so give the dough more time in a warm, draft-free spot.
My loaf is dense and heavy. This usually comes from too much flour, under-kneading or not allowing enough rising time. Weigh your flour, knead until the dough is smooth and stretchy, and wait until the dough has visibly doubled before shaping.
The crust is not crunchy. Make sure your oven is fully preheated, bake on a hot surface, and use a safe steam method at the start. Also remember to cool the loaf on a wire rack, since trapped moisture softens the crust.
The bottom crust is soggy. This happens when the loaf cools on a flat surface or inside a covered container. Always transfer the bread to a wire rack so air can circulate underneath.
The inside feels gummy. The bread was probably sliced too soon or underbaked. Let the loaf cool for at least 45 to 60 minutes, and check that the center reaches 96 to 99°C (205 to 210°F).
The loaf spread out instead of rising up. Insufficient surface tension during shaping or over-proofing can cause this. Tighten the surface by drawing the dough toward you when shaping, and avoid letting the second rise run much longer than 40 minutes in a warm kitchen.
Variations to Try
Once you are comfortable with the basic recipe, it is easy to make it your own:
- Herb and garlic loaf. Knead in a tablespoon of dried herbs, such as rosemary or oregano, with the flour.
- Cheese crunch bread. Fold in a handful of grated hard cheese during shaping for savory pockets of flavor.
- Seeded crust. Brush the shaped loaf lightly with water and sprinkle with sesame, poppy or sunflower seeds before scoring.
- Softer crumb. Include the optional tablespoon of olive oil for a slightly more tender center.
- Dinner rolls. Divide the dough into smaller portions after the first rise and shorten the baking time accordingly, watching for a golden color.
Serving Ideas for Homemade Crunch Bread
This loaf is a true all-rounder. Here are some of the best ways to enjoy it:
- Olive oil dipping. Serve thick slices with olive oil, cracked black pepper and dried herbs for a simple appetizer.
- Soup companion. Pair it with tomato soup, creamy mushroom soup or a hearty vegetable stew. The crisp crust is ideal for dunking.
- Garlic bread. Brush slices with garlic butter and toast until fragrant and golden.
- Cheese and bread board. Serve alongside your favorite cheeses, olives and sliced vegetables.
- Breakfast toast. Toast a slice and spread with butter, jam or honey.
- Rustic sandwiches. Fill with cheese, roasted vegetables or your favorite sandwich fillings.
How to Store Crunch Bread
Proper storage keeps your loaf tasting fresh for longer.
- Room temperature. Once completely cool, store the loaf in a paper bag or bread box for up to 2 days. This helps preserve the crisp crust.
- For a softer loaf. Store in an airtight bag for up to 3 days, keeping in mind that the crust will soften.
- Freezing. Wrap the cooled loaf tightly, or freeze individual slices, for up to 3 months. Slices are especially handy because you can toast them straight from the freezer.
- Reheating. Refresh the whole loaf in a 180°C (350°F) oven for 5 to 8 minutes to restore some of the crispness.
- Avoid refrigeration. Refrigerating bread can make it go stale more quickly.
Recipe Details at a Glance
- Prep time: 20 minutes
- First rise: 60 to 90 minutes
- Second rise: 25 to 40 minutes
- Bake time: 30 to 35 minutes
- Cooling time: 45 to 60 minutes
- Total time: Approximately 3 to 4 hours
- Yield: 1 medium-large loaf, approximately 10 to 12 slices
- Difficulty: Easy to intermediate
- Cooking method: Oven-baked yeast bread
- Texture: Crisp, golden crust with a soft, chewy center
- Flavor: Mild, comforting and delicious with savory or sweet toppings
Frequently Asked Questions About Crunch Bread
Can I use all-purpose flour instead of bread flour?
You can, but the result will be a little less chewy. Bread flour contains more protein, which develops into stronger gluten and gives the loaf better structure and rise. If you only have all-purpose flour, the bread will still be tasty, though slightly softer and less chewy.
Why is my dough so sticky?
This dough is meant to be soft and slightly tacky. Stickiness is normal at the start and becomes more manageable as you knead. Avoid adding large amounts of flour, because that leads to a dry, dense loaf. Lightly floured hands and a lightly floured surface are usually enough.
Do I need a stand mixer?
No. You can knead the dough by hand for about 8 to 10 minutes. A stand mixer with a dough hook simply speeds things up, taking roughly 6 to 8 minutes on low to medium speed.
How do I create steam in a home oven safely?
Use a separate sturdy metal tray placed in the oven during preheating and introduce steam at the start of baking if your oven setup allows it safely. Never pour water onto glass cookware or directly onto the oven’s heating elements. If you are unsure, skip the steam. The loaf will still bake well, though the crust will be slightly less crisp.
How do I know when the bread is fully baked?
The crust should be deeply golden and crisp, and the bottom should sound hollow when tapped. For the most reliable result, check that the center of the loaf has reached approximately 96 to 99°C (205 to 210°F).
Can I make the dough ahead of time?
The recipe as written is designed to be made in one session, but the timing is flexible. If your kitchen is cool, the dough may simply need extra rising time. Always judge readiness by how puffy and airy the dough looks rather than by the clock alone.
Can I freeze crunch bread?
Yes. Wrap the cooled loaf tightly or freeze individual slices for up to 3 months. To restore crispness, reheat the loaf in a 180°C (350°F) oven for 5 to 8 minutes.
Why shouldn’t I slice the bread right away?
While the bread cools, the crumb finishes setting and the crust develops its crunch. Cutting into it too early can make the center gummy and compress the soft interior. Wait at least 45 to 60 minutes.
Is this recipe suitable for beginners?
Absolutely. It is rated easy to intermediate, uses basic ingredients and walks you through each stage. Focus on measuring the flour accurately, giving the dough enough time to rise, and letting the loaf cool before slicing, and you will be rewarded with great results.
Final Thoughts
Baking your own bread is one of the most satisfying things you can do in the kitchen, and this crunch bread recipe proves it does not have to be complicated. With a few simple ingredients, a little patience and a very hot oven, you can pull a golden, crackling loaf out of your own oven with a soft, chewy center that is just as good with a bowl of soup as it is with a smear of butter.
Remember the essentials: weigh your flour, use lukewarm water, let the dough rise until it is puffy and airy, score the loaf, bake it hot, and be patient while it cools. Do those things and you will be baking bakery-style bread at home in no time.
Print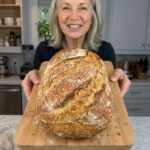
Delicious Crunch Bread
Ingredients
Here is everything you need to make one medium-large loaf:
- 490 g bread flour
- 350 ml lukewarm water
- 7 g instant yeast
- 10 g salt
- 1 tsp sugar
- 1 tbsp olive oil (optional, for a slightly softer crumb)
- Extra flour, for dusting
Why These Ingredients Matter
Bread flour. Bread flour has a higher protein content than all-purpose flour. When mixed with water and kneaded, those proteins form gluten, the stretchy network that traps gas from the yeast and gives bread its chew and structure. For a loaf with a chewy center and good oven spring, bread flour is the best choice.
Lukewarm water. Water temperature matters more than most people realize. It should feel comfortably warm to the touch, not hot. Water that is too cold slows the yeast down, while water that is too hot can damage or kill it. Lukewarm water wakes the yeast gently and helps the dough rise on schedule.
Instant yeast. Instant yeast is the easy option because it can be mixed straight into the dough. Here it is stirred into the water with the sugar to distribute it evenly before the flour goes in.
Salt. Salt does more than add flavor. It strengthens the gluten structure, controls the speed of fermentation and helps the crust brown beautifully. Do not skip it.
Sugar. Just one teaspoon gives the yeast a little food to get going and supports golden browning on the crust. It will not make the bread taste sweet.
Olive oil (optional). A tablespoon of olive oil produces a slightly softer crumb and adds a subtle richness. If you want the crispest possible crust, you can leave it out.
Instructions
Total time is approximately 3 to 4 hours, but most of that is hands-off waiting while the dough rises and the loaf cools.
In a large mixing bowl, combine the lukewarm water, instant yeast and sugar. Stir briefly to distribute the yeast.
Add the bread flour and salt. If you are using olive oil, add it now as well. Mix with a wooden spoon or your hands until a rough dough forms and no dry flour remains.
At this stage the dough should feel soft and slightly sticky. Cover the bowl and let it rest for 10 to 15 minutes. This short rest allows the flour to fully absorb the water, which makes the dough easier to knead and improves the final texture.
Transfer the dough to a lightly floured work surface. Knead for approximately 8 to 10 minutes, stretching and folding the dough until it becomes smoother and more elastic.
If you prefer to use a stand mixer, fit it with a dough hook and knead on low to medium speed for about 6 to 8 minutes.
You will know the dough is ready when it holds together well and feels stretchy when gently pulled. Resist the temptation to add large amounts of extra flour. A slightly tacky dough produces a more tender, chewier loaf, while too much flour makes the finished bread dry and heavy.
Shape the dough into a ball and place it in a lightly greased bowl. Cover with a clean kitchen towel or plastic wrap.
Leave it in a warm, draft-free place for approximately 60 to 90 minutes, or until it has roughly doubled in size. If your kitchen is cool, the dough may need additional time. Look for a noticeably expanded, airy dough rather than relying only on the clock. Room temperature has a big effect on how quickly yeast works, so trust what you see over what the timer says.
Gently press the dough to release some of the larger air pockets, then transfer it to a lightly floured surface.
Shape it into a round boule or an oval loaf, depending on your preference. Fold the edges toward the center, turn the dough seam-side down, and gently tighten the surface by drawing it toward you across the work surface. This surface tension helps the loaf hold its shape and rise upward in the oven instead of spreading flat.
Place the shaped loaf on parchment paper or a lightly floured baking tray. Cover loosely and let it rest for another 25 to 40 minutes, until slightly puffy.
During the final part of the second rise, preheat your oven to 230°C (450°F). If you are using a baking stone or a heavy baking tray, place it inside while the oven heats so it gets thoroughly hot.
For an extra-crispy crust, prepare a separate sturdy metal tray for steam if your oven allows it safely. Do not pour water onto glass cookware or directly onto the oven’s heating elements, as this can cause cracking or damage.
Dust the top of the loaf lightly with flour if you like a rustic, bakery-style appearance.
Using a sharp bread lame or razor, make one or two shallow slashes across the surface. These cuts give the dough a controlled place to expand during baking and create an attractive finish. Carefully transfer the loaf to the hot baking surface, keeping the parchment underneath if needed.
Bake at 230°C (450°F) for approximately 15 minutes. If you are using a safe steam method, introduce the steam at the very beginning of baking. Steam keeps the surface of the dough flexible so the loaf can expand fully before the crust sets.
Carefully remove the steam tray if you used one, then reduce the oven temperature to 210°C (410°F). Continue baking for another 15 to 20 minutes, until the crust is deeply golden and crisp.
There are two ways to check that the bread is done. First, tap the bottom of the loaf: it should sound hollow. Second, and more reliably, use a thermometer. The center of the loaf should reach approximately 96 to 99°C (205 to 210°F).
Remove the loaf from the oven and transfer it to a wire rack. Let it cool for at least 45 to 60 minutes before slicing.
This waiting period is not optional. As the bread cools, the crumb finishes setting and the crust develops its signature crunch. Slicing too early can leave the inside gummy. When the time comes, use a serrated bread knife to cut clean slices without crushing the soft interior.