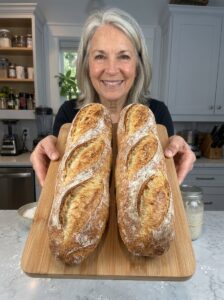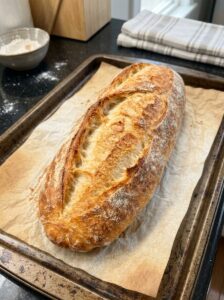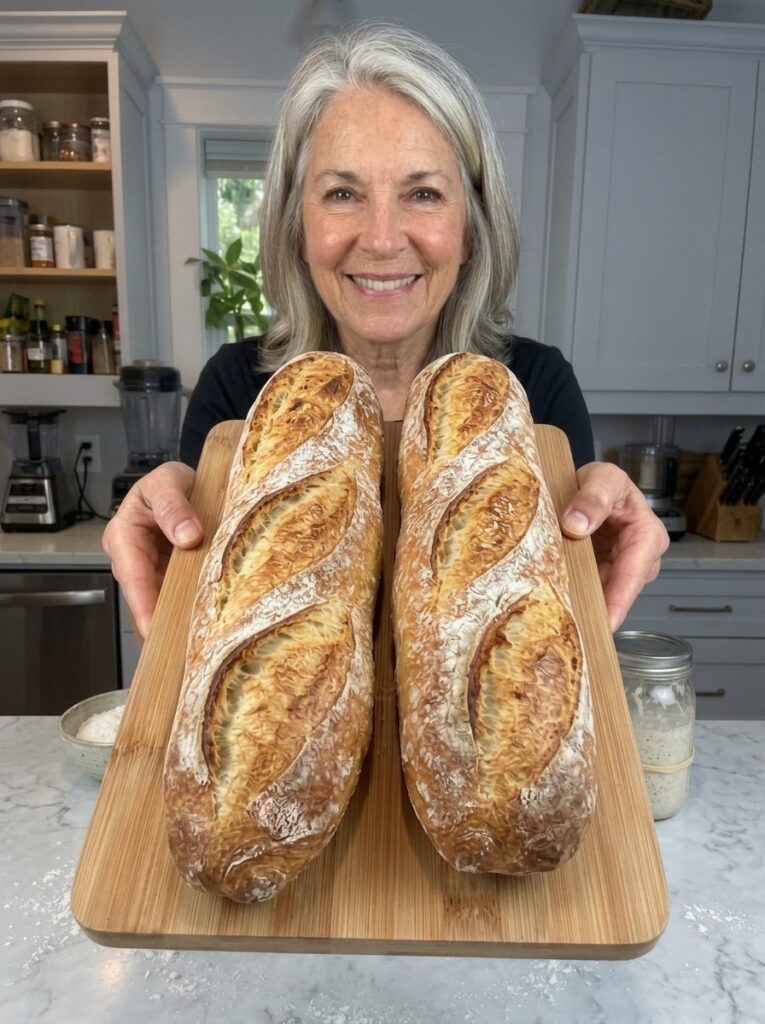
There is something almost magical about pulling a long, golden loaf of homemade bread out of the oven and hearing the crust crackle as it meets the air. If you have ever wanted to bake that experience at home, this easy sourdough French bread is the perfect place to start. It uses only four ingredients, relies on the natural fermentation power of your sourdough starter, and rewards you with a thin, crisp crust and a soft, chewy interior with a deliciously mild tang.
Whether you are a beginner who has just fed your first starter or an experienced baker looking for a dependable everyday loaf, this recipe delivers. In this complete guide, you will find the full ingredient list, a detailed step-by-step method, troubleshooting advice, serving ideas, storage tips, and answers to the most common questions about baking sourdough French bread.
What Is Sourdough French Bread?
Traditional French bread, like the classic baguette, is made from flour, water, salt, and yeast. Sourdough French bread keeps the same simple spirit but swaps commercial yeast for a sourdough starter, a living culture of wild yeast and beneficial bacteria. The starter makes the dough rise and also adds depth of flavor, a slight tang, and a more complex aroma than yeasted bread.
The result is a long, narrow, tapered loaf with a thin, crackly crust and a tender, chewy crumb. Because the flavor is mild rather than sharply sour, it appeals to almost everyone, including people who normally find sourdough too tangy.
Why You Will Love This Easy Sourdough French Bread
There are plenty of sourdough recipes online, so what makes this one worth baking? Here are the main reasons home bakers keep coming back to it:
- Only four ingredients. Bread flour, water, active sourdough starter, and salt. No commercial yeast, no sugar, no oil, and no specialty equipment.
- Thin, golden, crispy crust. Strong initial heat and steam create the signature crackly exterior that French bread is known for.
- Soft and chewy interior. A 70% hydration dough gives you a tender crumb that is still manageable to shape.
- Mild sourdough flavor. You get the character of sourdough without an overpowering sour punch.
- Wonderfully versatile. Use it for sandwiches, garlic bread, bruschetta, dipping into soup, or simply warm with butter.
- Flexible timing. You can bake the same day or refrigerate the shaped loaf for 8 to 12 hours for an even more developed flavor.
Ingredients for Sourdough French Bread
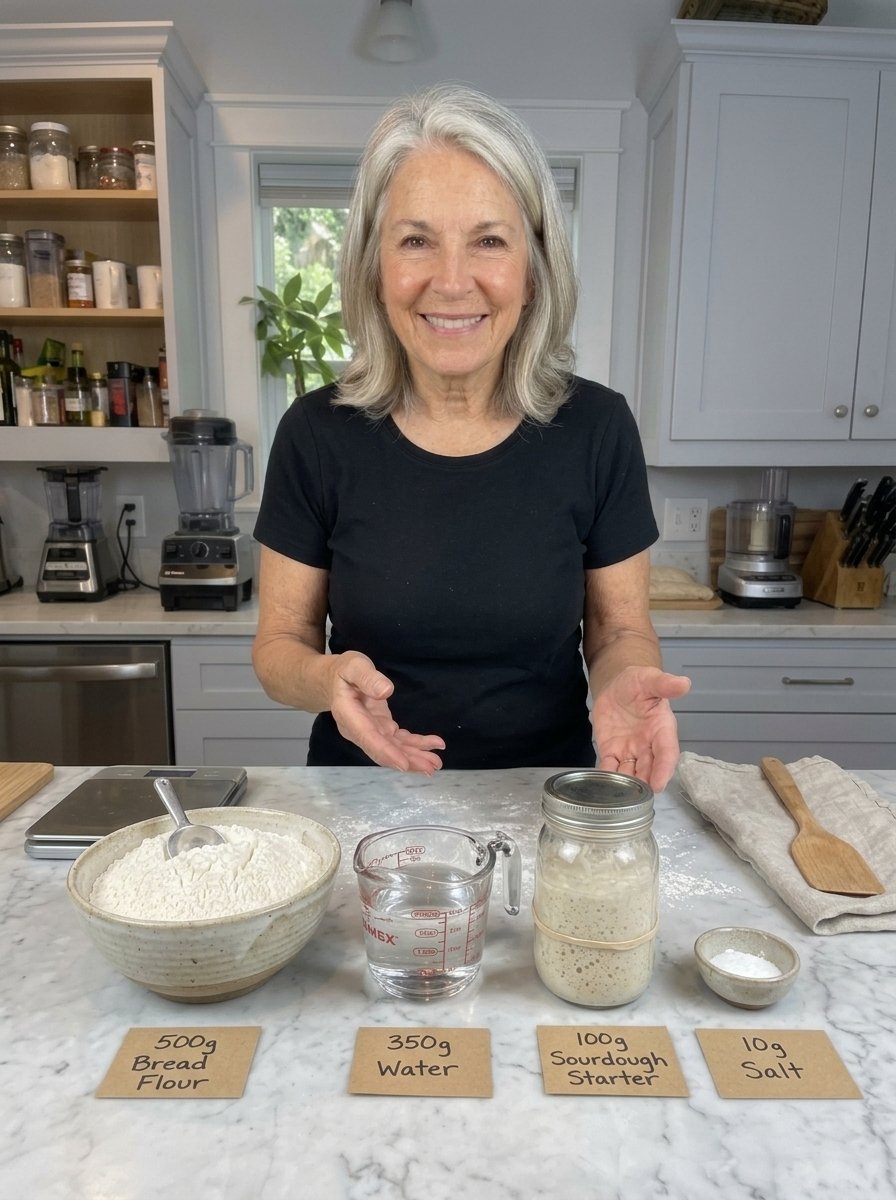
This recipe makes one French loaf, about 10 to 12 slices. Using a kitchen scale is strongly recommended, because weighing ingredients is far more accurate than measuring by cups and gives you consistent results every time.
- 500 g bread flour
- 350 g water, at room temperature
- 100 g active sourdough starter, bubbly and recently fed
- 10 g salt
A Closer Look at Each Ingredient
Bread flour. Bread flour has a higher protein content than all-purpose flour, which means it forms more gluten. Strong gluten traps the gas produced during fermentation, helping the loaf rise well and giving it that satisfying chew.
Water. Room-temperature water keeps fermentation moving at a steady, predictable pace. At 350 g of water for 500 g of flour, this dough has 70% hydration. That is wet enough to produce a soft, open crumb but still easy to handle and shape into a long loaf.
Active sourdough starter. This is the engine of the recipe. Your starter should be bubbly, airy, and rising predictably after feeding. A sluggish starter leads to a dense loaf and a much longer rise, so use it when it is at or near its peak.
Salt. Salt strengthens the dough, controls fermentation, and brings out the flavor of the flour. Do not skip it, and do not add it too early: in this recipe it goes in after the first rest.
Tips for the Best Sourdough French Bread
Before you start, keep these tips in mind. They make the difference between a good loaf and a great one.
- Use an active starter. Your starter should be bubbly, airy, and rising predictably after feeding. This is the single biggest factor in getting a good rise and good flavor.
- Measure the water carefully. The 70% hydration is what creates a soft, chewy crumb while keeping the dough manageable. Weigh your water instead of eyeballing it.
- Allow enough fermentation time. Sourdough rises according to dough temperature and starter strength, so follow the dough’s appearance rather than relying only on the clock.
- Create steam in the oven. Steam helps the loaf expand before the crust sets, giving it a thinner, crispier finish.
- Shape gently. Avoid pressing out all the air when forming the loaf. Keeping some of it helps create a light, open crumb.
- Cool before slicing. Let the bread cool completely so the interior finishes setting and stays soft rather than gummy.
How to Make Sourdough French Bread, Step by Step
The process looks long on paper, but most of the time is hands-off waiting. Active work totals only about 30 minutes. Here is how it all comes together.
Step 1: Mix the Dough
In a large mixing bowl, combine the 350 g of room-temperature water and 100 g of active sourdough starter. Stir until the starter is mostly dispersed in the water.
Add the 500 g of bread flour and mix until no dry flour remains. At this stage the dough may look rough and slightly sticky, which is completely normal. Do not be tempted to add extra flour.
Cover the bowl and let the dough rest for 30 minutes. This resting period, often called an autolyse-style rest, allows the flour to absorb the water and makes the dough easier to develop later.
Step 2: Add the Salt
Sprinkle the 10 g of salt over the dough. Use damp fingers to pinch, fold, and gently squeeze the dough until the salt is evenly incorporated. Wet hands prevent the dough from sticking to you.
Cover and rest for another 15 to 20 minutes. During this time the dough should gradually become smoother and more elastic.
Step 3: Develop the Dough with Stretch and Folds
Over the next 1½ to 2 hours, perform 3 to 4 sets of stretch and folds, spacing them about 30 minutes apart.
To do a stretch and fold, gently lift one side of the dough, stretch it upward without tearing it, and fold it over the center. Rotate the bowl and repeat on all four sides. That is one set.
Cover the dough between each set. With every round, it should become stronger, smoother, and more structured. This technique builds gluten without any kneading, which is why it is so popular with sourdough bakers.
Step 4: Let the Dough Rise (Bulk Fermentation)
After the final set of folds, cover the bowl and let the dough continue fermenting at room temperature. Depending on your kitchen temperature and starter activity, this may take another 2 to 5 hours.
Look for these signs that the dough is ready:
- It has noticeably increased in volume.
- It feels airy and light.
- You can see bubbles along the sides of the bowl.
Avoid waiting for it to double completely if it becomes very loose or overly bubbly. The dough should feel light while still holding its structure. Overfermented dough is hard to shape and can bake into a flat loaf, so it is better to err slightly on the early side than to wait too long.
Step 5: Shape the French Loaf
Lightly flour your work surface and gently turn out the dough. Pat it into a rough rectangle without pressing out too much of the trapped air.
Fold the top third toward the center, then fold the bottom third over it, like folding a letter. Starting from one end, roll the dough into a log, gently sealing the seam as you go.
Roll the loaf lightly with your hands to create an even shape with tapered ends. Aim for a long, narrow French-style loaf that fits comfortably on your baking tray.
Place it seam-side down on parchment paper or a lightly floured couche. Cover loosely to prevent the surface from drying out.
Step 6: Proof the Loaf
Let the shaped loaf proof at room temperature for approximately 1 to 2 hours, depending on the dough’s activity and the warmth of your kitchen.
The loaf should look slightly puffier and feel airy when gently pressed. Try the poke test: a light indentation should slowly spring back rather than disappearing immediately.
For a more developed sourdough flavor, you can instead refrigerate the shaped loaf for 8 to 12 hours, then bake it directly from the refrigerator if it is adequately proofed. This cold proof also makes the loaf easier to score, and it fits nicely into a busy schedule: shape in the evening and bake the next morning.
Step 7: Preheat the Oven
Preheat your oven to 230°C (450°F). Place a sturdy metal tray or baking stone inside while the oven heats so the bread receives strong initial heat.
If your oven setup allows safe steam baking, prepare a separate metal tray for hot water. Do not pour water onto a glass dish or directly onto an oven’s heating elements, as this can cause glass to shatter or damage the oven.
Step 8: Score and Bake the Bread
Carefully transfer the loaf, still on its parchment if needed, onto the hot baking surface. Using a sharp bread lame or razor, make one long, shallow slash along the top of the loaf. Scoring gives the bread a controlled place to expand and creates that classic French bread look.
Introduce steam using your oven’s safe steam method, then bake for 15 minutes at 230°C (450°F).
Carefully remove the steam tray if used, lower the temperature to 210°C (410°F), and continue baking for another 15 to 20 minutes, until the crust is golden brown and crisp.
To check for doneness, tap the bottom of the loaf. It should sound hollow. If you have a thermometer, the center should reach approximately 96 to 99°C (205 to 210°F).
Step 9: Cool Before Slicing
Transfer the finished bread to a wire rack and let it cool for at least 1 hour before slicing. This is the hardest step, since the smell of fresh bread is tempting, but it matters. As it cools, the crust becomes crisp and the soft interior finishes setting. Slice with a serrated bread knife and enjoy the contrast between the golden crust and chewy center.
Recipe at a Glance
- Prep time: 30 minutes
- Bulk fermentation: Approximately 3½ to 7 hours, depending on temperature and starter activity
- Final proof: 1 to 2 hours at room temperature, or 8 to 12 hours refrigerated
- Bake time: 30 to 35 minutes
- Cooling time: At least 1 hour
- Total time: Approximately 6 to 10 hours, excluding optional overnight refrigeration
- Yield: 1 French loaf, approximately 10 to 12 slices
- Difficulty: Intermediate
- Method: Oven-baked sourdough
- Texture: Thin, crisp golden crust with a soft, chewy interior and mild tangy flavor
Sample Baking Schedule
Sourdough fits into your day when you plan around it. Here is one way to schedule the same-day method, starting at 8:00 AM:
- 8:00 AM: Mix water, starter, and flour. Rest 30 minutes.
- 8:30 AM: Add salt and rest 15 to 20 minutes.
- 9:00 AM to 11:00 AM: Perform 3 to 4 sets of stretch and folds, about 30 minutes apart.
- 11:00 AM to 3:00 PM: Bulk fermentation at room temperature, watching the dough rather than the clock.
- 3:00 PM: Shape the loaf and let it proof for 1 to 2 hours.
- 5:00 PM: Preheat the oven, score, and bake for 30 to 35 minutes.
- 6:00 PM: Cool for at least an hour, then slice and serve with dinner.
If your kitchen is cool, everything will take longer, so adjust accordingly. For a more flexible plan, shape the loaf in the evening, refrigerate it for 8 to 12 hours, and bake the next day.
Troubleshooting Common Sourdough French Bread Problems
Even experienced bakers run into issues now and then. Use this quick guide to diagnose what happened and how to improve your next loaf.
My loaf is dense and did not rise much
The most common cause is a weak starter. Make sure your starter is bubbly, airy, and recently fed before you mix the dough. A cool kitchen can also slow fermentation significantly, so allow extra time and judge the dough by its appearance, not the clock.
My loaf spread out flat
This can happen when the dough is overfermented and has become very loose, or when it was not shaped with enough surface tension. Watch for the signs of a ready dough, and avoid letting it ferment until it is overly bubbly and slack. Shape firmly but gently, sealing the seam well.
The crust is thick and pale instead of thin and golden
Steam and strong initial heat are the keys here. Make sure your tray or stone is fully preheated and that you introduce steam safely at the start of baking. If the crust is pale, bake a few minutes longer, until it is golden brown.
The inside is gummy
Gumminess usually means the bread was sliced too early or not baked long enough. Let the loaf cool for at least an hour, and confirm the center reaches about 96 to 99°C (205 to 210°F).
The crumb is tight, with few holes
Pressing out too much air during shaping can lead to a tighter crumb. Handle the dough gently, and make sure the dough is properly fermented before shaping.
The dough is too sticky to handle
A 70% hydration dough is meant to be slightly sticky. Use damp hands during the salt and folding stages, and a light dusting of flour only when shaping. Resist adding much extra flour, because it will make the bread denser.
Serving Ideas for Sourdough French Bread
This loaf is as versatile as it is delicious. Here are some of the best ways to enjoy it:
- Classic French bread: Serve warm slices with salted butter or a drizzle of olive oil.
- Garlic bread: Brush slices with garlic butter, sprinkle with parsley, and toast until golden.
- Hearty sandwiches: Fill with cheese, roasted vegetables, deli meats, or your favorite sandwich ingredients.
- Soup companion: Serve alongside tomato soup, creamy vegetable soup, or a hearty stew.
- Bruschetta: Toast slices and top with chopped tomatoes, basil, olive oil, and a pinch of salt.
- Breakfast toast: Toast leftover slices and serve with butter, honey, or jam.
How to Store Sourdough French Bread
Homemade bread has no preservatives, so storage matters. Follow these guidelines to keep your loaf at its best:
- Room temperature: Store the completely cooled loaf in a paper bag or bread box for up to 2 days for the best crust.
- Longer storage: Place the bread in a sealed bag once fully cool to help retain softness for up to 3 to 4 days, although the crust will soften.
- Freezing: Slice the loaf, wrap it well, and freeze for up to 3 months.
- Reheating: Refresh the loaf in a 180°C (350°F) oven for 5 to 8 minutes. Toast frozen slices directly from the freezer.
- Avoid refrigeration: Refrigerating bread generally makes it stale faster.
Tips for Beginners Baking Sourdough for the First Time
If this is your first sourdough loaf, a few habits will set you up for success:
- Feed your starter ahead of time. Plan to use it when it is bubbly and active, usually several hours after feeding, depending on your kitchen.
- Keep notes. Write down the time you mixed the dough, the room temperature, and how the dough looked at each stage. Over a few bakes you will learn exactly how your starter behaves.
- Trust the dough. Recipes give time ranges because every kitchen and starter is different. The dough’s volume, bubbles, and feel are better guides than the clock.
- Be patient with shaping. Shaping a long French loaf takes practice. Even imperfect loaves taste wonderful, and your technique will improve with every bake.
- Use a kitchen scale. Weighing ingredients keeps your hydration consistent and your results repeatable.
Frequently Asked Questions
Can I use all-purpose flour instead of bread flour?
You can, but the loaf will have a slightly softer structure and less chew, because all-purpose flour contains less protein. Bread flour is recommended for the best rise and the signature chewy crumb. If you use all-purpose flour, handle the dough gently, as it may feel a little slacker.
How do I know my sourdough starter is active enough?
An active starter is bubbly and airy and rises predictably after feeding. Use it when it looks full of bubbles and is at or near its peak, rather than when it has collapsed or looks flat.
How long does it take to make sourdough French bread?
In total, plan on roughly 6 to 10 hours from mixing to slicing, though most of that is hands-off waiting. If you choose the overnight refrigerated proof, the schedule stretches across two days but the work remains minimal.
Can I make this recipe without a Dutch oven?
Yes. This recipe is designed for a metal baking tray or baking stone and a safe steam method, so no Dutch oven is needed. Just make sure the tray or stone is fully preheated and that you never pour water onto glass or directly onto the oven’s heating elements.
Why is steam important when baking French bread?
Steam keeps the surface of the dough moist during the first part of baking, which allows the loaf to expand fully before the crust sets. It also helps produce a thinner, crispier, shinier crust.
Can I proof the loaf in the refrigerator?
Yes. Refrigerate the shaped loaf for 8 to 12 hours for a more developed sourdough flavor, then bake it directly from the refrigerator if it is adequately proofed.
How do I get a more sour flavor?
This recipe is intentionally mild. For a tangier loaf, use the longer refrigerated proof, which develops more sourdough character.
How do I know when the bread is fully baked?
The crust should be golden brown and crisp, and the loaf should sound hollow when tapped on the bottom. If you use a thermometer, the center should read about 96 to 99°C (205 to 210°F).
Can I freeze sourdough French bread?
Yes. Slice the loaf, wrap it well, and freeze for up to 3 months. Toast the slices directly from the freezer, or refresh a whole loaf in a 180°C (350°F) oven for 5 to 8 minutes.
Why shouldn’t I slice the bread right away?
The interior is still setting while the loaf is hot. Cutting too early can make the crumb gummy. Cooling for at least an hour gives you a crisp crust and a soft, chewy center.
Final Thoughts
This easy sourdough French bread proves that you do not need complicated ingredients or professional equipment to bake a truly impressive loaf. With just flour, water, starter, and salt, plus a little patience, you can produce a bakery-style loaf with a thin golden crust, a soft chewy crumb, and a gentle tang that goes with almost everything.
Follow the dough instead of the clock, keep your starter active, create steam for a crisp crust, and let the bread cool before slicing. Do that, and every bake will get better than the last. Once you have mastered this loaf, you will find yourself making it for sandwiches, garlic bread, soup nights, and weekend breakfasts again and again.
Print
Easy Sourdough French Bread
Ingredients
This recipe makes one French loaf, about 10 to 12 slices. Using a kitchen scale is strongly recommended, because weighing ingredients is far more accurate than measuring by cups and gives you consistent results every time.
- 500 g bread flour
- 350 g water, at room temperature
- 100 g active sourdough starter, bubbly and recently fed
- 10 g salt
A Closer Look at Each Ingredient
Bread flour. Bread flour has a higher protein content than all-purpose flour, which means it forms more gluten. Strong gluten traps the gas produced during fermentation, helping the loaf rise well and giving it that satisfying chew.
Water. Room-temperature water keeps fermentation moving at a steady, predictable pace. At 350 g of water for 500 g of flour, this dough has 70% hydration. That is wet enough to produce a soft, open crumb but still easy to handle and shape into a long loaf.
Active sourdough starter. This is the engine of the recipe. Your starter should be bubbly, airy, and rising predictably after feeding. A sluggish starter leads to a dense loaf and a much longer rise, so use it when it is at or near its peak.
Salt. Salt strengthens the dough, controls fermentation, and brings out the flavor of the flour. Do not skip it, and do not add it too early: in this recipe it goes in after the first rest.
Tips for the Best Sourdough French Bread
Before you start, keep these tips in mind. They make the difference between a good loaf and a great one.
- Use an active starter. Your starter should be bubbly, airy, and rising predictably after feeding. This is the single biggest factor in getting a good rise and good flavor.
- Measure the water carefully. The 70% hydration is what creates a soft, chewy crumb while keeping the dough manageable. Weigh your water instead of eyeballing it.
- Allow enough fermentation time. Sourdough rises according to dough temperature and starter strength, so follow the dough’s appearance rather than relying only on the clock.
- Create steam in the oven. Steam helps the loaf expand before the crust sets, giving it a thinner, crispier finish.
- Shape gently. Avoid pressing out all the air when forming the loaf. Keeping some of it helps create a light, open crumb.
- Cool before slicing. Let the bread cool completely so the interior finishes setting and stays soft rather than gummy.
Instructions
The process looks long on paper, but most of the time is hands-off waiting. Active work totals only about 30 minutes. Here is how it all comes together.
Step 1: Mix the Dough
In a large mixing bowl, combine the 350 g of room-temperature water and 100 g of active sourdough starter. Stir until the starter is mostly dispersed in the water.
Add the 500 g of bread flour and mix until no dry flour remains. At this stage the dough may look rough and slightly sticky, which is completely normal. Do not be tempted to add extra flour.
Cover the bowl and let the dough rest for 30 minutes. This resting period, often called an autolyse-style rest, allows the flour to absorb the water and makes the dough easier to develop later.
Step 2: Add the Salt
Sprinkle the 10 g of salt over the dough. Use damp fingers to pinch, fold, and gently squeeze the dough until the salt is evenly incorporated. Wet hands prevent the dough from sticking to you.
Cover and rest for another 15 to 20 minutes. During this time the dough should gradually become smoother and more elastic.
Step 3: Develop the Dough with Stretch and Folds
Over the next 1½ to 2 hours, perform 3 to 4 sets of stretch and folds, spacing them about 30 minutes apart.
To do a stretch and fold, gently lift one side of the dough, stretch it upward without tearing it, and fold it over the center. Rotate the bowl and repeat on all four sides. That is one set.
Cover the dough between each set. With every round, it should become stronger, smoother, and more structured. This technique builds gluten without any kneading, which is why it is so popular with sourdough bakers.
Step 4: Let the Dough Rise (Bulk Fermentation)
After the final set of folds, cover the bowl and let the dough continue fermenting at room temperature. Depending on your kitchen temperature and starter activity, this may take another 2 to 5 hours.
Look for these signs that the dough is ready:
- It has noticeably increased in volume.
- It feels airy and light.
- You can see bubbles along the sides of the bowl.
Avoid waiting for it to double completely if it becomes very loose or overly bubbly. The dough should feel light while still holding its structure. Overfermented dough is hard to shape and can bake into a flat loaf, so it is better to err slightly on the early side than to wait too long.
Step 5: Shape the French Loaf
Lightly flour your work surface and gently turn out the dough. Pat it into a rough rectangle without pressing out too much of the trapped air.
Fold the top third toward the center, then fold the bottom third over it, like folding a letter. Starting from one end, roll the dough into a log, gently sealing the seam as you go.
Roll the loaf lightly with your hands to create an even shape with tapered ends. Aim for a long, narrow French-style loaf that fits comfortably on your baking tray.
Place it seam-side down on parchment paper or a lightly floured couche. Cover loosely to prevent the surface from drying out.
Step 6: Proof the Loaf
Let the shaped loaf proof at room temperature for approximately 1 to 2 hours, depending on the dough’s activity and the warmth of your kitchen.
The loaf should look slightly puffier and feel airy when gently pressed. Try the poke test: a light indentation should slowly spring back rather than disappearing immediately.
For a more developed sourdough flavor, you can instead refrigerate the shaped loaf for 8 to 12 hours, then bake it directly from the refrigerator if it is adequately proofed. This cold proof also makes the loaf easier to score, and it fits nicely into a busy schedule: shape in the evening and bake the next morning.
Step 7: Preheat the Oven
Preheat your oven to 230°C (450°F). Place a sturdy metal tray or baking stone inside while the oven heats so the bread receives strong initial heat.
If your oven setup allows safe steam baking, prepare a separate metal tray for hot water. Do not pour water onto a glass dish or directly onto an oven’s heating elements, as this can cause glass to shatter or damage the oven.
Step 8: Score and Bake the Bread
Carefully transfer the loaf, still on its parchment if needed, onto the hot baking surface. Using a sharp bread lame or razor, make one long, shallow slash along the top of the loaf. Scoring gives the bread a controlled place to expand and creates that classic French bread look.
Introduce steam using your oven’s safe steam method, then bake for 15 minutes at 230°C (450°F).
Carefully remove the steam tray if used, lower the temperature to 210°C (410°F), and continue baking for another 15 to 20 minutes, until the crust is golden brown and crisp.
To check for doneness, tap the bottom of the loaf. It should sound hollow. If you have a thermometer, the center should reach approximately 96 to 99°C (205 to 210°F).
Step 9: Cool Before Slicing
Transfer the finished bread to a wire rack and let it cool for at least 1 hour before slicing. This is the hardest step, since the smell of fresh bread is tempting, but it matters. As it cools, the crust becomes crisp and the soft interior finishes setting. Slice with a serrated bread knife and enjoy the contrast between the golden crust and chewy center.