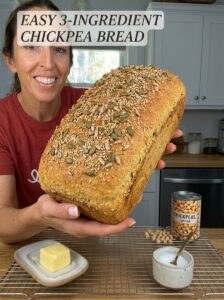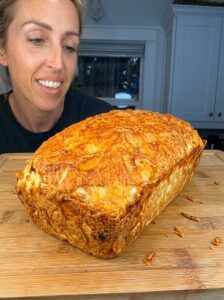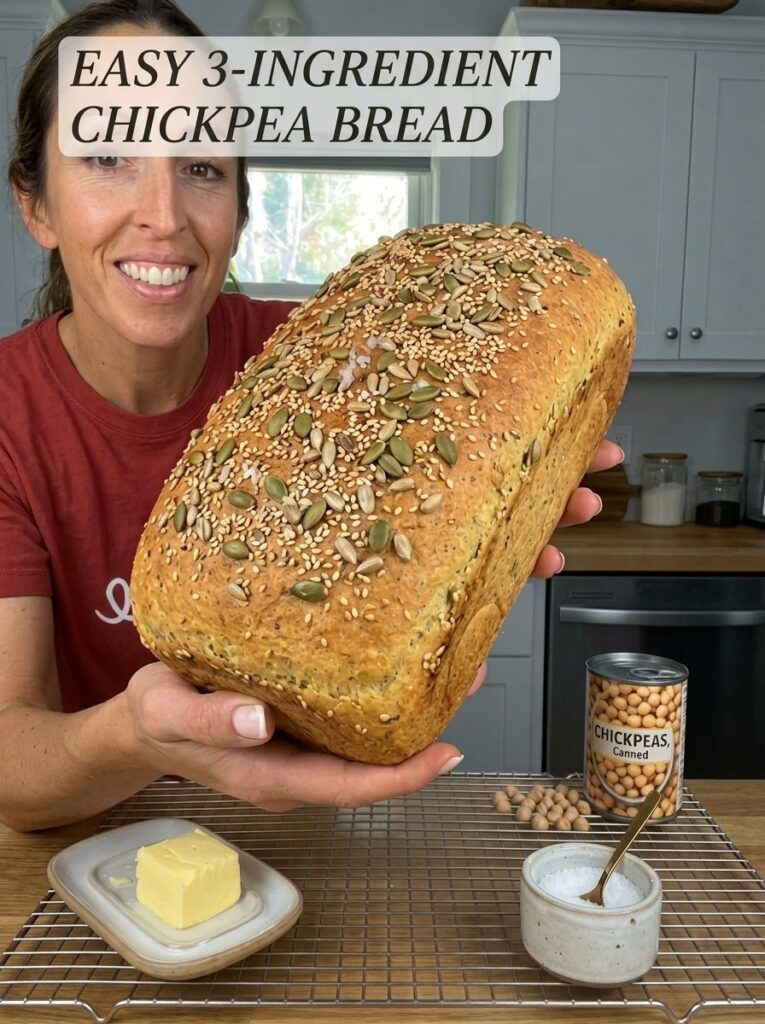
Easy 3-Ingredient Chickpea Bread 🫘🍞
If you thought homemade bread required yeast, kneading, and hours of patience, this Easy 3-Ingredient Chickpea Bread is here to change your mind. Made with just chickpeas, eggs, and Greek yogurt, this recipe delivers a tender, hearty loaf with a lightly golden crust — all without a single packet of yeast or a minute spent kneading dough.
This is the kind of recipe that feels almost too simple to work, yet it consistently delivers a satisfying, sliceable loaf with a mild, slightly savory flavor. It’s naturally gluten-free (as long as your ingredients are certified gluten-free), packed with plant-based protein and fiber from the chickpeas, and comes together in one blender and one loaf pan. Whether you’re exploring gluten-free baking, looking to sneak more legumes into your diet, or simply want an easy homemade bread recipe that doesn’t require a grocery run for specialty flours, this chickpea bread deserves a spot in your recipe rotation.
Let’s break down exactly why this recipe works, how to make it perfectly, and all the best ways to enjoy it.
Why This Chickpea Bread Recipe Works
Chickpeas might seem like an unusual base for bread, but they’re actually a brilliant substitute for flour in a lot of ways. Once blended smooth, chickpeas create a thick, starchy batter that bakes up into a cohesive, bread-like texture — no wheat flour required. This makes the recipe naturally friendly for anyone avoiding gluten or looking to reduce refined carbohydrates in their diet.
Here’s what each ingredient brings to the table:
- Chickpeas provide the bulk and structure of the bread. They’re rich in fiber and plant-based protein, and when blended thoroughly, they create a smooth, starchy base that mimics the texture of traditional flour-based bread.
- Eggs act as the binder, holding everything together while also contributing to the bread’s rise and structure. They help the batter set properly during baking, giving the loaf a sliceable, bread-like crumb rather than a dense, gummy texture.
- Greek yogurt adds moisture, a subtle tang, and additional protein. It also helps keep the crumb soft and tender, preventing the loaf from drying out or becoming crumbly.
Because there’s no flour, no yeast, and no rising time involved, this bread comes together almost entirely in the blender, which means minimal cleanup and virtually no room for error. It’s an especially great option for beginner bakers or anyone who wants homemade bread without committing to a whole afternoon in the kitchen.
Is Chickpea Bread Healthy?
This chickpea bread stands out nutritionally compared to traditional wheat-based bread in several ways:
- Higher in fiber and plant protein, thanks to the chickpeas, which support digestion and help keep you feeling fuller for longer
- Naturally gluten-free, making it a great option for anyone with gluten sensitivities or those following a gluten-free diet (just be sure to use certified gluten-free chickpeas if that’s a concern)
- Lower in refined carbohydrates than many traditional bread recipes, since it skips white flour entirely
- No added sugar, keeping the flavor profile savory and clean
Of course, “healthy” is relative to your individual dietary needs and goals, but this bread is a solid choice for anyone looking to incorporate more legumes into their diet or reduce their reliance on refined grains without sacrificing the experience of enjoying a good slice of bread.
Ingredients You’ll Need
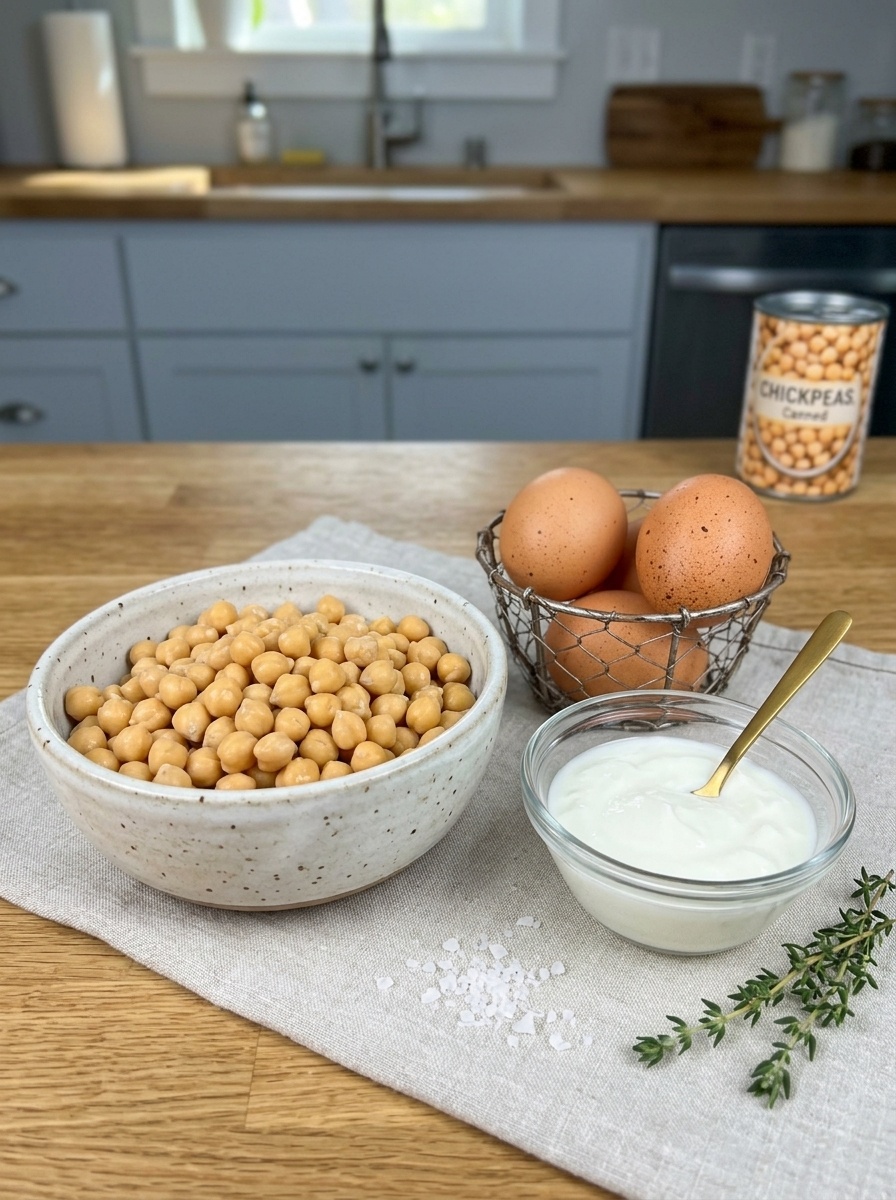
This recipe keeps things refreshingly simple with just three core ingredients:
- 2 cups (330 g) cooked chickpeas, drained and rinsed — Canned chickpeas work perfectly here and save time compared to cooking dried chickpeas from scratch. Just be sure to drain and rinse them well.
- 3 large eggs — These bind the batter together and help create structure and lift as the bread bakes.
- ½ cup (120 g) plain Greek yogurt — This adds moisture, protein, and a subtle tanginess that balances the earthiness of the chickpeas.
That’s the entire ingredient list. No flour, no oil, no sugar, no yeast — just three simple, wholesome ingredients you likely already have on hand or can easily pick up at any grocery store.
A Note on Choosing Your Chickpeas and Yogurt
Canned chickpeas are the most convenient option, but make sure to rinse them thoroughly to remove the starchy liquid (often called aquafaba) they’re packed in, as this can throw off the consistency of your batter if not properly drained. If you’re cooking dried chickpeas yourself, make sure they’re fully cooked and tender before blending, and let them cool slightly and drain well.
For the yogurt, plain Greek yogurt is best because of its thick consistency and protein content. Avoid flavored or sweetened varieties, as they’ll affect the savory flavor profile of the finished bread. Full-fat, low-fat, or non-fat Greek yogurt will all work, though full-fat will yield a slightly richer, more tender crumb.
Optional Tips for the Best Chickpea Bread ✨
A few small adjustments can make a big difference in the final texture and flavor of your loaf:
- Drain your chickpeas well. Excess liquid can make the batter too wet, leading to a dense or gummy loaf. Take the time to drain and even pat the chickpeas dry if needed.
- Rinse thoroughly. If you’re using canned chickpeas, give them a good rinse under cool running water to remove the canning liquid, which can carry a slightly metallic or overly salty taste.
- Invest in a good blend. A high-powered blender will give you the smoothest, most consistent batter, which translates directly into a more tender, uniform crumb. If your blender struggles with thick mixtures, you may need to stop and scrape down the sides several times.
- Season it up. Since this bread has a naturally mild, neutral flavor, it’s a great canvas for seasonings. Try adding garlic powder, onion powder, dried Italian herbs, smoked paprika, or a pinch of salt directly into the blender for extra flavor.
- Be patient while cooling. Just like other quick breads, this loaf needs time to fully cool and set before slicing. Cutting into it too early can make it seem underbaked, even when it’s perfectly done.
Step-by-Step Instructions
Step 1: Prepare the Chickpeas
If you’re using canned chickpeas, start by draining and rinsing them thoroughly under cool running water. This step removes excess sodium and the starchy canning liquid, both of which can affect the texture and flavor of your finished bread. Once rinsed, let the chickpeas drain well in a colander for a few minutes before adding them to the blender — the less excess liquid, the better your batter will turn out.
Step 2: Blend the Ingredients
Add the drained chickpeas, eggs, and Greek yogurt to a high-powered blender. Blend on high until the mixture becomes completely smooth and creamy, pausing occasionally to scrape down the sides of the blender with a spatula to make sure everything is fully incorporated. Keep blending until there are no visible pieces of chickpea remaining — you’re looking for a thick, smooth, pourable batter, similar in consistency to a thick pancake batter. This step is key to achieving a good bread-like texture rather than a grainy or chunky finished loaf.
Step 3: Prepare the Loaf Pan
Preheat your oven to 350°F (175°C) so it’s fully ready when your batter is done blending. Lightly grease a standard loaf pan with oil or nonstick spray, or line it with parchment paper for the easiest removal later on. Pour the smooth chickpea batter into the prepared pan, then use a spatula to gently smooth out the surface, ensuring an even bake and a nice, uniform top.
Step 4: Bake the Bread
Place the loaf pan into your preheated oven and bake for approximately 40–50 minutes. The bread is done when it’s firm in the center and lightly golden on top. Gently press the center of the loaf — it should feel set and should no longer look wet or jiggly. Because oven temperatures can vary, start checking for doneness around the 40-minute mark. If you notice the top browning too quickly while the inside is still cooking, loosely tent the loaf with foil for the remaining bake time to prevent burning while allowing the center to finish setting.
Step 5: Cool and Slice
Once fully baked, remove the loaf from the oven and let it cool in the pan for about 10–15 minutes. This resting period helps the loaf firm up slightly, making it much easier to remove in one piece. Carefully transfer the loaf to a wire rack and allow it to cool completely before slicing — this is an important step, as chickpea bread needs time for its structure to fully set. Slicing too early can result in a texture that seems gummy or underdone, even if the bread is fully baked. Once cooled, slice into even pieces and enjoy it fresh or toasted.
Serving Ideas for Chickpea Bread 🥑🍳
Thanks to its mild, slightly savory flavor, this chickpea bread pairs beautifully with a wide variety of toppings and dishes:
- Avocado toast — Toast a slice and top with mashed avocado, a sprinkle of salt, pepper, and red pepper flakes for a simple, satisfying breakfast.
- Sandwiches — Use it as a sturdy base for sandwiches filled with eggs, turkey, cheese, or fresh vegetables like cucumber, tomato, and lettuce.
- Soup and salad companion — Serve warm slices alongside your favorite soup or salad for an easy, well-rounded lunch.
- Savory spreads — Enjoy it with cream cheese, hummus, or another favorite savory spread for a quick and flavorful snack.
- Toasted and crispy — Toast slices until golden and crisp for an easy, crunchy snack any time of day.
Because this bread leans savory rather than sweet, it works especially well as a base for herb-forward toppings, dips, and spreads rather than jams or sweet butter, though feel free to experiment based on your preferences.
How to Store Chickpea Bread 🧊
To keep your loaf fresh and enjoyable for as long as possible, proper storage is key:
- Refrigerator: Once the bread has cooled completely, store it in an airtight container or wrap it tightly in plastic wrap or foil. Stored this way, it will stay fresh in the refrigerator for up to 4–5 days. Since this bread doesn’t contain the preservatives found in commercial loaves, refrigeration helps extend its shelf life.
- Freezer: For longer-term storage, slice the cooled loaf and place individual slices in a freezer-safe bag or airtight container. This makes it easy to pull out just one or two slices at a time without needing to thaw the entire loaf.
- Reheating: When you’re ready to enjoy a frozen slice, let it thaw at room temperature or in the refrigerator, then toast it until warmed through and lightly crisp. This helps restore the bread’s texture and makes it taste freshly baked again.
Frequently Asked Questions
Can I use dried chickpeas instead of canned?
Yes, as long as they’re fully cooked and tender. Cook dried chickpeas according to package instructions, then let them cool and drain well before blending. Keep in mind that 2 cups of cooked chickpeas is roughly equivalent to one standard 15-ounce can, drained.
Why is my chickpea bread dense or gummy?
This is usually caused by excess moisture, either from not draining the chickpeas well enough or from underbaking. Make sure your chickpeas are thoroughly drained, and always check that the center of the loaf is fully set before removing it from the oven.
Can I add seasonings or mix-ins?
Absolutely. This bread has a naturally neutral base, making it perfect for customization. Try blending in garlic powder, onion powder, dried herbs, or even shredded cheese for extra flavor.
Does this bread taste like chickpeas?
The flavor is fairly mild and slightly earthy, with the tanginess of the Greek yogurt helping to balance it out. It doesn’t taste overtly like hummus or traditional chickpea dishes, especially once toasted and topped with your favorite spreads.
Can I make this recipe dairy-free?
Since Greek yogurt is a key ingredient, you’d need to substitute with a thick, plain dairy-free yogurt alternative to keep a similar consistency and moisture level.
Final Thoughts
This Easy 3-Ingredient Chickpea Bread is proof that homemade bread can be both incredibly simple and genuinely satisfying, even without flour, yeast, or kneading. With just chickpeas, eggs, and Greek yogurt, you get a hearty, protein-rich loaf that’s naturally gluten-free and endlessly versatile — perfect for breakfast, sandwiches, snacks, or a side to your favorite soup or salad.
Once you try this recipe, you’ll likely find yourself keeping a can of chickpeas and a tub of Greek yogurt on hand just for this bread. It’s a fantastic addition to any gluten-free baking rotation and a great way to experiment with legume-based recipes if you haven’t already.
Prep Time: About 10 minutes
Cooking Time: Approximately 40–50 minutes
Total Time: About 50–60 minutes
Yield: 1 loaf, approximately 10–12 slices
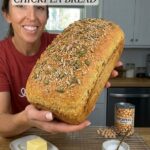
Easy 3-Ingredient Chickpea Bread
Ingredients
This recipe keeps things refreshingly simple with just three core ingredients:
- 2 cups (330 g) cooked chickpeas, drained and rinsed — Canned chickpeas work perfectly here and save time compared to cooking dried chickpeas from scratch. Just be sure to drain and rinse them well.
- 3 large eggs — These bind the batter together and help create structure and lift as the bread bakes.
- ½ cup (120 g) plain Greek yogurt — This adds moisture, protein, and a subtle tanginess that balances the earthiness of the chickpeas.
That’s the entire ingredient list. No flour, no oil, no sugar, no yeast — just three simple, wholesome ingredients you likely already have on hand or can easily pick up at any grocery store.
A Note on Choosing Your Chickpeas and Yogurt
Canned chickpeas are the most convenient option, but make sure to rinse them thoroughly to remove the starchy liquid (often called aquafaba) they’re packed in, as this can throw off the consistency of your batter if not properly drained. If you’re cooking dried chickpeas yourself, make sure they’re fully cooked and tender before blending, and let them cool slightly and drain well.
For the yogurt, plain Greek yogurt is best because of its thick consistency and protein content. Avoid flavored or sweetened varieties, as they’ll affect the savory flavor profile of the finished bread. Full-fat, low-fat, or non-fat Greek yogurt will all work, though full-fat will yield a slightly richer, more tender crumb.
Instructions
If you’re using canned chickpeas, start by draining and rinsing them thoroughly under cool running water. This step removes excess sodium and the starchy canning liquid, both of which can affect the texture and flavor of your finished bread. Once rinsed, let the chickpeas drain well in a colander for a few minutes before adding them to the blender — the less excess liquid, the better your batter will turn out.
Add the drained chickpeas, eggs, and Greek yogurt to a high-powered blender. Blend on high until the mixture becomes completely smooth and creamy, pausing occasionally to scrape down the sides of the blender with a spatula to make sure everything is fully incorporated. Keep blending until there are no visible pieces of chickpea remaining — you’re looking for a thick, smooth, pourable batter, similar in consistency to a thick pancake batter. This step is key to achieving a good bread-like texture rather than a grainy or chunky finished loaf.
Preheat your oven to 350°F (175°C) so it’s fully ready when your batter is done blending. Lightly grease a standard loaf pan with oil or nonstick spray, or line it with parchment paper for the easiest removal later on. Pour the smooth chickpea batter into the prepared pan, then use a spatula to gently smooth out the surface, ensuring an even bake and a nice, uniform top.
Place the loaf pan into your preheated oven and bake for approximately 40–50 minutes. The bread is done when it’s firm in the center and lightly golden on top. Gently press the center of the loaf — it should feel set and should no longer look wet or jiggly. Because oven temperatures can vary, start checking for doneness around the 40-minute mark. If you notice the top browning too quickly while the inside is still cooking, loosely tent the loaf with foil for the remaining bake time to prevent burning while allowing the center to finish setting.
Once fully baked, remove the loaf from the oven and let it cool in the pan for about 10–15 minutes. This resting period helps the loaf firm up slightly, making it much easier to remove in one piece. Carefully transfer the loaf to a wire rack and allow it to cool completely before slicing — this is an important step, as chickpea bread needs time for its structure to fully set. Slicing too early can result in a texture that seems gummy or underdone, even if the bread is fully baked. Once cooled, slice into even pieces and enjoy it fresh or toasted.