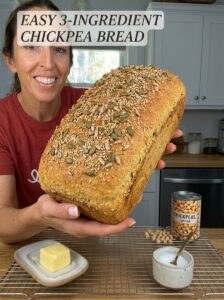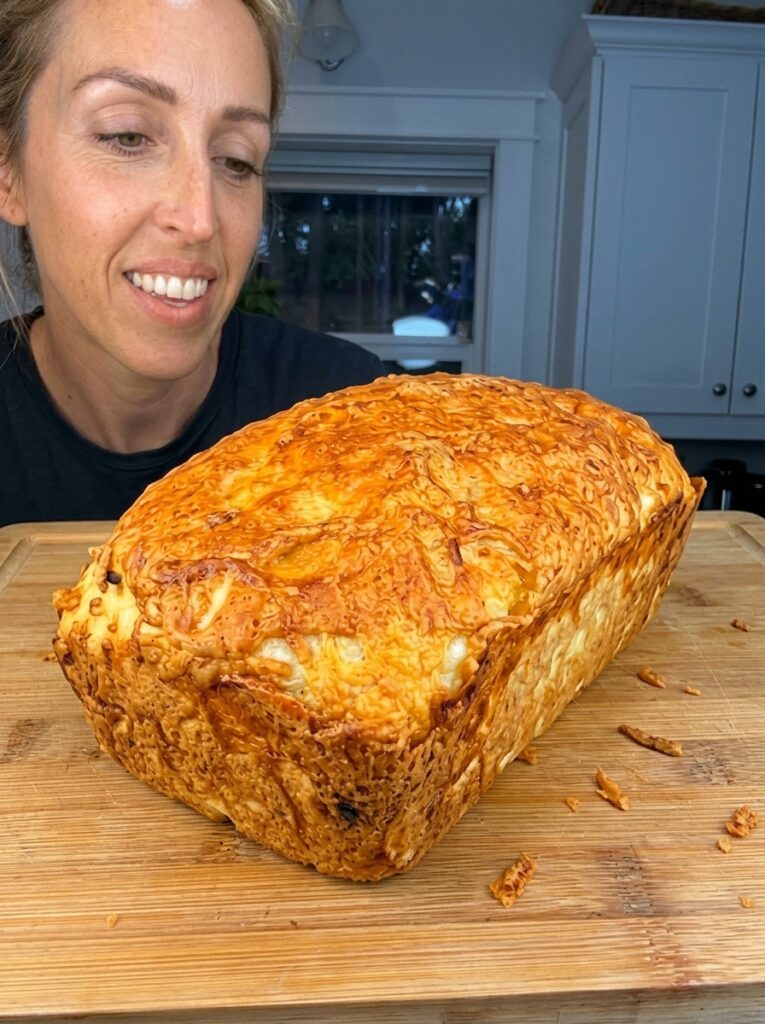
High-Protein 3-Ingredient Cottage Cheese Bread 🧀🍞💪
If you’ve been searching for an easy homemade bread recipe that doesn’t require yeast, kneading, or hours of proofing, this High-Protein 3-Ingredient Cottage Cheese Bread is about to become your new go-to. With just cottage cheese, eggs, and self-rising flour, you can have a warm, golden loaf of bread on your counter in under an hour — no bread machine, no stand mixer, and no waiting around for dough to rise.
This recipe has been trending for good reason. It taps into everything home bakers and health-conscious eaters are looking for right now: high protein content, minimal ingredients, quick prep time, and a texture that rivals traditional bread. Whether you’re meal-prepping for the week, looking for a healthier bread alternative, or just want to try a fun, foolproof baking project, this cottage cheese bread checks every box.
Let’s dive into why this recipe works so well, how to make it perfectly every time, and all the creative ways you can enjoy it.
Why This Cottage Cheese Bread Recipe Works
Traditional bread recipes rely on yeast to create rise and structure, which means long rising times, precise temperature control, and a fair amount of patience. This recipe skips all of that by using self-rising flour, which already contains baking powder and salt, giving the loaf lift without any waiting.
The magic ingredient here is cottage cheese. It might sound unusual in a bread recipe, but cottage cheese brings three major benefits:
- Moisture — Cottage cheese has a high water content, which keeps the crumb soft and tender instead of dry or crumbly.
- Protein — A single cup of cottage cheese can contain upwards of 25 grams of protein, which means this bread packs significantly more protein than a standard slice of store-bought bread.
- Structure — The proteins in cottage cheese help bind the batter together, working alongside the eggs to create a sturdy yet tender crumb that holds up well to slicing and toasting.
The eggs do double duty as well. They add richness, help emulsify the batter, and contribute to that light golden color on the crust. Combined with self-rising flour, you get a loaf that’s soft in the middle, slightly firm on the outside, and packed with enough protein to make it a legitimately satisfying breakfast or snack option — not just a treat.
Is Cottage Cheese Bread Healthy?
Compared to many traditional bread recipes, this cottage cheese bread offers a noticeably different nutritional profile. Because it relies on cottage cheese and eggs instead of large amounts of butter, oil, or sugar, it tends to be:
- Higher in protein than typical white or wheat bread
- Lower in added sugar, since this recipe doesn’t call for any
- Simpler in ingredients, with nothing artificial or hard to pronounce
That said, “healthy” always depends on your personal goals and dietary needs. If you’re trying to increase your protein intake without loading up on processed protein bars or powders, this bread is a fantastic whole-food option. It’s especially popular among people following high-protein diets, those doing strength training, or anyone looking to feel fuller for longer without a lot of extra effort in the kitchen.
Ingredients You’ll Need
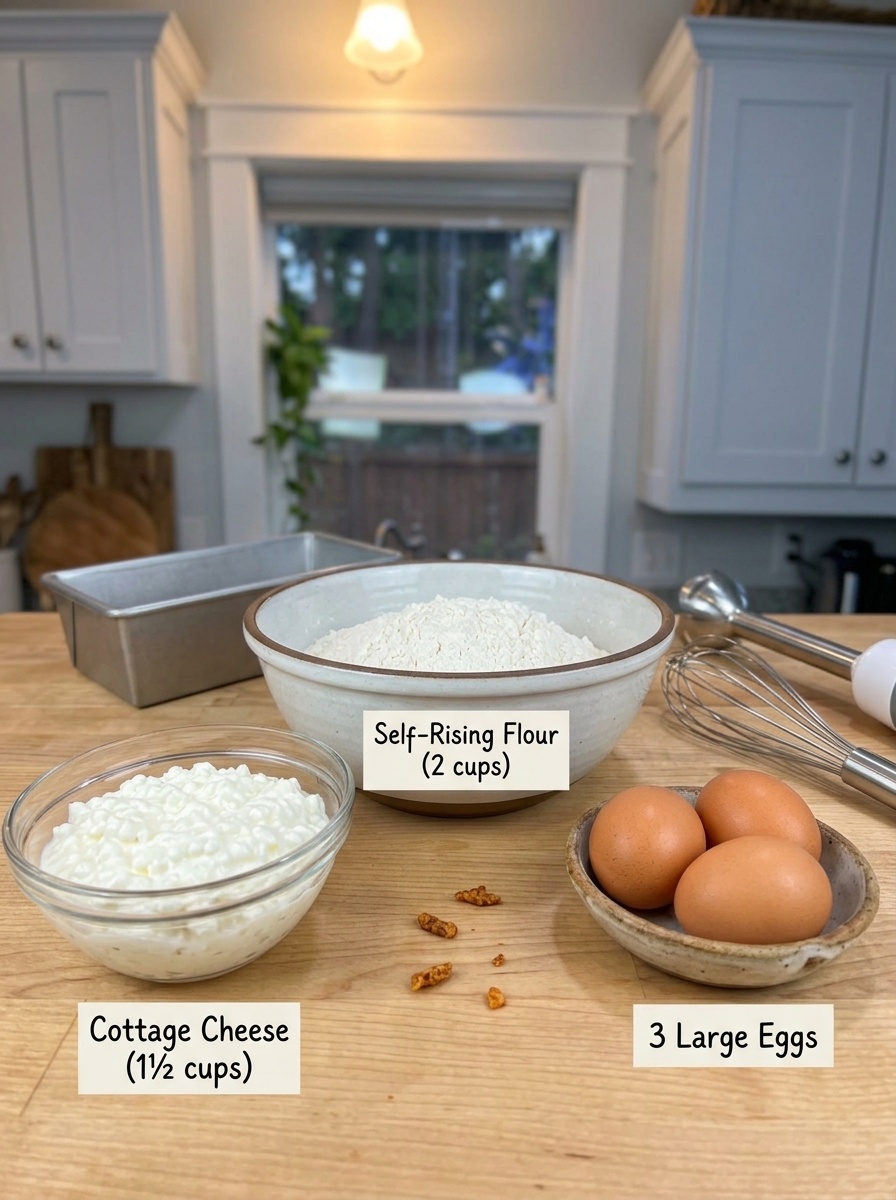
One of the best parts of this recipe is how short the ingredient list is. You only need three things:
- 1½ cups (340 g) cottage cheese — Full-fat or low-fat both work, depending on the texture and richness you prefer. Full-fat will yield a slightly more tender, moist crumb, while low-fat keeps things a bit lighter.
- 3 large eggs — These help bind the batter and add structure, protein, and a subtle richness.
- 2 cups (240 g) self-rising flour — This is the leavening agent in the recipe, so there’s no need for additional yeast or baking powder.
That’s it. No sugar, no oil, no butter, no yeast. Just three simple pantry and fridge staples that come together into a genuinely delicious loaf.
A Quick Note on Self-Rising Flour
If you don’t have self-rising flour on hand, you can make your own substitute by combining all-purpose flour with baking powder and a pinch of salt. For every cup of all-purpose flour, whisk in about 1½ teaspoons of baking powder and ¼ teaspoon of salt. This DIY version works just as well in this recipe and is a handy trick to remember for other quick bread recipes too.
Optional Tips for the Best Cottage Cheese Bread ✨
Getting a perfect loaf every time comes down to a few small but important details:
- Choose your cottage cheese wisely. Full-fat cottage cheese will give you a richer, more tender bread, while low-fat versions create a slightly lighter texture. Neither is “wrong” — it’s simply a matter of preference.
- Blend for smoothness. If your cottage cheese has large curds, pulse it briefly with the eggs in a blender or food processor before adding the flour. This creates a smoother batter and a more uniform crumb, without visible curds throughout the bread.
- Don’t overmix. Once you add the self-rising flour, stir just until everything is combined. Overmixing develops gluten unnecessarily and can lead to a denser, tougher loaf instead of the light, tender texture you’re going for.
- Use the right pan. A standard loaf pan (roughly 9×5 inches) will give you the classic shape and even baking. Using a pan that’s too large or too small can throw off your bake time and final texture.
- Let it cool fully. This is the step most people want to skip, but patience really does pay off here. Cutting into the bread while it’s still warm can cause it to look gummy or underbaked, even if it isn’t. Letting it cool completely allows the crumb structure to set properly.
- Smooth the top before baking. A quick pass with a spatula before it goes into the oven helps create an even, attractive golden top.
Step-by-Step Instructions
Step 1: Prepare the Cottage Cheese Mixture
Start by adding the cottage cheese and eggs to a large mixing bowl. Stir thoroughly until the eggs are fully incorporated and the mixture looks creamy and well combined. If you want an extra-smooth texture with no visible curds, transfer the cottage cheese and eggs to a blender and pulse until mostly smooth before moving on to the next step. This step is optional but recommended if you’re serving the bread to picky eaters or simply prefer a more uniform texture.
Step 2: Add the Flour
Sprinkle the self-rising flour into the cottage cheese and egg mixture. Using a spatula or wooden spoon, gently stir until a thick, soft batter forms and all of the flour is fully incorporated — you shouldn’t see any dry streaks or pockets of flour. Be careful not to overmix at this stage. A few gentle folds is all it takes to bring everything together; overworking the batter can result in a denser, chewier loaf rather than the soft, tender crumb this bread is known for.
Step 3: Prepare the Loaf Pan
Preheat your oven to 350°F (175°C) so it’s fully heated by the time your batter is ready. While the oven warms up, lightly grease a standard loaf pan with butter, oil, or nonstick spray, or line it with parchment paper for even easier removal later. Transfer the thick batter into the prepared pan, using a spatula to gently smooth the top. This small step helps the loaf bake evenly and gives it a neat, attractive finish.
Step 4: Bake the Bread
Place the loaf pan in your preheated oven and bake for approximately 40–50 minutes. You’ll know it’s done when the top is lightly golden and the loaf feels firm to the touch in the center. For extra assurance, insert a toothpick into the middle of the loaf — it should come out mostly clean, without wet batter clinging to it. Ovens vary, so start checking around the 40-minute mark. If the top is browning faster than the inside is cooking, loosely tent the loaf with a piece of foil for the remaining bake time to prevent over-browning while the center finishes cooking through.
Step 5: Cool and Slice
Once baked, remove the bread from the oven and let it rest in the pan for about 10–15 minutes. This brief resting period allows the structure to firm up slightly, making it easier to remove without breaking. Carefully turn the loaf out onto a wire rack to finish cooling completely — this typically takes another hour or so, depending on your kitchen’s temperature. Resist the urge to slice into it early. Letting the bread cool fully ensures clean slices and the best possible texture. Once cooled, slice into even pieces and enjoy fresh, toasted, or however you like it best.
Serving Ideas for Cottage Cheese Bread 🥑🍳
This bread’s mild flavor makes it incredibly versatile, fitting into just about any meal of the day. Here are some of the best ways to enjoy it:
- Classic avocado toast — Toast a slice and top with mashed avocado, a fried or poached egg, and a sprinkle of salt and pepper for a filling, high-protein breakfast.
- Sandwich bread — Use it as the base for turkey, ham, chicken, or veggie sandwiches. Its sturdy crumb holds up well to fillings without falling apart.
- Simple snack — Toast a slice and spread it with more cottage cheese, cream cheese, or nut butter for a quick, protein-packed snack between meals.
- Alongside soup or salad — Serve warm slices as a side for your favorite soup or salad for an easy, comforting lunch.
- Savory toppings — Try it with hummus, smoked salmon, sliced tomatoes, or a drizzle of olive oil and everything bagel seasoning for a savory twist.
Because the bread itself isn’t sweet, it leans more toward savory pairings, though a light drizzle of honey or a smear of jam works nicely too if you’re craving something sweeter.
How to Store Cottage Cheese Bread 🧊
Proper storage helps this bread stay fresh and delicious for days:
- Refrigerator: Once the bread has cooled completely, store it in an airtight container or wrap it tightly in plastic wrap or foil. It will keep well in the refrigerator for up to 4–5 days. Because this bread doesn’t contain preservatives like store-bought loaves, refrigeration helps prevent it from spoiling too quickly.
- Freezer: For longer storage, slice the cooled loaf and place the individual slices in a freezer-safe bag or airtight container. This makes it easy to grab just what you need without thawing the entire loaf. Frozen slices will keep well for a couple of months.
- Reheating: When you’re ready to enjoy a frozen slice, simply thaw it at room temperature or in the fridge, then pop it in the toaster until warmed through and lightly crisp. This restores much of the fresh-baked texture and flavor.
Frequently Asked Questions
Can I use a different type of flour?
Self-rising flour is what makes this recipe work without yeast, since it already contains the leavening agents needed for rise. If you only have all-purpose flour, you can make a substitute by adding baking powder and salt, as mentioned earlier in this article.
Why does my bread taste like eggs?
Since eggs are one of only three ingredients, their flavor can come through more noticeably than in a traditional bread recipe. If you’re sensitive to this, using slightly smaller eggs or blending the batter thoroughly can help mellow the taste.
Can I add mix-ins like herbs or cheese?
Absolutely. This bread is a great base for customization. Try folding in shredded cheddar, chopped chives, garlic powder, or Italian herbs for a savory variation.
Why is my loaf dense instead of light?
Overmixing the batter after adding the flour is the most common cause of a dense loaf. Stir just until the flour disappears into the batter, and no more.
Can I make this into muffins instead of a loaf?
Yes, this batter works well in a muffin tin. Reduce the baking time significantly — start checking around 20–25 minutes, since muffins bake much faster than a full loaf.
Final Thoughts
This High-Protein 3-Ingredient Cottage Cheese Bread proves that homemade bread doesn’t have to be complicated to be delicious. With no yeast, no kneading, and no lengthy proofing time, it’s an approachable recipe for beginner bakers and a convenient one for experienced cooks who want something quick and nutritious. The combination of cottage cheese and eggs delivers a soft, protein-rich loaf that fits seamlessly into breakfasts, lunches, and snacks alike.
Give this recipe a try, and don’t be afraid to experiment with add-ins or toppings once you’ve mastered the basic version. Once you see how simple — and satisfying — this bread is to make, it may just become a regular part of your baking rotation.
Prep Time: About 10 minutes
Cooking Time: Approximately 40–50 minutes
Total Time: About 50–60 minutes
Yield: 1 loaf, approximately 10–12 slices
High-Protein 3-Ingredient Cottage Cheese Bread
Ingredients
One of the best parts of this recipe is how short the ingredient list is. You only need three things:
- 1½ cups (340 g) cottage cheese — Full-fat or low-fat both work, depending on the texture and richness you prefer. Full-fat will yield a slightly more tender, moist crumb, while low-fat keeps things a bit lighter.
- 3 large eggs — These help bind the batter and add structure, protein, and a subtle richness.
- 2 cups (240 g) self-rising flour — This is the leavening agent in the recipe, so there’s no need for additional yeast or baking powder.
That’s it. No sugar, no oil, no butter, no yeast. Just three simple pantry and fridge staples that come together into a genuinely delicious loaf.
A Quick Note on Self-Rising Flour
If you don’t have self-rising flour on hand, you can make your own substitute by combining all-purpose flour with baking powder and a pinch of salt. For every cup of all-purpose flour, whisk in about 1½ teaspoons of baking powder and ¼ teaspoon of salt. This DIY version works just as well in this recipe and is a handy trick to remember for other quick bread recipes too.
Optional Tips for the Best Cottage Cheese Bread ✨
Getting a perfect loaf every time comes down to a few small but important details:
- Choose your cottage cheese wisely. Full-fat cottage cheese will give you a richer, more tender bread, while low-fat versions create a slightly lighter texture. Neither is “wrong” — it’s simply a matter of preference.
- Blend for smoothness. If your cottage cheese has large curds, pulse it briefly with the eggs in a blender or food processor before adding the flour. This creates a smoother batter and a more uniform crumb, without visible curds throughout the bread.
- Don’t overmix. Once you add the self-rising flour, stir just until everything is combined. Overmixing develops gluten unnecessarily and can lead to a denser, tougher loaf instead of the light, tender texture you’re going for.
- Use the right pan. A standard loaf pan (roughly 9×5 inches) will give you the classic shape and even baking. Using a pan that’s too large or too small can throw off your bake time and final texture.
- Let it cool fully. This is the step most people want to skip, but patience really does pay off here. Cutting into the bread while it’s still warm can cause it to look gummy or underbaked, even if it isn’t. Letting it cool completely allows the crumb structure to set properly.
- Smooth the top before baking. A quick pass with a spatula before it goes into the oven helps create an even, attractive golden top.
Instructions
Start by adding the cottage cheese and eggs to a large mixing bowl. Stir thoroughly until the eggs are fully incorporated and the mixture looks creamy and well combined. If you want an extra-smooth texture with no visible curds, transfer the cottage cheese and eggs to a blender and pulse until mostly smooth before moving on to the next step. This step is optional but recommended if you’re serving the bread to picky eaters or simply prefer a more uniform texture.
Sprinkle the self-rising flour into the cottage cheese and egg mixture. Using a spatula or wooden spoon, gently stir until a thick, soft batter forms and all of the flour is fully incorporated — you shouldn’t see any dry streaks or pockets of flour. Be careful not to overmix at this stage. A few gentle folds is all it takes to bring everything together; overworking the batter can result in a denser, chewier loaf rather than the soft, tender crumb this bread is known for.
Preheat your oven to 350°F (175°C) so it’s fully heated by the time your batter is ready. While the oven warms up, lightly grease a standard loaf pan with butter, oil, or nonstick spray, or line it with parchment paper for even easier removal later. Transfer the thick batter into the prepared pan, using a spatula to gently smooth the top. This small step helps the loaf bake evenly and gives it a neat, attractive finish.
Place the loaf pan in your preheated oven and bake for approximately 40–50 minutes. You’ll know it’s done when the top is lightly golden and the loaf feels firm to the touch in the center. For extra assurance, insert a toothpick into the middle of the loaf — it should come out mostly clean, without wet batter clinging to it. Ovens vary, so start checking around the 40-minute mark. If the top is browning faster than the inside is cooking, loosely tent the loaf with a piece of foil for the remaining bake time to prevent over-browning while the center finishes cooking through.
Once baked, remove the bread from the oven and let it rest in the pan for about 10–15 minutes. This brief resting period allows the structure to firm up slightly, making it easier to remove without breaking. Carefully turn the loaf out onto a wire rack to finish cooling completely — this typically takes another hour or so, depending on your kitchen’s temperature. Resist the urge to slice into it early. Letting the bread cool fully ensures clean slices and the best possible texture. Once cooled, slice into even pieces and enjoy fresh, toasted, or however you like it best.