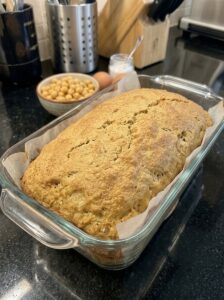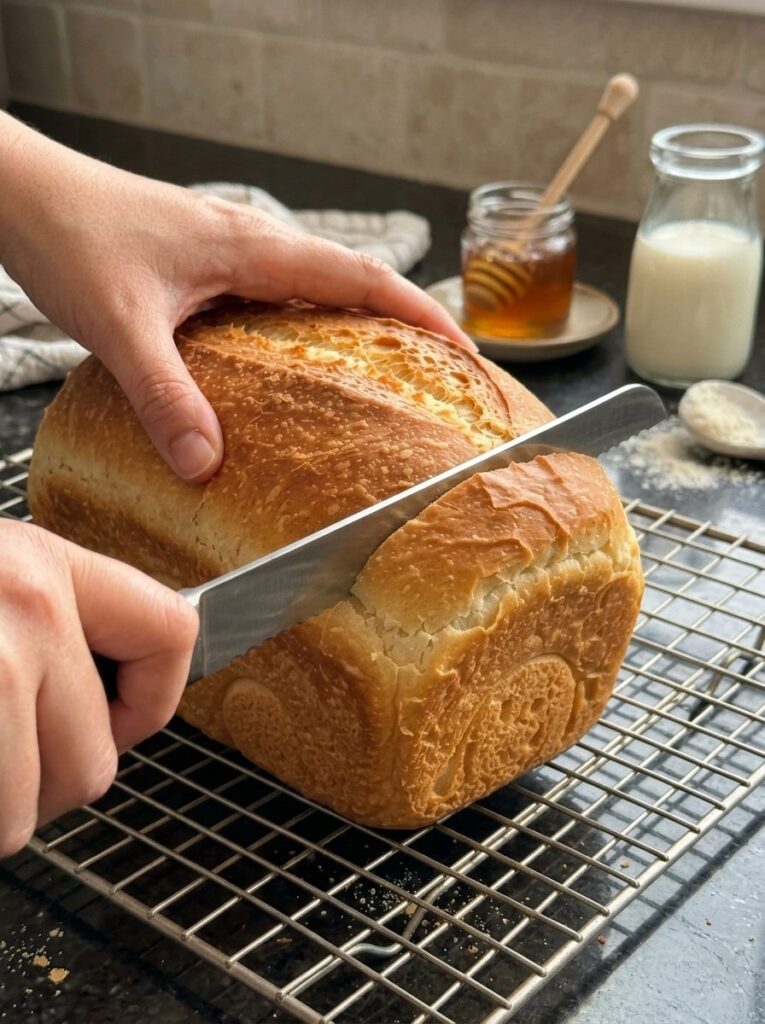
There is something deeply comforting about pulling a golden loaf out of your own oven. The smell fills the kitchen, the crust crackles as it cools, and the first slice, still faintly warm and spread with butter, tastes better than anything from a store shelf. The good news is that you do not need special equipment, years of baking experience, or strong forearms to make it happen. This easy no-knead honey milk bread is pillowy soft, wonderfully fluffy, and lightly sweet, and it comes together with nothing more than a bowl and a sturdy spoon.
If you have ever been intimidated by yeast bread, this recipe is the perfect place to start. There is no kneading, no stand mixer, and no complicated shaping. You stir the dough, let it rise, shape it gently, let it rise again, and bake. In this guide, you will find the full recipe, the reasons it works, practical tips for avoiding common mistakes, ideas for serving, storage advice, and answers to the questions bakers ask most often.
Why You Will Love This No-Knead Honey Milk Bread
Before we get to the ingredients, here is why this loaf deserves a permanent spot in your recipe rotation.
It is truly beginner-friendly. Many people avoid homemade bread because kneading feels like a skill that takes practice. This dough skips it completely. You stir until no dry flour remains, and the time spent resting does the rest of the work.
It has a soft, tender crumb. Warm milk, a whole egg, and melted butter give the loaf a delicate, fluffy interior that is ideal for sandwiches, toast, and French toast.
It is lightly sweet, not dessert-sweet. Just three tablespoons of honey add a gentle sweetness and help the crust turn a gorgeous golden brown. The flavor is balanced enough for savory fillings and for sweet toppings alike.
It uses simple pantry ingredients. Flour, milk, yeast, honey, egg, butter, and salt are all you need. Two optional extras, a splash of milk for brushing and a little honey for glazing, make the finished loaf look bakery-worthy.
It is versatile. One loaf can be breakfast toast on Monday, a peanut butter sandwich on Tuesday, and rich French toast by the weekend.
What Is Honey Milk Bread?
Honey milk bread is a soft, enriched white sandwich loaf made with milk instead of water and sweetened with honey rather than plain sugar. Because the dough contains dairy, egg, and butter, the crumb turns out tender and the crust stays thin and soft. The honey contributes a mellow, floral sweetness and encourages the crust to brown evenly.
Traditional milk breads often rely on long kneading sessions or special techniques to build structure. This version keeps the same cozy flavor and soft texture but simplifies the method into a no-knead dough. The result is a loaf that is easy to make on a regular weeknight or a lazy weekend afternoon.
Ingredients for Easy No-Knead Honey Milk Bread
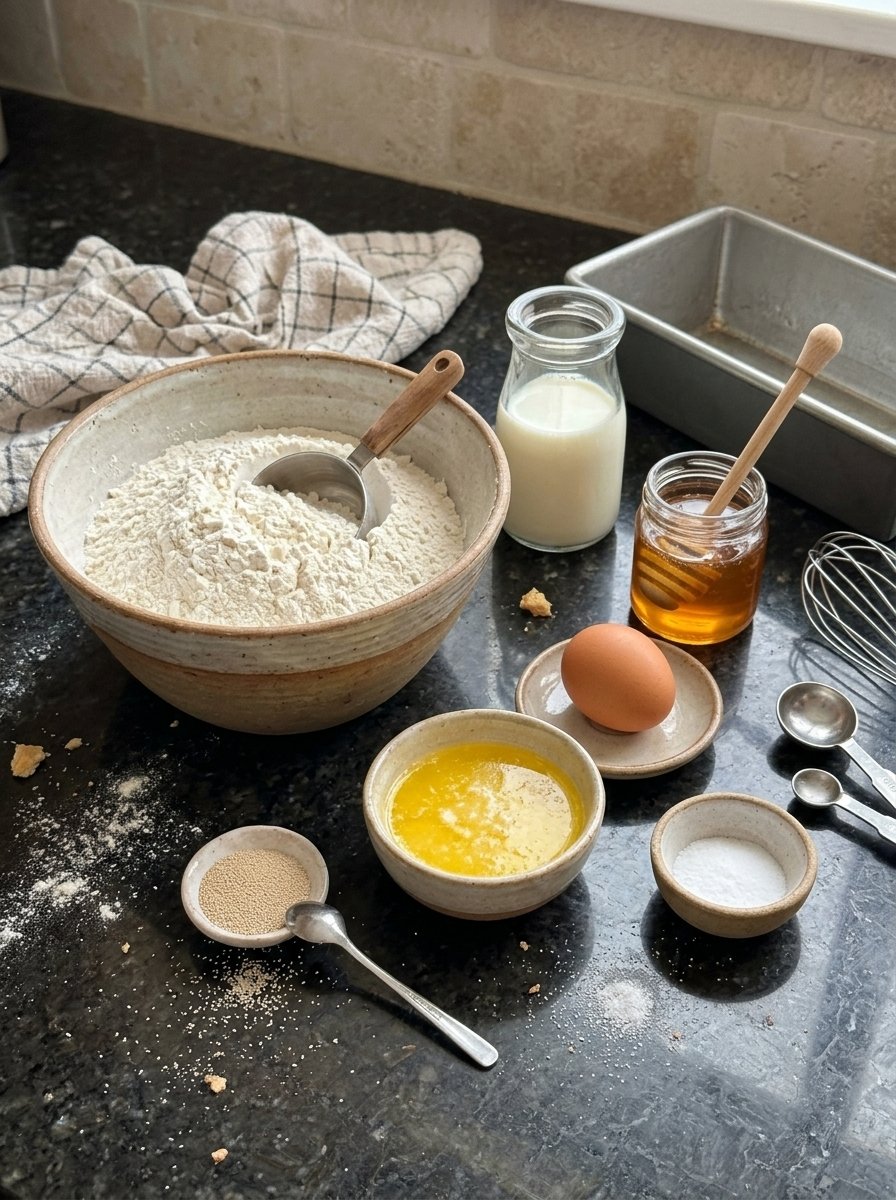
Here is everything you need to make one loaf, which yields about 10 to 12 slices.
- 3 cups (375 g) all-purpose flour
- 1 cup (240 ml) warm milk
- 2¼ teaspoons (7 g) instant yeast
- 3 tablespoons (45 g) honey
- 1 large egg, at room temperature
- 3 tablespoons (42 g) unsalted butter, melted and slightly cooled
- 1 teaspoon salt
- 1 tablespoon milk, for brushing the top (optional)
- 1 teaspoon honey, for brushing after baking (optional)
A Closer Look at the Ingredients
All-purpose flour. This is the backbone of the loaf, and you do not need specialty bread flour. All-purpose flour gives a tender, soft crumb that suits a sandwich loaf perfectly. Because too much flour is the most common reason homemade bread turns out dense, weighing it on a kitchen scale is the most reliable way to measure. If you are using cups, spoon the flour into the measuring cup and level it off rather than scooping directly from the bag.
Warm milk. Milk adds richness, softness, and a subtle sweetness that water cannot match. It should feel comfortably warm to the touch, never hot. Milk that is too hot can damage the yeast and prevent the dough from rising properly.
Instant yeast. Instant yeast can be mixed directly into the wet ingredients, which keeps the process quick and simple. The amount here, 2¼ teaspoons (7 g), is one standard packet.
Honey. Honey sweetens the dough, feeds the yeast, and helps the crust brown beautifully. A mild honey such as clover or wildflower works well, though any honey you enjoy will do.
Egg. One large egg at room temperature adds structure, richness, and a soft, tender bite. Using it at room temperature helps it blend smoothly into the warm mixture.
Unsalted butter. Melted butter makes the crumb soft and gives the bread a rich, comforting flavor. Let it cool slightly before adding it so it does not overheat the other ingredients.
Salt. Salt balances the sweetness and brings out the flavor of the flour and butter. Do not skip it.
Recipe at a Glance
- Prep time: 15 minutes
- First rise: 60 to 90 minutes
- Second rise: 30 to 45 minutes
- Bake time: 30 to 35 minutes
- Total time: approximately 2 hours 15 minutes to 3 hours
- Yield: 1 loaf, about 10 to 12 slices
- Oven temperature: 350°F (175°C)
- Texture: soft, fluffy, tender, and lightly sweet
- Difficulty: easy and beginner-friendly
How to Make No-Knead Honey Milk Bread: Step by Step
Step 1: Mix the Wet Ingredients
In a large mixing bowl, combine the warm milk, honey, and instant yeast. Stir until the honey dissolves completely into the milk. Add the egg and the melted butter, then whisk until everything is well combined and smooth. Making sure the wet ingredients are fully blended before the flour goes in helps the dough come together evenly.
Step 2: Add the Dry Ingredients
Add the flour and salt to the wet mixture. Stir with a sturdy spoon or spatula until no dry flour remains and a soft, sticky dough forms. The dough should look rough and slightly tacky. This is exactly how it should look, so there is no need to knead it and no need to add extra flour to make it smoother.
Step 3: Let the Dough Rise
Cover the bowl with a clean kitchen towel or plastic wrap. Leave it in a warm, draft-free place for about 60 to 90 minutes, or until the dough has roughly doubled in size. The exact timing depends on how warm your kitchen is. In a cool room, the dough may need the full 90 minutes or a little longer, while a warm kitchen can speed things up. Watch the dough rather than the clock.
Step 4: Shape the Loaf
Lightly grease a 9 × 5-inch loaf pan. Gently scrape the risen dough onto a lightly floured surface. With lightly floured hands, carefully shape it into a loaf without pressing out too much air. The trapped air bubbles are what keep the finished bread light and fluffy. Place the shaped dough seam-side down in the prepared pan.
Step 5: Let It Rise Again
Cover the pan loosely and let the dough rise for another 30 to 45 minutes, or until it looks puffy and rises just above the rim of the pan. Near the end of this rising time, preheat your oven to 350°F (175°C) so it is ready when the loaf is.
Step 6: Brush and Bake
If you like, gently brush the top of the loaf with a little milk for a golden finish. Bake for 30 to 35 minutes, until the loaf is golden brown and cooked through. If the top browns too quickly, loosely cover it with foil for the final part of baking.
Step 7: Add a Touch of Honey
Remove the bread from the oven. While it is still warm, lightly brush the top with honey if you would like a subtle shine and a little extra sweetness. Let the loaf rest in the pan for about 10 minutes, then transfer it to a wire rack.
Step 8: Cool, Slice, and Enjoy
Allow the bread to cool before slicing so the soft interior can set properly. Cutting too early can make the crumb seem gummy. Once cooled, cut into thick slices and enjoy plain, spread with butter, toasted with jam, or filled with your favorite sandwich ingredients.
Tips for the Best Honey Milk Bread
Small details make a big difference in a simple recipe like this one. Keep these tips in mind for consistently soft, fluffy results.
Use warm, not hot, milk. The milk should feel comfortably warm to the touch. If it is hot enough to be uncomfortable, let it cool for a few minutes before adding the yeast.
Measure the flour carefully. Too much flour leads to a dense loaf. A kitchen scale is the most dependable tool, and 375 grams is the target for this recipe.
Keep the dough slightly sticky. This is a soft, no-knead dough, so resist the urge to add lots of extra flour. A slightly tacky dough bakes into a more tender, moist crumb.
Allow enough rising time. Let the dough rise until it is visibly puffy. Rising times are guidelines, and your kitchen temperature determines the real timing.
Brush with honey for a glossy finish. A light honey glaze gives the crust a beautiful shine and a touch of extra sweetness, and it makes the loaf look as good as it tastes.
Cool before slicing. It is tempting to cut into warm bread, but letting it rest helps the interior set and gives cleaner, neater slices.
Common Mistakes and How to Fix Them
My dough did not rise. The most likely culprits are milk that was too hot, which can damage yeast, or a room that was too cool. Make sure the milk is only comfortably warm, and place the covered bowl somewhere warm and free of drafts. If your yeast is old, it may also be less active, so check the date on the package.
My bread turned out dense. Excess flour is the usual reason. Weigh the flour instead of scooping it, and keep the dough soft and slightly sticky. Pressing out too much air during shaping can also lead to a heavier crumb, so handle the dough gently.
The top browned too fast. Ovens vary. If the top of the loaf is getting very dark before the bread is cooked through, loosely cover it with foil for the final part of baking.
The crumb seems gummy. The loaf was probably sliced while still hot. Give it time to cool on a wire rack so the interior can set.
The dough is too sticky to shape. A sticky dough is normal here. Use a lightly floured surface and lightly floured hands, and add flour only a little at a time if you truly need it.
Variations to Try
Once you are comfortable with the base recipe, it is easy to make it your own. Here are a few simple ideas, all built on the same method.
- Cinnamon swirl-style topping: Serve slices toasted with cinnamon butter for a cozy breakfast.
- Extra-glossy crust: Brush with milk before baking and honey after baking for the most golden, shiny finish.
- Sandwich loaf for the week: Slice the entire cooled loaf and freeze portions so you always have soft bread on hand.
When experimenting, change one thing at a time so you can tell what makes a difference, and keep the flour amount steady so the dough stays soft.
Serving Ideas
This soft honey milk bread is wonderfully versatile. Here are some favorite ways to enjoy it.
- Classic and simple: Serve warm slices with butter and a drizzle of honey.
- Sweet breakfast: Toast and top with jam, peanut butter, or cinnamon butter.
- Easy sandwiches: Use the soft slices for peanut butter and jelly or your favorite lunch fillings.
- Afternoon treat: Pair a slice with tea, coffee, or a glass of milk.
- French toast: Use slightly stale slices to make rich, tender French toast.
Because the bread is only lightly sweet, it works just as well with savory fillings like eggs, cheese, or sliced turkey as it does with sweet spreads.
How to Store Honey Milk Bread
Proper storage keeps your loaf soft and fresh for as long as possible.
Room temperature. Store the completely cooled loaf in an airtight bag or container for up to 3 days.
Refrigerator. Refrigeration can dry out homemade bread, so room-temperature storage is usually best for short-term use.
Freezer. Slice the cooled loaf and freeze it in a freezer-safe bag for up to 2 to 3 months. Separate slices with parchment paper if you like, which makes it easy to pull out just what you need.
To reheat. Toast frozen slices straight from the freezer, or warm a slice briefly in the microwave for a soft, just-baked feel.
Frequently Asked Questions
Can I really make this bread without kneading?
Yes. This recipe is designed as a no-knead dough. You stir the ingredients until no dry flour remains, then let time do the work during the two rises. The dough should stay soft, rough, and slightly tacky.
Do I need a stand mixer?
No. A large bowl and a sturdy spoon or spatula are all you need, which makes this recipe ideal for small kitchens and first-time bread bakers.
Can I use bread flour instead of all-purpose flour?
This recipe was developed with all-purpose flour, which produces a tender, soft crumb. If you try another flour, keep the dough soft and slightly sticky, and be aware that the texture may differ.
What kind of yeast should I use?
The recipe uses instant yeast, which is mixed directly into the warm milk and honey. The recipe calls for 2¼ teaspoons (7 g), roughly one standard packet.
How do I know when the dough has risen enough?
For the first rise, look for dough that has roughly doubled in size. For the second rise, the dough should look puffy and rise just above the rim of the 9 × 5-inch pan. Visual cues are more reliable than the clock because kitchen temperatures vary.
How do I know when the bread is done?
The loaf should be golden brown and cooked through after 30 to 35 minutes at 350°F (175°C). If the top is browning too quickly, loosely cover it with foil for the last part of baking.
Is the honey and milk brushing necessary?
No, both are optional. Brushing the top with milk before baking helps the crust turn golden, and brushing with honey after baking adds shine and a touch of extra sweetness.
Can I freeze honey milk bread?
Yes. Slice the cooled loaf, place the slices in a freezer-safe bag, and freeze for up to 2 to 3 months. Toast the slices straight from the freezer when you are ready to eat them.
Why shouldn’t I refrigerate homemade bread?
Refrigeration can dry out homemade bread. For short-term storage, an airtight bag or container at room temperature is usually the best choice.
What makes this bread so soft?
The combination of warm milk, a whole egg, and melted butter creates a tender, delicate crumb, while the high-moisture, slightly sticky dough keeps the loaf from turning dense.
Final Thoughts
Homemade bread does not have to be complicated, and this easy no-knead honey milk bread proves it. With a handful of everyday ingredients, a single bowl, and a little patience while the dough rises, you can bake a soft, fluffy, lightly sweet loaf that tastes like it came from a neighborhood bakery. The golden crust, the pillowy crumb, and the gentle honey flavor make it a loaf worth baking again and again.
Whether you are a first-time bread baker or simply want a reliable recipe that fits into a busy week, this loaf delivers big comfort for very little effort. Bake it this weekend, slice it thick, add a little butter, and enjoy the simple pleasure of fresh bread from your own kitchen. If you love it, share the recipe with a friend, and tell us in the comments how you served yours.
Print
Easy No-Knead Honey Milk Bread
Ingredients
Here is everything you need to make one loaf, which yields about 10 to 12 slices.
- 3 cups (375 g) all-purpose flour
- 1 cup (240 ml) warm milk
- 2¼ teaspoons (7 g) instant yeast
- 3 tablespoons (45 g) honey
- 1 large egg, at room temperature
- 3 tablespoons (42 g) unsalted butter, melted and slightly cooled
- 1 teaspoon salt
- 1 tablespoon milk, for brushing the top (optional)
- 1 teaspoon honey, for brushing after baking (optional)
A Closer Look at the Ingredients
All-purpose flour. This is the backbone of the loaf, and you do not need specialty bread flour. All-purpose flour gives a tender, soft crumb that suits a sandwich loaf perfectly. Because too much flour is the most common reason homemade bread turns out dense, weighing it on a kitchen scale is the most reliable way to measure. If you are using cups, spoon the flour into the measuring cup and level it off rather than scooping directly from the bag.
Warm milk. Milk adds richness, softness, and a subtle sweetness that water cannot match. It should feel comfortably warm to the touch, never hot. Milk that is too hot can damage the yeast and prevent the dough from rising properly.
Instant yeast. Instant yeast can be mixed directly into the wet ingredients, which keeps the process quick and simple. The amount here, 2¼ teaspoons (7 g), is one standard packet.
Honey. Honey sweetens the dough, feeds the yeast, and helps the crust brown beautifully. A mild honey such as clover or wildflower works well, though any honey you enjoy will do.
Egg. One large egg at room temperature adds structure, richness, and a soft, tender bite. Using it at room temperature helps it blend smoothly into the warm mixture.
Unsalted butter. Melted butter makes the crumb soft and gives the bread a rich, comforting flavor. Let it cool slightly before adding it so it does not overheat the other ingredients.
Salt. Salt balances the sweetness and brings out the flavor of the flour and butter. Do not skip it.
Instructions
In a large mixing bowl, combine the warm milk, honey, and instant yeast. Stir until the honey dissolves completely into the milk. Add the egg and the melted butter, then whisk until everything is well combined and smooth. Making sure the wet ingredients are fully blended before the flour goes in helps the dough come together evenly.
Add the flour and salt to the wet mixture. Stir with a sturdy spoon or spatula until no dry flour remains and a soft, sticky dough forms. The dough should look rough and slightly tacky. This is exactly how it should look, so there is no need to knead it and no need to add extra flour to make it smoother.
Cover the bowl with a clean kitchen towel or plastic wrap. Leave it in a warm, draft-free place for about 60 to 90 minutes, or until the dough has roughly doubled in size. The exact timing depends on how warm your kitchen is. In a cool room, the dough may need the full 90 minutes or a little longer, while a warm kitchen can speed things up. Watch the dough rather than the clock.
Lightly grease a 9 × 5-inch loaf pan. Gently scrape the risen dough onto a lightly floured surface. With lightly floured hands, carefully shape it into a loaf without pressing out too much air. The trapped air bubbles are what keep the finished bread light and fluffy. Place the shaped dough seam-side down in the prepared pan.
Cover the pan loosely and let the dough rise for another 30 to 45 minutes, or until it looks puffy and rises just above the rim of the pan. Near the end of this rising time, preheat your oven to 350°F (175°C) so it is ready when the loaf is.
If you like, gently brush the top of the loaf with a little milk for a golden finish. Bake for 30 to 35 minutes, until the loaf is golden brown and cooked through. If the top browns too quickly, loosely cover it with foil for the final part of baking.
Remove the bread from the oven. While it is still warm, lightly brush the top with honey if you would like a subtle shine and a little extra sweetness. Let the loaf rest in the pan for about 10 minutes, then transfer it to a wire rack.
Allow the bread to cool before slicing so the soft interior can set properly. Cutting too early can make the crumb seem gummy. Once cooled, cut into thick slices and enjoy plain, spread with butter, toasted with jam, or filled with your favorite sandwich ingredients.