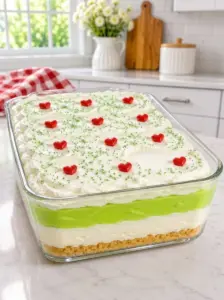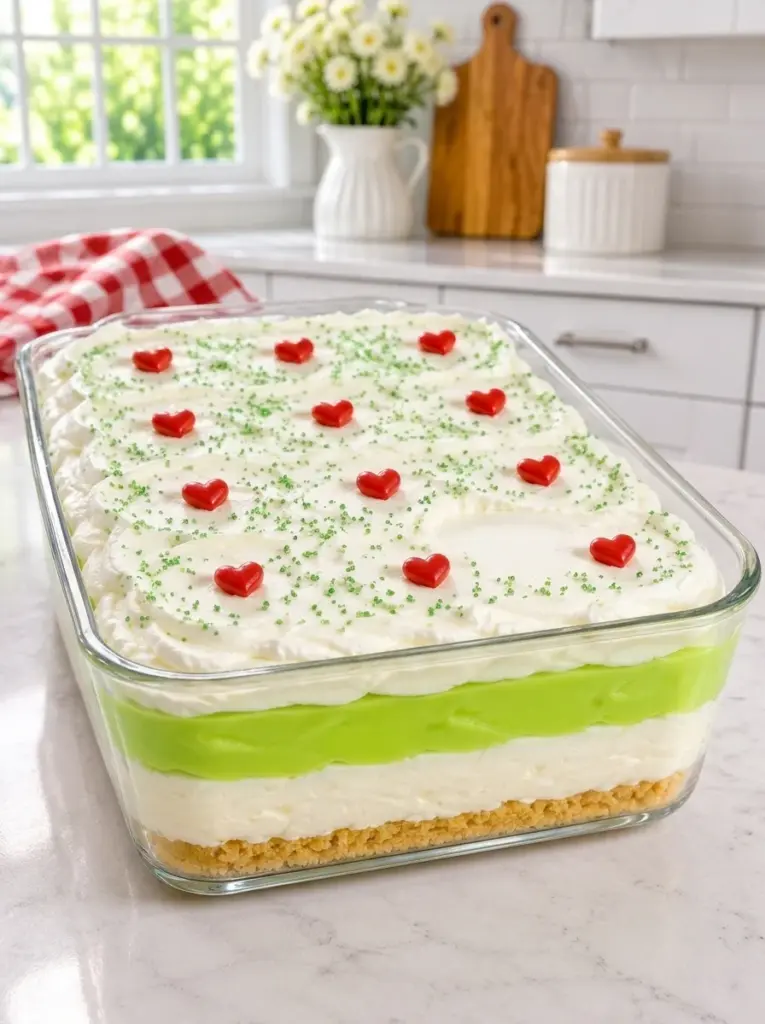
This Grinch Lush combines a buttery golden cookie crust, fluffy cheesecake filling, bright green vanilla pudding, and a soft whipped topping. Red candy hearts and green sprinkles give the dessert its festive finish, while the layers underneath deliver sweet vanilla flavor, tangy cream cheese, and tender cookie crumbs.
It is a convenient dessert for Christmas parties, family gatherings, and holiday movie nights. There is no baking required, and most of the preparation involves mixing and spreading. Once assembled, the refrigerator does the remaining work.
The green pudding provides the signature Grinch-inspired color without changing the familiar vanilla flavor. A small amount of gel coloring creates a vivid layer that stands out between the pale cheesecake filling and white topping.
Prepare the dessert the night before serving for a relaxed holiday schedule. Add the decorations at the last minute so the candy hearts remain distinct and the green sugar does not bleed into the topping.
What Is Grinch Lush?
Grinch Lush is a chilled, layered dessert inspired by the green Christmas character and his recognizable red heart.
A “lush” dessert typically combines a crumb crust with creamy fillings and whipped topping. This version has four main layers:
- A Golden Oreo cookie crust
- A fluffy cream cheese filling
- Green-tinted vanilla pudding
- A whipped topping finish
Unlike baked cheesecake, the filling contains no eggs and does not need oven time. It firms through refrigeration while retaining a soft, creamy texture.
The crust also softens slightly as the dessert rests, making it easy to cut or spoon into servings. Expect a creamy layered dessert rather than a firm cheesecake bar.
Why You’ll Love This Recipe
There is no oven required. The recipe uses instant pudding and a chilled cookie crust.
It is easy to prepare ahead. An overnight rest improves the dessert’s structure and simplifies serving.
The decoration is simple. Red candy hearts and green sugar provide the theme without elaborate piping.
The flavor is familiar. Vanilla cookies, cream cheese, and pudding make a sweet, approachable combination.
It serves a group. A 9 × 13-inch dish provides 12 generous portions.
The layers look attractive. A clear dish shows the golden base, pale cheesecake, green pudding, and white topping.
You can serve it neatly or casually. Cut into squares when well chilled or spoon into bowls.
Ingredient Breakdown
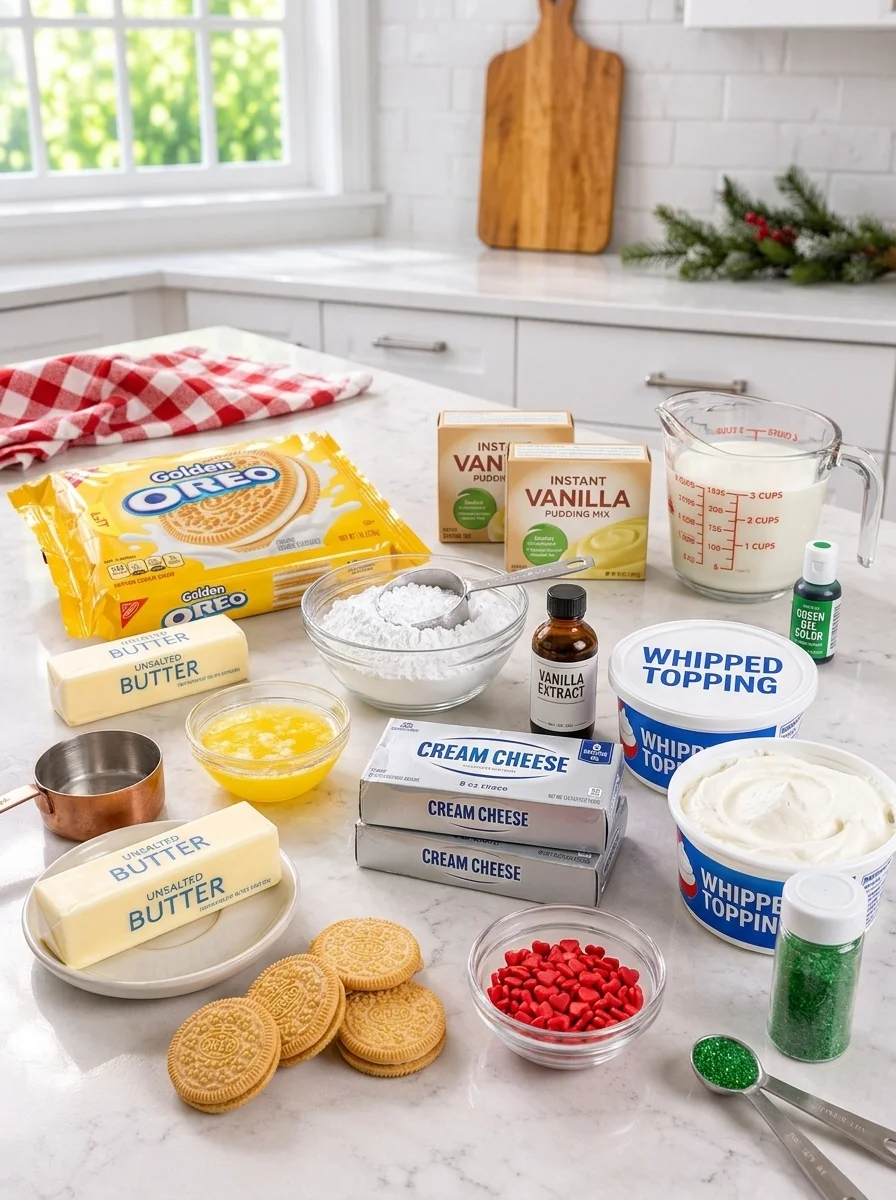
Golden Oreo Cookies — 36 Cookies, About 14 Ounces
Use the whole cookies, including their cream filling.
The filling contributes sweetness and helps the crumbs bind with the butter. Crush the cookies finely so the crust presses together evenly.
Package sizes and individual cookie weights can vary. Approximately 400 grams is a useful guide if measuring by weight.
Unsalted Butter — 6 Tablespoons
Melt the butter before mixing it into the crumbs.
The mixture should be evenly moistened, without dry patches or a pool of butter at the bottom. Stir thoroughly before pressing it into the dish.
Full-Fat Block Cream Cheese — 8 Ounces
Block cream cheese provides a predictable, creamy base.
Soften it until it beats smoothly, but do not melt it. Cold cream cheese can leave small lumps that are difficult to remove after the whipped topping is folded in.
Spreadable cream cheese from a tub can have a different moisture content and may produce a softer layer.
Powdered Sugar — 1 Cup
Powdered sugar sweetens the cheesecake filling and incorporates without the graininess of granulated sugar.
Sift it first if it contains firm lumps.
Vanilla Extract — 1 Teaspoon
Vanilla rounds out the cream cheese filling and complements the pudding.
There is no need for additional flavoring in the green layer unless you intentionally want to change the recipe.
Frozen Whipped Topping — 16 Ounces Total, Thawed
Use 8 ounces in the cheesecake filling and 8 ounces over the pudding.
These are package weights rather than fluid-ounce measurements. Thaw in the refrigerator according to the product directions.
The topping should be soft and spreadable, with no frozen pieces.
Instant Vanilla Pudding Mix — Two 3.4-Ounce Packages
Use instant pudding, not cook-and-serve.
The recipe calls for 3 cups milk for both packages combined. This produces a thicker layer than the usual pudding preparation, helping it hold its place in the dessert.
Cold Whole Milk — 3 Cups
Whole milk creates a rich pudding layer.
Measure carefully and keep it cold until mixing. Extra milk can prevent the dessert from portioning cleanly.
Lime-Green Gel Food Coloring
Gel coloring provides a strong color without adding much liquid.
Add a little at a time. The exact amount depends on the brand and concentration.
Red Candy Hearts and Green Sugar Sprinkles
Use 12 small red candy hearts and 1–2 teaspoons green sugar sprinkles.
Arrange one heart over each intended portion. Add the decorations just before serving to reduce color bleeding.
Equipment You’ll Need
- A 9 × 13-inch baking dish
- A food processor or sturdy food-storage bag and rolling pin
- Two mixing bowls
- An electric mixer
- A whisk
- A flexible spatula
- An offset spatula or the back of a spoon
- Measuring tools
A clear glass dish displays the layers, but another similarly sized serving dish also works.
How to Make Grinch Lush
Step 1: Crush the Cookies
Place the Golden Oreos in a food processor and pulse into fine crumbs.
Alternatively, seal them in a sturdy bag and crush with a rolling pin. Check the corners for larger pieces before finishing.
Leave the cream filling in the cookies.
Step 2: Prepare the Crust
Mix the crumbs with the melted butter until evenly moistened.
Transfer to the baking dish and spread across the bottom. Press firmly with a flat-bottomed measuring cup, paying attention to the corners.
Refrigerate for 20 minutes while preparing the fillings.
Step 3: Beat the Cream Cheese
Beat the softened cream cheese until smooth.
Add powdered sugar and vanilla, then beat until creamy. Scrape down the bowl and beaters so no firm cream cheese remains.
Step 4: Fold in Whipped Topping
Add 8 ounces thawed whipped topping.
Fold gently with a spatula, lifting the cream cheese mixture over the topping until evenly combined. Stop once there are no large streaks.
Step 5: Add the Cheesecake Layer
Place small dollops of filling across the chilled crust.
Spread gently into an even layer. Starting with several dollops requires less dragging and helps keep crumbs from pulling into the filling.
Refrigerate while preparing the pudding.
Step 6: Make the Green Pudding
Whisk both packages of instant pudding mix with 3 cups cold whole milk for approximately 2 minutes.
Add lime-green gel coloring gradually and whisk until evenly tinted.
Let stand for 3–5 minutes, until thickened but still spreadable.
Step 7: Add the Pudding Layer
Spoon the green pudding over the cheesecake layer in several small dollops.
Spread gently with light pressure, keeping the two layers separate.
Step 8: Add the Final Topping
Spread the remaining 8 ounces whipped topping over the pudding.
Make shallow swirls with the back of a spoon if desired. Avoid digging deeply enough to pull green pudding through the surface.
Step 9: Chill
Cover without touching the topping.
Refrigerate for at least 4 hours, preferably overnight. The layers should be cold and set enough to portion, while remaining soft.
Step 10: Decorate and Serve
Arrange the candy hearts over the surface and scatter lightly with green sugar.
Cut into 12 portions using a clean knife. Lift with a serving spatula or spoon into bowls.
Tips for Clean Layers and a Creamy Texture
Crush the cookies finely. Large pieces make the crust more difficult to portion.
Chill the crust before spreading. Firm butter helps hold the crumbs in place.
Soften the cream cheese properly. Smooth cream cheese creates a more even filling.
Fold rather than beat the whipped topping. Gentle mixing helps preserve its light texture.
Use the listed milk quantity. The concentrated pudding layer supports the dessert’s structure.
Spread with light pressure. Pressing hard can blend neighboring layers.
Give it enough chilling time. Four hours is the minimum; overnight is convenient.
Decorate late. Moisture can dissolve colored sugar and soften candy details.
Expect a soft dessert. Even fully chilled, it will not have the firmness of a gelatin-set cheesecake.
Variations to Try
Chocolate Cookie Crust
Replace the Golden Oreos with a similar weight of chocolate sandwich cookies.
The dark base creates a stronger color contrast and adds chocolate flavor.
White Chocolate Pudding Layer
Use similarly sized packages of instant white chocolate pudding in place of vanilla.
Check the package type and use the recipe’s measured milk quantity.
Peppermint Grinch Lush
Add ⅛ teaspoon peppermint extract to the cheesecake layer.
Taste before adding more because peppermint extract can overpower the vanilla quickly.
Individual Dessert Cups
Layer the ingredients in small clear cups instead of one large dish.
Divide each component evenly and allow the cups to chill thoroughly. The yield depends on cup size.
Extra Cookie Finish
Reserve a small handful of crushed cookies separately and sprinkle around the edges just before serving.
This adds a little crunch against the soft layers.
Christmas Color Version
Keep the vanilla pudding pale green and use a mixture of red-and-green decorations.
The flavor remains the same while the presentation becomes a broader Christmas theme.
Serving Ideas
Keep the dessert in its baking dish for easy serving and attractive visible layers.
Arrange the 12 candy hearts in three rows of four to mark the portions. Use a modest scattering of green sugar so the white topping remains visible.
For a holiday dessert table, pair small portions with:
- Shortbread cookies
- Chocolate truffles
- Fresh strawberries
- Gingerbread cookies
- Coffee or tea
Use a clean, flat serving spatula to lift portions. If a square does not release neatly, serve it in a bowl; the creamy layers still make an appealing dessert.
Storage and Make-Ahead Instructions
Refrigerator
Cover and refrigerate at 40°F (4°C) or below for up to 3 days.
The cookie base gradually becomes softer, and decorations may lose definition.
Making It the Night Before
Assemble all four layers, cover, and refrigerate overnight.
Add hearts and sprinkles shortly before serving.
Preparing Components Separately
Crush the cookies ahead and store airtight at room temperature.
The cream cheese layer can be prepared and refrigerated separately, but it may need gentle stirring before spreading. Prepare the instant pudding close to assembly because it becomes harder to spread once fully set.
Freezing
Freezing is not recommended for the intended texture. Pudding and whipped topping can change consistency after thawing, and decorations may bleed.
Serving at Parties
Keep refrigerated until needed and return leftovers promptly. Avoid leaving the dairy-based dessert at room temperature for more than 2 hours.
Recipe Card
Grinch Lush
A festive no-bake dessert with a golden cookie crust, fluffy cheesecake filling, green vanilla pudding, and whipped topping.
- Prep time: 25 minutes
- Cook time: None
- Chill time: At least 4 hours
- Total time: Approximately 4 hours 25 minutes
- Yield: 12 generous servings
- Dish: 9 × 13 inches
- Difficulty: Easy
Ingredients
Golden cookie crust:
- 36 Golden Oreo cookies, approximately 14 ounces, including filling
- 6 tablespoons unsalted butter, melted
Cheesecake layer:
- 8 ounces full-fat block cream cheese, softened
- 1 cup powdered sugar
- 1 teaspoon vanilla extract
- 8 ounces frozen whipped topping, thawed
Green pudding layer:
- 2 packages instant vanilla pudding mix, 3.4 ounces each
- 3 cups cold whole milk
- Lime-green gel food coloring, as needed
Topping:
- 8 ounces frozen whipped topping, thawed
- 12 small red candy heart sprinkles
- 1–2 teaspoons green sugar sprinkles
Instructions
- Crush whole cookies into fine crumbs.
- Mix with melted butter and press evenly into the baking dish.
- Refrigerate for 20 minutes while preparing the fillings.
- Beat cream cheese until smooth. Add powdered sugar and vanilla.
- Fold in 8 ounces whipped topping.
- Spread gently over the chilled crust.
- Whisk both pudding mixes with 3 cups cold milk for 2 minutes.
- Add green coloring gradually. Rest for 3–5 minutes.
- Spread pudding over the cheesecake filling.
- Add the remaining whipped topping.
- Cover and refrigerate for at least 4 hours, preferably overnight.
- Decorate with hearts and green sugar just before serving.
Frequently Asked Questions
Can I use cook-and-serve pudding?
This method requires instant pudding. Cook-and-serve pudding needs a different preparation and cooling process.
Do I remove the cookie filling?
No. Crush the whole cookies, including their cream centers.
Why is my pudding runny?
Check that you used instant pudding and measured 3 cups milk for both packages combined. Some milk substitutes also affect setting.
Can I use plant-based milk?
Follow the pudding manufacturer’s guidance for compatible alternatives and adjusted quantities. A direct substitution may not set properly.
Can I use homemade whipped cream?
Yes, but it may be less stable during storage. Whip until it holds firm peaks and expect a somewhat different texture from packaged whipped topping.
Why are crumbs mixing into the cheesecake layer?
The crust may not be chilled enough, or the filling is being dragged too firmly. Add small dollops and spread gently.
Can I make the green layer without food coloring?
You can leave it its natural color, but it will not have the signature green appearance. The flavor is unchanged.
Why are the sprinkles bleeding?
Sugar decorations dissolve gradually on moist surfaces. Add them shortly before serving.
Can I cut smaller portions?
Yes. Cut into 15 or 18 portions for a dessert table, adjusting the candy-heart quantity if you want one per serving.
Can I double the recipe?
Yes. Use two 9 × 13-inch dishes rather than one extra-deep container for easier layering, chilling, and serving.