Homemade Sourdough Italian Bread: Crispy Crust, Soft & Airy Crumb
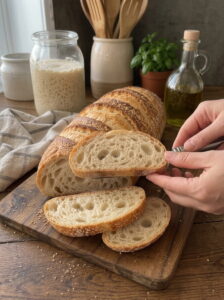
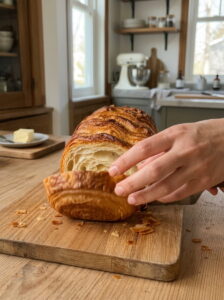
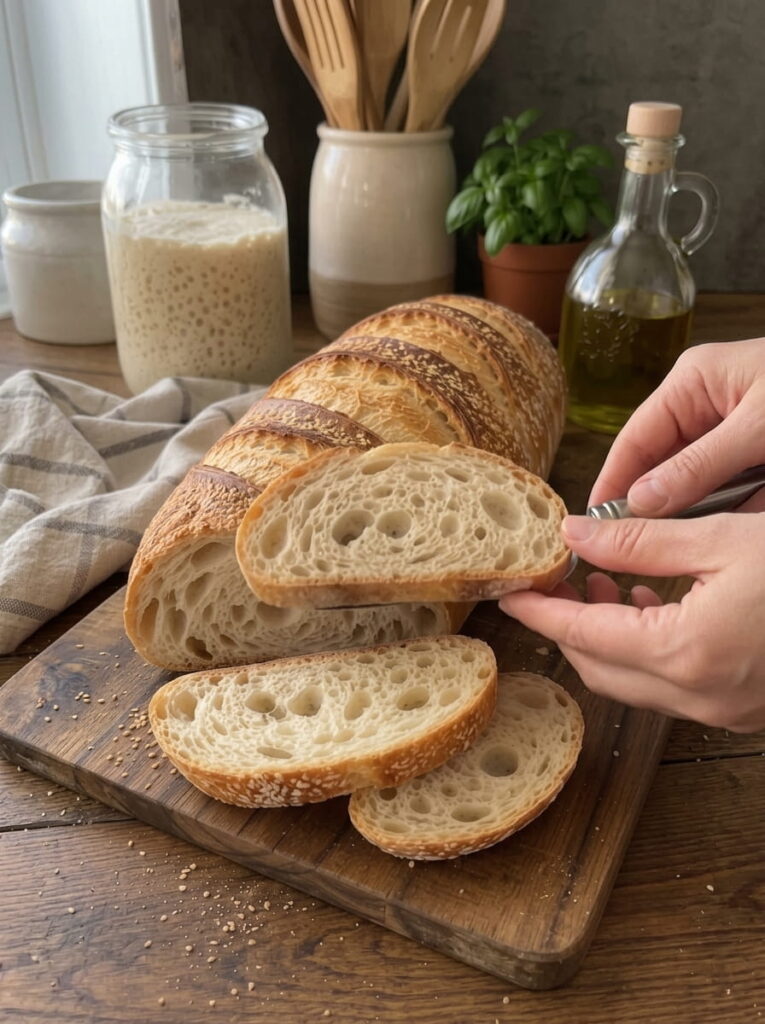
Enjoy the taste of homemade Italian-style bread with a beautifully golden, crispy crust and a soft, airy interior. This rustic sourdough loaf has a wonderfully chewy texture, a mild tangy flavor and an irresistible aroma that fills your kitchen as it bakes. It is made with an active sourdough starter and just four simple ingredients, and it is perfect for serving with pasta, dipping in olive oil, making sandwiches or enjoying warm with butter.
If you love the idea of baking real artisan bread at home but feel unsure where to begin, this recipe is a great place to start. There is no commercial yeast, no complicated shaping and no special flour blend. Just flour, water, starter and salt, plus a little time and patience.
Below you will find the full recipe, ingredient notes, a timeline, step-by-step instructions, troubleshooting tips, variations, storage advice, serving ideas and answers to frequently asked questions.
What Is Sourdough Italian Bread?
Sourdough Italian bread is a rustic loaf made with a wild yeast starter rather than commercial yeast. The fermentation of flour and water by wild yeast and beneficial bacteria creates a bread with a mild tang, a chewy crumb and a deep, complex flavor. The Italian style generally refers to a loaf with a crisp, golden crust and a soft, airy interior, ideal for sopping up sauces, serving alongside meals and making sandwiches.
This version is made with only four ingredients: bread flour, water, active sourdough starter and salt. The long, slow fermentation does the work of developing flavor and texture, while stretch-and-folds build strength in the dough without any kneading. Baking in a preheated Dutch oven traps steam and produces a blistered, crackly crust.
Why You’ll Love This Recipe
It uses only four ingredients. Flour, water, starter and salt are all you need.
There is no kneading. Gentle stretch-and-folds build the dough’s structure with very little effort.
It has a crispy, golden crust. Baking in a covered Dutch oven creates steam, which gives a crisp, crackly crust and good oven spring.
It has a soft, airy interior. The long fermentation gives an open crumb with a pleasant chew.
The flavor is mild and tangy. The sourdough tang is gentle rather than sharp, which makes this loaf versatile.
It is flexible with your schedule. The cold proof lets you shape the dough one day and bake it the next.
It beats store-bought. Fresh bread with no additives or preservatives tastes better and fills your home with a wonderful aroma.
It is perfect for sharing. A beautiful rustic loaf makes a lovely gift or table centerpiece.
Ingredients You’ll Need
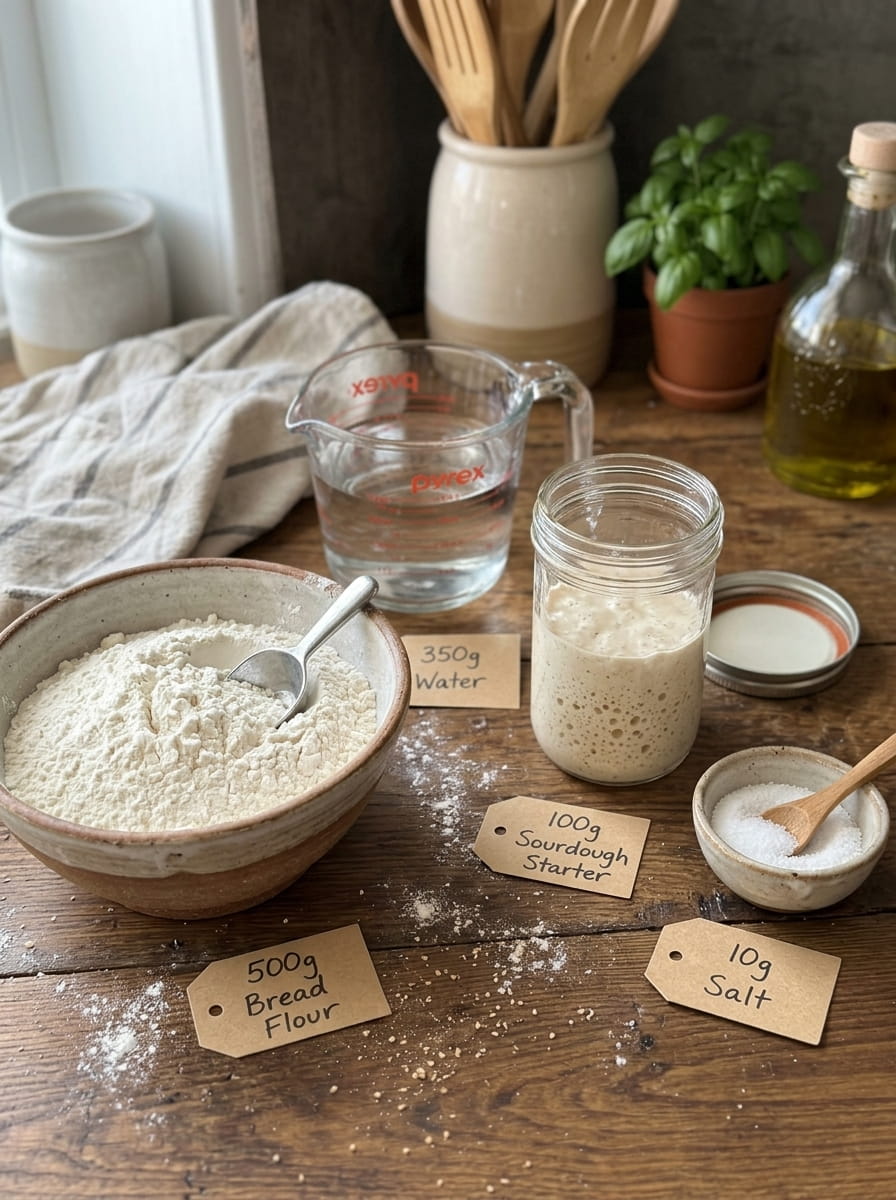
- 500 g bread flour
- 350 g water, at room temperature
- 100 g active sourdough starter, at 100% hydration
- 10 g salt
Ingredient Notes
Bread flour. Bread flour contains more protein than all-purpose flour, which develops into more gluten. This gives the loaf strength, a chewy texture and a higher rise. Always weigh your flour on a kitchen scale. Sourdough is sensitive to measurements, and cups are not accurate enough.
Water. Room temperature water is a good starting point. If your kitchen is cold, use slightly warmer water to speed fermentation, and in a hot kitchen use cooler water. Filtered or tap water is fine, but if your tap water is heavily chlorinated, letting it sit out for a while or using filtered water can help the starter.
Active sourdough starter (100% hydration). Your starter should be bubbly, risen and at its peak, usually 4 to 8 hours after feeding, depending on your starter and the temperature. A 100% hydration starter is made with equal weights of flour and water. If your starter is sluggish, the dough will take much longer to rise and the loaf may be dense. A doubled volume, plenty of bubbles and a pleasant yeasty, slightly tangy smell are good signs that it is ready.
Salt. Salt strengthens the gluten, controls fermentation and brings out flavor. Fine sea salt or regular table salt both work. Ten grams is about 2% of the flour weight, a standard amount for most bread.
Timeline Overview
Sourdough is a slow process, but most of it is hands-off. Here is a rough plan:
- Day 1, morning: Mix the dough and rest for 30 minutes, add the salt, and begin bulk fermentation with stretch-and-folds (about 4 to 6 hours total).
- Day 1, afternoon or evening: Shape the loaf and place it in a basket. Refrigerate for the cold proof (8 to 16 hours).
- Day 2: Preheat the oven, score and bake (about 1 hour including preheating), then cool for at least 1 hour.
Active time is only about 30 minutes in total, spread across the day.
How to Make Sourdough Italian Bread
Step 1: Mix the Dough
In a large bowl, combine the water and active sourdough starter, stirring until the starter mostly dissolves. Add the bread flour and mix with your hand or a spatula until no dry flour remains. The dough will look rough and shaggy. Cover the bowl and let it rest for 30 minutes. This rest, often called an autolyse, allows the flour to hydrate fully and makes the dough smoother and easier to handle.
Step 2: Add the Salt
Sprinkle the salt over the dough and work it in with damp hands until evenly incorporated. You can squeeze and pinch the dough, folding it over itself. Wet hands help prevent sticking.
Step 3: Bulk Fermentation
Cover the bowl and let the dough ferment at room temperature for about 4 to 6 hours. The exact time depends on the strength of your starter and the temperature of your kitchen. A warm kitchen speeds things up, and a cool one slows things down.
Step 4: Stretch and Fold
During the first 2 hours of bulk fermentation, perform 3 to 4 sets of stretch-and-folds, spaced about 30 minutes apart. To do a set, wet your hand, grab one side of the dough, lift and gently stretch it upward, then fold it over the center. Rotate the bowl and repeat around the dough, usually four times. Each set takes less than a minute.
These folds build strength and structure, trapping gas and creating an airy crumb. After the last set, let the dough rest undisturbed for the remainder of the bulk fermentation.
Step 5: Check the Fermentation
The dough is ready when it looks smoother, feels airy and has increased noticeably in volume. You should see bubbles on the surface and along the sides of the bowl, and the dough should jiggle when you shake the bowl. A volume increase of around 50% to 75% is a common target, though the visual and tactile signs matter more than a number. If your kitchen is cool, it may need more time. Avoid overfermenting, which can make the dough slack and sticky.
Step 6: Shape the Loaf
Turn the dough onto a lightly floured surface. Gently shape it into a round or oval loaf (boule or batard), creating surface tension without pressing out too much air. To shape, fold the edges toward the center, flip the dough over and use your hands or a bench scraper to drag it gently toward you, tightening the surface. The goal is a taut skin that holds the loaf’s shape.
Step 7: Cold Proof
Place the dough seam-side up in a floured proofing basket or a towel-lined bowl. Use rice flour or a mix of flour to prevent sticking. Cover and refrigerate for 8 to 16 hours. The cold slows fermentation, deepens flavor and makes the dough easier to score. If you prefer a quicker version, you can proof at room temperature for 1 to 2 hours, but the flavor and handling will be different.
Step 8: Preheat the Oven
Place a Dutch oven with its lid inside the oven and preheat to 245°C (475°F) for at least 30 minutes. A very hot Dutch oven is key to a great crust and oven spring.
If you do not have a Dutch oven, use a baking stone or heavy tray and a separate oven-safe pan on the lower rack. When you load the bread, pour hot water into the pan to create steam, and be careful of the hot steam.
Step 9: Score the Bread
Carefully turn the dough onto parchment paper and make one confident slash across the top with a sharp bread lame, razor blade or knife. Scoring controls where the loaf expands, preventing random bursts and creating an attractive pattern. A decisive cut about 1 cm deep works well.
Step 10: Bake
Using the parchment as a sling, carefully transfer the loaf into the hot Dutch oven, cover with the lid and bake for 20 minutes. The trapped steam keeps the crust soft at first, allowing the loaf to expand fully. Remove the lid, reduce the temperature to 230°C (450°F) and bake for another 15 to 25 minutes, until deeply golden and crisp. The internal temperature should reach about 96°C to 99°C (205°F to 210°F).
Always use thick oven mitts. The Dutch oven and lid are extremely hot.
Step 11: Cool Completely
Transfer the bread to a wire rack and let it cool for at least 1 hour before slicing. This helps the crumb finish setting and preserves the airy texture. As the loaf cools, you may hear the crust crackling, often called singing. It is a good sign.
Tips for the Best Sourdough Italian Bread
Use a strong starter at its peak. This is the single most important factor for good rise and flavor.
Weigh everything. Precision matters in sourdough baking.
Watch the dough, not the clock. Fermentation times vary widely. Look for volume, bubbles and a jiggly, airy texture.
Use wet hands. They prevent sticking when handling wet, sticky dough.
Do not skip the cold proof. It improves flavor and makes the dough easier to shape and score.
Preheat thoroughly. A hot Dutch oven gives great oven spring and a crisp crust.
Score with confidence. A quick, deep cut works better than a hesitant one.
Be patient with cooling. Cutting too early can result in a gummy crumb.
Keep notes. Record your times, temperatures and results to improve your loaves over time.
Common Mistakes to Avoid
Flat loaf. This can result from a weak starter, overfermentation, underfermentation or poor shaping. Make sure the starter is active, and watch the dough rather than the clock.
Dense, gummy crumb. The dough may be underfermented, or the loaf may have been sliced too early. Allow adequate bulk fermentation and let the bread cool fully.
Pale crust. The oven may not have been hot enough, or the loaf was not baked long enough. Bake until deeply golden.
Crust too hard or burnt on the bottom. Place a baking sheet under the Dutch oven or move the rack up slightly. You can also lift the loaf out of the pot for the last few minutes.
Dough spreads out instead of rising. The dough may be overproofed or too wet. Shorten fermentation or reduce water slightly next time.
Dough sticks to the basket. Use more flour, ideally rice flour, to coat the basket.
Large tunnels or holes in the crumb. This can be caused by uneven shaping or underfermentation. Shape more carefully and allow more time.
Too sour. A long cold proof or very ripe starter can increase sourness. Shorten the cold proof or use the starter slightly earlier.
Delicious Variations
Olive and rosemary sourdough. Fold in pitted olives and fresh or dried rosemary during one of the stretch-and-fold sets.
Garlic and herb sourdough. Add roasted garlic and Italian herbs for a fragrant loaf perfect for pasta night.
Sun-dried tomato and basil. Fold in chopped sun-dried tomatoes and dried basil for a Mediterranean twist.
Cheese sourdough. Add shredded Parmesan, pecorino or aged cheddar to the dough.
Whole wheat Italian sourdough. Replace 10% to 20% of the bread flour with whole wheat flour. You may need slightly more water.
Seeded crust. Brush the shaped loaf with water and roll it in sesame, poppy or sunflower seeds before the cold proof.
Olive oil version. Add a tablespoon or two of olive oil for a softer crumb and richer flavor.
Pizza or focaccia. Use the dough to make sourdough focaccia or pizza crusts for a different experience.
Serving Ideas
With meals:
- Serve warm alongside pasta, lasagna, risotto or Italian soups
- Use it to mop up tomato sauce, stews and braises
- Pair with a hearty salad and a glass of wine
As a starter:
- Dip into extra virgin olive oil and balsamic vinegar
- Serve with whipped ricotta, honey and black pepper
- Top with fresh tomatoes, basil and garlic for bruschetta
Sandwiches and toasts:
- Build sandwiches with prosciutto, mozzarella and tomato
- Make grilled cheese or panini
- Top toast with avocado, eggs or smoked salmon
Breakfast and snacks:
- Toast with butter, jam or honey
- Serve with cheese and cured meats on a board
- Make croutons or breadcrumbs from leftovers
How to Store Sourdough Italian Bread
At room temperature: Store the cooled loaf cut-side down on a cutting board, or wrapped in a clean kitchen towel or paper bag, for up to 2 to 3 days. Avoid sealing it in plastic, which softens the crust.
In an airtight container or bag: This keeps the interior moist for a few more days, but the crust will soften. Re-crisp it in a hot oven for a few minutes.
In the freezer: Slice the cooled loaf and freeze in a freezer-safe bag for up to 3 months. Toast slices from frozen or thaw at room temperature.
Refreshing stale bread: Sprinkle the crust lightly with water and warm the loaf in a 175°C (350°F) oven for 5 to 10 minutes. Stale sourdough also makes fantastic croutons, breadcrumbs, panzanella and French toast.
Avoid the refrigerator: Refrigeration tends to speed up staling in bread, so it is usually best to store it at room temperature or freeze it.
Nutrition Notes
Sourdough bread is made from flour, water and salt, with fermentation by wild yeast and bacteria. It provides carbohydrates for energy and some protein. Some people find sourdough easier to digest because of the long fermentation, but it still contains gluten and is not suitable for people with celiac disease or gluten intolerance. Exact nutritional values depend on your ingredients and slice size. If you have dietary restrictions or a health condition, check with your doctor or a registered dietitian.
Frequently Asked Questions
Do I need a Dutch oven?
It is the easiest method, since it traps steam and produces a crisp crust and excellent oven spring. If you do not have one, bake on a preheated baking stone or heavy tray with a pan of hot water on the rack below for steam.
What does active sourdough starter mean?
It is a starter that has been fed and is at its peak activity, bubbly and risen, ready to leaven the dough.
Can I use all-purpose flour?
Yes, but results will differ. All-purpose flour has less protein, so the dough may be slightly weaker and spread more. Bread flour is recommended for this recipe.
How do I know when bulk fermentation is done?
The dough should look puffy and airy, with bubbles on the surface and the sides of the bowl, and it should jiggle when the bowl is moved. It should have increased noticeably in volume.
Can I skip the cold proof?
You can proof at room temperature for 1 to 2 hours instead, but the cold proof improves flavor, structure and scoring.
How long can the dough stay in the fridge?
The recipe suggests 8 to 16 hours. Going much beyond that can lead to overproofing and a sourer, flatter loaf, though results vary by starter and fridge temperature.
Why is my sourdough not rising?
A weak starter, cold kitchen, underfermentation or overfermentation can all be causes. Use an active starter at its peak and give the dough enough time.
Why is the crumb gummy?
The loaf may have been underbaked, underfermented or sliced too soon. Bake until deeply golden and let the loaf cool for at least an hour.
What if I do not have a proofing basket?
Line a bowl with a clean kitchen towel, dust it generously with flour and place the dough inside.
Can I bake without parchment paper?
You can, but parchment makes transferring the dough much easier and safer.
Can I bake it in a loaf pan?
Yes. Shape the dough into a log, place it in a greased loaf pan and proof until it rises near the top. Bake with steam initially. The shape and crust will differ from a Dutch oven loaf.
Can I double the recipe?
Yes. Double the ingredients, divide the dough into two loaves at shaping and bake them one after the other or in two Dutch ovens.
Final Thoughts
Homemade sourdough Italian bread is one of the most rewarding things you can bake. With only four ingredients, a handful of gentle folds and a little patience, you get a rustic loaf with a crackling golden crust, a soft, airy crumb and a mild tangy flavor.
Keep your starter active, watch your dough and let time do the hard work. Soon you will be pulling beautiful loaves out of your own oven and serving them with pasta, olive oil, sandwiches or simply a little butter.
Bake a loaf this weekend, and enjoy the aroma and the first warm slice. It is bread worth waiting for.
Print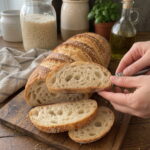
Homemade Sourdough Italian Bread
Ingredients
- 500 g bread flour
- 350 g water, at room temperature
- 100 g active sourdough starter, at 100% hydration
- 10 g salt
Instructions
In a large bowl, combine the water and active sourdough starter, stirring until the starter mostly dissolves. Add the bread flour and mix with your hand or a spatula until no dry flour remains. The dough will look rough and shaggy. Cover the bowl and let it rest for 30 minutes. This rest, often called an autolyse, allows the flour to hydrate fully and makes the dough smoother and easier to handle.
Sprinkle the salt over the dough and work it in with damp hands until evenly incorporated. You can squeeze and pinch the dough, folding it over itself. Wet hands help prevent sticking.
Cover the bowl and let the dough ferment at room temperature for about 4 to 6 hours. The exact time depends on the strength of your starter and the temperature of your kitchen. A warm kitchen speeds things up, and a cool one slows things down.
During the first 2 hours of bulk fermentation, perform 3 to 4 sets of stretch-and-folds, spaced about 30 minutes apart. To do a set, wet your hand, grab one side of the dough, lift and gently stretch it upward, then fold it over the center. Rotate the bowl and repeat around the dough, usually four times. Each set takes less than a minute.
These folds build strength and structure, trapping gas and creating an airy crumb. After the last set, let the dough rest undisturbed for the remainder of the bulk fermentation.
The dough is ready when it looks smoother, feels airy and has increased noticeably in volume. You should see bubbles on the surface and along the sides of the bowl, and the dough should jiggle when you shake the bowl. A volume increase of around 50% to 75% is a common target, though the visual and tactile signs matter more than a number. If your kitchen is cool, it may need more time. Avoid overfermenting, which can make the dough slack and sticky.
Turn the dough onto a lightly floured surface. Gently shape it into a round or oval loaf (boule or batard), creating surface tension without pressing out too much air. To shape, fold the edges toward the center, flip the dough over and use your hands or a bench scraper to drag it gently toward you, tightening the surface. The goal is a taut skin that holds the loaf’s shape.
Place the dough seam-side up in a floured proofing basket or a towel-lined bowl. Use rice flour or a mix of flour to prevent sticking. Cover and refrigerate for 8 to 16 hours. The cold slows fermentation, deepens flavor and makes the dough easier to score. If you prefer a quicker version, you can proof at room temperature for 1 to 2 hours, but the flavor and handling will be different.
Place a Dutch oven with its lid inside the oven and preheat to 245°C (475°F) for at least 30 minutes. A very hot Dutch oven is key to a great crust and oven spring.
If you do not have a Dutch oven, use a baking stone or heavy tray and a separate oven-safe pan on the lower rack. When you load the bread, pour hot water into the pan to create steam, and be careful of the hot steam.
Carefully turn the dough onto parchment paper and make one confident slash across the top with a sharp bread lame, razor blade or knife. Scoring controls where the loaf expands, preventing random bursts and creating an attractive pattern. A decisive cut about 1 cm deep works well.
Using the parchment as a sling, carefully transfer the loaf into the hot Dutch oven, cover with the lid and bake for 20 minutes. The trapped steam keeps the crust soft at first, allowing the loaf to expand fully. Remove the lid, reduce the temperature to 230°C (450°F) and bake for another 15 to 25 minutes, until deeply golden and crisp. The internal temperature should reach about 96°C to 99°C (205°F to 210°F).
Always use thick oven mitts. The Dutch oven and lid are extremely hot.
Transfer the bread to a wire rack and let it cool for at least 1 hour before slicing. This helps the crumb finish setting and preserves the airy texture. As the loaf cools, you may hear the crust crackling, often called singing. It is a good sign.