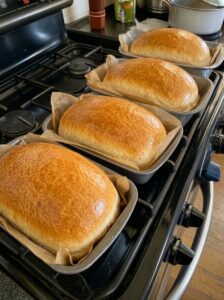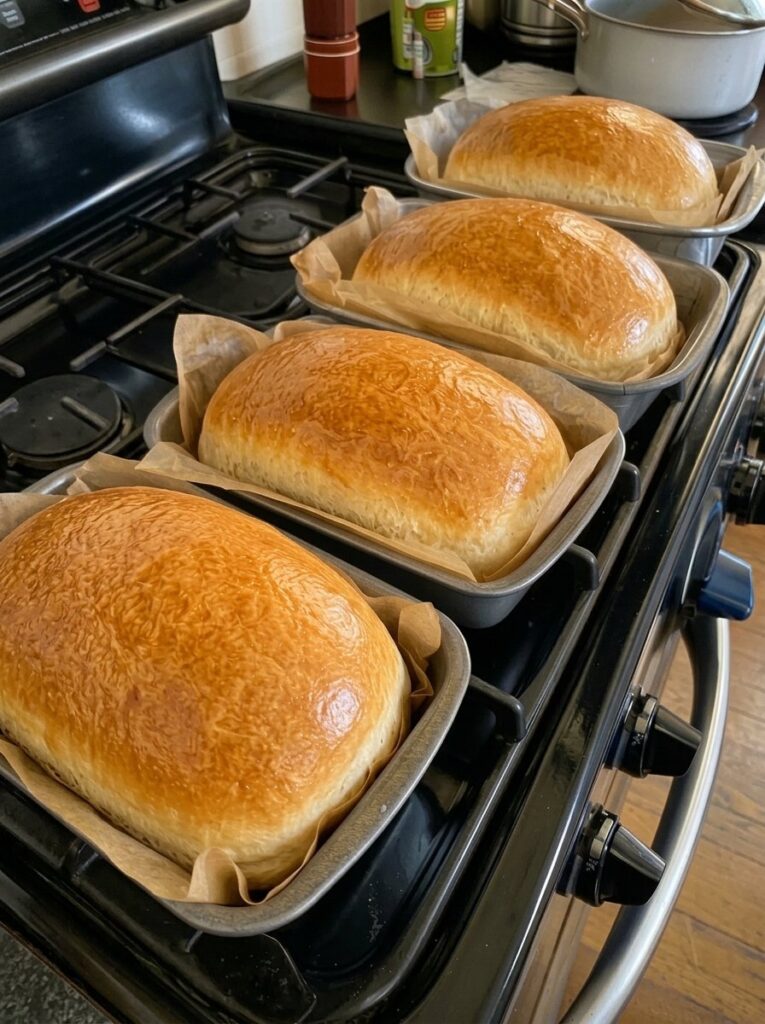
Soft Homemade Milk Bread Recipe: Fluffy, Golden, and Easy to Make
There is something deeply comforting about pulling a warm loaf of bread out of your own oven. The smell fills the kitchen, the crust turns a gentle golden brown, and the first slice, soft and pillowy with a little melting butter, makes the effort worthwhile. This soft homemade milk bread delivers all of that without special equipment, unusual ingredients, or years of baking experience.
This milk bread is tender, fluffy, lightly golden, and wonderfully soft, with a delicate crumb and a rich, comforting flavor. It uses just six simple pantry ingredients, including warm milk, which gives the loaf its signature softness. It’s easy enough for everyday baking and delicious enough to make a plain breakfast or weekday lunch feel special.
In this guide, you’ll find the full recipe, a clear step-by-step method, troubleshooting tips, serving ideas, storage instructions, and answers to the most common milk bread questions. Whether you’re a first-time bread baker or just want a reliable sandwich loaf, you’ll find everything you need here.
What Is Milk Bread?
Milk bread is a soft, slightly rich bread made with milk in place of water as the main liquid. Milk contributes natural sugars, fat, and proteins, which together create a more tender crumb, a softer texture, and a lightly golden crust than a bread made with water alone.
The result is a loaf that feels almost cloud-like when you tear into it. The slices hold together well enough for sandwiches but stay soft enough to enjoy plain. Milk breads are popular around the world in many forms, and this version keeps things simple: a straightforward dough, a basic knead, two rises, and a single bake.
Why You’ll Love This Soft Homemade Milk Bread
Here’s why this recipe is likely to become a regular in your kitchen:
- Only six ingredients. Flour, milk, yeast, sugar, salt, and butter are all you need. Most of them are probably already in your pantry.
- Incredibly soft texture. The warm milk and melted butter produce a tender, fluffy crumb that stays soft after baking.
- Beginner-friendly. There’s no stand mixer, no starter, and no complicated shaping. A bowl, a wooden spoon, and your hands are enough.
- Wonderfully versatile. It works for toast, sandwiches, grilled cheese, French toast, and more.
- Great for meal prep. The loaf slices well and freezes beautifully, so you can have fresh-tasting bread on hand for weeks.
- A rich, comforting flavor. The lightly sweet, milky taste is gentle enough for savory meals and lovely with sweet toppings.
Ingredients for Soft Homemade Milk Bread
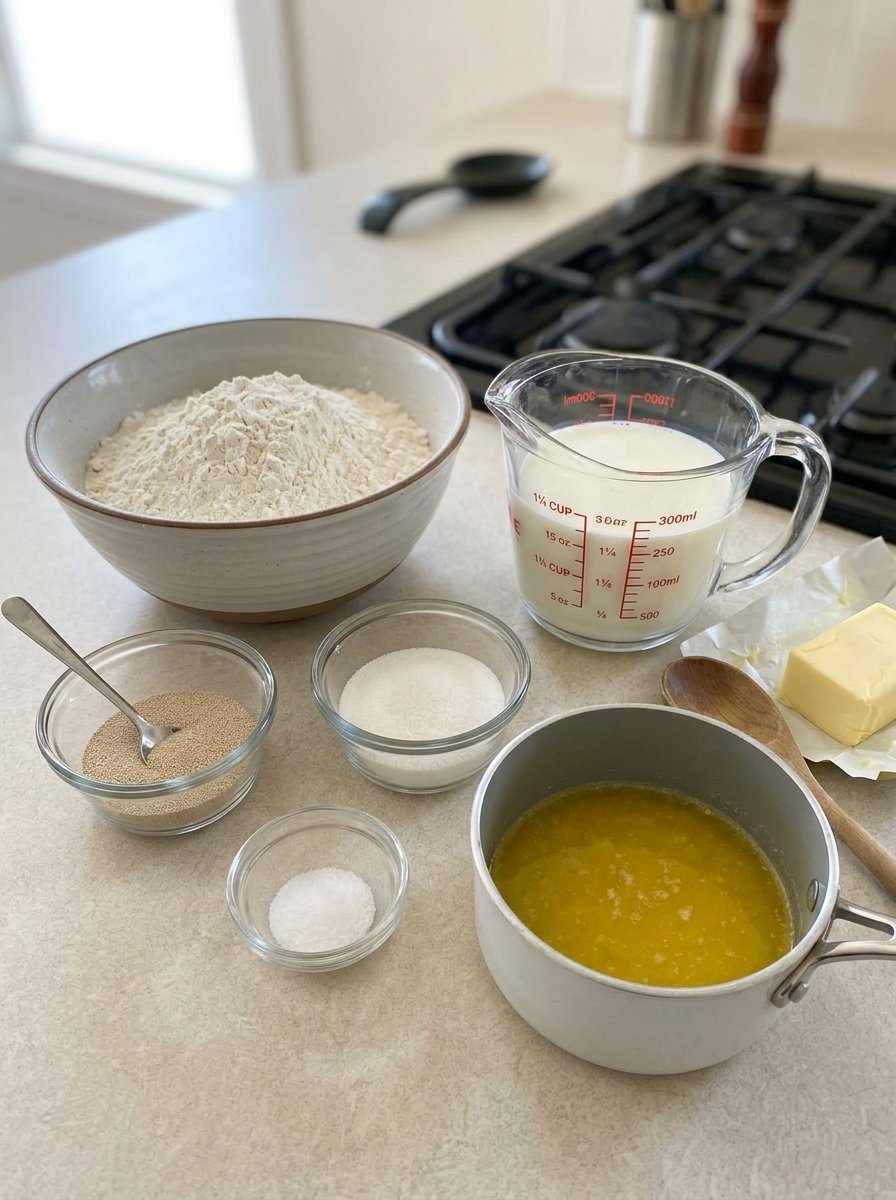
Here’s everything you need to make one loaf, which yields approximately 10 to 12 slices:
- 3 cups (360 g) all-purpose flour
- 1¼ cups (300 ml) warm milk
- 2¼ tsp (7 g) instant yeast
- 2 tbsp granulated sugar
- 1 tsp salt
- 2 tbsp unsalted butter, melted
You’ll also want a little extra melted butter for brushing the finished loaf, and a bit of flour for your work surface.
A Closer Look at the Ingredients
All-purpose flour. This is the structure of your loaf. All-purpose flour is widely available and gives a soft but sturdy crumb that’s ideal for sandwich bread. Measuring by weight (360 g) is the most accurate way to bake. If you use cups, spoon the flour into the measuring cup and level it off rather than scooping directly from the bag, which can pack in too much flour and make the bread dense.
Warm milk. Milk is the star of this recipe. It adds richness, softness, and flavor. Whole milk creates the richest and softest loaf, but other milk varieties can also work. The milk should be warm, not hot. Think comfortably warm to the touch, like a baby bottle. Very hot liquid can damage the yeast and prevent your dough from rising.
Instant yeast. Instant yeast is what makes the bread rise. It’s reliable and easy to use, and in this recipe it’s activated in the warm milk with sugar before the other ingredients are added. Check the date on your yeast package. Old yeast is one of the most common reasons bread fails to rise.
Granulated sugar. Sugar feeds the yeast and adds a subtle sweetness. It also helps the crust brown to a pretty golden color.
Salt. Salt balances the flavor and helps control the yeast’s activity. Don’t skip it, or the bread will taste flat.
Unsalted butter. Melted butter enriches the dough, softens the crumb, and adds flavor. Using unsalted butter lets you control the overall saltiness of the loaf.
Tips for the Best Milk Bread
A few small habits can make a big difference in how your loaf turns out:
- Use warm milk, not hot. Very hot liquid can kill the yeast. If you’re unsure, let the milk cool for a minute before using it.
- Choose whole milk when you can. It creates a richer, softer loaf, though other milk varieties will still work.
- Aim for soft, slightly tacky dough. The dough should feel soft and a little tacky but not extremely sticky. Add flour gradually, a tablespoon at a time, if needed.
- Watch the dough, not the clock. Rising times depend on the temperature of your kitchen. Allow the dough to rise until it’s noticeably puffy rather than relying only on the timer.
- Brush with butter for a softer crust. For an extra-soft crust, brush the freshly baked loaf with a little melted butter.
- Be patient and let it cool. Let the loaf cool before slicing so the delicate crumb has time to set. Cutting too early can make the interior seem gummy.
How to Make Soft Homemade Milk Bread: Step by Step
Prep time: about 20 minutes
First rise: 1 to 1½ hours
Second rise: 30 to 60 minutes
Bake time: 30 to 35 minutes
Total time: about 2½ to 3½ hours
Yield: 1 loaf, approximately 10 to 12 slices
Step 1: Prepare the Yeast Mixture
Add the warm milk and sugar to a large mixing bowl. Sprinkle the instant yeast over the milk and stir gently to combine. Let the mixture stand for about 5 minutes. You may notice it looking slightly foamy or bubbly, which is a good sign that your yeast is active. Even if the foam is modest, the dough will usually rise well as long as your yeast is fresh and the milk wasn’t too hot.
Step 2: Make the Dough
Add the melted butter, flour, and salt to the bowl. Stir with a wooden spoon or spatula until a soft dough forms. At first it will look shaggy and rough. That’s normal. Once the dough becomes difficult to stir, transfer it to a lightly floured work surface and get ready to knead.
Step 3: Knead the Dough
Knead the dough for about 8 to 10 minutes, or until it becomes smooth, elastic, and soft. To knead, push the dough away from you with the heel of your hand, fold it back over itself, give it a quarter turn, and repeat.
If the dough feels excessively sticky, add a small amount of flour, one tablespoon at a time. Avoid adding too much, because a slightly soft dough produces a more tender loaf. As you knead, the dough will gradually go from sticky and rough to smooth and supple. A good sign that you’ve kneaded enough is when the dough springs back slowly when you press it gently with a finger.
Step 4: First Rise
Place the dough in a lightly greased bowl. Cover with plastic wrap or a clean kitchen towel and set it somewhere warm and draft-free. Let the dough rise for about 1 to 1½ hours, or until it has approximately doubled in size.
If your kitchen is cool, the rise may take longer. A spot near (but not on) a warm appliance or inside an oven that’s turned off can help. Remember to judge by the dough’s size and appearance, not just the clock.
Step 5: Shape the Loaf
Gently press the dough down to release some of the larger air bubbles. Transfer it to a lightly floured surface and shape it into a smooth loaf that fits a 9×5-inch loaf pan. Place the shaped dough into a lightly greased pan, seam-side down.
Shaping tip: flatten the dough into a rectangle, roll it up snugly from the short side, and pinch the seam closed. This creates surface tension, which helps the loaf rise upward and gives you evenly shaped slices.
Step 6: Second Rise
Cover the loaf loosely with a clean kitchen towel. Let it rise again for about 30 to 60 minutes, or until the dough becomes noticeably puffy and rises close to the top of the pan. This second rise is what gives the finished bread its light, airy texture, so give it the time it needs.
Step 7: Bake the Bread
Preheat your oven to 350°F (175°C). Place the risen loaf in the oven and bake for about 30 to 35 minutes, or until the top is beautifully golden brown and the loaf is cooked through. If the top browns too quickly, loosely cover it with foil during the final portion of baking.
Step 8: Finish and Cool
Remove the bread from the oven and brush the top with melted butter while it’s still warm. Let the loaf cool in the pan for about 10 minutes, then carefully transfer it to a wire rack. Allow it to cool for at least 30 to 45 minutes before slicing.
It’s tempting to cut into warm bread right away, but waiting helps the crumb set so your slices come out clean and soft instead of squished.
Troubleshooting Common Milk Bread Problems
Even simple bread can have off days. Here are common issues and how to fix them:
My dough didn’t rise. The most likely culprits are old yeast, milk that was too hot, or a rising spot that was too cold. Check your yeast’s expiration date, make sure the milk is only warm, and try moving the dough to a slightly warmer, draft-free location. Give it extra time before deciding it has failed.
My bread is dense. Dense bread often comes from adding too much flour, under-kneading, or not letting the dough rise enough. Measure flour carefully, knead until the dough is smooth and elastic, and let each rise finish until the dough is puffy.
The dough is too sticky to handle. Dough that is slightly tacky is correct, but if it’s sticking heavily to your hands and surface, add flour one tablespoon at a time. Lightly flouring your hands can also help. Avoid adding too much at once.
The top browned too quickly. Every oven runs a little differently. If the top is getting too dark before the loaf is done, loosely cover it with foil for the last part of baking.
The crust is too firm. Brush the loaf with melted butter right after baking. This softens the crust and adds a little extra flavor.
The bread is gummy inside. This usually means it was sliced too soon or underbaked. Let the loaf cool completely enough for the crumb to set, and make sure the top is a deep golden brown before removing it from the oven.
Easy Variations to Try
Once you’ve mastered the basic recipe, you can experiment with small changes:
- Honey milk bread: Swap the granulated sugar for an equal amount of honey for a slightly different sweetness.
- Cinnamon swirl loaf: Before rolling the dough up in Step 5, sprinkle it with cinnamon and a little sugar.
- Herb and garlic loaf: Knead in a teaspoon of dried herbs, then brush the baked loaf with garlic butter.
- Dinner rolls: Divide the dough into equal pieces, shape into balls, and bake in a greased baking dish. Baking time will be shorter, so start checking earlier.
If you try a variation, keep the core method the same and adjust one thing at a time so you can see how it affects the result.
What to Serve with Milk Bread
This bread is as versatile as it is soft. Here are some of our favorite ways to enjoy it:
- Warm with butter, honey, or jam. The simplest way is often the best. Spread butter on a warm slice and let it melt.
- As toast. Toast slices until golden and top with eggs, avocado, or cream cheese for a satisfying breakfast.
- For classic sandwiches. The soft crumb and sturdy slices make this loaf ideal for sandwiches of all kinds.
- For grilled cheese. Butter the outside of the slices and toast them in a skillet for a golden, crispy exterior and a melty center.
- For school lunches and meal prep. Pack slices for lunchboxes or prep sandwiches for the week.
- Alongside soups, salads, stews, or hearty dinners. A soft slice is perfect for dipping and soaking up flavor.
- As French toast. Use slightly stale slices to make French toast, since they absorb the custard well without falling apart.
How to Store Milk Bread
At room temperature: Store the completely cooled loaf in an airtight container or bread bag at room temperature for up to 3 days. Make sure the bread is fully cooled before storing it, because trapped warmth creates moisture that can make the crust soggy.
In the freezer: For longer storage, slice the bread and freeze individual slices in a freezer-safe bag or container for up to 2 to 3 months. Freezing slices individually means you can take out only what you need.
To thaw: Thaw slices at room temperature, or toast them directly from frozen for a quick breakfast or sandwich base.
Frequently Asked Questions About Milk Bread
Can I use a different type of milk?
Yes. Whole milk creates a richer, softer loaf, but other milk varieties can also work. The texture and flavor may differ slightly depending on the milk you choose.
What kind of yeast should I use?
This recipe uses instant yeast, which is simple to use and reliable. Always check the expiration date, since old yeast may not rise properly.
Do I need a stand mixer?
No. This recipe is designed to be made by hand. You’ll stir the dough with a wooden spoon or spatula and then knead it on a lightly floured surface for about 8 to 10 minutes.
Why does the recipe say to let the dough rise “until puffy” instead of for a set time?
Rising time varies with the temperature and humidity of your kitchen. Warmer rooms speed things up, and cooler rooms slow them down. Watching the dough for visible signs, like doubling in size during the first rise and looking noticeably puffy during the second, is more reliable than following the clock alone.
How do I know when the bread is done baking?
The top should be beautifully golden brown, and the loaf should be cooked through. After about 30 to 35 minutes in a 350°F (175°C) oven, check the color. If it’s browning too fast, cover it loosely with foil.
What size pan do I need?
A 9×5-inch loaf pan is the right size for this recipe. Grease it lightly before adding the shaped dough.
Why should I wait before slicing?
Letting the loaf cool allows the delicate crumb to set. Slicing too soon can leave the interior feeling doughy and make clean slices difficult.
Can I make the bread ahead of time?
Yes. Bake the loaf, cool it completely, and store it at room temperature for up to 3 days. For longer storage, slice and freeze it for up to 2 to 3 months.
Can I use leftover bread?
Absolutely. Slightly stale slices are perfect for French toast, and any bread can be toasted to refresh it.
Final Thoughts
This soft homemade milk bread proves that great bread doesn’t have to be complicated. With six simple ingredients, a little kneading, and some patience during the rises, you can bake a tender, fluffy, golden loaf that’s wonderful for everything from breakfast toast to weeknight grilled cheese. It’s the kind of recipe you can return to again and again, and it’s a lovely way to build confidence if you’re new to baking bread.
Remember the key points: use warm (not hot) milk, keep the dough soft and slightly tacky, let it rise until puffy, and give the finished loaf time to cool before slicing. Follow those simple habits and you’ll be rewarded with a loaf that’s soft, comforting, and delicious.
If you make this recipe, leave a comment and a rating to let others know how it turned out. Happy baking!
Print
Soft Homemade Milk Bread
Ingredients
Here’s everything you need to make one loaf, which yields approximately 10 to 12 slices:
- 3 cups (360 g) all-purpose flour
- 1¼ cups (300 ml) warm milk
- 2¼ tsp (7 g) instant yeast
- 2 tbsp granulated sugar
- 1 tsp salt
- 2 tbsp unsalted butter, melted
You’ll also want a little extra melted butter for brushing the finished loaf, and a bit of flour for your work surface.
A Closer Look at the Ingredients
All-purpose flour. This is the structure of your loaf. All-purpose flour is widely available and gives a soft but sturdy crumb that’s ideal for sandwich bread. Measuring by weight (360 g) is the most accurate way to bake. If you use cups, spoon the flour into the measuring cup and level it off rather than scooping directly from the bag, which can pack in too much flour and make the bread dense.
Warm milk. Milk is the star of this recipe. It adds richness, softness, and flavor. Whole milk creates the richest and softest loaf, but other milk varieties can also work. The milk should be warm, not hot. Think comfortably warm to the touch, like a baby bottle. Very hot liquid can damage the yeast and prevent your dough from rising.
Instant yeast. Instant yeast is what makes the bread rise. It’s reliable and easy to use, and in this recipe it’s activated in the warm milk with sugar before the other ingredients are added. Check the date on your yeast package. Old yeast is one of the most common reasons bread fails to rise.
Granulated sugar. Sugar feeds the yeast and adds a subtle sweetness. It also helps the crust brown to a pretty golden color.
Salt. Salt balances the flavor and helps control the yeast’s activity. Don’t skip it, or the bread will taste flat.
Unsalted butter. Melted butter enriches the dough, softens the crumb, and adds flavor. Using unsalted butter lets you control the overall saltiness of the loaf.
Instructions
Prep time: about 20 minutes
First rise: 1 to 1½ hours
Second rise: 30 to 60 minutes
Bake time: 30 to 35 minutes
Total time: about 2½ to 3½ hours
Yield: 1 loaf, approximately 10 to 12 slices
Add the warm milk and sugar to a large mixing bowl. Sprinkle the instant yeast over the milk and stir gently to combine. Let the mixture stand for about 5 minutes. You may notice it looking slightly foamy or bubbly, which is a good sign that your yeast is active. Even if the foam is modest, the dough will usually rise well as long as your yeast is fresh and the milk wasn’t too hot.
Add the melted butter, flour, and salt to the bowl. Stir with a wooden spoon or spatula until a soft dough forms. At first it will look shaggy and rough. That’s normal. Once the dough becomes difficult to stir, transfer it to a lightly floured work surface and get ready to knead.
Knead the dough for about 8 to 10 minutes, or until it becomes smooth, elastic, and soft. To knead, push the dough away from you with the heel of your hand, fold it back over itself, give it a quarter turn, and repeat.
If the dough feels excessively sticky, add a small amount of flour, one tablespoon at a time. Avoid adding too much, because a slightly soft dough produces a more tender loaf. As you knead, the dough will gradually go from sticky and rough to smooth and supple. A good sign that you’ve kneaded enough is when the dough springs back slowly when you press it gently with a finger.
Place the dough in a lightly greased bowl. Cover with plastic wrap or a clean kitchen towel and set it somewhere warm and draft-free. Let the dough rise for about 1 to 1½ hours, or until it has approximately doubled in size.
If your kitchen is cool, the rise may take longer. A spot near (but not on) a warm appliance or inside an oven that’s turned off can help. Remember to judge by the dough’s size and appearance, not just the clock.
Gently press the dough down to release some of the larger air bubbles. Transfer it to a lightly floured surface and shape it into a smooth loaf that fits a 9×5-inch loaf pan. Place the shaped dough into a lightly greased pan, seam-side down.
Shaping tip: flatten the dough into a rectangle, roll it up snugly from the short side, and pinch the seam closed. This creates surface tension, which helps the loaf rise upward and gives you evenly shaped slices.
Cover the loaf loosely with a clean kitchen towel. Let it rise again for about 30 to 60 minutes, or until the dough becomes noticeably puffy and rises close to the top of the pan. This second rise is what gives the finished bread its light, airy texture, so give it the time it needs.
Preheat your oven to 350°F (175°C). Place the risen loaf in the oven and bake for about 30 to 35 minutes, or until the top is beautifully golden brown and the loaf is cooked through. If the top browns too quickly, loosely cover it with foil during the final portion of baking.
Remove the bread from the oven and brush the top with melted butter while it’s still warm. Let the loaf cool in the pan for about 10 minutes, then carefully transfer it to a wire rack. Allow it to cool for at least 30 to 45 minutes before slicing.
It’s tempting to cut into warm bread right away, but waiting helps the crumb set so your slices come out clean and soft instead of squished.