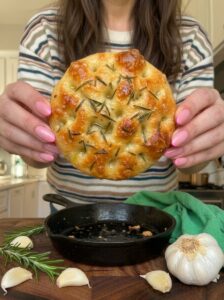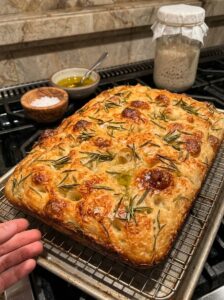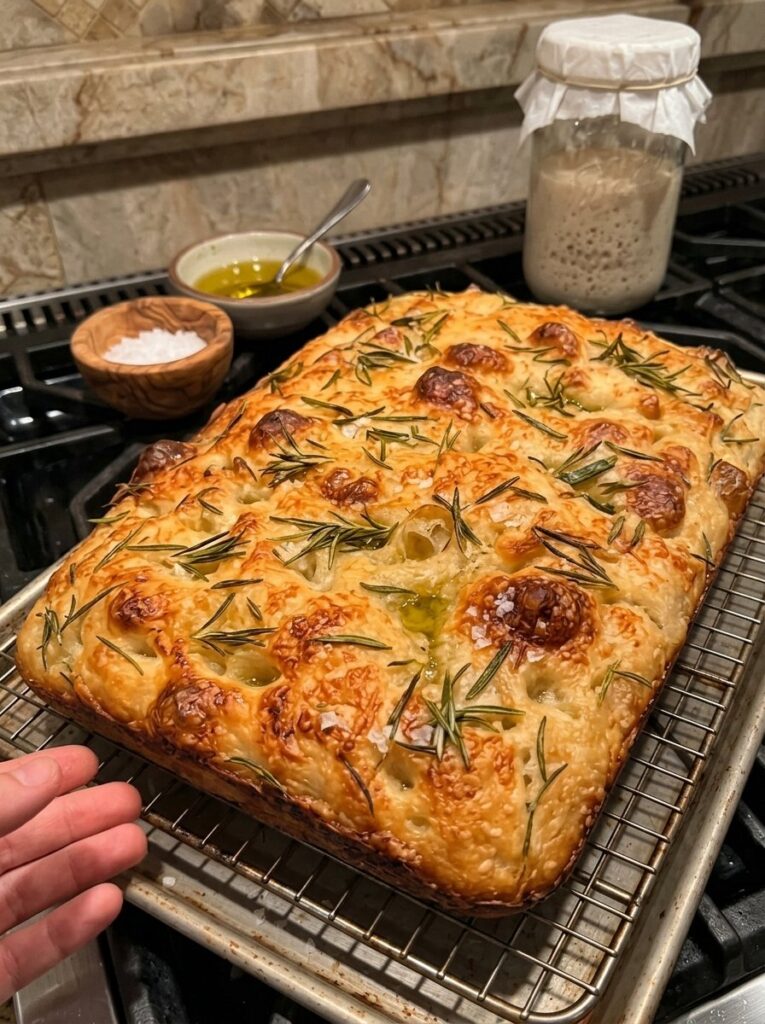
There are few things in the baking world as satisfying as pulling a pan of sourdough focaccia out of a hot oven. The edges are crisp and golden, the surface is dotted with deep dimples that hold pools of olive oil, and the fresh rosemary perfumes the whole kitchen. Inside, the crumb is soft, airy, and wonderfully chewy, with the gentle tang that only a sourdough starter can deliver.
If you have a jar of bubbly starter on your counter and you are looking for a bread that rewards patience without demanding advanced skills, this sourdough focaccia recipe is the one to bake. It uses a simple stretch-and-fold method instead of heavy kneading, comes together with just a handful of pantry ingredients, and produces a large 9×13-inch pan of bread that serves 12 to 16 people.
In this guide, you will find everything you need: the ingredient list, a clear step-by-step method, timing for each stage, troubleshooting advice, serving ideas, storage instructions, and answers to the most common questions about making focaccia with a sourdough starter.
What Is Sourdough Focaccia?
Focaccia is a flat, oven-baked Italian bread known for its olive oil-rich crust and its signature dimpled surface. Traditional focaccia is leavened with commercial yeast, but sourdough focaccia swaps the yeast for a natural fermentation made from flour, water, wild yeast, and beneficial bacteria.
The result is a bread with more depth of flavor, a slightly tangy finish, and a texture that stays moist for longer. The long, slow fermentation also gives the dough time to develop an open, bubbly structure, which is exactly what you want in focaccia.
Why Bake Focaccia With a Sourdough Starter?
- Better flavor. Wild fermentation creates complex, mildly tangy notes that yeast alone cannot match.
- Beautiful texture. The extended rise builds a light, open crumb with big irregular bubbles.
- Minimal effort. Stretch-and-fold sessions replace traditional kneading, so most of the time is hands-off.
- Flexible schedule. You can bake the same day or refrigerate the dough overnight for even deeper flavor.
- Great for beginners. Focaccia is forgiving. There is no scoring, no shaping, and no Dutch oven required.
Quick Recipe Overview
| Detail | Time or Amount |
|---|---|
| Prep time | About 30 minutes |
| Bulk fermentation | Approximately 3 to 6 hours |
| Final proof | Approximately 1 to 3 hours |
| Cooking time | 25 to 35 minutes |
| Total time | About 5 to 10 hours, depending on starter activity and room temperature |
| Yield | 1 large 9×13-inch focaccia, approximately 12 to 16 pieces |
| Oven temperature | 425°F (220°C) |
Most of that time is waiting, not working. Active hands-on time is only a few minutes at each stage, which makes this a perfect weekend bake or a recipe you can fit around a busy day.
Ingredients for Sourdough Focaccia
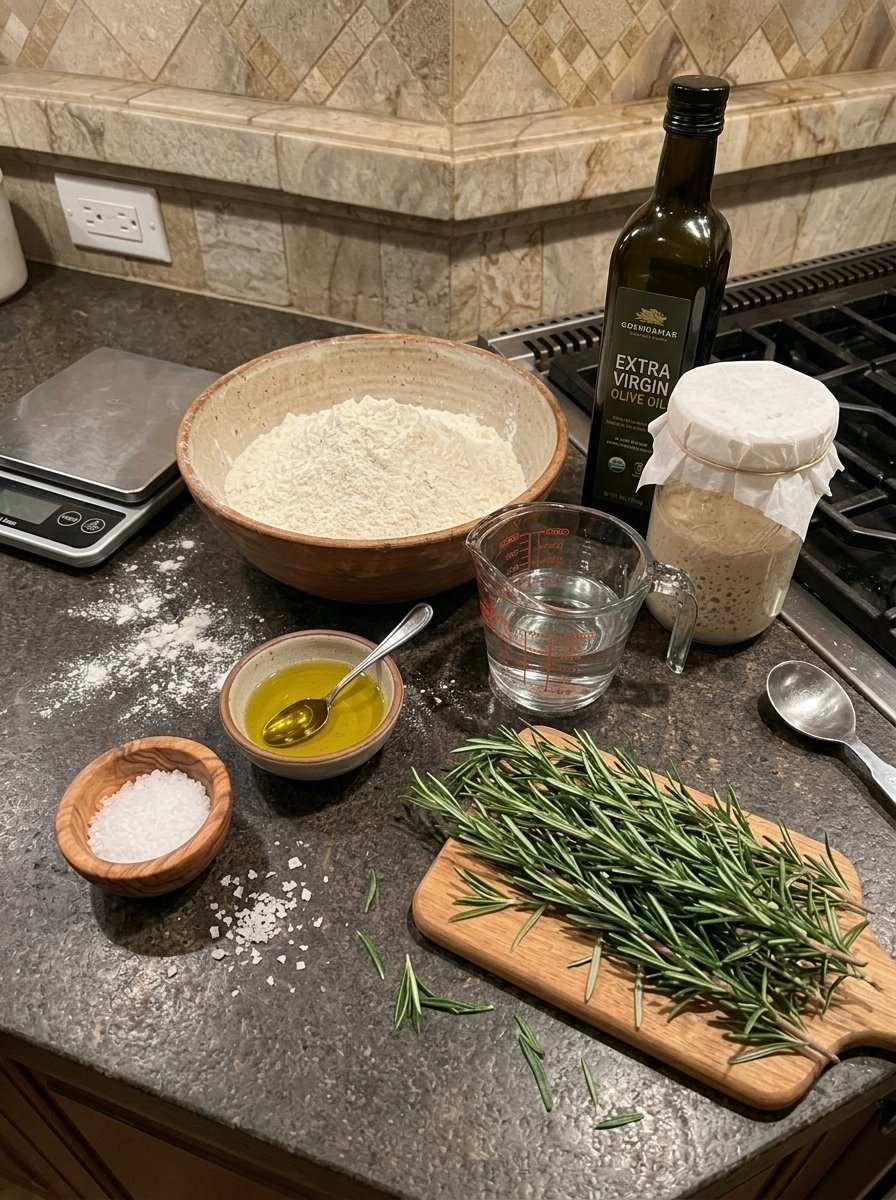
For the Dough
- 100 g active, bubbly sourdough starter (100% hydration)
- 400 g bread flour or all-purpose flour
- 320 g water, room temperature
- 10 g salt
- 25 g olive oil, plus more for the pan and topping
For the Topping
- 1 to 2 tbsp fresh rosemary, finely chopped
- 2 to 3 tbsp olive oil, for drizzling
- Flaky sea salt, for sprinkling
Ingredient Notes
Sourdough starter. Use a starter that is active and near its peak after feeding. It should be bubbly, smell pleasantly tangy, and look airy. A sluggish starter will slow your rise dramatically and can leave you with a dense loaf.
Flour. Bread flour has a higher protein content and gives you a chewier, more structured crumb. All-purpose flour works well too and produces a slightly softer bite. Either is a good choice.
Water. Room temperature water keeps fermentation predictable. This is a high-hydration dough, so it will feel soft, stretchy, and sticky. That is exactly how it should be.
Olive oil. Use a good-quality olive oil, since its flavor shines in this bread. You will use oil in the dough, in the pan, and on top, so do not be shy.
Rosemary and flaky salt. Fresh rosemary is best for its aroma, and flaky sea salt adds a satisfying crunch and a burst of seasoning on the finished bread.
Tips for the Best Sourdough Focaccia
Before you start, keep these pointers in mind. They make the difference between a good focaccia and a great one.
- Use an active starter. Feed your starter ahead of time and use it when it is bubbly and near its peak. This is the single biggest factor in how well your dough rises.
- Keep the dough hydrated. The dough will be sticky. Resist the urge to add lots of extra flour, because the moisture is what creates a light, open crumb.
- Watch the dough, not just the clock. Fermentation times depend on your starter’s strength and your kitchen temperature. Look for dough that has expanded noticeably and appears airy with visible bubbles.
- Use plenty of olive oil. A generous coating in the pan is what creates the crispy bottom and golden edges that make focaccia so irresistible.
- Handle the dough gently. Stretching and folding builds strength without heavy kneading, and gentle handling preserves the air bubbles you worked so hard to develop.
- Consider a cold ferment. Refrigerating the dough overnight deepens the sourdough flavor and gives you more flexibility with your baking schedule.
How to Make Sourdough Focaccia: Step-by-Step
Step 1: Mix the Starter and Water
In a large mixing bowl, combine the active sourdough starter and the room temperature water. Stir until the starter is mostly dissolved and the mixture looks cloudy.
Add the flour and mix with a sturdy spoon or your hands until no dry flour remains. At this stage the dough will look rough and sticky, and that is completely normal. Cover the bowl and let it rest for about 30 minutes. This rest period, often called an autolyse, allows the flour to hydrate fully and makes the dough easier to work with.
Step 2: Add the Salt and Olive Oil
Sprinkle the salt over the dough and add the 25 g of olive oil. Use your fingers to pinch, fold, and squeeze the dough until the salt and oil are evenly incorporated.
Continue mixing for a few minutes. The dough may feel slippery at first, but it will gradually become more cohesive as you work it. Cover the bowl and let it rest for about 15 to 20 minutes.
Step 3: Stretch and Fold
With slightly wet hands, lift one edge of the dough, stretch it upward gently, and fold it over the center. Rotate the bowl and repeat on all four sides. Cover the bowl and rest the dough for about 20 to 30 minutes.
Repeat this stretch-and-fold process 3 to 4 times over the next 1½ to 2 hours, allowing the dough to rest between each set. With each round, you should notice the dough becoming smoother, stronger, and more elastic. Wet hands are the secret here, since they prevent sticking and protect the delicate structure of the dough.
Step 4: Bulk Fermentation
Cover the bowl and leave the dough at room temperature until it has expanded noticeably, looks airy, and shows bubbles along the sides and across the surface. This usually takes approximately 3 to 6 hours from the initial mixing.
In a warm kitchen, fermentation will move faster. In a cooler kitchen, it will take longer. Do not wait for the dough to double in a rigid way if it already looks very bubbly and aerated. Trust what you see rather than the clock.
Step 5: Prepare the Baking Pan
Generously coat a 9×13-inch (23×33 cm) baking pan with olive oil, making sure the bottom and sides are well covered. Pour a little extra olive oil into the center of the pan.
This oil prevents sticking and fries the base of the dough in the oven, creating that deliciously crisp, golden bottom.
Step 6: Transfer the Dough
Using lightly oiled hands or a flexible dough scraper, gently transfer the fermented dough into the prepared pan. Turn the dough once if needed to coat it lightly with oil.
Stretch it gently toward the edges without forcing it. If it resists or springs back, let it rest for 15 to 20 minutes and then stretch again. Cover the pan loosely.
Step 7: Final Proof
Let the dough rise in the pan for approximately 1 to 3 hours, or until it becomes noticeably puffy, soft, and full of bubbles. The exact time depends on your starter and kitchen temperature.
Want deeper flavor? After the initial bulk fermentation, cover the pan and refrigerate the dough overnight. The next day, let it come up to room temperature and become puffy in the pan before moving on to baking.
Step 8: Preheat the Oven
When the dough is nearly ready, preheat your oven to 425°F (220°C). Make sure the oven is fully heated before the focaccia goes in. A properly hot oven gives you a crisp crust and a beautifully risen interior.
Step 9: Dimple and Add the Toppings
Drizzle the surface of the dough generously with olive oil. Coat your fingertips with oil and press them gently into the dough to create deep dimples across the entire surface. Press down toward the bottom of the pan without completely deflating the dough.
Scatter the chopped fresh rosemary evenly over the top and finish with flaky sea salt. Drizzle a little more olive oil into the dimples for extra flavor and a golden finish.
Step 10: Bake the Focaccia
Place the pan in the preheated oven and bake for about 25 to 35 minutes, or until the top is deeply golden and the edges are crisp. The bottom should be nicely browned while the inside stays soft, chewy, and airy.
If the surface needs more color, bake for a few additional minutes, but keep an eye on the rosemary so it does not burn.
Step 11: Cool and Serve
Remove the focaccia from the oven and let it rest in the pan for about 10 minutes. Carefully transfer it to a cutting board or wire rack. Allow it to cool slightly before slicing so the crumb can set while the crust stays crisp.
Cut into squares or long pieces and serve warm for the best flavor and texture.
Troubleshooting Your Sourdough Focaccia
Even simple recipes can throw a curveball. Here are the most common issues and how to fix them.
My focaccia is dense. The most likely cause is an underactive starter or under-fermented dough. Make sure your starter is bubbly and near its peak before mixing, and give the dough enough time to become airy and full of bubbles during both the bulk fermentation and the final proof.
The dough is too sticky to handle. High hydration is intentional here. Use wet or lightly oiled hands instead of adding more flour. The dough will become easier to manage with each stretch and fold.
The dough keeps springing back when I stretch it. The gluten is tense. Cover the pan and let the dough rest for 15 to 20 minutes, then try again. Gentle patience works better than force.
The bottom is not crispy. Use more olive oil in the pan, and make sure your oven is fully preheated. A metal pan also conducts heat better than glass, which helps the base brown.
The rosemary burned. If the top browns before the inside is done, check it earlier next time and consider tucking the rosemary into the dimples or pressing it gently into the dough so it is partially coated in oil.
The flavor is not tangy enough. Try the overnight cold ferment. Refrigerating the dough develops a deeper sourdough flavor and gives you more complexity in every bite.
Easy Variations to Try
Once you have mastered the classic rosemary version, the dough is a wonderful canvas for creativity. A few ideas worth trying:
- Garlic and herb. Add thinly sliced garlic and a mix of thyme and oregano before baking.
- Olive and sea salt. Press pitted olives into the dimples for a briny, savory bite.
- Cherry tomato. Halve small tomatoes and nestle them into the dough with a drizzle of oil.
- Cheese topped. Scatter grated Parmesan or a handful of shredded mozzarella over the top in the last few minutes of baking.
- Lemon and thyme. Add lemon zest and fresh thyme for a bright, fragrant twist.
Keep the toppings light enough that the dough can still rise and form its signature dimples.
What to Serve With Sourdough Focaccia
Focaccia is incredibly versatile. Here are some of the best ways to enjoy it:
- With a dipping bowl. Serve warm with extra-virgin olive oil and balsamic vinegar for dipping.
- Alongside soup or pasta. It pairs beautifully with tomato soup, vegetable soup, a hearty stew, or a bowl of pasta.
- As sandwich bread. Slice it horizontally and fill it with cheese, vegetables, or your favorite proteins for a sandwich with incredible texture.
- As an appetizer. Arrange it on a board alongside olives, cheeses, and roasted vegetables.
- On its own. Add a touch more olive oil and enjoy a warm piece straight from the pan.
How to Store and Reheat Focaccia
Room temperature. Store completely cooled focaccia in an airtight container at room temperature for up to 2 days.
Freezing. For longer storage, slice the focaccia into portions, wrap them tightly, and freeze for up to 2 to 3 months.
Reheating. Thaw at room temperature, then reheat in a 350°F (175°C) oven for about 5 to 10 minutes to restore some of the crispness.
A quick storage tip. For the best texture, avoid sealing the bread while it is still warm. Trapped steam softens the crust and takes away the crunch you worked so hard to achieve.
Make-Ahead Schedule
Because sourdough baking depends so much on timing, it helps to plan. Here is a simple way to fit this recipe into your day.
Same-day method:
- Morning: mix the dough and complete your stretch-and-folds.
- Midday to afternoon: let the dough finish its bulk fermentation.
- Afternoon: transfer to the pan, proof until puffy, dimple, and bake.
- Evening: serve warm with dinner.
Overnight method:
- Afternoon or evening: mix the dough and complete the stretch-and-folds.
- After bulk fermentation: cover and refrigerate overnight.
- Next day: let the dough warm up and become puffy in the pan.
- Dimple, top, and bake.
The overnight method is ideal if you want a stronger sourdough flavor or need to split the work across two days.
Frequently Asked Questions
Can I make sourdough focaccia without bread flour?
Yes. All-purpose flour works well in this recipe. Bread flour gives a slightly chewier texture, while all-purpose flour yields a softer crumb. Both make delicious focaccia.
How do I know if my sourdough starter is ready to use?
Your starter should be active, bubbly, pleasantly tangy, and near its peak after feeding. If it has risen and looks airy with plenty of bubbles, it is ready to use.
How long does sourdough focaccia take to make?
Total time is about 5 to 10 hours, depending on your starter’s activity and your room temperature. Most of that is hands-off fermentation and proofing time.
Can I let the dough ferment in the refrigerator?
Absolutely. A cold ferment after bulk fermentation deepens the flavor and makes your baking schedule more flexible. Let the dough warm up and puff in the pan the next day before baking.
Why is my focaccia dough so sticky?
Focaccia is a high-hydration dough, so stickiness is expected. Wet or oiled hands and a flexible dough scraper make it easy to handle. Adding extra flour can lead to a denser crumb.
What size pan should I use?
A 9×13-inch (23×33 cm) baking pan is ideal for this recipe and yields about 12 to 16 pieces.
Can I freeze sourdough focaccia?
Yes. Slice it into portions, wrap tightly, and freeze for up to 2 to 3 months. Reheat in a 350°F (175°C) oven for 5 to 10 minutes.
How do I get a crispy bottom?
Use plenty of olive oil in the pan, preheat your oven fully, and bake until the bottom is nicely browned. The oil essentially fries the base as it bakes.
Final Thoughts
Homemade sourdough focaccia is one of the most rewarding breads you can bake. It asks for patience more than skill, fits beautifully into a weekend, and turns a handful of simple ingredients into something that looks and tastes like it came from an Italian bakery. The crackling golden crust, the pillowy interior, the fragrant rosemary, and the crunch of flaky salt make every slice memorable.
Get your starter bubbling, set aside a relaxed afternoon, and give this recipe a try. Once you pull that first golden pan from the oven, it will almost certainly become a regular in your kitchen.
Print
Sourdough Focaccia
Ingredients
For the Dough
- 100 g active, bubbly sourdough starter (100% hydration)
- 400 g bread flour or all-purpose flour
- 320 g water, room temperature
- 10 g salt
- 25 g olive oil, plus more for the pan and topping
For the Topping
- 1 to 2 tbsp fresh rosemary, finely chopped
- 2 to 3 tbsp olive oil, for drizzling
- Flaky sea salt, for sprinkling
Ingredient Notes
Sourdough starter. Use a starter that is active and near its peak after feeding. It should be bubbly, smell pleasantly tangy, and look airy. A sluggish starter will slow your rise dramatically and can leave you with a dense loaf.
Flour. Bread flour has a higher protein content and gives you a chewier, more structured crumb. All-purpose flour works well too and produces a slightly softer bite. Either is a good choice.
Water. Room temperature water keeps fermentation predictable. This is a high-hydration dough, so it will feel soft, stretchy, and sticky. That is exactly how it should be.
Olive oil. Use a good-quality olive oil, since its flavor shines in this bread. You will use oil in the dough, in the pan, and on top, so do not be shy.
Rosemary and flaky salt. Fresh rosemary is best for its aroma, and flaky sea salt adds a satisfying crunch and a burst of seasoning on the finished bread.
Instructions
In a large mixing bowl, combine the active sourdough starter and the room temperature water. Stir until the starter is mostly dissolved and the mixture looks cloudy.
Add the flour and mix with a sturdy spoon or your hands until no dry flour remains. At this stage the dough will look rough and sticky, and that is completely normal. Cover the bowl and let it rest for about 30 minutes. This rest period, often called an autolyse, allows the flour to hydrate fully and makes the dough easier to work with.
Sprinkle the salt over the dough and add the 25 g of olive oil. Use your fingers to pinch, fold, and squeeze the dough until the salt and oil are evenly incorporated.
Continue mixing for a few minutes. The dough may feel slippery at first, but it will gradually become more cohesive as you work it. Cover the bowl and let it rest for about 15 to 20 minutes.
With slightly wet hands, lift one edge of the dough, stretch it upward gently, and fold it over the center. Rotate the bowl and repeat on all four sides. Cover the bowl and rest the dough for about 20 to 30 minutes.
Repeat this stretch-and-fold process 3 to 4 times over the next 1½ to 2 hours, allowing the dough to rest between each set. With each round, you should notice the dough becoming smoother, stronger, and more elastic. Wet hands are the secret here, since they prevent sticking and protect the delicate structure of the dough.
Cover the bowl and leave the dough at room temperature until it has expanded noticeably, looks airy, and shows bubbles along the sides and across the surface. This usually takes approximately 3 to 6 hours from the initial mixing.
In a warm kitchen, fermentation will move faster. In a cooler kitchen, it will take longer. Do not wait for the dough to double in a rigid way if it already looks very bubbly and aerated. Trust what you see rather than the clock.
Generously coat a 9×13-inch (23×33 cm) baking pan with olive oil, making sure the bottom and sides are well covered. Pour a little extra olive oil into the center of the pan.
This oil prevents sticking and fries the base of the dough in the oven, creating that deliciously crisp, golden bottom.
Using lightly oiled hands or a flexible dough scraper, gently transfer the fermented dough into the prepared pan. Turn the dough once if needed to coat it lightly with oil.
Stretch it gently toward the edges without forcing it. If it resists or springs back, let it rest for 15 to 20 minutes and then stretch again. Cover the pan loosely.
Let the dough rise in the pan for approximately 1 to 3 hours, or until it becomes noticeably puffy, soft, and full of bubbles. The exact time depends on your starter and kitchen temperature.
Want deeper flavor? After the initial bulk fermentation, cover the pan and refrigerate the dough overnight. The next day, let it come up to room temperature and become puffy in the pan before moving on to baking.
When the dough is nearly ready, preheat your oven to 425°F (220°C). Make sure the oven is fully heated before the focaccia goes in. A properly hot oven gives you a crisp crust and a beautifully risen interior.
Drizzle the surface of the dough generously with olive oil. Coat your fingertips with oil and press them gently into the dough to create deep dimples across the entire surface. Press down toward the bottom of the pan without completely deflating the dough.
Scatter the chopped fresh rosemary evenly over the top and finish with flaky sea salt. Drizzle a little more olive oil into the dimples for extra flavor and a golden finish.
Place the pan in the preheated oven and bake for about 25 to 35 minutes, or until the top is deeply golden and the edges are crisp. The bottom should be nicely browned while the inside stays soft, chewy, and airy.
If the surface needs more color, bake for a few additional minutes, but keep an eye on the rosemary so it does not burn.
Remove the focaccia from the oven and let it rest in the pan for about 10 minutes. Carefully transfer it to a cutting board or wire rack. Allow it to cool slightly before slicing so the crumb can set while the crust stays crisp.
Cut into squares or long pieces and serve warm for the best flavor and texture.