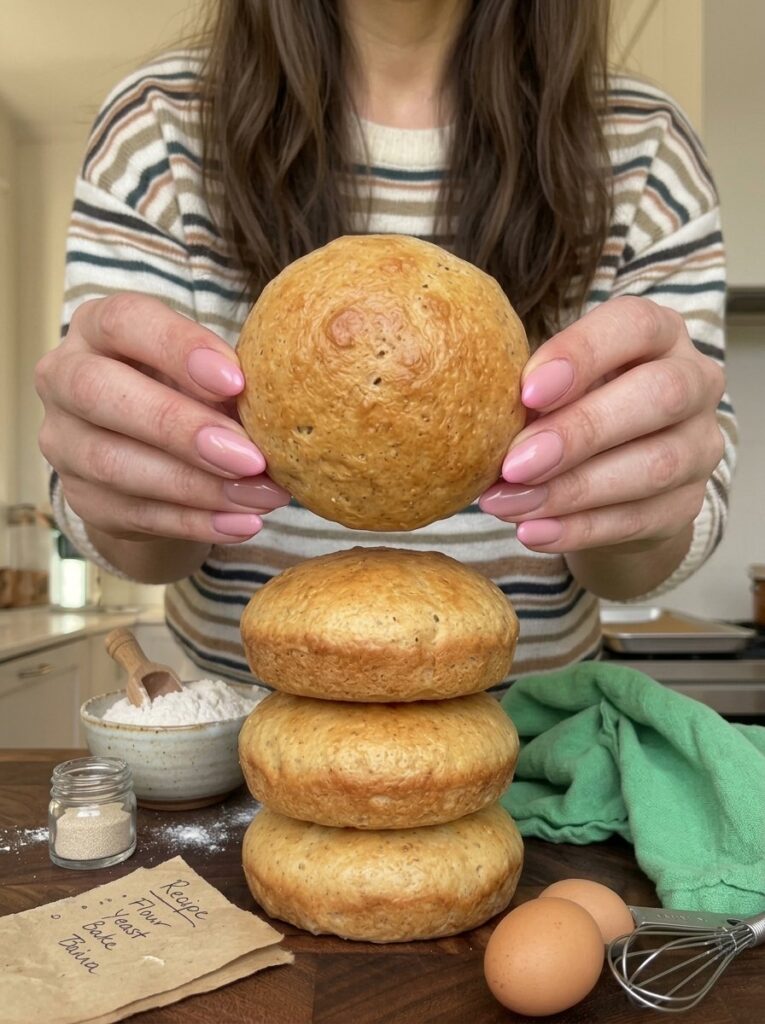
If you have ever wished you could pull warm, golden dinner rolls out of the oven without waiting on yeast to rise, without kneading dough, and without a long list of ingredients, this recipe is for you. These 3-ingredient white bean dinner rolls are made with canned white beans, eggs, and self-rising flour. That is the entire ingredient list.
The beans blend into a smooth, creamy puree that gives the rolls a soft, tender interior. The eggs bind everything together and add structure. The self-rising flour provides the leavening and salt, so the rolls puff up in the oven all by themselves. The result is a batch of small, rustic rolls with lightly golden tops that taste wonderful next to a bowl of soup, a roast dinner, or a plate of scrambled eggs.
In this guide you will find the full ingredient list, step-by-step instructions, troubleshooting tips, serving ideas, storage advice, and answers to the most common questions about making bean-based bread rolls at home.
Why You Will Love These White Bean Dinner Rolls
Before we get to the method, here is why this recipe deserves a spot in your regular rotation.
- Only three ingredients. Canned white beans, eggs, and self-rising flour. You probably have most of them in your kitchen already.
- No yeast and no proofing. There is no waiting for dough to rise, no worrying about water temperature, and no risk of dead yeast.
- No kneading. You blend, stir, scoop, and bake. If you can use a blender and a spatula, you can make these.
- Fast. About 10 minutes of prep, 20 to 25 minutes in the oven, and a short cooling time. Total time is roughly 35 to 45 minutes.
- Soft and tender texture. Because the beans are blended until completely smooth, the crumb is even and tender rather than gritty or lumpy.
- Versatile. Serve them with dinner, split them for breakfast sandwiches, or turn them into mini sandwiches for lunch.
- Budget friendly. A can of beans, a couple of eggs, and a cup of flour make a small batch of rolls for very little money.
Ingredients You Need
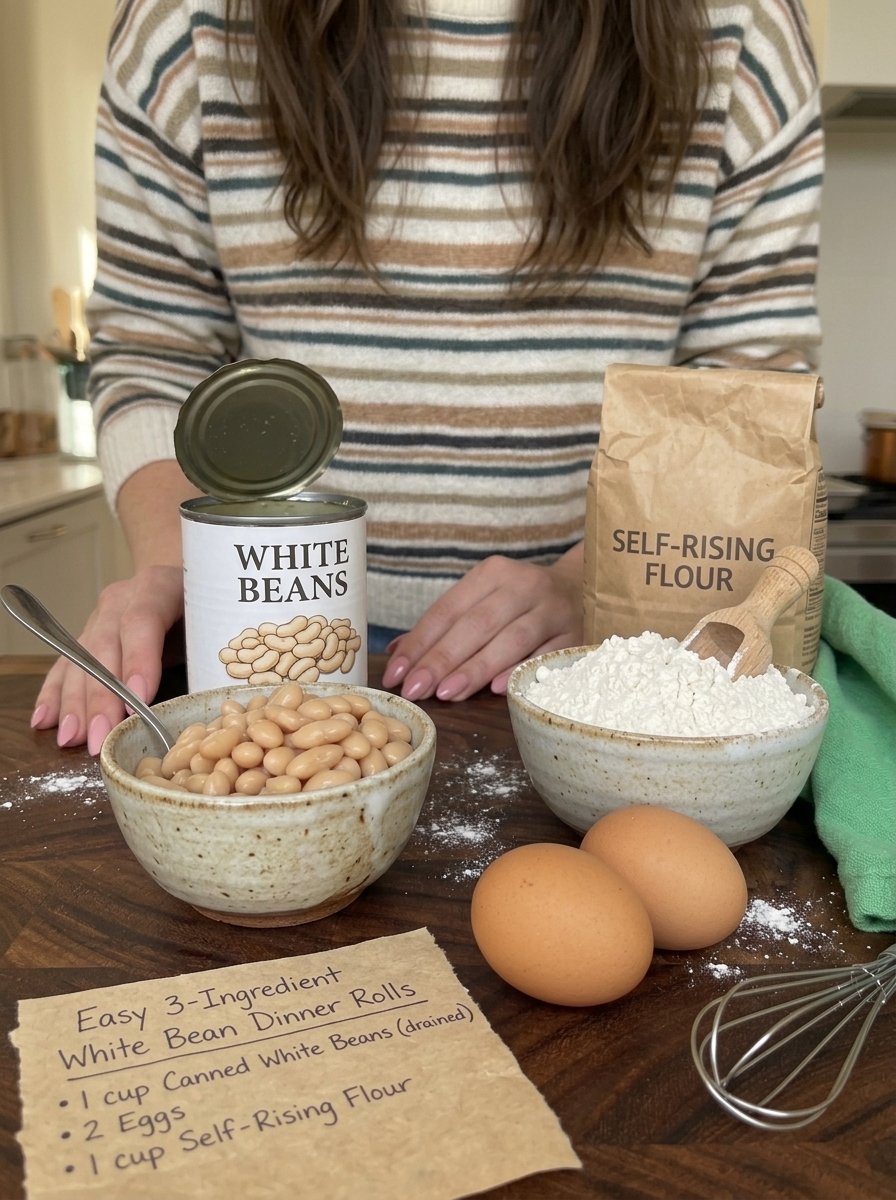
This recipe makes 6 to 8 small dinner rolls.
| Ingredient | Amount |
|---|---|
| Canned white beans (cannellini or great northern), drained and rinsed | 1 cup (240 g) |
| Large eggs | 2 |
| Self-rising flour | 1 cup (125–130 g) |
You will also want a little oil, butter, or non-stick spray to grease the muffin pan, unless you are using silicone muffin cups.
About the White Beans
Cannellini beans and great northern beans both work well. They have a mild flavor and a creamy texture that blends into a smooth puree. Because the beans are blended with eggs and flour, their taste becomes very subtle in the finished rolls. Most people notice a soft, slightly savory, bread-like flavor rather than anything that tastes distinctly like beans.
Drain the beans in a colander and rinse them under cool running water. Rinsing removes the canning liquid, which can taste salty or starchy. Then shake off as much water as you can. This step matters more than it might seem, and we will come back to it in the tips below.
About the Eggs
Use large eggs, ideally at room temperature. Room-temperature eggs blend more easily into the bean puree and help create a uniform batter. If you forget to take them out ahead of time, place the eggs in a bowl of warm tap water for a few minutes before using them.
About the Self-Rising Flour
Self-rising flour is all-purpose flour that already contains baking powder and salt. That is what allows these rolls to rise without yeast. Make sure your self-rising flour is fresh, because the leavening loses strength over time. If your flour has been sitting in the pantry for a long while, you may get flatter, denser rolls.
Equipment
- Blender or food processor
- Medium mixing bowl
- Spatula
- Muffin pan (or silicone muffin cups)
- Wire cooling rack
- Toothpick for checking doneness
A muffin pan is the best choice for this recipe. The batter is soft and scoopable rather than a shapeable dough, so the pan helps the rolls hold their round shape as they bake.
How to Make White Bean Dinner Rolls: Step by Step
Step 1: Preheat the Oven
Preheat your oven to 375°F (190°C). Lightly grease a muffin pan, or line it with silicone muffin cups.
Step 2: Prepare the White Beans
Drain and rinse the canned white beans thoroughly under cool running water. Shake off the excess water, then transfer the beans to a blender or food processor.
Blend until the beans form a smooth, thick puree. Stop and scrape down the sides as needed so that no large pieces remain. Smoothness is the secret to a good texture here. If you leave bean pieces in the puree, you will notice them in the finished rolls.
Step 3: Add the Eggs
Add the eggs to the blended beans and blend again until the mixture is creamy and completely combined. It should look smooth and slightly thick, with no visible pieces of egg or bean.
Step 4: Mix in the Self-Rising Flour
Transfer the bean and egg mixture to a medium mixing bowl. Add the self-rising flour and gently stir with a spatula until no dry patches remain.
Avoid vigorous mixing. Stir just until combined to keep the rolls tender. The batter should be thick, soft, and scoopable. If it seems unusually thin, let it stand for 2 to 3 minutes so the flour can absorb some of the moisture.
Step 5: Fill the Muffin Pan
Divide the batter evenly among 6 to 8 muffin cups, filling each about two-thirds to three-quarters full. Smooth the tops gently with the back of a spoon if you like a neater look. For a more rustic appearance, leave the tops slightly rounded.
Step 6: Bake Until Golden
Place the muffin pan in the preheated oven and bake for approximately 20 to 25 minutes. The rolls should rise, develop lightly golden tops, and feel set when gently touched.
Insert a toothpick into the center of one roll. It should come out clean or with a few moist crumbs, but no wet batter. If the centers still look underbaked, continue baking for another 3 to 5 minutes, checking frequently.
Step 7: Cool the Rolls
Remove the pan from the oven and let the rolls cool for about 5 to 10 minutes. Carefully loosen the edges with a small spatula and transfer the rolls to a wire rack. Their texture will become firmer as they rest, and they will be easier to remove from the pan once they have had a few minutes to set.
Step 8: Serve and Enjoy
Serve the rolls warm alongside your favorite meal. Break one open to reveal the tender interior, then enjoy it plain or with a little butter, olive oil, or your favorite spread. These rolls are especially delicious when served fresh on the day they are baked.
Tips for the Best White Bean Dinner Rolls
Small details make a big difference when a recipe has only three ingredients. Keep these tips in mind.
1. Drain the beans thoroughly. Excess liquid can make the batter too wet and prevent the rolls from setting properly. After rinsing, let the beans sit in the colander for a minute and give them a good shake.
2. Blend until completely smooth. A smooth bean puree creates a more even texture without noticeable bean pieces. Scrape down the sides of the blender and blend again if needed.
3. Use room-temperature eggs. They blend more easily with the bean puree and help create a uniform batter.
4. Do not overmix the flour. Stir just until combined. Overmixing can make the rolls tougher instead of tender.
5. Aim for the right consistency. The batter should be thick and scoopable, not watery. Different brands of flour and variations in how moist the beans are can affect the texture. If the batter seems thin, let it rest for a few minutes before scooping.
6. Check that your self-rising flour is fresh. It contains the leavening and salt needed to help the rolls rise without yeast. Old flour can lead to rolls that do not rise as well.
7. Let the rolls cool briefly before serving. They need a few minutes to firm up after baking, which also makes them easier to remove from the pan.
Troubleshooting Common Problems
My rolls came out dense or flat
The most likely culprit is old self-rising flour. The baking powder inside it weakens over time. Try a fresh bag next time. Overmixing the batter can also contribute to a denser texture, so stir gently and stop as soon as the dry patches disappear.
The centers are still wet
This usually means the beans were not drained well enough or the rolls need a little more time. Bake for another 3 to 5 minutes and check with a toothpick. Next time, drain the beans more thoroughly and let the batter stand for a couple of minutes before filling the pan.
The batter looks too thin
Bean moisture and flour brands vary. Let the batter rest for 2 to 3 minutes so the flour can absorb some of the liquid. If it is still very runny, you can stir in a small spoonful of extra self-rising flour, but add it sparingly so the rolls stay tender.
I can see bean pieces in the batter
Blend the bean puree for longer, and scrape down the sides of the blender. A smoother puree gives a more even crumb.
The rolls stuck to the pan
Grease the muffin pan well, or use silicone muffin cups. Also, let the rolls cool for 5 to 10 minutes before loosening the edges. Rolls that are removed too early can be fragile.
Serving Ideas
These rolls are mild and soft, which makes them easy to pair with almost anything.
- With soup: Serve alongside tomato soup, vegetable soup, or creamy mushroom soup. They are great for dunking.
- With dinner: Pair with roasted chicken, baked fish, or roasted vegetables as a simple bread side.
- As breakfast rolls: Split and serve with scrambled eggs or a little cheese.
- With dips: Enjoy with hummus, herbed yogurt dip, or olive oil with herbs.
- As mini sandwiches: Slice horizontally and fill with cheese, lettuce, tomato, or your favorite sandwich ingredients.
Flavor Variations to Try
The base recipe is intentionally simple, but it is easy to customize once you are comfortable with the batter. Because the original recipe is built on three ingredients, add extras in small amounts so you do not upset the balance of the batter.
- Herb rolls: Stir a small spoonful of chopped fresh or dried herbs into the batter just before filling the pan.
- Cheesy rolls: Fold in a little shredded cheese with the flour.
- Garlic butter finish: Brush the warm rolls with melted butter mixed with a little garlic.
- Seeded tops: Sprinkle sesame or other seeds over the tops before baking for extra crunch.
If you try a variation, make a note of how the batter feels. It should still be thick and scoopable, not watery.
How to Store White Bean Dinner Rolls
Allow the rolls to cool completely before storing them.
- Refrigerator: Place the rolls in an airtight container and refrigerate for up to 3 to 4 days.
- Freezer: Freeze in a sealed freezer-safe bag or container for up to 2 months. Separate the rolls with parchment paper if needed so they do not stick together.
- Reheating: Warm in a 300°F (150°C) oven for about 5 to 8 minutes, or microwave briefly until heated through.
Because these rolls contain beans and eggs, refrigerate leftovers promptly rather than leaving them at room temperature for extended periods. For the best texture, enjoy them warm on the day they are baked.
Recipe Summary
| Prep time | About 10 minutes |
| Cook time | 20–25 minutes |
| Cooling time | 5–10 minutes |
| Total time | About 35–45 minutes |
| Yield | 6–8 small dinner rolls |
| Oven temperature | 375°F (190°C) |
Why Beans Work in Baking
Using beans in baked goods might sound unusual, but it makes sense once you think about what beans are made of. Cooked white beans are soft, starchy, and mild in flavor. When they are blended, they become a smooth puree that adds moisture and body to a batter, a bit like how mashed banana or applesauce is used in some quick breads. The eggs add protein and structure, and the self-rising flour supplies the lift.
Because the beans do so much of the work, you need less flour than in a traditional bread roll. That is why this recipe uses only one cup of self-rising flour for the whole batch.
If you are curious about the nutrition of these rolls, check the labels on your canned beans and flour and use a nutrition calculator with your exact brands, since values vary from product to product.
Frequently Asked Questions
Can I make these rolls without a blender?
A blender or food processor gives the smoothest result, which is important for texture. If you only have a bowl, you can mash the beans very thoroughly, but you may end up with small bean pieces in the finished rolls. Whichever method you use, aim for the smoothest puree possible.
Do these rolls taste like beans?
The beans are very mild once blended and baked, so the rolls taste soft and savory rather than strongly like beans. Serving them with butter, olive oil, or a savory meal makes the flavor even more bread-like.
Can I use a different type of canned bean?
This recipe is written for white beans such as cannellini or great northern beans, which have a mild flavor and creamy texture. Other beans may change the flavor and color of the rolls, and we have not tested them here.
Can I use all-purpose flour instead of self-rising flour?
Self-rising flour contains the leavening and salt needed to help these rolls rise without yeast. If you only have all-purpose flour, you would need to add baking powder and salt yourself, but the recipe as written uses self-rising flour for the best and simplest result.
Do I have to use a muffin pan?
A muffin pan is recommended. The batter is soft, so the pan helps the rolls hold their shape as they bake. Silicone muffin cups work well too.
How do I know when the rolls are done?
The rolls should rise, develop lightly golden tops, and feel set when gently touched. A toothpick inserted into the center should come out clean or with a few moist crumbs, but no wet batter.
Can I freeze white bean dinner rolls?
Yes. Cool them completely, then freeze in a sealed freezer-safe bag or container for up to 2 months. Separate the rolls with parchment paper if needed. Reheat in a 300°F (150°C) oven for about 5 to 8 minutes.
How long do the rolls keep in the fridge?
Stored in an airtight container, they keep for up to 3 to 4 days in the refrigerator.
Why are my rolls too wet inside?
The most common reasons are beans that were not drained well or rolls that need a few more minutes in the oven. Drain the beans thoroughly next time, and if the centers look underbaked, bake another 3 to 5 minutes.
What can I serve with these rolls?
They pair well with soups, roasted chicken, baked fish, roasted vegetables, scrambled eggs, and dips such as hummus or herbed yogurt. You can also slice them for mini sandwiches.
Final Thoughts
These 3-ingredient white bean dinner rolls prove that good bread does not have to be complicated. With canned white beans, eggs, and self-rising flour, you can have a tray of soft, golden rolls on the table in under 45 minutes, with no yeast, no kneading, and almost no cleanup.
Blend the beans until smooth, mix the flour in gently, and give the rolls a few minutes to cool and set. Serve them warm with soup, dinner, or breakfast, and keep any leftovers in the fridge or freezer for later.
If you make this recipe, leave a comment below and tell us how you served your rolls. Do not forget to save or share the recipe so you can find it the next time you want fresh bread in a hurry.
Print
Easy 3-Ingredient White Bean Dinner Rolls
Ingredients
Ingredients You Need
This recipe makes 6 to 8 small dinner rolls.
-
Canned white beans (cannellini or great northern), drained and rinsed: 1 cup (240 g)
-
Large eggs: 2
-
Self-rising flour: 1 cup (125–130 g)
You will also need a little oil, butter, or non-stick spray to grease the muffin pan, unless you are using silicone muffin cups.
About the White Beans
Cannellini beans and great northern beans both work well. They have a mild flavor and a creamy texture that blends into a smooth puree. Because the beans are blended with eggs and flour, their taste becomes very subtle in the finished rolls. Most people notice a soft, slightly savory, bread-like flavor rather than anything that tastes distinctly like beans.
Drain the beans in a colander and rinse them under cool running water. Rinsing removes the canning liquid, which can taste salty or starchy. Then shake off as much water as you can. This step matters more than it might seem, and we will come back to it in the tips below.
About the Eggs
Use large eggs, ideally at room temperature. Room-temperature eggs blend more easily into the bean puree and help create a uniform batter. If you forget to take them out ahead of time, place the eggs in a bowl of warm tap water for a few minutes before using them.
About the Self-Rising Flour
Self-rising flour is all-purpose flour that already contains baking powder and salt. That is what allows these rolls to rise without yeast. Make sure your self-rising flour is fresh, because the leavening loses strength over time. If your flour has been sitting in the pantry for a long while, you may get flatter, denser rolls.
Instructions
Preheat your oven to 375°F (190°C). Lightly grease a muffin pan, or line it with silicone muffin cups.
Drain and rinse the canned white beans thoroughly under cool running water. Shake off the excess water, then transfer the beans to a blender or food processor.
Blend until the beans form a smooth, thick puree. Stop and scrape down the sides as needed so that no large pieces remain. Smoothness is the secret to a good texture here. If you leave bean pieces in the puree, you will notice them in the finished rolls.
Add the eggs to the blended beans and blend again until the mixture is creamy and completely combined. It should look smooth and slightly thick, with no visible pieces of egg or bean.
Transfer the bean and egg mixture to a medium mixing bowl. Add the self-rising flour and gently stir with a spatula until no dry patches remain.
Avoid vigorous mixing. Stir just until combined to keep the rolls tender. The batter should be thick, soft, and scoopable. If it seems unusually thin, let it stand for 2 to 3 minutes so the flour can absorb some of the moisture.
Divide the batter evenly among 6 to 8 muffin cups, filling each about two-thirds to three-quarters full. Smooth the tops gently with the back of a spoon if you like a neater look. For a more rustic appearance, leave the tops slightly rounded.
Place the muffin pan in the preheated oven and bake for approximately 20 to 25 minutes. The rolls should rise, develop lightly golden tops, and feel set when gently touched.
Insert a toothpick into the center of one roll. It should come out clean or with a few moist crumbs, but no wet batter. If the centers still look underbaked, continue baking for another 3 to 5 minutes, checking frequently.
Remove the pan from the oven and let the rolls cool for about 5 to 10 minutes. Carefully loosen the edges with a small spatula and transfer the rolls to a wire rack. Their texture will become firmer as they rest, and they will be easier to remove from the pan once they have had a few minutes to set.
Serve the rolls warm alongside your favorite meal. Break one open to reveal the tender interior, then enjoy it plain or with a little butter, olive oil, or your favorite spread. These rolls are especially delicious when served fresh on the day they are baked.