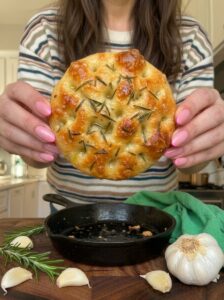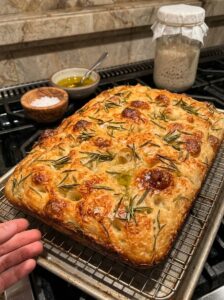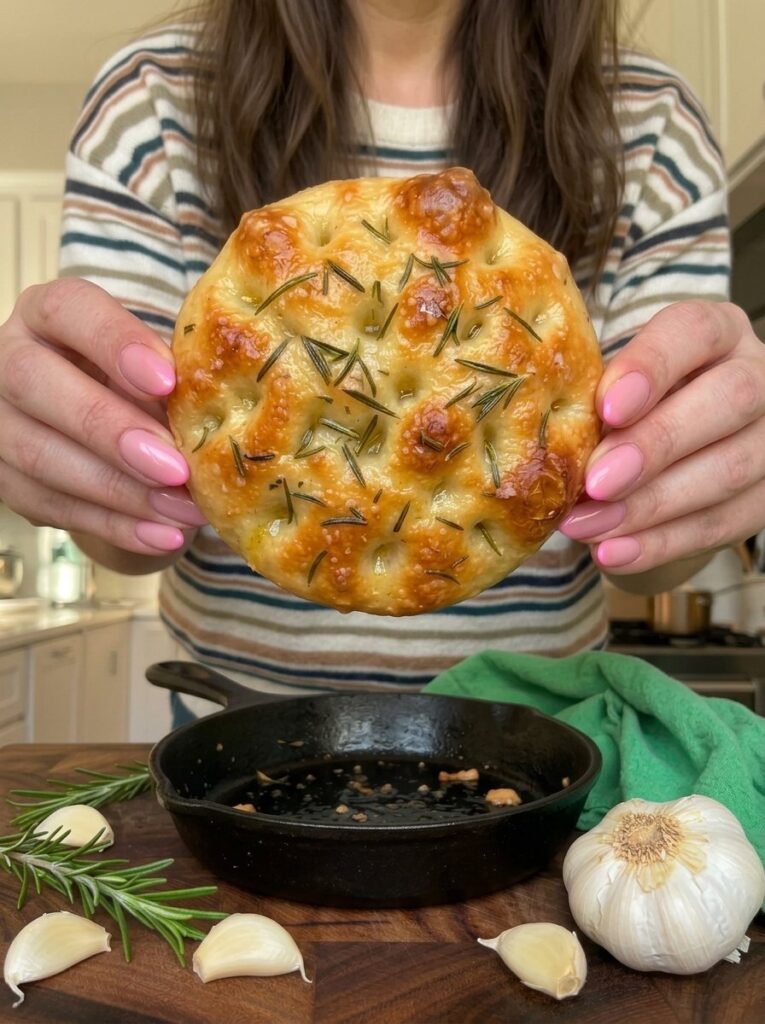
Few things in the kitchen are as satisfying as pulling a golden, dimpled focaccia out of the oven. The crackly olive-oil crust, the fluffy, chewy center, and the smell of roasted garlic and fresh rosemary make it feel like a small celebration. The problem is that most focaccia recipes make a full sheet pan of bread, which is too much for one or two people.
This single-serve garlic rosemary focaccia fixes that. It makes one personal-sized loaf baked in a small skillet, and it needs only a handful of pantry staples and about 10 minutes of hands-on time. There’s no stand mixer, no kneading, and no leftover bread going stale on the counter. Just a warm, aromatic focaccia with crisp edges and a soft, airy middle.
Whether you’re cooking for yourself, planning a cozy dinner for two, or want to try focaccia without committing to a giant batch, this recipe is for you.
Table of Contents
- Why You’ll Love This Single-Serve Focaccia
- Ingredients You’ll Need
- Equipment
- Step-by-Step Instructions
- Tips for the Best Garlic Rosemary Focaccia
- Common Mistakes to Avoid
- Variations and Flavor Ideas
- What to Serve with Focaccia
- How to Store, Reheat, and Freeze
- Frequently Asked Questions
- Final Thoughts
Why You’ll Love This Single-Serve Focaccia
It’s perfectly portioned. The recipe yields one personal-sized focaccia that serves one hungry person or two people sharing. You get fresh-baked bread without the pile of leftovers.
It’s truly no-knead. The dough comes together in one small bowl with a spoon. You stir until no dry patches remain, then let time do the work. Beginners and anyone nervous about yeast bread can handle it.
It uses simple ingredients. You need flour, water, instant yeast, salt, and olive oil for the dough. For the topping you need garlic, fresh rosemary, and flaky sea salt. Most of these are probably already in your kitchen.
It has a bakery-style texture. Baking in an oiled skillet fries the bottom and edges in olive oil, so you get a crisp, golden crust around a tender, pillowy interior. This is the texture people look for in a good focaccia.
It’s full of flavor. Garlic and rosemary are a classic pairing. Mixed into olive oil and drizzled over the dough before baking, they perfume every bite.
It’s flexible. It works as a snack, a side for soup, or the base of a small sandwich. A recipe this small and quick fits almost any meal.
Ingredients You’ll Need
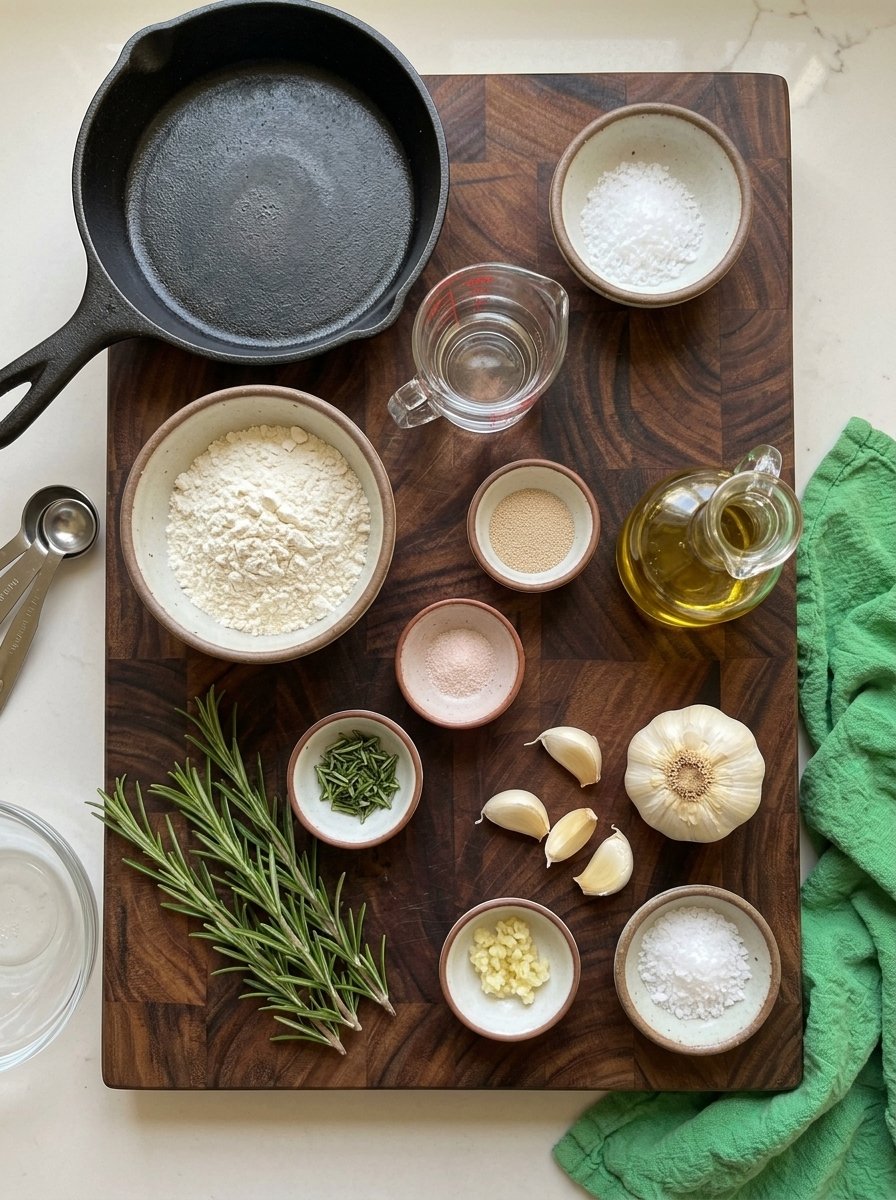
The ingredient list is short, but each item matters.
For the Focaccia Dough
- ½ cup + 2 tbsp (80 g) all-purpose flour
- ¼ cup (60 ml) lukewarm water
- ¼ tsp instant yeast
- ¼ tsp salt
- 1 tsp olive oil
For the Garlic Rosemary Topping
- 1–2 tbsp olive oil, for the skillet and the topping
- 1 small garlic clove, finely minced
- ½–1 tsp fresh rosemary, finely chopped
- Flaky sea salt, for sprinkling
Ingredient Notes
All-purpose flour works well here and keeps the recipe accessible. Bread flour gives a slightly chewier crumb, but it isn’t necessary. Weighing the flour (80 g) is the most reliable method because scooped cups can vary a lot, and with a dough this small a few extra spoonfuls change the texture noticeably.
Instant yeast can be stirred straight into the water. If you only have active dry yeast, the water should be a little warmer, and you may need to wait slightly longer for it to foam.
Lukewarm water should feel barely warm on your wrist, not hot. Water that is too hot can kill the yeast and leave you with dense bread.
Olive oil is a main flavor in focaccia, so use one you enjoy. Extra-virgin olive oil adds a fruity, peppery depth.
Fresh rosemary is strongly recommended. Dried rosemary can be woody and sharp, while fresh rosemary stays fragrant and tender as it bakes.
Flaky sea salt adds crunch and bursts of salinity on top. Maldon or a similar flaky salt works best, but coarse kosher salt is an acceptable substitute.
Equipment
You don’t need much:
- A small mixing bowl
- A spoon or silicone spatula
- A 6–8-inch (15–20 cm) oven-safe skillet. Cast iron is ideal because it holds heat and gives a deeply golden, crisp bottom crust, but any small oven-safe pan works.
- Plastic wrap or a clean kitchen towel
- A small bowl for the garlic-rosemary oil
- A cutting board and sharp knife
Step-by-Step Instructions
Time overview: Prep is about 10 minutes, the first rise takes 1–1½ hours, the second rise takes 20–30 minutes, and baking takes 15–20 minutes. The total is roughly 1 hour 45 minutes to 2 hours 30 minutes, and almost all of it is hands-off.
Step 1: Mix the Dough
In a small mixing bowl, combine the lukewarm water and instant yeast. Let the mixture sit for 2–3 minutes so the yeast can begin to activate.
Add the flour, salt, and 1 teaspoon of olive oil. Stir with a spoon or spatula until everything comes together into a soft, slightly sticky dough. Scrape down the sides of the bowl so no flour is left behind.
You don’t need to knead. Mix just until no dry patches remain. The dough should look shaggy and feel tacky, and that stickiness is what produces an airy center.
Step 2: Let the Dough Rise
Cover the bowl with plastic wrap or a clean kitchen towel. Leave it in a warm, draft-free spot for about 1 to 1½ hours, until the dough looks puffy, bubbly, and noticeably larger.
Rising time depends on your kitchen temperature. In a cool room it may take longer, and in a warm kitchen it may be ready sooner. Go by how the dough looks rather than the clock. Visible bubbles and clear expansion are the signs you want.
Step 3: Prepare the Skillet
Lightly coat your 6–8-inch oven-safe skillet with olive oil, covering the bottom and the sides. Drizzle a little extra oil into the bottom. This pool of oil gives the focaccia its signature crisp, almost fried bottom and golden edges.
Step 4: Shape the Dough
Lightly oil your hands, since the dough is sticky, and gently transfer the risen dough into the skillet. Carefully stretch it toward the edges without pressing out all the air. Those bubbles are what keep the bread fluffy.
If the dough springs back and won’t stretch, rest it for 5–10 minutes and try again. Relaxed gluten stretches much more easily.
Step 5: Allow the Second Rise
Cover the skillet loosely with a towel or plastic wrap and let the dough rise for another 20–30 minutes, until puffy and airy. While it rests, preheat your oven to 400°F (200°C).
Step 6: Prepare the Garlic Rosemary Oil
In a small bowl, combine the remaining olive oil, the finely minced garlic, and the chopped rosemary. Stir well so the garlic and herbs are distributed throughout the oil. Let it sit for a few minutes while the dough finishes rising so the flavors can infuse.
Step 7: Dimple and Season the Dough
Drizzle the garlic rosemary oil evenly over the dough, making sure some garlic and rosemary land across the top. With oiled fingertips, press deep dimples into the dough, taking care not to deflate it completely. These dimples are the hallmark of focaccia, and they collect pools of flavorful oil as it bakes.
Finish with a light, even sprinkle of flaky sea salt.
Step 8: Bake Until Golden
Place the skillet in the preheated oven and bake for 15–20 minutes, until the focaccia is puffed, golden brown, and crisp around the edges. The center should stay soft and chewy, and the bottom should have a lightly crisp crust.
Watch the garlic. Finely minced garlic can brown quickly, and burnt garlic turns bitter. If the top darkens too fast, loosely cover the focaccia with foil for the rest of the bake.
Step 9: Rest and Serve Warm
Carefully remove the skillet from the oven (the handle will be hot!) and let the focaccia rest for about 5 minutes. If you like, brush the top with a little extra olive oil while it’s still warm. Loosen the edges with a spatula, then move it to a cutting board or serve it straight from the skillet once it’s safe to handle.
Slice into wedges and enjoy it warm.
Tips for the Best Garlic Rosemary Focaccia
Keep the dough soft and slightly sticky. It’s tempting to add more flour when the dough clings to your spoon. Resist. A wetter dough creates a lighter, airier crumb, and oiled hands handle it easily.
Use fresh rosemary. Fresh rosemary has a fragrant, piney, earthy flavor that pairs well with garlic and olive oil. Chop it finely so you don’t get sharp, spiky pieces in the bread.
Distribute the garlic evenly. Mince the garlic as finely as you can so it spreads across the surface and flavors every bite rather than clumping in a few spots.
Use plenty of olive oil. A generous coating helps the bottom and edges turn golden and crisp. This is not the place to skimp.
Let the dough rise until puffy. Judge by expansion and bubbles, not by the timer. A properly proofed dough bakes up light and tender.
Watch the garlic while baking. For a milder, sweeter flavor, use roasted garlic, or mix the fresh garlic into the olive oil before spreading it over the dough. The oil shields the garlic from direct heat so it browns more gently.
Dimple with confidence. Press your fingertips deep enough to nearly reach the bottom of the dough, but don’t poke through. Deep dimples give you the classic look and the little oil pockets.
Common Mistakes to Avoid
Adding too much flour. This is the most common issue with small-batch focaccia. Extra flour leads to a dense, dry bread instead of a soft, bubbly one.
Using water that’s too hot. Hot water can kill yeast. Lukewarm, barely warm to the touch, is what you want.
Rushing the rise. If the dough hasn’t visibly puffed up, it isn’t ready. A cold kitchen simply needs more time. Try placing the bowl in the oven with just the light on, or near a warm (not hot) spot.
Deflating the dough when shaping. Be gentle. Stretch rather than press, and keep as many air bubbles as possible.
Using a skillet that’s too big. A 6–8-inch skillet gives the right thickness. A larger pan spreads the dough too thin and you lose the fluffy center.
Letting the garlic burn. Cover the focaccia with foil if the garlic darkens before the bread is done.
Skipping the oil in the pan. The oil in the skillet is what fries the bottom crust. Without it, you lose that crispness.
Variations and Flavor Ideas
Once you’ve mastered the base recipe, it’s easy to change things up:
- Roasted garlic focaccia: Swap the fresh garlic for soft roasted garlic cloves for a sweeter, mellower flavor.
- Cheesy garlic focaccia: Sprinkle a little grated Parmesan or mozzarella over the top during the last 5 minutes of baking.
- Olive and rosemary focaccia: Press a few halved olives into the dimples before baking.
- Cherry tomato focaccia: Add halved cherry tomatoes to the dimples for a juicy, slightly sweet contrast.
- Lemon and herb focaccia: Add a little lemon zest to the oil along with thyme or oregano.
- Spicy focaccia: Add a pinch of red pepper flakes to the garlic rosemary oil.
- Everything-seasoning focaccia: Sprinkle a bit of everything bagel seasoning on top with the flaky salt.
Keep any additions modest. Too many toppings can weigh down such a small dough.
What to Serve with Focaccia
This focaccia is versatile. Here are some of the best ways to enjoy it:
For dipping: Serve it warm with extra-virgin olive oil or balsamic vinegar. It’s simple and hard to beat.
With soup or stew: It’s excellent next to tomato soup, creamy vegetable soup, or a hearty stew. The crisp edges are great for soaking up broth.
With a main dish: Pair it with pasta, roasted vegetables, or a fresh green salad for a complete meal.
As a mini sandwich: Slice it horizontally and fill it with mozzarella and tomato, or whatever fillings you like. Because it’s already seasoned with garlic and rosemary, you don’t need much else.
On a snack board: Serve it with olives, cheese, and sliced tomatoes for a quick Mediterranean-inspired snack.
How to Store, Reheat, and Freeze
This focaccia is best fresh from the oven, when the edges are crisp and the center is soft. But if you have leftovers, here’s how to handle them.
Storing: Let the bread cool completely, then keep it in an airtight container at room temperature for up to 1–2 days.
Reheating: Warm it in a 350°F (175°C) oven for about 4–6 minutes, until heated through and lightly crisp again. The oven restores the texture far better than a microwave, which tends to make focaccia chewy and soft.
Freezing: For longer storage, wrap the fully cooled focaccia tightly or place it in a freezer-safe bag and freeze for up to 2 months. Thaw at room temperature, then reheat in the oven before serving.
Frequently Asked Questions
Can I make this focaccia without a cast iron skillet?
Yes. Any 6–8-inch oven-safe pan works, including a small cake pan or an oven-safe frying pan. Cast iron gives the crispiest, most golden bottom, but other pans still produce good results. Be sure to oil the pan generously.
Do I really not need to knead the dough?
Correct. The dough is wet and sticky, and the long rise develops the structure for you. Stir until no dry flour remains, and that’s all.
Can I use dried rosemary instead of fresh?
You can, but fresh is much better. If you use dried, use about half the amount, crush it between your fingers, and mix it into the oil so it softens.
Can I use active dry yeast instead of instant yeast?
Yes. Dissolve it in the lukewarm water and wait until it becomes foamy, usually 5–10 minutes, before adding the other ingredients. The rise may take slightly longer.
Why is my focaccia dense?
The most common causes are too much flour, dead yeast from water that was too hot, or not letting the dough rise enough. Keep the dough sticky, use lukewarm water, and wait for visible puffiness.
Why did my garlic burn?
Minced garlic is delicate and browns fast in a hot oven. Mix it thoroughly into the olive oil so it’s coated, use roasted garlic, or cover the focaccia loosely with foil if it browns too quickly.
Can I make the dough ahead of time?
You can slow the first rise in the refrigerator for several hours or overnight for more flavor. Let the dough come back toward room temperature before shaping, and expect the timing to vary.
Can I double the recipe?
Yes, though this recipe is designed as a personal-sized loaf. If you double it, use a larger skillet (about 10 inches) or bake two small ones, and keep an eye on the baking time.
Is this recipe vegan?
Yes. It contains no eggs, dairy, or animal products, so it’s naturally vegan.
How do I know when the focaccia is done?
Look for a puffed, deep golden top and crisp edges. The bottom should be lightly crisp when you lift it with a spatula, and the center should be soft and chewy.
Final Thoughts
Homemade bread doesn’t have to be a big project. This single-serve garlic rosemary focaccia delivers everything you love about a classic Italian focaccia: the crackling, oil-kissed crust, the soft and airy interior, and the aroma of garlic and fresh rosemary, all in a small, manageable portion.
With five dough ingredients, no kneading, and mostly passive time, it’s an easy recipe to fit into a weekend afternoon or a quiet evening at home. Mix the dough, let it rise while you get on with your day, and in under two and a half hours you’ll have a warm, golden loaf ready to tear into.
Make it once and you’ll probably make it again. It’s a simple way to turn a bowl of soup, a plate of pasta, or a slice of cheese into a meal that feels a little special.
If you try it, leave a comment and let us know how it turned out, and share your favorite topping variations.
Print
Single-Serve Garlic Rosemary Focaccia
Ingredients
The ingredient list is short, but each item matters.
For the Focaccia Dough
- ½ cup + 2 tbsp (80 g) all-purpose flour
- ¼ cup (60 ml) lukewarm water
- ¼ tsp instant yeast
- ¼ tsp salt
- 1 tsp olive oil
For the Garlic Rosemary Topping
- 1–2 tbsp olive oil, for the skillet and the topping
- 1 small garlic clove, finely minced
- ½–1 tsp fresh rosemary, finely chopped
- Flaky sea salt, for sprinkling
Ingredient Notes
All-purpose flour works well here and keeps the recipe accessible. Bread flour gives a slightly chewier crumb, but it isn’t necessary. Weighing the flour (80 g) is the most reliable method because scooped cups can vary a lot, and with a dough this small a few extra spoonfuls change the texture noticeably.
Instant yeast can be stirred straight into the water. If you only have active dry yeast, the water should be a little warmer, and you may need to wait slightly longer for it to foam.
Lukewarm water should feel barely warm on your wrist, not hot. Water that is too hot can kill the yeast and leave you with dense bread.
Olive oil is a main flavor in focaccia, so use one you enjoy. Extra-virgin olive oil adds a fruity, peppery depth.
Fresh rosemary is strongly recommended. Dried rosemary can be woody and sharp, while fresh rosemary stays fragrant and tender as it bakes.
Flaky sea salt adds crunch and bursts of salinity on top. Maldon or a similar flaky salt works best, but coarse kosher salt is an acceptable substitute.
Instructions
Time overview: Prep is about 10 minutes, the first rise takes 1–1½ hours, the second rise takes 20–30 minutes, and baking takes 15–20 minutes. The total is roughly 1 hour 45 minutes to 2 hours 30 minutes, and almost all of it is hands-off.
In a small mixing bowl, combine the lukewarm water and instant yeast. Let the mixture sit for 2–3 minutes so the yeast can begin to activate.
Add the flour, salt, and 1 teaspoon of olive oil. Stir with a spoon or spatula until everything comes together into a soft, slightly sticky dough. Scrape down the sides of the bowl so no flour is left behind.
You don’t need to knead. Mix just until no dry patches remain. The dough should look shaggy and feel tacky, and that stickiness is what produces an airy center.
Cover the bowl with plastic wrap or a clean kitchen towel. Leave it in a warm, draft-free spot for about 1 to 1½ hours, until the dough looks puffy, bubbly, and noticeably larger.
Rising time depends on your kitchen temperature. In a cool room it may take longer, and in a warm kitchen it may be ready sooner. Go by how the dough looks rather than the clock. Visible bubbles and clear expansion are the signs you want.
Lightly coat your 6–8-inch oven-safe skillet with olive oil, covering the bottom and the sides. Drizzle a little extra oil into the bottom. This pool of oil gives the focaccia its signature crisp, almost fried bottom and golden edges.
Lightly oil your hands, since the dough is sticky, and gently transfer the risen dough into the skillet. Carefully stretch it toward the edges without pressing out all the air. Those bubbles are what keep the bread fluffy.
If the dough springs back and won’t stretch, rest it for 5–10 minutes and try again. Relaxed gluten stretches much more easily.
Cover the skillet loosely with a towel or plastic wrap and let the dough rise for another 20–30 minutes, until puffy and airy. While it rests, preheat your oven to 400°F (200°C).
In a small bowl, combine the remaining olive oil, the finely minced garlic, and the chopped rosemary. Stir well so the garlic and herbs are distributed throughout the oil. Let it sit for a few minutes while the dough finishes rising so the flavors can infuse.
Drizzle the garlic rosemary oil evenly over the dough, making sure some garlic and rosemary land across the top. With oiled fingertips, press deep dimples into the dough, taking care not to deflate it completely. These dimples are the hallmark of focaccia, and they collect pools of flavorful oil as it bakes.
Finish with a light, even sprinkle of flaky sea salt.
Place the skillet in the preheated oven and bake for 15–20 minutes, until the focaccia is puffed, golden brown, and crisp around the edges. The center should stay soft and chewy, and the bottom should have a lightly crisp crust.
Watch the garlic. Finely minced garlic can brown quickly, and burnt garlic turns bitter. If the top darkens too fast, loosely cover the focaccia with foil for the rest of the bake.
Carefully remove the skillet from the oven (the handle will be hot!) and let the focaccia rest for about 5 minutes. If you like, brush the top with a little extra olive oil while it’s still warm. Loosen the edges with a spatula, then move it to a cutting board or serve it straight from the skillet once it’s safe to handle.
Slice into wedges and enjoy it warm.