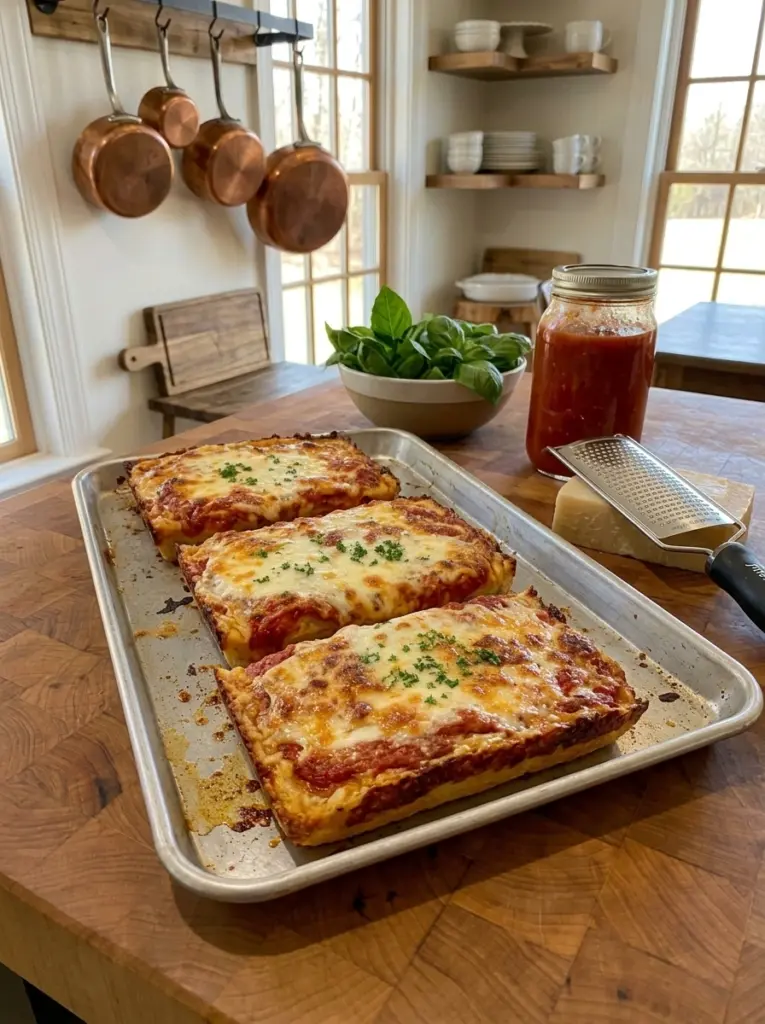
Baked Chicken Parmesan: Crispy, Cheesy Comfort Food Without the Deep Fryer
Chicken Parmesan is one of the most beloved dishes in Italian-American cooking, and for good reason — crispy breaded chicken, tangy marinara, and melted mozzarella is a combination that’s nearly impossible to resist. Baked Chicken Parmesan delivers all of that same satisfying flavor and texture, but skips the deep frying in favor of oven baking, resulting in a lighter dish that’s less messy to prepare while still achieving that signature golden, crispy coating.
What makes this baked version so successful is a few key techniques: pounding the chicken to an even thickness so it cooks quickly and evenly, using panko breadcrumbs mixed with Parmesan for a coating that crisps beautifully in the oven, and adding the sauce and cheese only toward the end of baking so the breading stays crisp rather than becoming soggy. The result is a dish that captures everything wonderful about traditional chicken Parmesan, in a format that’s more approachable for a regular weeknight dinner.
In this article, we’ll walk through a complete ingredient breakdown, detailed step-by-step instructions, expert tips for achieving the crispiest possible coating, creative variation ideas, storage and reheating instructions, and answers to the most frequently asked questions about this classic dish.
Why This Recipe Works So Well
Baked chicken Parmesan has become a go-to alternative to the traditional fried version, and this recipe brings together several techniques that make it especially successful:
Baking is far less messy than deep frying. Without a pot of hot oil to manage, this version is significantly easier to prepare and clean up after, making it much more practical for a weeknight dinner.
Panko breadcrumbs create a genuinely crispy coating. Unlike standard breadcrumbs, panko’s larger, flakier texture crisps up beautifully in the oven, delivering that satisfying crunch even without frying.
Adding sauce and cheese at the end keeps the breading crisp. Rather than baking the chicken submerged in sauce from the start, this method adds the marinara and mozzarella only in the final minutes, preserving the crispy texture underneath.
Pounding the chicken ensures even cooking. Even-thickness cutlets cook through quickly and uniformly, preventing the frustrating combination of overcooked edges and an underdone center.
It’s a genuine crowd-pleaser. Chicken Parmesan is beloved across a wide range of tastes, making it a reliable choice for family dinners, entertaining, or anytime you want a dish everyone will enjoy.
Ingredients You’ll Need
A note on ingredients: since none were specified in the original request, the list below represents a classic, well-balanced version of this dish. Feel free to adjust the cheese or seasoning to your taste.
- 4 boneless, skinless chicken breasts — the protein base of the dish; pounded thin for even cooking
- 1 cup panko breadcrumbs — creates a light, crispy coating that bakes up beautifully golden
- ½ cup grated Parmesan cheese (for the breading) — adds salty, nutty flavor directly into the coating
- 2 large eggs, beaten — helps the breadcrumb coating adhere to the chicken
- ½ cup all-purpose flour — the first layer in the breading process, helping everything stick properly
- 1 teaspoon Italian seasoning — adds herby, aromatic flavor to the breading
- 1 teaspoon garlic powder — reinforces the savory flavor of the coating
- ½ teaspoon salt — essential for properly seasoning the chicken and breading
- ½ teaspoon black pepper — adds a gentle background heat
- 2 tablespoons olive oil — drizzled over the breaded chicken to help it crisp and brown in the oven
- 1½ cups marinara sauce — the classic tangy tomato sauce layer
- 1½ cups shredded mozzarella cheese — melts into that signature gooey, stretchy topping
- ¼ cup grated Parmesan cheese (for topping) — adds a final layer of salty, nutty flavor
- Fresh basil or parsley, for garnish — adds a pop of color and freshness to the finished dish
Step-by-Step Instructions
Step 1: Preheat the Oven and Prepare the Baking Sheet
Preheat your oven to 425°F (220°C). Line a large baking sheet with parchment paper, or place a wire rack on top of a baking sheet for even crispier results.
Step 2: Pound the Chicken
Place each chicken breast between two sheets of plastic wrap and gently pound with a meat mallet or rolling pin until they’re an even thickness of about ½ inch. Alternatively, slice each breast horizontally into thinner cutlets. Pat the chicken dry with paper towels.
Step 3: Set Up the Breading Station
Arrange three shallow dishes. In the first, place the flour. In the second, place the beaten eggs. In the third, combine the panko breadcrumbs, ½ cup grated Parmesan, Italian seasoning, garlic powder, salt, and black pepper, mixing well.
Step 4: Bread the Chicken
Working one piece at a time, dredge each chicken cutlet in the flour, shaking off any excess. Next, dip it into the beaten eggs, allowing any excess to drip off. Finally, press it firmly into the panko and Parmesan mixture, coating both sides thoroughly and pressing to help the coating adhere.
Step 5: Arrange and Drizzle with Oil
Place the breaded chicken cutlets on the prepared baking sheet in a single layer, leaving space between each piece. Drizzle or lightly brush the tops with the olive oil, which helps the coating brown and crisp in the oven.
Step 6: Bake the Chicken
Transfer the baking sheet to the preheated oven and bake for 18 to 22 minutes, or until the coating is deeply golden and the chicken is cooked through to an internal temperature of 165°F (74°C). Cooking time may vary depending on the thickness of your cutlets.
Step 7: Add the Sauce and Cheese
Remove the baking sheet from the oven. Spoon about ⅓ cup of marinara sauce over the top of each chicken cutlet, spreading it out but leaving the edges of the breading exposed to help them stay crisp. Sprinkle the shredded mozzarella evenly over the sauce, followed by the ¼ cup of grated Parmesan.
Step 8: Finish Baking
Return the baking sheet to the oven and bake for another 5 to 8 minutes, or until the cheese is fully melted and bubbling. For an extra golden, slightly browned cheese topping, switch the oven to broil for the final 1 to 2 minutes, watching closely to prevent burning.
Step 9: Rest and Serve
Remove from the oven and let the chicken rest for 3 to 5 minutes before serving. Garnish with fresh basil or parsley and serve warm.
Expert Tips for the Best Results
Pound the chicken to an even thickness. This is one of the most important steps for ensuring the chicken cooks evenly and stays juicy, preventing the thin edges from drying out before the thicker center is cooked through.
Pat the chicken dry before breading. Excess surface moisture can prevent the flour from adhering properly, which in turn affects how well the rest of the breading sticks.
Press the breadcrumb coating on firmly. Taking a moment to press the panko mixture onto each side of the chicken helps it adhere well and creates a thicker, crispier crust.
Use a wire rack for even crispier results. Placing the breaded chicken on a wire rack set over a baking sheet allows hot air to circulate underneath, helping the bottom crisp up rather than steaming against the pan.
Add the sauce and cheese only at the end. This is key to preserving the crispy texture of the breading. Baking the chicken fully first, then adding the toppings for just a few final minutes, prevents a soggy coating.
Don’t drown the chicken in sauce. Leaving the edges of the breading exposed helps maintain that satisfying crunch around the perimeter of each piece.
Use freshly shredded mozzarella when possible. Pre-shredded cheese is coated with anti-caking agents that can prevent smooth melting. Freshly shredded cheese will give you a creamier, more evenly melted topping.
Delicious Variations to Try
This recipe is a wonderful base for experimentation. Here are some popular ways to switch things up:
Spicy Version: Add ½ teaspoon of red pepper flakes to the breadcrumb mixture, or use a spicy arrabbiata-style marinara sauce, for a bolder, spicier kick.
Chicken Parmesan Pasta Dinner: Serve the finished chicken over a bed of spaghetti tossed in additional marinara for a classic, complete Italian-American dinner.
Eggplant Parmesan Swap: Substitute sliced eggplant for the chicken, using the same breading and baking method, for a vegetarian version of this classic dish.
Extra Cheesy Version: Add a layer of shredded provolone alongside the mozzarella for an even richer, more complex cheese topping.
Herb-Crusted Version: Add a tablespoon of finely chopped fresh basil or oregano to the panko mixture for an even more aromatic, herb-forward coating.
Chicken Parmesan Sandwiches: Serve each finished cutlet in a toasted hoagie roll with extra sauce and cheese for a hearty, satisfying sandwich version.
What to Serve With Baked Chicken Parmesan
This dish pairs beautifully with a variety of classic Italian-American sides:
- Spaghetti or linguine tossed in marinara is the most traditional pairing for chicken Parmesan
- Garlic bread or a crusty Italian loaf for soaking up any extra sauce on the plate
- A crisp Caesar or arugula salad with a bright, acidic dressing helps balance the richness of the cheese
- Roasted or steamed vegetables, such as broccoli, asparagus, or green beans, add color and freshness
- A glass of medium-bodied red wine, like Chianti or Sangiovese, pairs beautifully with the tomato and cheese flavors
Storage and Reheating Instructions
Refrigerating: Store leftovers in an airtight container in the refrigerator for up to 4 days. Note that the breading will soften somewhat during storage.
Freezing: This dish freezes reasonably well for up to 2 months. For best results, freeze the breaded, baked chicken before adding the sauce and cheese, then add those toppings fresh when reheating. Thaw overnight in the refrigerator before reheating.
Reheating in the oven: Reheat at 375°F (190°C) for 12 to 15 minutes, or until heated through and the coating has re-crisped somewhat. This method helps preserve the texture far better than the microwave.
Reheating in an air fryer: For the crispiest reheated result, an air fryer at 350°F (175°C) for 5 to 7 minutes works exceptionally well.
Reheating in the microwave: Place a portion on a microwave-safe plate and heat in 30-second intervals, checking frequently, until warmed through, though note the breading will soften significantly using this method.
Frequently Asked Questions
Why use panko breadcrumbs instead of regular breadcrumbs? Panko breadcrumbs are larger and flakier than standard breadcrumbs, which allows them to crisp up significantly better in the oven, producing a texture closer to fried chicken Parmesan without the deep frying.
Why is my breading falling off during baking? This is usually caused by not patting the chicken dry before breading, or not pressing the breadcrumb coating on firmly enough. Following the flour, egg, and panko sequence carefully and pressing the coating on well helps it adhere properly.
Can I use chicken thighs instead of chicken breast? Yes, boneless, skinless chicken thighs can be used, though they may require slightly different cooking times depending on thickness. Always check for an internal temperature of 165°F (74°C).
Why did my breading get soggy? This is almost always caused by adding the sauce too early in the baking process. Baking the breaded chicken fully first, then adding the sauce and cheese only for the final few minutes, is the key to preserving that crispy texture.
Can I make this recipe gluten-free? Yes. Substitute gluten-free panko breadcrumbs and a gluten-free all-purpose flour blend for the regular versions in this recipe.
Can I prepare the chicken ahead of time? Yes. You can bread the chicken cutlets up to a day in advance and store them covered in the refrigerator, then bake them fresh when you’re ready to serve.
How many servings does this recipe make? This recipe typically yields 4 servings, one chicken cutlet per person, though pounding the breasts thin and slicing them can stretch this further depending on portion size.
Final Thoughts
Baked Chicken Parmesan delivers all the crispy, cheesy, saucy satisfaction of the classic Italian-American favorite, without the mess and heaviness of deep frying. By using panko breadcrumbs, pounding the chicken to an even thickness, and adding the sauce and cheese only at the end, this version achieves a genuinely crispy crust alongside tender, juicy chicken and a perfectly melted cheese topping.
Whether you’re cooking for a family dinner, entertaining guests, or simply craving that timeless chicken Parmesan combination, this recipe delivers every time. Save it, bookmark it, or print it out — because once this crispy, cheesy baked chicken Parmesan comes out of the oven, it’s guaranteed to become a regular favorite in your household.