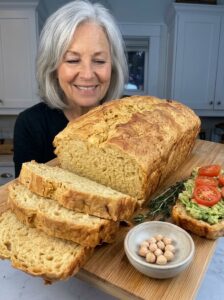
Soft and Fluffy Honey Milk Sandwich Loaf: Easy Homemade Bread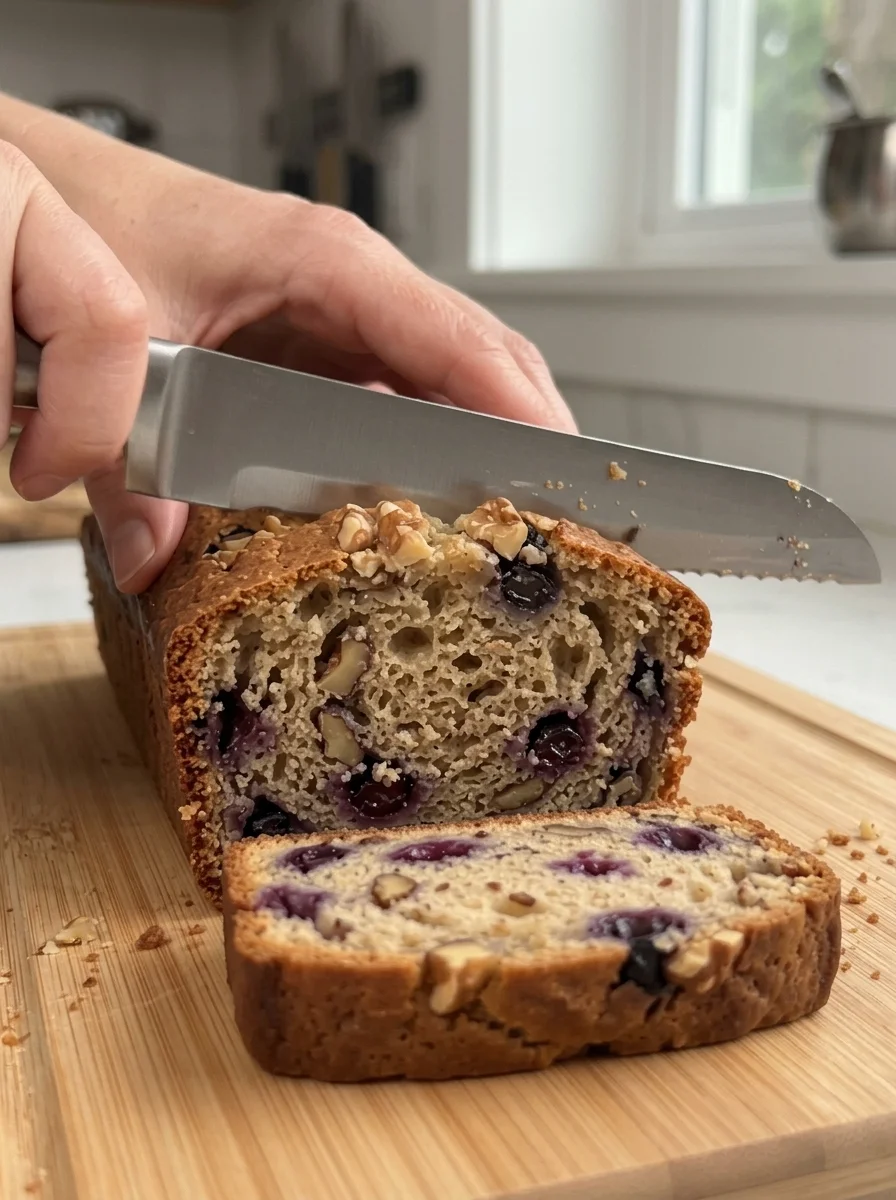
· @oussama
This soft, fluffy homemade honey milk bread has a tender crumb, a lightly sweet honey flavor and a beautiful golden crust. Made with milk, butter and honey, this sandwich loaf is perfect for breakfast toast, lunch sandwiches, French toast or a warm slice straight from the oven.
If you want a homemade sandwich loaf that tastes rich and slices cleanly, this honey milk bread recipe is a great choice. It uses a classic kneaded yeast dough with everyday ingredients: flour, warm milk, honey, butter, yeast and salt. An egg is optional for extra richness. The dough takes about 20 minutes to prepare, rises twice and bakes in a standard 9 x 5-inch loaf pan. In about 2½ to 3 hours, you have a bakery-style loaf for the week.
Why you will love this honey milk sandwich loaf
This loaf has everything you want in an everyday bread. Here is what makes it special.
- Soft, tender crumb. Milk and butter give a plush, pillowy texture that stays soft for days.
- Gentle honey sweetness. Honey adds a light, floral sweetness without making the bread taste like cake.
- Golden crust. A quick brush of milk and honey on top gives a glossy, golden finish.
- A true sandwich slice. The loaf slices cleanly and holds fillings well.
- Versatile. It works for toast, sandwiches, French toast and sweet or savory snacks.
- Simple ingredients. You likely already have everything in your kitchen.
- Easy to customize. Add cinnamon, oats or whole wheat, or turn the dough into dinner rolls.
What makes milk bread so soft?
Milk bread gets its softness from several things working together. Milk adds fat, sugar and proteins that make the crumb tender and help the crust brown. Butter coats the gluten strands and keeps the loaf moist. Honey holds on to moisture, which helps the bread stay soft for longer. Thorough kneading builds a smooth, elastic dough that traps gas during the rise, which gives the loaf its light, fluffy structure.
What does honey milk bread taste like?
Honey milk bread tastes mild, buttery and lightly sweet, with a soft, springy crumb and a thin golden crust. The honey flavor is subtle, and it pairs well with both sweet toppings like jam and savory fillings like eggs and cheese. It toasts beautifully and makes excellent French toast.
Is this bread no-knead?
No. Unlike no-knead loaves, this recipe uses a kneaded dough, which gives a finer, more even sandwich-style crumb. You can knead by hand for 8 to 10 minutes or use a stand mixer with a dough hook for 5 to 7 minutes.
Honey milk sandwich loaf recipe details
This recipe makes 1 loaf of about 10 to 12 slices. Most of the time is hands-off rising.
- Prep time: 20 minutes
- Rise time: 1½-2 hours
- Bake time: 30-35 minutes
- Total time: approximately 2½-3 hours
- Oven temperature: 350°F (175°C)
- Loaf pan size: 9 x 5 inches (23 x 13 cm)
- Yield: 1 loaf, about 10-12 slices
Ingredients for honey milk bread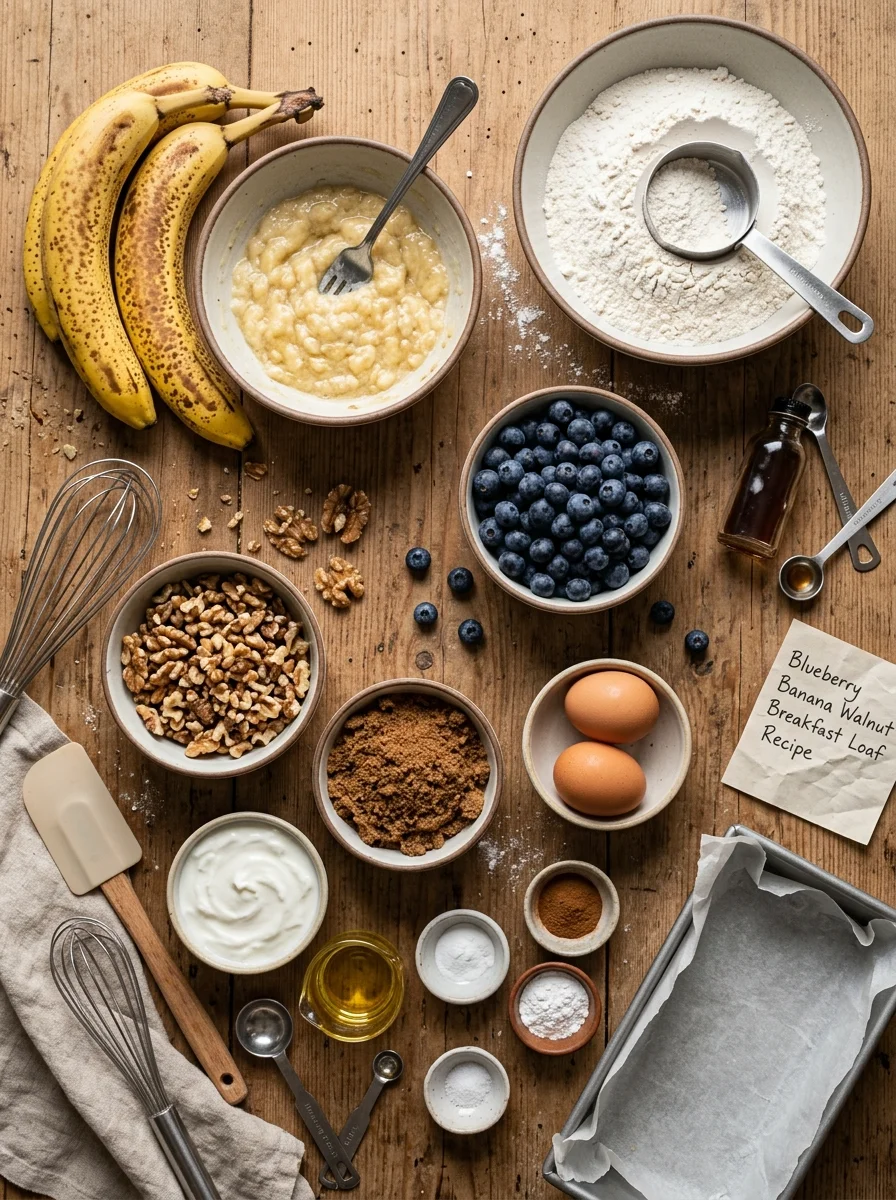
- 3 cups (375 g) all-purpose or bread flour
- ¾ cup (180 ml) warm milk
- 2¼ teaspoons (7 g) instant yeast
- 3 tablespoons (63 g) honey
- 3 tablespoons (42 g) unsalted butter, softened
- 1 teaspoon salt
- 1 large egg, room temperature (optional, for a richer loaf)
For the golden top (optional)
- 1 tablespoon milk
- 1 teaspoon honey
Equipment you will need
- Large mixing bowl and a wooden spoon
- Stand mixer with a dough hook, optional
- 9 x 5-inch (23 x 13 cm) loaf pan
- Pastry brush
- Plastic wrap or a clean kitchen towel
- Wire cooling rack
- Instant-read thermometer, optional
How to make honey milk sandwich bread, step by step
Follow these seven steps for a soft, golden loaf. Read through them once first, since the dough needs two rises.
Step 1: Prepare the dough
- In a large mixing bowl, combine the warm milk, honey and instant yeast. Stir to dissolve the honey.
- If you are using active dry yeast instead of instant, let the mixture stand for 5-10 minutes until foamy.
- Add the flour, salt, softened butter and optional egg.
- Mix with a wooden spoon until a rough dough forms.
- The dough should feel soft and slightly tacky. If it is very wet, add flour 1 tablespoon at a time. If it feels dry, add a little milk.
Step 2: Knead until smooth
- Transfer the dough to a lightly floured surface.
- Knead for about 8-10 minutes, until smooth, elastic and stretchy.
- Alternatively, use a stand mixer with a dough hook for 5-7 minutes on low to medium speed.
- Place the dough in a lightly greased bowl and cover.
Step 3: Let the dough rise
- Leave the dough in a warm place for about 60-90 minutes, or until doubled in size.
- The exact time depends on your room temperature. Allow the dough to rise until visibly puffy rather than relying only on the clock.
Step 4: Shape the loaf
- Gently press the dough to release excess gas.
- Turn it onto a lightly floured surface and shape it into a rectangle about the width of your loaf pan.
- Roll the rectangle into a snug log, pinching the seam closed.
- Place it seam-side down into a greased 9 x 5-inch (23 x 13 cm) loaf pan.
Step 5: Second rise
- Cover the pan loosely and let the dough rise for 30-60 minutes, until puffy and just above the rim of the pan.
- Avoid letting it overproof, as the loaf may collapse or bake unevenly.
Step 6: Bake the bread
- Preheat the oven to 350°F (175°C).
- If desired, gently brush the top with the milk-and-honey mixture.
- Bake for 30-35 minutes, until golden brown and cooked through.
- If the top browns too quickly, loosely cover it with foil for the final part of baking.
- For the most reliable check, the center should reach approximately 190-200°F (88-93°C).
Step 7: Cool before slicing
- Remove the loaf from the pan after about 5-10 minutes and transfer it to a wire rack.
- Let it cool completely before slicing. This helps the soft interior set properly and prevents a gummy crumb.
How to tell when honey milk bread is done
- Color: The top should be deep golden brown.
- Temperature: The center should read about 190-200°F (88-93°C) on an instant-read thermometer.
- Sound: Tap the bottom of the loaf after removing it from the pan. It should sound hollow.
- Sides: The loaf should feel firm and pull slightly away from the pan.
Tips for the softest honey milk bread
These habits help you get a tall, tender loaf every time.
- Use warm milk, not hot milk. Aim for about 100-110°F (38-43°C). Excessive heat can damage the yeast.
- Measure flour accurately. Too much flour can make the loaf dense and dry. Weigh it if you can.
- Knead thoroughly. A smooth, elastic dough helps create the fluffy sandwich-bread texture.
- Keep the dough covered. This prevents the surface from drying out during rising.
- Do not add too much extra flour. A slightly tacky dough generally produces a softer loaf.
- Cool completely before slicing. Cutting while hot can compress the crumb.
- Try the windowpane test. Stretch a small piece of dough thin. If it forms a translucent film without tearing, the gluten is ready.
- Use a thermometer. It is the most reliable way to know the center is cooked.
Ingredient notes and substitutions
- Flour. All-purpose flour gives a soft, tender loaf. Bread flour gives a slightly taller, chewier one. Both work well.
- Milk. Whole milk gives the richest crumb. Low-fat milk works too, with a slightly less rich result.
- Honey. Mild honey such as clover or wildflower gives the best flavor. Maple syrup or sugar can replace it, though the flavor will differ.
- Butter. Use unsalted butter, softened to room temperature. If you only have salted butter, reduce the salt slightly.
- Yeast. Instant yeast can be mixed in directly. Active dry yeast should foam in the warm milk first.
- Egg. Optional. It makes the loaf richer and the crumb a bit more golden.
- Salt. It adds flavor and controls the yeast. Do not skip it.
Honey milk bread troubleshooting
- Bread is dense: Too much flour was added, the dough was not kneaded enough or it did not rise fully. Keep the dough tacky and let it become puffy.
- Bread is dry: It was overbaked or too much flour was used. Check the internal temperature and bake only until done.
- Dough did not rise: The yeast may be old, or the milk was too hot or too cold. Check the expiry date and use milk at 100-110°F (38-43°C).
- Top browns too quickly: Cover loosely with foil for the last part of baking.
- Bread collapsed: The second rise went too long. Bake when the dough is puffy and just above the rim of the pan.
- Bread is gummy inside: It was cut too soon or underbaked. Cool completely and check the center temperature.
- Dough is too sticky: Knead a little longer before adding more flour, and use only a tablespoon at a time.
- Crust is too dark: Lower the oven temperature slightly or cover the loaf with foil.
Easy variations
Once you know the base loaf, it is simple to change it up.
- Cinnamon honey bread. Add 1 teaspoon ground cinnamon to the flour.
- Honey oat bread. Replace ¼ cup of flour with ¼ cup of finely ground oats, and sprinkle rolled oats on top before baking.
- Extra-buttery loaf. Increase the butter to 4 tablespoons for a richer texture.
- Whole-wheat honey bread. Replace up to half the flour with whole-wheat flour. Add 1-2 tablespoons extra milk if the dough feels dry.
- Honey dinner rolls. Divide the dough into 10-12 equal portions, shape into balls and bake in a greased baking dish for approximately 18-22 minutes at 350°F (175°C), until golden and cooked through.
- Seeded top. Brush the loaf with milk and sprinkle sesame or sunflower seeds before baking.
Serving ideas
Enjoy your honey milk bread with:
- Butter and honey
- Peanut butter or almond butter
- Homemade jam or fruit preserves
- Eggs and cheese for breakfast sandwiches
- Turkey, chicken or vegetable sandwich fillings
- Cinnamon sugar for sweet toast
- French toast with berries and yogurt
Storage instructions
- Room temperature: Store in an airtight bag or bread container for up to 3 days.
- Refrigerator: Not recommended for everyday storage because it can make bread stale faster.
- Freezer: Slice the cooled loaf and freeze in a sealed freezer bag for up to 3 months.
- Reheating: Toast slices directly from frozen or warm briefly in a toaster oven.
Make-ahead tips
- Refrigerate the dough overnight. After kneading, cover and refrigerate the dough for 8-12 hours. Let it warm up for 30-45 minutes before shaping.
- Slice before freezing. Cut the cooled loaf so you can take out only what you need.
- Bake the day before. Warm the loaf in the oven before serving.
- Mix the glaze early. Keep the milk-and-honey mixture ready for brushing before the bake.
Honey milk bread FAQ
Can I use active dry yeast instead of instant? Yes. Use the same amount and let it foam in the warm milk and honey for 5-10 minutes before adding the other ingredients.
Can I knead the dough in a stand mixer? Yes. Use a dough hook on low to medium speed for 5-7 minutes, until the dough is smooth and elastic.
Can I replace honey with sugar? Yes. Use the same amount of sugar, or slightly less. The loaf will taste a little different, since honey adds a distinct flavor and helps keep the bread moist.
Can I make it without an egg? Yes. The egg is optional. The loaf will be slightly less rich, but still soft.
Can I use water instead of milk? You can, but the loaf will be less soft and less rich. Milk gives the signature tender crumb.
Why is my dough sticky? The dough should be soft and slightly tacky. Knead it a little longer before adding more flour, and use only a tablespoon at a time.
How do I know when the loaf is fully baked? The top should be golden brown, and the center should reach about 190-200°F (88-93°C). A hollow sound from the bottom of the loaf is also a good sign.
Can I make the dough ahead of time? Yes. Refrigerate the dough overnight after kneading, then let it warm up before shaping and letting it rise in the pan.
Can I freeze honey milk bread? Yes. Slice the fully cooled loaf and freeze it in a sealed bag for up to 3 months.
Can I make it dairy-free? Yes. Use a plant-based milk and dairy-free butter. The flavor and texture may differ a little.
Can I double the recipe? Yes. Make two loaves using two pans, and bake them on the center rack. Check each loaf for doneness.
Final thoughts
This homemade honey milk sandwich loaf is soft, tender, lightly sweet and wonderfully buttery. The honey adds a gentle sweetness, while the milk helps create a delicate crumb that works well for both sweet and savory sandwiches.
Keep the dough soft, let it rise until properly puffy and wait until the loaf has cooled before slicing for the fluffiest results.
Print
Blueberry Banana Walnut Breakfast Loaf
Ingredients
- 3 cups (375 g) all-purpose or bread flour
- ¾ cup (180 ml) warm milk
- 2¼ teaspoons (7 g) instant yeast
- 3 tablespoons (63 g) honey
- 3 tablespoons (42 g) unsalted butter, softened
- 1 teaspoon salt
- 1 large egg, room temperature (optional, for a richer loaf)
For the golden top (optional)
- 1 tablespoon milk
- 1 teaspoon honey
Equipment you will need
- Large mixing bowl and a wooden spoon
- Stand mixer with a dough hook, optional
- 9 x 5-inch (23 x 13 cm) loaf pan
- Pastry brush
- Plastic wrap or a clean kitchen towel
- Wire cooling rack
- Instant-read thermometer, optional
Instructions
Follow these seven steps for a soft, golden loaf. Read through them once first, since the dough needs two rises.
Step 1: Prepare the dough
- In a large mixing bowl, combine the warm milk, honey and instant yeast. Stir to dissolve the honey.
- If you are using active dry yeast instead of instant, let the mixture stand for 5-10 minutes until foamy.
- Add the flour, salt, softened butter and optional egg.
- Mix with a wooden spoon until a rough dough forms.
- The dough should feel soft and slightly tacky. If it is very wet, add flour 1 tablespoon at a time. If it feels dry, add a little milk.
Step 2: Knead until smooth
- Transfer the dough to a lightly floured surface.
- Knead for about 8-10 minutes, until smooth, elastic and stretchy.
- Alternatively, use a stand mixer with a dough hook for 5-7 minutes on low to medium speed.
- Place the dough in a lightly greased bowl and cover.
Step 3: Let the dough rise
- Leave the dough in a warm place for about 60-90 minutes, or until doubled in size.
- The exact time depends on your room temperature. Allow the dough to rise until visibly puffy rather than relying only on the clock.
Step 4: Shape the loaf
- Gently press the dough to release excess gas.
- Turn it onto a lightly floured surface and shape it into a rectangle about the width of your loaf pan.
- Roll the rectangle into a snug log, pinching the seam closed.
- Place it seam-side down into a greased 9 x 5-inch (23 x 13 cm) loaf pan.
Step 5: Second rise
- Cover the pan loosely and let the dough rise for 30-60 minutes, until puffy and just above the rim of the pan.
- Avoid letting it overproof, as the loaf may collapse or bake unevenly.
Step 6: Bake the bread
- Preheat the oven to 350°F (175°C).
- If desired, gently brush the top with the milk-and-honey mixture.
- Bake for 30-35 minutes, until golden brown and cooked through.
- If the top browns too quickly, loosely cover it with foil for the final part of baking.
- For the most reliable check, the center should reach approximately 190-200°F (88-93°C).
Step 7: Cool before slicing
- Remove the loaf from the pan after about 5-10 minutes and transfer it to a wire rack.
- Let it cool completely before slicing. This helps the soft interior set properly and prevents a gummy crumb.