Cheesy Baked Meat Subs: The Ultimate Comfort Food Recipe for Busy Weeknights
Meta Description: Learn how to make cheesy baked meat subs at home — a hearty, melty, oven-baked sandwich packed with savory ground beef, marinara, and gooey cheese. Perfect for weeknight dinners or game day.
There’s something undeniably comforting about a cheesy baked meat sub — crusty bread, a rich and savory meat filling, and a blanket of melted, bubbling cheese, all warmed together in the oven until every bite is irresistible. This dish sits at the perfect intersection of a hearty sandwich and a baked casserole, making it a go-to option for weeknight dinners, casual gatherings, game-day spreads, or anytime you’re craving serious comfort food.
Unlike a basic meatball sub or a simple cheesesteak, cheesy baked meat subs are built specifically to be baked, allowing the cheese to melt deeply into the meat filling and the bread to turn perfectly crisp on the outside while staying soft and pillowy on the inside. In this guide, we’ll cover everything you need to make the best version of this recipe at home: ingredient choices, step-by-step instructions, customization ideas, make-ahead tips, and answers to common questions.
Why You’ll Love This Recipe
Cheesy baked meat subs check every box for an easy, crowd-pleasing meal:
- Quick and beginner-friendly. With basic pantry staples and about 40 minutes total, this recipe comes together fast, even on the busiest weeknights.
- Customizable. Swap the meat, cheese, or seasonings to match your family’s preferences or whatever you have on hand.
- Perfect for feeding a crowd. This recipe scales easily, making it ideal for parties, potlucks, or game-day gatherings.
- Kid-approved. The combination of melty cheese and savory meat sauce is a guaranteed hit with picky eaters.
- Minimal cleanup. Everything bakes together on a single sheet pan, meaning fewer dishes at the end of the night.
Whether you’re feeding a hungry family or looking for the ultimate tailgate recipe, cheesy baked meat subs deliver big flavor with minimal effort.
Ingredients You’ll Need
For the Meat Filling
- 1 ½ pounds ground beef (or a mix of ground beef and Italian sausage for extra flavor)
- 1 small yellow onion, finely diced
- 3-4 cloves garlic, minced
- 1 tablespoon olive oil
- 1 (14-15 oz) can crushed tomatoes or marinara sauce
- 2 tablespoons tomato paste (for a richer, deeper flavor)
- 1 teaspoon dried oregano
- 1 teaspoon dried basil
- ½ teaspoon red pepper flakes (optional, for a bit of heat)
- 1 teaspoon Worcestershire sauce (adds savory depth)
- Salt and freshly ground black pepper, to taste
- 1 tablespoon fresh parsley, chopped (for garnish)
For Assembly
- 4-6 sub rolls or hoagie buns (sturdy enough to hold the filling without getting soggy)
- 3 tablespoons unsalted butter, softened
- 1-2 cloves garlic, minced (for garlic butter spread)
- 2 cups shredded mozzarella cheese
- 1 cup shredded provolone cheese (or use all mozzarella if preferred)
- ¼ cup grated Parmesan cheese
- Extra fresh parsley or basil, for garnish
Optional Add-Ins
- Sliced bell peppers and onions, sautéed
- Sliced mushrooms, sautéed
- Banana peppers or pepperoncini, for tang
- A drizzle of ranch or garlic aioli before serving
Step-by-Step Instructions
Step 1: Preheat the Oven
Preheat your oven to 375°F (190°C). Line a large baking sheet with parchment paper or lightly grease it to prevent sticking.
Step 2: Cook the Meat Filling
In a large skillet over medium heat, warm the olive oil. Add the diced onion and cook for 3-4 minutes, until softened and translucent. Add the minced garlic and cook for another 30 seconds, until fragrant.
Add the ground beef to the skillet, breaking it apart with a wooden spoon. Cook until browned and no longer pink, about 6-8 minutes. Drain excess grease if necessary.
Stir in the crushed tomatoes, tomato paste, oregano, basil, red pepper flakes (if using), and Worcestershire sauce. Season with salt and pepper to taste. Reduce the heat to low and let the mixture simmer for 8-10 minutes, stirring occasionally, until it thickens into a rich, saucy filling. This simmering step is key — it allows the flavors to meld and prevents the finished subs from becoming watery.
Remove from heat and stir in the chopped parsley.
Step 3: Prepare the Rolls
While the meat filling simmers, prepare your sub rolls. Slice each roll open lengthwise, being careful not to cut all the way through so the sub stays intact like a book.
In a small bowl, mix the softened butter with the minced garlic. Spread this garlic butter evenly across the inside of each roll. This step adds flavor and also creates a barrier that helps prevent the bread from becoming soggy once the filling is added.
Step 4: Assemble the Subs
Arrange the prepared rolls on the lined baking sheet, opened and facing up. Spoon a generous amount of the meat filling into each roll, spreading it evenly from end to end.
Top each sub generously with shredded mozzarella and provolone cheese, making sure the cheese covers the meat filling completely — this helps lock in moisture during baking and creates that irresistible cheese-pull effect. Finish with a sprinkle of grated Parmesan over the top.
Step 5: Bake to Melty Perfection
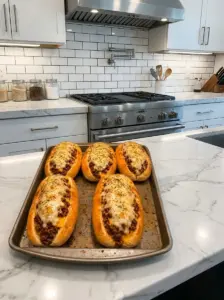
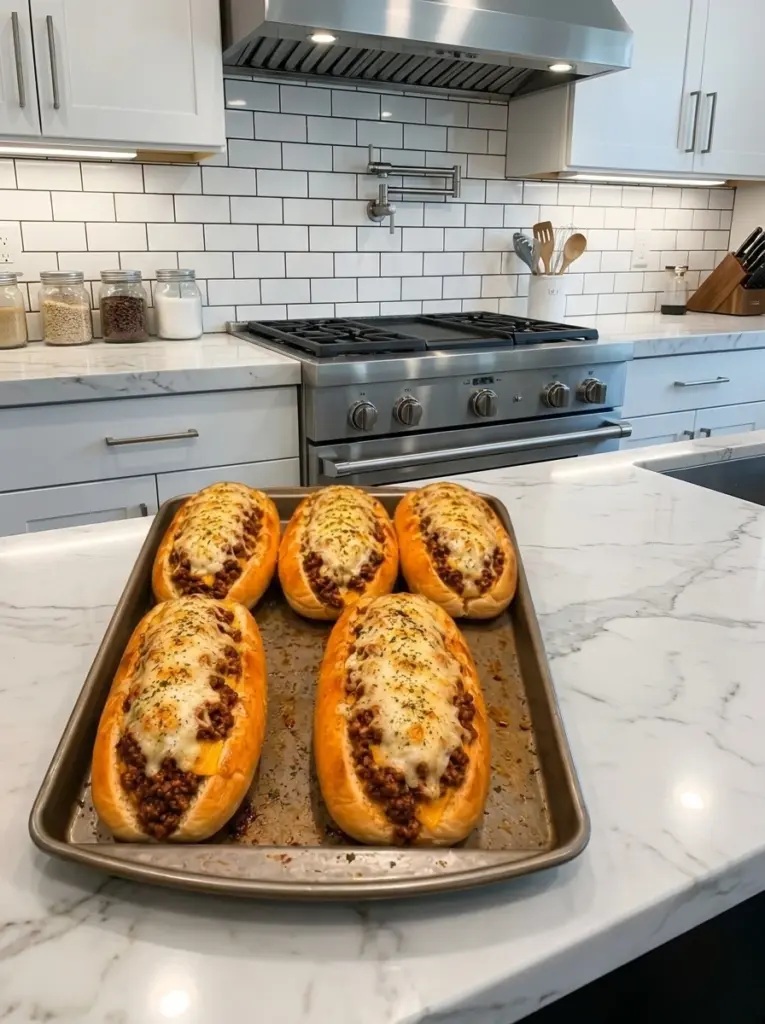
Place the baking sheet in the preheated oven and bake for 10-12 minutes, or until the cheese is fully melted, bubbly, and just beginning to turn golden in spots. If you prefer an extra-crisp, browned cheese topping, switch the oven to broil for the final 1-2 minutes, watching closely to prevent burning.
The bread edges should be lightly toasted and golden by the time the subs come out of the oven.
Step 6: Garnish and Serve
Remove the subs from the oven and let them cool for 2-3 minutes before serving — the cheese and filling will be extremely hot. Garnish with additional fresh parsley or basil for a pop of color and freshness.
Slice each sub in half, if desired, and serve immediately while warm and gooey.
Tips for the Best Cheesy Baked Meat Subs
- Choose sturdy bread. Soft sandwich bread will fall apart under the weight of the filling. Look for hoagie rolls, French bread, or Italian sub rolls with a firm crust.
- Don’t skip the garlic butter. This small step makes a noticeable difference in flavor and texture, helping to prevent soggy bread.
- Simmer the meat sauce until thickened. A watery filling is the number one cause of soggy subs. Take the extra few minutes to let it reduce properly.
- Use a cheese blend. Combining mozzarella (for that classic melt and stretch) with provolone (for tangy, sharp flavor) creates the best texture and taste.
- Toast the bread lightly before adding filling if you want an extra layer of crunch and moisture protection — simply bake the empty, buttered rolls for 3-4 minutes before adding the meat filling and cheese.
- Watch closely under the broiler. Cheese can go from perfectly golden to burnt in under a minute, so stay near the oven during this step.
Recipe Variations to Try
One of the best things about cheesy baked meat subs is how easily they adapt to different flavors and dietary needs:
- Italian-Style: Add sliced pepperoni and a sprinkle of Italian seasoning to the meat filling, and use a marinara-heavy sauce base.
- Philly-Inspired: Swap the ground beef for thinly sliced steak, and add sautéed onions and green peppers along with provolone cheese for a cheesesteak-inspired twist.
- Spicy Buffalo Meat Subs: Mix in buffalo sauce with the ground beef instead of marinara, and top with a blend of mozzarella and blue cheese crumbles.
- BBQ Meat Subs: Replace the marinara with your favorite barbecue sauce and use a smoked cheddar and mozzarella blend.
- Turkey or Chicken Version: Substitute ground turkey or ground chicken for a lighter take on the classic recipe.
- Vegetarian Option: Use a plant-based ground meat substitute or a mixture of sautéed mushrooms and lentils in place of the beef.
What to Serve with Cheesy Baked Meat Subs
Round out your meal with a few simple sides:
- Crispy oven-baked fries or sweet potato fries
- A simple side salad with Italian vinaigrette
- Garlic knots or breadsticks
- Kettle-cooked potato chips for a quick, no-cook option
- A cup of marinara or au jus for dipping
Make-Ahead and Storage Tips
Make-Ahead: The meat filling can be prepared up to 2 days in advance and stored in an airtight container in the refrigerator. When ready to serve, simply reheat the filling on the stovetop, then assemble and bake the subs fresh for the best texture.
Storing Leftovers: Fully assembled and baked subs can be stored in an airtight container in the refrigerator for up to 3 days. Note that the bread will soften slightly upon reheating.
Reheating: For the best results, reheat leftover subs in a 350°F oven for 8-10 minutes, or until warmed through and the cheese is melty again. Avoid microwaving if possible, as this can make the bread chewy and unevenly heated.
Freezing: The meat filling alone freezes well for up to 3 months. Thaw overnight in the refrigerator before reheating and assembling into fresh rolls.
Frequently Asked Questions
Can I use a different type of meat? Absolutely. Ground turkey, ground chicken, Italian sausage, or even shredded rotisserie chicken all work well in place of ground beef.
What’s the best cheese for baked subs? A combination of mozzarella and provolone offers the best balance of melt, stretch, and flavor. Cheddar, Monterey Jack, or a store-bought Italian cheese blend also work nicely.
How do I keep the bread from getting soggy? Spreading a layer of garlic butter on the inside of the rolls before adding the filling creates a barrier against moisture. Lightly toasting the rolls before assembly can add an extra layer of protection.
Can I make these subs ahead of time for a party? Yes — prepare the meat filling in advance, then assemble and bake the subs shortly before serving for the best texture and freshest taste.
Can I make this recipe in an air fryer? Yes, for smaller batches. Assemble the subs and place them in the air fryer basket at 350°F for 5-7 minutes, or until the cheese is melted and bubbly.
Final Thoughts
Cheesy baked meat subs are the kind of recipe that earns a permanent spot in your dinner rotation. With a rich, savory meat filling, gooey melted cheese, and perfectly toasted bread, this dish delivers restaurant-quality comfort food with minimal effort and easy-to-find ingredients. Whether you’re cooking for a weeknight family dinner, hosting friends for game day, or simply craving something warm and cheesy, this recipe is guaranteed to satisfy.
Try it once, and don’t be surprised if it quickly becomes a most-requested favorite in your household.