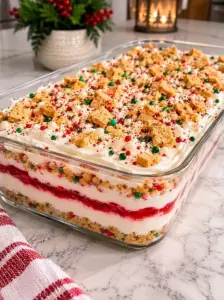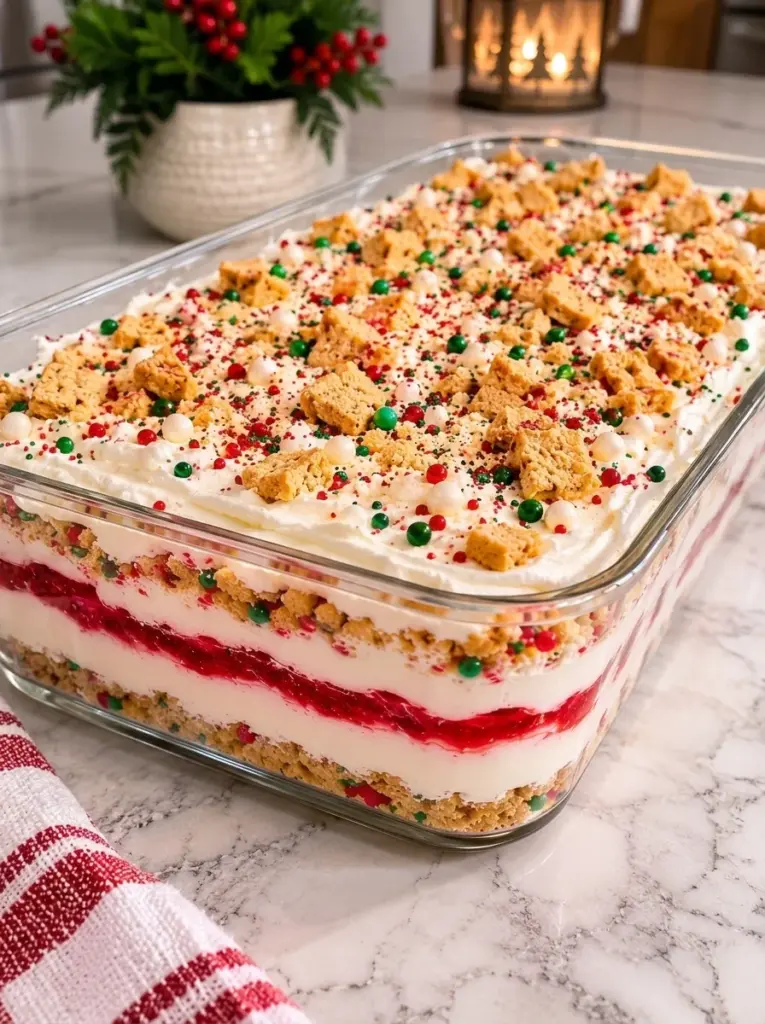
Christmas Cookie Lasagna is a chilled, layered dessert with a vanilla sandwich-cookie crust, fluffy cream cheese filling, thick vanilla pudding, and a cloud of whipped topping. Crushed sugar cookies and red-and-green sprinkles finish the top, giving a simple no-bake dessert a festive appearance.
The name refers to the stacked layers rather than pasta. Each spoonful combines buttery cookie crumbs with two creamy fillings, and the refrigerator does most of the work once the dish is assembled. It is a practical option when oven space is occupied by dinner or holiday baking.
Prepare the dessert ahead, keep it chilled, and add the delicate decorations shortly before serving. The layers need several hours to settle, so this is a dessert to plan the day before rather than assemble just as guests arrive.
This article expands the supplied recipe with ingredient and assembly guidance. It has not been independently kitchen-tested. Cookie size, pudding brand, whipped topping, and chilling temperature affect the final firmness and slice quality.
What to Expect
The cookie base should be cohesive enough to support a portion while remaining easy to cut. Above it, the cream cheese layer is tangy and lightly fluffy, the pudding layer is smooth and vanilla-forward, and the whipped topping is soft and airy.
The dessert is creamy rather than firm like a baked cheesecake. Proper chilling helps it hold a square, but a softer spoon-served portion is still possible depending on the products used. There is no gelatin or baked structure guaranteeing a rigid slice.
The cream cheese layer is relatively thin in a 9-by-13-inch dish. Spread it patiently rather than expecting a deep cheesecake filling. The pudding layer contributes much of the volume.
Decorations change as they sit. Crushed cookies soften against whipped topping, sprinkles can bleed, and hard candies may become sticky. Adding those elements near serving protects their appearance and texture.
Ingredients
Cookie Crust
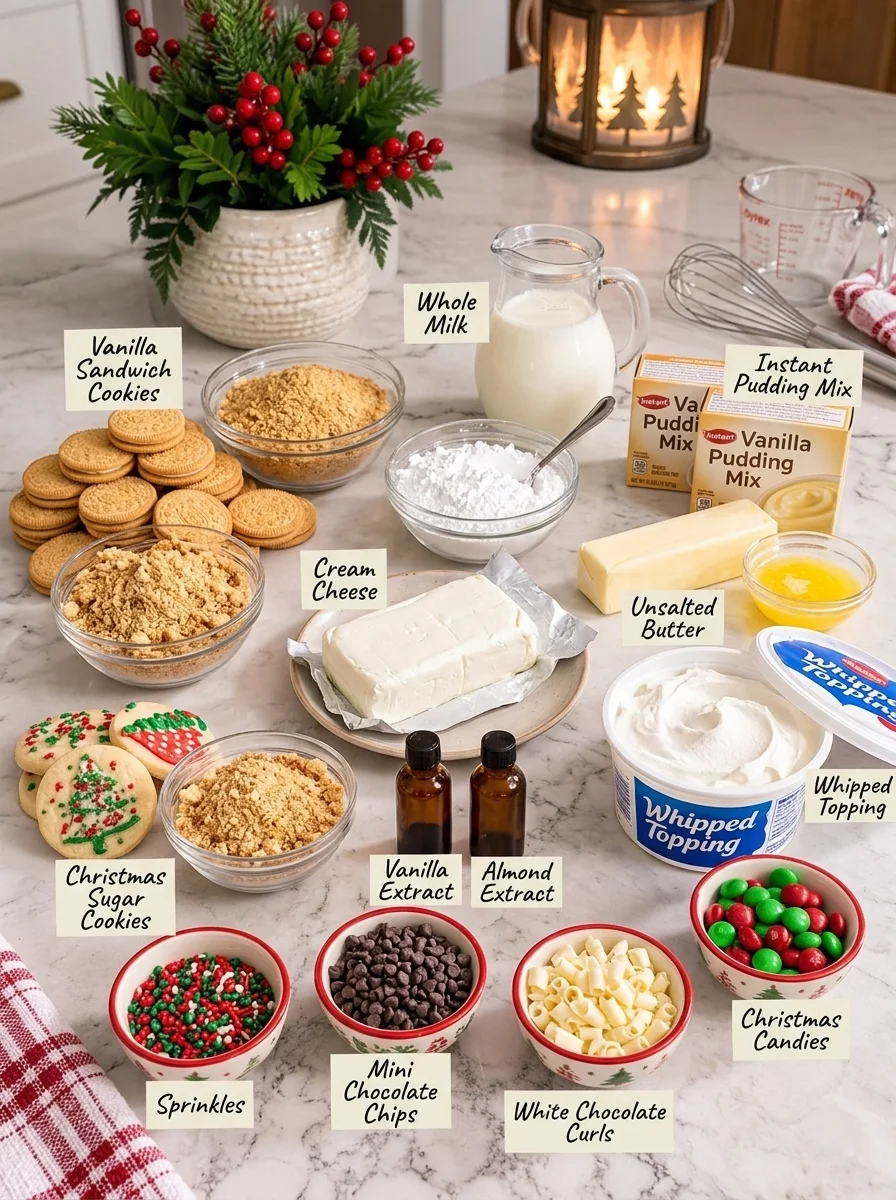
- 36 regular-size vanilla sandwich cookies, such as Golden Oreos, including their filling
- 5 tablespoons unsalted butter, melted
Cream Cheese Layer
- 8 ounces block cream cheese, softened
- 1/2 cup powdered sugar
- 1 teaspoon vanilla extract
- 1 cup whipped topping, thawed according to package directions
Vanilla Pudding Layer
- 2 packages instant vanilla pudding mix, 3.4 ounces each
- 3 cups cold whole milk
- Up to 1/2 teaspoon almond extract, optional
Top Layer
- 2 cups whipped topping, thawed
Decorations
- 1/2 cup crushed baked Christmas sugar cookies
- 2 tablespoons red-and-green holiday sprinkles
- Mini chocolate chips or white chocolate curls, as desired
- Small Christmas candies, optional
Whipped topping total: Three cups: one cup folded into the cream cheese mixture and two cups spread over the pudding.
Pudding mix total: Two 3.4-ounce packages, or 6.8 ounces combined. The three cups of milk are for both packages together, not for each box.
Pan: One 9-by-13-inch dish with sufficient depth for the layered dessert and a cover.
Ingredient Notes
Crush whole sandwich cookies
Include the cookie filling when making the crumbs. It contributes sweetness and helps the crust come together with the butter.
Regular-size cookies are the reference. Double-stuffed, thin, mini, and differently sized store-brand cookies change the proportion of filling and crumbs. If substituting, the crust may need adjustment after a small trial.
Crush finely for an even base. Large pieces make the crust more difficult to press and can pull away when the cream cheese layer is spread.
Use softened block cream cheese
Block cream cheese provides a thicker starting texture than many spreadable products sold in tubs. Let it soften enough to beat smoothly, but do not melt it.
Cold lumps are difficult to remove once whipped topping has been folded in. Beat the cream cheese smooth first, scraping the bowl, before adding powdered sugar and vanilla.
Softening should fit within ordinary food-handling limits. Do not leave the cream cheese out for hours while completing other holiday preparations.
Choose instant pudding
Use instant vanilla pudding, not cook-and-serve pudding. The two products use different preparation methods and are not interchangeable under these instructions.
The recipe uses less milk than two boxes often call for when prepared as a standalone pudding. That concentrated mixture is intentional for a layered dessert. Use the stated three cups total for a conventional 3.4-ounce instant product, while recognizing that other package sizes or formulations may require a different recipe.
Sugar-free mixes are frequently sold in smaller boxes and cannot be substituted by matching the box count alone. Check product yield, ingredients, and mixing instructions before attempting that change.
Keep the milk cold
Cold whole milk helps standard dairy-based instant pudding set according to its intended method. Warm milk can delay thickening and make assembly messier.
Plant-based milk is not an automatic equal substitution. Some instant pudding products require special non-dairy instructions or different amounts. Use a recipe or manufacturer method designed for the chosen beverage.
Whipped topping is measured by volume
The recipe calls for three cups total, not three tubs. Container sizes and volume estimates differ, so measure the thawed topping rather than assuming a particular container supplies the exact amount.
Thaw according to the package directions, typically under refrigeration. Keep it cool and fold gently so the cream cheese layer retains some air.
Fresh whipped cream is possible as a separate adaptation, but it may not hold for the same storage period unless stabilized appropriately. Do not assume every whipped product behaves identically.
Almond extract is optional
Almond extract adds a bakery-style note but can be strong. Start with less if you are unsure of the flavor. Vanilla alone is enough for a complete dessert.
Check the extract label and guest requirements rather than assuming all almond-flavored products have the same ingredients or allergen status.
Equipment
Use a food processor or a sturdy bag and rolling pin for the cookies, a bowl for the crumbs, an electric mixer for the cream cheese, a whisk for the pudding, and a flexible spatula for spreading.
A small offset spatula makes it easier to distribute thin layers without dragging the one beneath. A flat-bottomed measuring cup helps press the crust evenly.
A glass dish shows the layers nicely. If using parchment for lifting, create a broad sling with accessible overhang, but remember that this is a soft dessert. Lifting an entire chilled slab may still be less reliable than cutting and serving directly from the dish.
How to Make Christmas Cookie Lasagna
1. Prepare the dish
Choose a clean 9-by-13-inch dish. A very light coating of butter or cooking spray is optional; the cookie crust already contains butter.
For serving directly from the pan, lining is not necessary. If using a parchment sling, smooth it against the base so folds do not distort the crust.
Clear a level space in the refrigerator before starting. The assembled dessert needs to remain flat while it sets.
2. Make fine cookie crumbs
Pulse the whole vanilla sandwich cookies in a food processor until finely crushed. Alternatively, crush them in a sealed sturdy bag with a rolling pin, working in batches if necessary.
Transfer to a bowl and stir in the melted butter. Mix until the crumbs look evenly moistened and no dry pockets remain at the bottom.
The mixture should clump lightly when pressed. It should not look like crumbs floating in melted butter.
3. Press and chill the crust
Spread the crumbs across the base of the dish. Press with a flat-bottomed measuring cup or spoon until the layer is even, paying attention to the corners.
Use firm, steady pressure, but avoid compacting it into an excessively hard slab. The aim is a cohesive base that can still be cut after chilling.
Refrigerate for about 15–20 minutes while preparing the cream cheese layer.
4. Beat the cream cheese mixture
Beat the softened cream cheese until smooth. Scrape the bowl and beat again if needed to eliminate lumps.
Add powdered sugar and vanilla. Start at low speed so the sugar does not scatter, then beat until evenly combined.
Fold in one cup of thawed whipped topping with a spatula. Use gentle strokes until the mixture is uniform rather than continuing with vigorous mixing.
5. Spread the cream cheese layer
Place small dollops across the chilled crust instead of dropping the whole mixture into one mound. Connect the dollops with a spatula, working carefully toward the corners.
This approach reduces the distance the filling must travel and makes it less likely to pull crumbs from the base.
If the mixture is difficult to spread, pause briefly and use lighter strokes. Do not add milk automatically, which can loosen the layer unnecessarily.
Return the dish to the refrigerator while preparing the pudding if the filling has softened during handling.
6. Whisk the pudding
Combine both packages of instant vanilla pudding with three cups cold whole milk and the optional almond extract.
Whisk for about two minutes, scraping the sides and bottom so no dry mix remains. Let stand for approximately three to five minutes, until noticeably thickened but still spreadable.
The timing is a guide. If the pudding remains very fluid, check that you used instant mix of the stated size and the correct total milk amount before pouring it over the cream cheese.
7. Add the pudding layer
Spoon the thickened pudding across the cream cheese layer in several places. Spread gently into an even layer with a clean spatula.
Avoid digging into the cream cheese beneath. If the lower layer is very soft, chill it briefly before continuing rather than forcing the pudding across it.
A few imperfections at the edges will be covered by the topping. Keep the layers distinct without repeatedly smoothing them back and forth.
8. Add the whipped topping
Spread the remaining two cups whipped topping over the pudding. Use light strokes and work from dollops placed around the surface.
The finish can be smooth or softly swirled. A simple surface is easier to decorate later than a heavily worked one that mixes pudding into the topping.
Cover without pressing the lid or wrap into the cream. A dish with a raised lid is particularly convenient.
9. Chill thoroughly
Refrigerate for at least four hours, preferably overnight. Chilling allows the pudding and cream cheese layers to firm and gives the crust time to settle.
Do not use a short freezer stay as an automatic replacement for the full refrigerator rest. The outer layers can firm while the center remains soft, and partial freezing changes the texture.
Keep the dish level and avoid moving it repeatedly during the initial setting period.
10. Decorate before serving
Add crushed sugar cookies, sprinkles, chocolate chips or curls, and optional candies close to serving time.
Use a light distribution so the creamy layers remain visible when portions are served. For a festive look, concentrate a little decoration around the edges and leave room for clean cutting lines.
Peppermint candies are an optional flavor change. Add them at the last moment because they can soften, dissolve, or bleed onto the topping.
11. Slice and serve cold
Use a sharp knife to cut portions. Wipe the blade between cuts, and if you warm it briefly in water, dry it completely before slicing.
Slide a thin serving spatula beneath the crust and lift gently. The first piece can be less tidy because there is limited space to maneuver.
If the dessert is softer than expected, serve it as a spoon dessert rather than trying to lift large unsupported squares. Return the remaining dish to the refrigerator promptly.
Tips for Distinct Layers
Start with a chilled, evenly pressed crust. Loose crumbs are more likely to mix into the filling during spreading.
Smooth the cream cheese before folding in whipped topping. Chilling later does not remove lumps introduced at the beginning.
Use thickened, spreadable pudding rather than a bowl of liquid. The concentrated milk ratio is intended to support layering, but product differences still matter.
Place each layer in dollops. Spreading several small piles is gentler than pushing one large mound from the center to every corner.
Give the dessert enough time to chill. A clean-looking top cannot compensate for a warm, soft center beneath it.
Make-Ahead Planning
Assemble the base dessert the evening before serving and refrigerate covered. Add the decorative cookie crumbs, sprinkles, and candy just before the celebration.
If preparing components separately, keep the dairy ingredients refrigerated. The crust can be pressed into the dish ahead, but pudding that has fully set in a separate bowl may need gentle whisking and can be harder to spread neatly.
The simplest plan is usually to assemble all four layers, cover, and chill, leaving only decoration for serving day.
Keep a small amount of extra topping decoration separate so you can refresh the appearance of individual portions without adding more to the whole dish.
Serving Ideas
Serve small chilled squares on dessert plates with forks or spoons. The recipe is sweet and rich, so twelve portions are generous; sixteen smaller pieces may suit a larger dessert table.
Coffee, tea, or a simple glass of milk pairs easily with the vanilla layers. Fresh berries can be offered separately for contrast, but adding wet fruit directly over the whole dish can introduce liquid and stain the topping.
For a party, bring out part of the dessert or serve promptly from the refrigerator. A chilled layered dessert is less suited to sitting on a warm buffet for several hours.
Storage and Freezing
Keep covered at 40°F or below and enjoy within three days. Use clean utensils and refrigerate remaining portions promptly after serving.
Do not leave this dairy-based dessert at room temperature for more than two hours, or more than one hour when temperatures exceed 90°F. Follow USDA leftover handling guidance.
For freezing, leave off delicate decorations and package the dessert well in a freezer-safe container. Freeze for up to one month for best quality. Thaw overnight in the refrigerator and add fresh decorations before serving.
Pudding can release liquid after freezing, and the whipped topping and crust may become softer. Freezing is a convenience option rather than a guarantee of unchanged texture. A small test portion is useful if you plan to freeze a batch for an event.
Do not repeatedly thaw and refreeze the whole dish. Portioning before freezing can make it easier to remove only what you need.
Variations
Peppermint finish: Add a little crushed peppermint candy just before serving. Keep the quantity modest because it can quickly dominate vanilla and almond flavors.
Chocolate accents: Use mini chocolate chips or chocolate curls on the surface. Avoid a very thick layer that makes the dessert difficult to cut.
Different sandwich cookies: A festive-colored cookie can change the appearance, but check the flavor and filling quantity. A heavily filled cookie may produce a softer or sweeter crust.
Vanilla-only: Omit almond extract if you prefer a straightforward vanilla dessert. No replacement is required.
Individual cups: Divide the components among dessert cups as an untested presentation adaptation. The yield depends on cup size. Do not assume the full pan’s filling will fit a specific number without measuring the portions.
Troubleshooting
The crust crumbles when served
The crumbs may be too coarse, unevenly moistened, or insufficiently pressed. Chill thoroughly and use a spatula that supports the base. A softer first portion does not necessarily mean the entire dessert has failed.
The cream cheese layer is lumpy
The cheese was probably too cold or not beaten smooth before folding. Start with softened block cream cheese and scrape the bowl thoroughly during mixing.
The pudding stays runny
Check the pudding type, package size, milk amount, and milk type. Cook-and-serve pudding and smaller sugar-free packages do not follow the same method. Do not keep pouring a fluid mixture into the dish hoping the lower layer will hold it.
The layers mix together
The lower layer may be too soft, or the spatula may be pressing too deeply. Chill briefly between layers if needed and spread from several small dollops.
The sprinkles bleed
Moisture from the topping dissolves some colors. Add decorations close to serving and use a small amount rather than expecting them to remain unchanged overnight.
The dessert will not hold a neat square
It may need more chilling, or the particular products may create a softer set. Serve smaller portions with a broad spatula, or spoon into bowls. The recipe does not contain a structural stabilizer that guarantees firm slices.
Frequently Asked Questions
Do I remove the sandwich-cookie filling?
No. Crush the whole cookies, including the filling, for this recipe.
Can I use homemade whipped cream?
It is a possible adaptation, but unstabilized cream may not hold the same way over several days. The stated recipe uses thawed whipped topping. A substitution should be tested rather than assumed identical.
Can I use plant milk for the pudding?
Only with a compatible product and method. Some instant mixes do not set properly with an equal amount of non-dairy beverage. Follow manufacturer guidance or choose a recipe formulated for that combination.
Can I use a smaller pan?
A smaller dish makes deeper layers and may not have enough capacity. It can also change how easily the dessert portions. Use the stated 9-by-13-inch dish for the first batch.
Is this actually no-bake?
Yes. The sandwich cookies and sugar-cookie decorations are already baked products, and the dessert itself requires mixing and refrigeration rather than oven cooking. Use instant pudding as directed.
How accurate is the nutrition?
The supplied estimate of approximately 425 calories and five grams protein per one-twelfth portion depends on cookie size, whipped topping, pudding, and decorations. It is plausible as a broad estimate for some products but has not been verified for a tested batch. Calculate from package labels, include toppings, and divide by the actual serving count for precision.
Print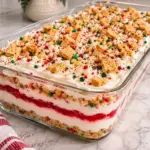
Christmas Cookie Lasagna
Description
- Prep: About 25–35 minutes, including pressing and layering
- Initial crust chill: 15–20 minutes, overlapping filling preparation
- Final chill: At least 4 hours, preferably overnight
- Total: Approximately 4 1/2 hours or longer
- Servings: 12 generous portions or 16 smaller portions
- Method: No-bake, refrigerated
Ingredients
Cookie Crust
- 36 regular-size vanilla sandwich cookies, such as Golden Oreos, including their filling
- 5 tablespoons unsalted butter, melted
Cream Cheese Layer
- 8 ounces block cream cheese, softened
- 1/2 cup powdered sugar
- 1 teaspoon vanilla extract
- 1 cup whipped topping, thawed according to package directions
Vanilla Pudding Layer
- 2 packages instant vanilla pudding mix, 3.4 ounces each
- 3 cups cold whole milk
- Up to 1/2 teaspoon almond extract, optional
Top Layer
- 2 cups whipped topping, thawed
Decorations
- 1/2 cup crushed baked Christmas sugar cookies
- 2 tablespoons red-and-green holiday sprinkles
- Mini chocolate chips or white chocolate curls, as desired
- Small Christmas candies, optional
Whipped topping total: Three cups: one cup folded into the cream cheese mixture and two cups spread over the pudding.
Pudding mix total: Two 3.4-ounce packages, or 6.8 ounces combined. The three cups of milk are for both packages together, not for each box.
Pan: One 9-by-13-inch dish with sufficient depth for the layered dessert and a cover.
Instructions
1. Prepare the dish
Choose a clean 9-by-13-inch dish. A very light coating of butter or cooking spray is optional; the cookie crust already contains butter.
For serving directly from the pan, lining is not necessary. If using a parchment sling, smooth it against the base so folds do not distort the crust.
Clear a level space in the refrigerator before starting. The assembled dessert needs to remain flat while it sets.
2. Make fine cookie crumbs
Pulse the whole vanilla sandwich cookies in a food processor until finely crushed. Alternatively, crush them in a sealed sturdy bag with a rolling pin, working in batches if necessary.
Transfer to a bowl and stir in the melted butter. Mix until the crumbs look evenly moistened and no dry pockets remain at the bottom.
The mixture should clump lightly when pressed. It should not look like crumbs floating in melted butter.
3. Press and chill the crust
Spread the crumbs across the base of the dish. Press with a flat-bottomed measuring cup or spoon until the layer is even, paying attention to the corners.
Use firm, steady pressure, but avoid compacting it into an excessively hard slab. The aim is a cohesive base that can still be cut after chilling.
Refrigerate for about 15–20 minutes while preparing the cream cheese layer.
4. Beat the cream cheese mixture
Beat the softened cream cheese until smooth. Scrape the bowl and beat again if needed to eliminate lumps.
Add powdered sugar and vanilla. Start at low speed so the sugar does not scatter, then beat until evenly combined.
Fold in one cup of thawed whipped topping with a spatula. Use gentle strokes until the mixture is uniform rather than continuing with vigorous mixing.
5. Spread the cream cheese layer
Place small dollops across the chilled crust instead of dropping the whole mixture into one mound. Connect the dollops with a spatula, working carefully toward the corners.
This approach reduces the distance the filling must travel and makes it less likely to pull crumbs from the base.
If the mixture is difficult to spread, pause briefly and use lighter strokes. Do not add milk automatically, which can loosen the layer unnecessarily.
Return the dish to the refrigerator while preparing the pudding if the filling has softened during handling.
6. Whisk the pudding
Combine both packages of instant vanilla pudding with three cups cold whole milk and the optional almond extract.
Whisk for about two minutes, scraping the sides and bottom so no dry mix remains. Let stand for approximately three to five minutes, until noticeably thickened but still spreadable.
The timing is a guide. If the pudding remains very fluid, check that you used instant mix of the stated size and the correct total milk amount before pouring it over the cream cheese.
7. Add the pudding layer
Spoon the thickened pudding across the cream cheese layer in several places. Spread gently into an even layer with a clean spatula.
Avoid digging into the cream cheese beneath. If the lower layer is very soft, chill it briefly before continuing rather than forcing the pudding across it.
A few imperfections at the edges will be covered by the topping. Keep the layers distinct without repeatedly smoothing them back and forth.
8. Add the whipped topping
Spread the remaining two cups whipped topping over the pudding. Use light strokes and work from dollops placed around the surface.
The finish can be smooth or softly swirled. A simple surface is easier to decorate later than a heavily worked one that mixes pudding into the topping.
Cover without pressing the lid or wrap into the cream. A dish with a raised lid is particularly convenient.
9. Chill thoroughly
Refrigerate for at least four hours, preferably overnight. Chilling allows the pudding and cream cheese layers to firm and gives the crust time to settle.
Do not use a short freezer stay as an automatic replacement for the full refrigerator rest. The outer layers can firm while the center remains soft, and partial freezing changes the texture.
Keep the dish level and avoid moving it repeatedly during the initial setting period.
10. Decorate before serving
Add crushed sugar cookies, sprinkles, chocolate chips or curls, and optional candies close to serving time.
Use a light distribution so the creamy layers remain visible when portions are served. For a festive look, concentrate a little decoration around the edges and leave room for clean cutting lines.
Peppermint candies are an optional flavor change. Add them at the last moment because they can soften, dissolve, or bleed onto the topping.
11. Slice and serve cold
Use a sharp knife to cut portions. Wipe the blade between cuts, and if you warm it briefly in water, dry it completely before slicing.
Slide a thin serving spatula beneath the crust and lift gently. The first piece can be less tidy because there is limited space to maneuver.
If the dessert is softer than expected, serve it as a spoon dessert rather than trying to lift large unsupported squares. Return the remaining dish to the refrigerator promptly.