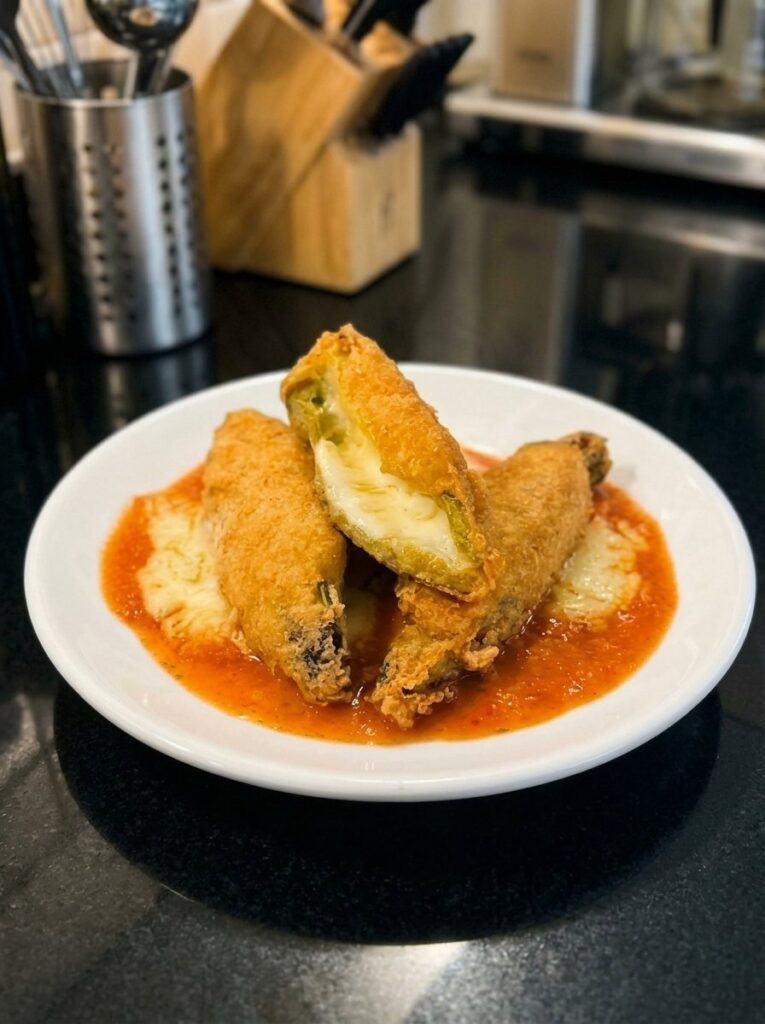
Introduction: The Mexican Comfort Dish Everyone Should Master
Few dishes capture the spirit of Mexican home cooking like Hatch chile rellenos. Imagine a roasted, smoky chile pepper filled with stretchy, melted cheese, wrapped in a cloud-like egg batter, and fried until it turns a deep, golden brown. Then picture it resting in a pool of warm, brick-red tomato-chile salsa. Every bite starts with a crisp, puffy crust, moves into tender smoky pepper, and finishes with gooey cheese and a gentle kick of heat.
This crispy Hatch chile rellenos recipe brings all of that together in a way that is approachable for home cooks. You do not need restaurant equipment or years of practice. You need good peppers, a little patience, and a few simple techniques, all of which you will find in this guide. Along the way, we will cover how to roast and peel the chiles, how to build a fluffy egg batter that actually clings to the pepper, how to keep your oil at the right temperature, and how to make a homemade chile relleno salsa from scratch that tastes better than anything from a jar.
Whether you are cooking for a family dinner, a weekend gathering, or you simply have a bag of fresh Hatch chiles and need inspiration, this is the recipe to bookmark.
What Are Hatch Chile Rellenos?
Chile relleno translates to “stuffed chile” in Spanish, and that is exactly what it is: a whole roasted chile pepper, stuffed (usually with cheese), coated in batter, and fried. The dish is a staple of Mexican cuisine, with roots often traced to the state of Puebla, and versions of it appear in kitchens and restaurants across Mexico and the American Southwest.
Traditionally, chile rellenos are made with poblano peppers. However, Hatch chiles, grown in the Hatch Valley of New Mexico, have become a beloved alternative, especially during their late-summer harvest season. Hatch peppers are prized for their earthy, smoky, slightly sweet flavor and heat levels that range from mild to hot. When roasted, they develop an incredible aroma that fills the whole house, and that signature smoky character is exactly what makes a Hatch chile relleno so memorable.
The finished dish is typically served topped with or sitting in a warm tomato-based sauce. In this recipe, that sauce is a rich, slightly spicy salsa built from boiled Roma tomatoes, jalapeño or serrano, and chile de árbol, blended with garlic, onion, and Mexican oregano, then simmered until it thickens.
Why You Will Love This Recipe
- Light, fluffy batter. Beating the egg whites to stiff peaks creates an airy coating that puffs up in the oil and turns beautifully golden.
- Gooey, melty cheese. Monterey Jack or Oaxaca cheese gives you that irresistible cheese pull in every bite.
- Smoky Hatch flavor. Thoroughly roasted peppers deliver deep, savory, slightly sweet notes you cannot get from canned chiles.
- A salsa with real depth. The homemade tomato-chile salsa is simmered in a little oil, which concentrates the flavor and gives it a silky finish.
- Perfect for sharing. This is a hearty, family-style meal that feels special without being complicated.
- Easy to customize. Adjust the heat, swap the cheese, or add fillings to make it your own.
Ingredients for Crispy Hatch Chile Rellenos
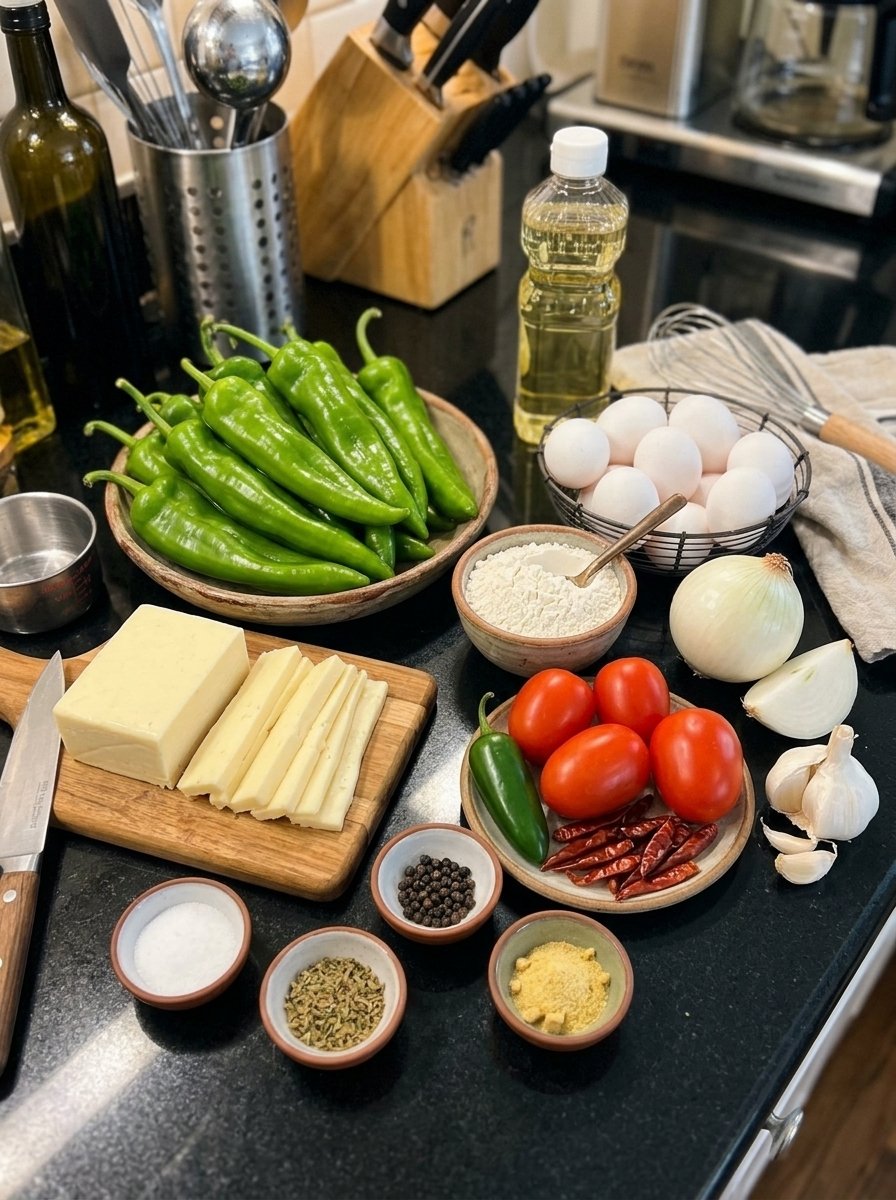
This recipe is divided into two parts: the rellenos themselves and the homemade salsa. Most of the ingredients are pantry or grocery-store staples.
For the Chile Rellenos
- 10–12 Hatch peppers
- 8 large eggs, at room temperature
- ¾ teaspoon salt
- ½ teaspoon black pepper
- ¼ cup all-purpose flour, plus extra for dusting
- 8–12 ounces Monterey Jack or Oaxaca cheese, cut into strips
- Vegetable oil, enough for frying
For the Homemade Tomato-Chile Salsa
- 4 Roma tomatoes
- 1 jalapeño or serrano pepper
- 5 chile de árbol peppers, or more or less to taste
- ¼ onion
- 3 garlic cloves
- 1 teaspoon chicken bouillon
- ½ teaspoon Mexican oregano
- Salt, to taste
- 1 cup water
- 1 tablespoon vegetable oil, for the salsa
Ingredient Notes and Substitutions
Hatch peppers. Look for large, firm, smooth-skinned peppers with a straight shape. Straight, wide peppers are easier to stuff, and smooth skins without tears hold together better during roasting and frying. If Hatch chiles are out of season, poblano peppers or Anaheim peppers are excellent substitutes.
Cheese. Monterey Jack melts smoothly and has a mild, buttery flavor. Oaxaca cheese, a traditional Mexican string cheese, is even stretchier and slightly tangier. Queso quesadilla, asadero, or a mild white cheddar can also work. Cut the cheese into thick strips that fit comfortably inside the pepper.
Chile de árbol. These small, slender dried red chiles bring clean, sharp heat to the salsa. Use five for a medium-spicy salsa, fewer for a milder one, or more if you like it fiery.
Chicken bouillon. A common shortcut in Mexican home cooking, bouillon adds savory depth to the salsa. If you prefer, you can swap in a little extra salt and a splash of broth in place of some of the water.
Mexican oregano. It has a citrusy, earthy flavor that differs from Mediterranean oregano. If you cannot find it, use regular oregano, but use a slightly smaller amount.
Equipment You Will Need
- Gas burner, grill, or very hot skillet for roasting the peppers
- Tongs
- Heat-safe bowl with a lid (or a heat-safe bag) for steaming
- Saucepan for the salsa
- Blender
- Electric hand mixer or stand mixer for the egg whites
- Two large mixing bowls (one must be perfectly clean and dry)
- Deep skillet or Dutch oven for frying
- Kitchen thermometer (strongly recommended)
- Wire rack or paper towel-lined plate
How to Make Crispy Hatch Chile Rellenos: Step-by-Step
Step 1: Roast the Hatch Peppers
Place the Hatch peppers directly over a gas flame, on a hot grill, or in a very hot skillet. Turn them frequently with tongs until the skins are blistered and charred on all sides. Do not be afraid of black spots; that char is what loosens the skin and creates the smoky flavor. Just be careful not to cook the peppers so long that the flesh turns mushy or falls apart.
Step 2: Steam the Peppers
Transfer the roasted peppers to a heat-safe bowl and cover it, or place the peppers in a heat-safe bag. Let them steam for about 10 minutes. The trapped steam loosens the skins from the flesh, which makes peeling far easier.
Step 3: Peel and Clean the Chiles
Gently rub away the charred skins with your fingers. Avoid rinsing the peppers under water, since that washes away flavor. Make a small lengthwise slit in each pepper and carefully remove the seeds and veins, keeping the peppers as intact as possible. Pat them dry with paper towels. Dry peppers are essential, because moisture prevents flour and batter from sticking.
Step 4: Boil the Salsa Ingredients
Place the Roma tomatoes, jalapeño or serrano pepper, and chile de árbol peppers in a saucepan. Add enough water to cover them and boil for about 8–10 minutes, until the tomatoes soften and the peppers are tender.
Step 5: Blend the Homemade Salsa
Transfer the cooked tomatoes and peppers to a blender. Add the onion, garlic, chicken bouillon, Mexican oregano, salt to taste, and 1 cup of water. Blend until smooth. Take care when blending hot ingredients: vent the lid slightly and cover it with a kitchen towel to let steam escape safely.
Step 6: Cook the Salsa
Heat 1 tablespoon of vegetable oil in the saucepan over medium-low heat. Carefully pour in the blended salsa; it may sputter. Simmer for 5–10 minutes, stirring occasionally, until slightly thickened and flavorful. Taste and adjust the salt or chile heat as desired. Reduce the heat to low to keep the salsa warm while you fry.
Step 7: Stuff the Hatch Peppers
Gently open each roasted chile and place strips of Monterey Jack or Oaxaca cheese inside. Tuck the cheese securely into each pepper, taking care not to overfill or tear the openings. If a pepper does tear, you can patch it with a small piece of another pepper or simply handle it gently during dipping.
Step 8: Prepare the Egg Batter
Separate the eggs, placing the whites in a large, clean, dry bowl and the yolks in another bowl. Beat the egg whites with an electric mixer until they form stiff, glossy peaks. Add the yolks one at a time, gently folding after each addition. Fold in the salt and black pepper without deflating the mixture.
Step 9: Heat the Frying Oil
Pour enough vegetable oil into a deep skillet or Dutch oven to surround the chiles generously. Heat the oil to approximately 350°F (175°C). Use a kitchen thermometer if available to help maintain a steady temperature.
Step 10: Dust the Stuffed Chiles
Lightly coat each stuffed pepper with flour, shaking off any excess. This thin layer helps the fluffy egg batter adhere to the chile.
Step 11: Coat the Chiles in Egg Batter
Carefully dip each floured pepper into the egg mixture, turning gently until completely coated. Use a spoon to help cover any exposed areas while keeping the batter light and airy.
Step 12: Fry Until Golden and Crispy
Carefully lower the coated chiles into the hot oil, working in batches so the pan is not overcrowded. Fry for about 2–4 minutes per side, turning gently as needed, until the batter is puffed and beautifully golden brown. Adjust the heat as necessary to prevent the coating from browning too quickly.
Step 13: Drain the Fried Chiles
Transfer the cooked chile rellenos to a wire rack or a paper towel-lined plate to drain excess oil. Let them rest briefly while you finish frying the remaining peppers.
Step 14: Serve with Homemade Salsa
Arrange the hot chile rellenos on a serving platter. Spoon the warm tomato-chile salsa generously over the top or serve it alongside for dipping. Enjoy immediately while the coating is crisp and the cheese is melted and stretchy.
Pro Tips for the Best Crispy Hatch Chile Rellenos
These small details separate good rellenos from truly great ones.
- Choose firm Hatch peppers. Select peppers that are large enough to stuff and have skins without tears. Damaged peppers fall apart during peeling and frying.
- Roast thoroughly. Blistering the skins all over makes peeling easier and gives the chiles their signature smoky flavor.
- Keep the peppers intact. Make just a small slit and remove the seeds carefully so you create enough room for the cheese without ruining the pepper’s shape.
- Beat the egg whites until stiff. A fluffy egg batter creates the light, airy coating that makes chile rellenos so delicious. Stiff, glossy peaks are the goal.
- Dust with flour first. A light coating helps the batter cling to the peppers during frying.
- Maintain the oil temperature. Aim for about 350°F (175°C). Oil that is too cool can make the coating greasy, while oil that is too hot can brown it before the cheese melts.
- Fry in batches. Crowding the pan lowers the oil temperature and makes the chiles harder to turn.
- Serve immediately. The batter is crispiest just after frying, especially when paired with warm salsa.
Common Mistakes and How to Fix Them
The batter slides off the pepper. This usually means the pepper was still damp or skipped the flour. Pat the chiles very dry and dust them lightly with flour before dipping. Also make sure the egg whites are beaten to stiff peaks, since a runny batter will not cling.
The egg whites will not whip. Even a trace of yolk or grease prevents whites from foaming. Use a spotlessly clean, dry bowl and beaters, and separate each egg carefully. Room-temperature eggs whip up with more volume than cold ones.
The coating is greasy. The oil was probably too cool. Use a thermometer, keep the oil near 350°F (175°C), and avoid frying too many rellenos at once.
The coating is dark but the cheese is not melted. Your oil is too hot. Lower the heat slightly, and make sure the cheese strips are not too thick or packed in too tightly.
The peppers tore while peeling. Steam them a full 10 minutes so the skins release easily, and peel gently with your fingers rather than scraping with a knife. Choose peppers with intact skins in the first place.
The cheese leaked into the oil. Do not overstuff. Tuck the cheese in snugly, and leave the slit as small as possible. Using a toothpick to pin the opening closed can help.
Delicious Variations to Try
Once you have mastered the classic version, experiment with these ideas:
- Different cheeses. Try queso fresco blended with Monterey Jack, pepper jack for extra heat, or a mix of Oaxaca and cream cheese for a creamier center.
- Meat-filled rellenos. Stuff the peppers with seasoned ground beef, shredded chicken, or picadillo along with the cheese for a heartier meal.
- Vegetarian fillings. Add sautéed corn, black beans, mushrooms, or spinach alongside the cheese.
- Milder salsa. Reduce or remove the chile de árbol and use only a jalapeño for a gentler sauce.
- Smoky salsa. Roast the tomatoes, onion, and garlic on a dry skillet before blending for a deeper, charred flavor.
- Baked option. For a lighter take, you can bake stuffed and battered chiles on a greased sheet, though the texture will be softer than fried rellenos.
What to Serve with Chile Rellenos
Chile rellenos are rich and satisfying on their own, but a few sides round out the meal beautifully:
- Mexican rice to soak up the extra salsa
- Refried beans or whole pinto beans
- Warm corn or flour tortillas for scooping and wrapping
- A fresh green salad or sliced avocado for a cool, creamy contrast
- Pickled red onions for a bright, tangy bite
- Crumbled cotija cheese and chopped cilantro as a finishing garnish
For a brunch twist, serve a relleno alongside scrambled eggs and breakfast potatoes.
How to Store and Reheat Leftovers
Chile rellenos are best enjoyed fresh, but you can store leftovers with a bit of care.
Refrigerating. Let the rellenos cool completely, then place them in an airtight container, ideally separated from the salsa. Store the salsa in its own container. Both keep for up to 3 days in the refrigerator.
Reheating. Reheat the rellenos on a wire rack set over a baking sheet in a 375°F (190°C) oven for about 10–15 minutes, until hot and the coating has re-crisped. An air fryer also works well. Avoid the microwave, which makes the batter soggy. Warm the salsa gently on the stove.
Freezing. Stuffed, un-battered peppers can be frozen on a tray, then transferred to a freezer bag. Thaw them in the refrigerator before dusting, battering, and frying. Because the batter is made fresh, this is the best make-ahead strategy.
Make-ahead tip. You can roast, peel, and stuff the chiles a day in advance and keep them covered in the refrigerator. The salsa can also be made ahead and reheated. Then you only need to batter and fry on the day you serve.
Frequently Asked Questions
Can I use poblano peppers instead of Hatch chiles?
Yes. Poblano peppers are the traditional choice for chile rellenos and work wonderfully in this recipe. They tend to be milder and slightly larger. Anaheim peppers are another good substitute.
When is Hatch chile season?
Fresh Hatch chiles are typically harvested in late summer, usually from August into September. During that window, they are sold fresh and often roasted on-site at grocery stores and markets. Outside of the season, many stores sell frozen roasted Hatch chiles, which you can thaw, pat dry, and use in this recipe.
How spicy are Hatch chile rellenos?
It depends on the variety. Hatch chiles are sold in mild, medium, hot, and extra-hot grades. For a family-friendly meal, choose mild or medium. The salsa heat is separately adjustable by changing the number of chile de árbol peppers.
Why do you separate the eggs for chile rellenos?
Beating the whites on their own to stiff peaks traps air, which gives the batter its signature light, puffy, soufflé-like texture. The yolks are then folded in gently to add richness and color without deflating the foam.
What is the best cheese for chile rellenos?
Monterey Jack and Oaxaca are the most popular choices because they melt smoothly and stretch beautifully. Both are mild enough to let the smoky chile shine.
What temperature should the oil be for frying chile rellenos?
Aim for about 350°F (175°C). This temperature gives you a crisp, golden coating while allowing the cheese inside time to melt fully.
Can I make chile rellenos without frying?
You can bake them for a lighter option, but the coating will not be as crisp or puffy. For the classic crunchy, golden finish, shallow or deep frying is the best method.
How do I keep the batter from falling apart in the oil?
Dry the peppers well, dust them with flour, use stiffly whipped egg whites, and lower them into the oil gently. Avoid moving them too soon; let each side set for a moment before turning.
Is the salsa spicy?
With five chile de árbol peppers and a jalapeño or serrano, the salsa has a pleasant, noticeable heat. Reduce the number of dried chiles for a milder sauce, or add more for extra fire.
Can I make the salsa ahead of time?
Absolutely. The salsa tastes even better after resting, and it keeps in the refrigerator for up to 3 days. Reheat it gently before serving.
Recipe Summary Card
Crispy Hatch Chile Rellenos with Homemade Salsa
- Course: Main dish
- Cuisine: Mexican, Southwestern
- Key technique: Roasting, stuffing, battering, and frying
- Fry temperature: About 350°F (175°C)
- Fry time: 2–4 minutes per side
- Salsa simmer time: 5–10 minutes
- Best served: Immediately, with warm salsa
Final Thoughts
These crispy Hatch chile rellenos are proof that a handful of simple ingredients can turn into something extraordinary. The smoky, tender Hatch chile, the pillowy golden batter, the molten cheese, and the vibrant homemade salsa all come together in a dish that feels both comforting and celebratory. Once you understand the key steps, which are roasting thoroughly, drying the peppers, whipping the whites to stiff peaks, and keeping your oil at the right temperature, you will be able to make them with confidence any time the craving hits.
Print
Crispy Hatch Chile Rellenos with Homemade Salsa
- Total Time: 45 minutes
Ingredients
This recipe is divided into two parts: the rellenos themselves and the homemade salsa. Most of the ingredients are pantry or grocery-store staples.
For the Chile Rellenos
- 10–12 Hatch peppers
- 8 large eggs, at room temperature
- ¾ teaspoon salt
- ½ teaspoon black pepper
- ¼ cup all-purpose flour, plus extra for dusting
- 8–12 ounces Monterey Jack or Oaxaca cheese, cut into strips
- Vegetable oil, enough for frying
For the Homemade Tomato-Chile Salsa
- 4 Roma tomatoes
- 1 jalapeño or serrano pepper
- 5 chile de árbol peppers, or more or less to taste
- ¼ onion
- 3 garlic cloves
- 1 teaspoon chicken bouillon
- ½ teaspoon Mexican oregano
- Salt, to taste
- 1 cup water
- 1 tablespoon vegetable oil, for the salsa
Instructions
Place the Hatch peppers directly over a gas flame, on a hot grill, or in a very hot skillet. Turn them frequently with tongs until the skins are blistered and charred on all sides. Do not be afraid of black spots; that char is what loosens the skin and creates the smoky flavor. Just be careful not to cook the peppers so long that the flesh turns mushy or falls apart.
Step 2: Steam the Peppers
Transfer the roasted peppers to a heat-safe bowl and cover it, or place the peppers in a heat-safe bag. Let them steam for about 10 minutes. The trapped steam loosens the skins from the flesh, which makes peeling far easier.
Step 3: Peel and Clean the Chiles
Gently rub away the charred skins with your fingers. Avoid rinsing the peppers under water, since that washes away flavor. Make a small lengthwise slit in each pepper and carefully remove the seeds and veins, keeping the peppers as intact as possible. Pat them dry with paper towels. Dry peppers are essential, because moisture prevents flour and batter from sticking.
Step 4: Boil the Salsa Ingredients
Place the Roma tomatoes, jalapeño or serrano pepper, and chile de árbol peppers in a saucepan. Add enough water to cover them and boil for about 8–10 minutes, until the tomatoes soften and the peppers are tender.
Step 5: Blend the Homemade Salsa
Transfer the cooked tomatoes and peppers to a blender. Add the onion, garlic, chicken bouillon, Mexican oregano, salt to taste, and 1 cup of water. Blend until smooth. Take care when blending hot ingredients: vent the lid slightly and cover it with a kitchen towel to let steam escape safely.
Step 6: Cook the Salsa
Heat 1 tablespoon of vegetable oil in the saucepan over medium-low heat. Carefully pour in the blended salsa; it may sputter. Simmer for 5–10 minutes, stirring occasionally, until slightly thickened and flavorful. Taste and adjust the salt or chile heat as desired. Reduce the heat to low to keep the salsa warm while you fry.
Step 7: Stuff the Hatch Peppers
Gently open each roasted chile and place strips of Monterey Jack or Oaxaca cheese inside. Tuck the cheese securely into each pepper, taking care not to overfill or tear the openings. If a pepper does tear, you can patch it with a small piece of another pepper or simply handle it gently during dipping.
Step 8: Prepare the Egg Batter
Separate the eggs, placing the whites in a large, clean, dry bowl and the yolks in another bowl. Beat the egg whites with an electric mixer until they form stiff, glossy peaks. Add the yolks one at a time, gently folding after each addition. Fold in the salt and black pepper without deflating the mixture.
Step 9: Heat the Frying Oil
Pour enough vegetable oil into a deep skillet or Dutch oven to surround the chiles generously. Heat the oil to approximately 350°F (175°C). Use a kitchen thermometer if available to help maintain a steady temperature.
Step 10: Dust the Stuffed Chiles
Lightly coat each stuffed pepper with flour, shaking off any excess. This thin layer helps the fluffy egg batter adhere to the chile.
Step 11: Coat the Chiles in Egg Batter
Carefully dip each floured pepper into the egg mixture, turning gently until completely coated. Use a spoon to help cover any exposed areas while keeping the batter light and airy.
Step 12: Fry Until Golden and Crispy
Carefully lower the coated chiles into the hot oil, working in batches so the pan is not overcrowded. Fry for about 2–4 minutes per side, turning gently as needed, until the batter is puffed and beautifully golden brown. Adjust the heat as necessary to prevent the coating from browning too quickly.
Step 13: Drain the Fried Chiles
Transfer the cooked chile rellenos to a wire rack or a paper towel-lined plate to drain excess oil. Let them rest briefly while you finish frying the remaining peppers.
Step 14: Serve with Homemade Salsa
Arrange the hot chile rellenos on a serving platter. Spoon the warm tomato-chile salsa generously over the top or serve it alongside for dipping. Enjoy immediately while the coating is crisp and the cheese is melted and stretchy.
- Prep Time: 2–4 minutes per side
- Cook Time: 5–10 minutes