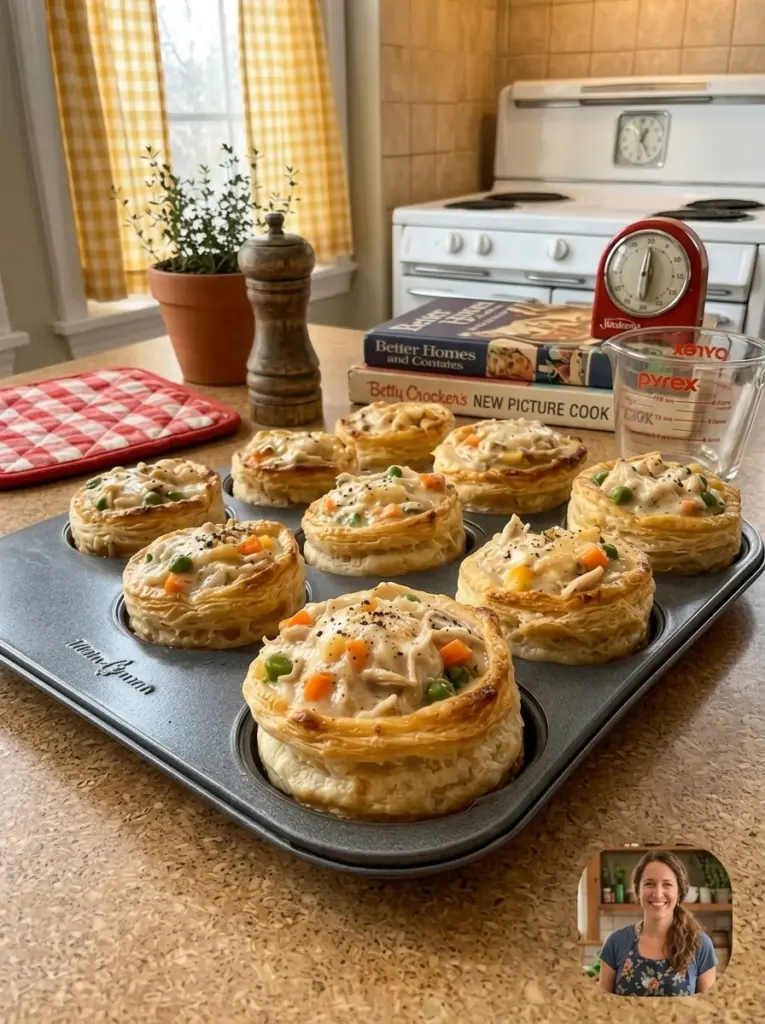
Creamy Chicken Pot Pie Cups: A Fun, Portable Twist on a Classic Comfort Food
Chicken pot pie has been a beloved comfort food staple for generations, but transforming it into individual, portion-controlled cups makes it even more convenient and fun to serve. Creamy Chicken Pot Pie Cups take all the classic flavors of a traditional pot pie — tender chicken, hearty vegetables, and a rich, creamy filling — and tuck them into flaky, individual pastry cups baked in a muffin tin. The result is a dish that’s just as comforting as the original, but easier to portion, serve, and even pack for lunch the next day.
What makes this version so appealing is its convenience without sacrificing flavor. Each cup delivers that same rich, savory filling you’d expect from a classic pot pie, wrapped in a golden, flaky crust, but in a self-contained, individually portioned package. They’re perfect for family dinners where everyone gets their own personal pot pie, for entertaining guests with a fun, handheld comfort food option, or for meal prepping a batch to freeze and reheat throughout the week.
In this article, we’ll walk through a complete ingredient breakdown, detailed step-by-step instructions, expert tips for a flaky crust and a perfectly thickened filling, creative variation ideas, storage and reheating instructions, and answers to the most frequently asked questions about this recipe.
Why This Recipe Works So Well
Turning a classic pot pie into individual cups offers several genuine advantages over the traditional full-dish version:
Portion control is built right in. Rather than cutting slices from a large pie, each cup is already perfectly portioned, making serving effortless and ensuring everyone gets a fair share of filling and crust.
They’re easier to pack and reheat. Individual cups are ideal for meal prepping, packing for lunches, or freezing in batches, since each one reheats quickly and evenly on its own.
The crust-to-filling ratio is more generous. Because each cup is individually wrapped in pastry, you get a higher proportion of that flaky, golden crust in every bite compared to a traditional pie.
They’re fun and approachable for both kids and adults. The handheld, muffin-tin format makes this dish feel a little more playful and approachable than a traditional pie, while still delivering all that classic comfort food flavor.
The filling comes together with straightforward technique. A simple roux-based sauce thickens the filling into that classic, creamy pot pie texture without requiring any complicated steps.
Ingredients You’ll Need
A note on ingredients: since none were specified in the original request, the list below represents a well-balanced, classic version of this dish. Feel free to adjust vegetables, proportions, or crust type to your preference.
- 2 cups cooked, shredded or diced chicken — rotisserie chicken works wonderfully here for convenience, or use freshly cooked chicken breast or thighs
- 3 tablespoons butter — the base for the roux that thickens the filling
- 3 tablespoons all-purpose flour — combined with butter to thicken the creamy filling
- 1½ cups chicken broth — forms the savory base of the filling’s sauce
- ¾ cup whole milk or heavy cream — adds richness and creaminess to the filling
- 1 cup frozen mixed vegetables (peas, carrots, corn) — the classic pot pie vegetable mix, adding color, texture, and heartiness
- ½ cup diced celery — adds a subtle, aromatic crunch
- ½ small onion, diced — forms the aromatic foundation of the filling
- 2 cloves garlic, minced — adds essential savory depth
- 1 teaspoon dried thyme — adds classic, earthy pot pie flavor
- Salt and black pepper, to taste — essential for properly seasoning the filling
- 2 sheets refrigerated pie crust (or puff pastry) — cut into rounds to line and top the individual cups
- 1 egg, beaten (for egg wash) — brushed over the pastry tops for a beautifully golden, glossy finish
- Fresh parsley, for garnish — adds a pop of color and freshness to the finished cups
Step-by-Step Instructions
Step 1: Preheat the Oven and Prepare the Muffin Tin
Preheat your oven to 400°F (200°C). Lightly grease a standard 12-cup muffin tin.
Step 2: Sauté the Aromatics
Melt the butter in a large saucepan or skillet over medium heat. Add the diced onion and celery, sautéing for 3 to 4 minutes, until softened. Add the minced garlic and cook for another 30 to 60 seconds, until fragrant.
Step 3: Build the Roux
Sprinkle the flour evenly over the sautéed vegetables, stirring constantly to combine. Cook for 1 to 2 minutes, stirring frequently, to cook off the raw flour taste and create the base for thickening the filling.
Step 4: Add the Broth and Milk
Slowly pour in the chicken broth while whisking constantly to prevent lumps from forming. Once smooth, gradually whisk in the milk or heavy cream. Continue cooking over medium heat, stirring frequently, until the mixture thickens and coats the back of a spoon, about 4 to 5 minutes.
Step 5: Add the Chicken and Vegetables
Stir in the shredded or diced chicken, frozen mixed vegetables, dried thyme, salt, and black pepper. Let the mixture simmer for 3 to 4 minutes, until the vegetables are heated through and the filling has thickened nicely. Remove from heat and let it cool slightly while you prepare the pastry.
Step 6: Cut and Fit the Pastry
On a lightly floured surface, roll out the pie crust or puff pastry sheets if needed. Using a round cutter (or the rim of a glass) slightly larger than the muffin tin cups, cut out 12 rounds for the bottom crusts and gently press them into each cup of the prepared muffin tin, letting the edges come up the sides slightly. Cut 12 smaller rounds from the remaining pastry for the tops.
Step 7: Fill the Cups
Spoon the chicken and vegetable filling evenly into each pastry-lined cup, filling generously but leaving a bit of room at the top.
Step 8: Top and Seal
Place a smaller pastry round over the top of each filled cup, gently pressing the edges to seal them to the bottom crust where possible. Using a small knife, cut a couple of small slits in the top of each cup to allow steam to escape while baking.
Step 9: Add the Egg Wash and Bake
Brush the tops of each pastry cup with the beaten egg for a beautifully golden, glossy finish. Transfer the muffin tin to the preheated oven and bake for 20 to 25 minutes, or until the pastry is deeply golden brown and the filling is bubbling through the slits.
Step 10: Cool Slightly and Serve
Let the pot pie cups cool in the muffin tin for 5 to 10 minutes before carefully removing them with a small offset spatula or butter knife, running it gently around the edges to loosen them first. Garnish with freshly chopped parsley before serving.
Expert Tips for the Best Results
Let the filling cool slightly before assembling. Warm filling is easier to handle and less likely to make the pastry soggy compared to piping-hot filling straight off the stove.
Don’t overfill the cups. While it’s tempting to pack in as much filling as possible, overfilling can cause the filling to bubble over and make the tops difficult to seal properly.
Cut slits in the top crust. This small step allows steam to escape during baking, preventing the tops from becoming soggy or bursting open unevenly.
Use cold pastry for the best flaky texture. If your dough has warmed up while you’re working with it, pop it in the refrigerator for a few minutes before cutting and shaping, since cold butter in the pastry is what creates those flaky layers.
Whisk constantly when building the roux-based sauce. Adding the broth and milk gradually while whisking prevents lumps from forming, ensuring a smooth, creamy filling.
Let the cups cool slightly before removing them from the tin. This brief resting period helps them set enough to remove cleanly without the crust falling apart.
Use rotisserie chicken for a shortcut. Pre-cooked rotisserie chicken saves time and adds great flavor, making this recipe even more convenient for busy weeknights.
Delicious Variations to Try
This recipe is a wonderful base for experimentation. Here are some popular ways to switch things up:
Turkey Pot Pie Cups: Substitute leftover cooked turkey for the chicken, making this a great way to use up Thanksgiving leftovers.
Extra Veggie Version: Add diced potatoes, mushrooms, or green beans to the filling for even more texture and heartiness.
Cheesy Addition: Stir a handful of shredded cheddar cheese into the filling for an extra layer of richness and flavor.
Puff Pastry Swap: Use puff pastry instead of traditional pie crust for an extra flaky, layered texture on both the top and bottom.
Herb-Forward Version: Add a teaspoon of fresh rosemary or sage along with the thyme for a more robust, herby flavor profile.
Lighter Version: Substitute the heavy cream or whole milk with a lower-fat milk, and use a reduced-fat pie crust to lighten the dish while keeping the core flavors intact.
What to Serve With Creamy Chicken Pot Pie Cups
These cups are hearty and satisfying enough to be a complete meal on their own, but a few simple sides can round out the table:
- A crisp green salad with a light vinaigrette adds a fresh, crisp contrast to the richness of the filling
- Roasted or steamed vegetables, such as green beans or asparagus, add extra color and nutrition
- A simple soup, like a light vegetable or tomato soup, pairs nicely for a heartier meal
- A glass of white wine, like Chardonnay or Sauvignon Blanc, complements the creamy, savory flavors nicely
Storage and Reheating Instructions
Refrigerating: Store leftover pot pie cups in an airtight container in the refrigerator for up to 4 days.
Freezing: These cups freeze exceptionally well, either before or after baking. To freeze unbaked, assemble the cups in a freezer-safe container, freeze until solid, then transfer to a freezer bag for up to 3 months, baking directly from frozen with a few extra minutes added to the baking time. To freeze after baking, cool completely, then store in an airtight container for up to 3 months, thawing overnight in the refrigerator before reheating.
Reheating in the oven: Reheat at 350°F (175°C) for 12 to 15 minutes, or until heated through and the crust has re-crisped slightly. This method helps preserve the pastry’s texture better than the microwave.
Reheating in the microwave: Place a cup on a microwave-safe plate and heat in 30-second intervals, checking frequently, until warmed through, keeping in mind the crust will soften using this method.
Frequently Asked Questions
Can I use store-bought pie crust for this recipe? Yes, refrigerated store-bought pie crust works perfectly for this recipe and saves significant time compared to making pastry from scratch.
Can I make the filling ahead of time? Yes. The filling can be made up to 2 days in advance and stored in the refrigerator. Let it come closer to room temperature before assembling the cups to make the process easier.
Why is my filling too thin? This is usually caused by not cooking the roux long enough, or not letting the sauce simmer sufficiently after adding the broth and milk. Be sure to whisk constantly and let the mixture thicken properly before adding the chicken and vegetables.
Can I use a muffin tin with a nonstick coating instead of greasing it? Yes, a nonstick muffin tin can be used, though a light greasing is still recommended to ensure the cups release easily after baking.
Can I make these vegetarian? Yes. Substitute the chicken with extra vegetables, such as diced potatoes and mushrooms, and use vegetable broth in place of chicken broth for a fully vegetarian version.
Can I make this recipe gluten-free? Yes. Substitute a gluten-free pie crust and use an equal amount of a gluten-free all-purpose flour blend or cornstarch (using about half the amount for cornstarch) in place of the regular flour for the roux.
How many pot pie cups does this recipe make? This recipe, using a standard 12-cup muffin tin, yields 12 individual pot pie cups, making it easy to portion for a family dinner or to freeze extras for later.
Final Thoughts
Creamy Chicken Pot Pie Cups take everything wonderful about a classic chicken pot pie — tender chicken, hearty vegetables, and a rich, creamy filling wrapped in flaky pastry — and transform it into a convenient, portion-controlled format that’s perfect for busy families, meal prepping, or fun entertaining. Each golden, individually baked cup delivers all that nostalgic comfort food flavor in a fun, handheld package.
Whether you’re making these for a family dinner, packing them for lunches throughout the week, or freezing a batch for future busy nights, this recipe delivers reliable comfort every time. Save it, bookmark it, or print it out — because once these creamy, flaky chicken pot pie cups come out of the oven, they’re guaranteed to become a regular favorite in your household.