Easy 3-Ingredient Cottage Cheese Bread Rolls (No Yeast, No Rise Time)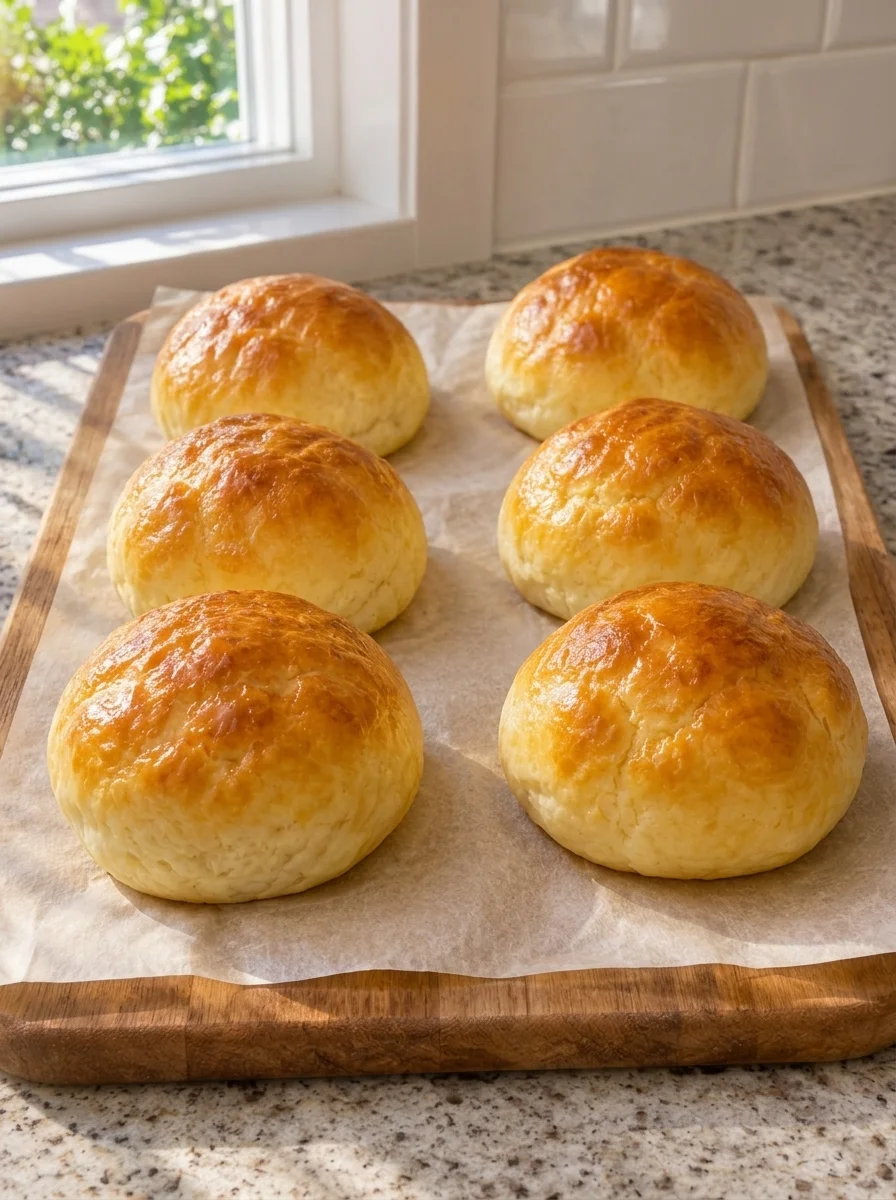
Meta title: 3-Ingredient Cottage Cheese Bread Rolls (No Yeast, 45 Minutes)
Meta description: Make soft, golden cottage cheese bread rolls with just 3 ingredients. No yeast, no rise time, and ready in about 45 minutes. Easy step-by-step recipe.
Focus keyword: cottage cheese bread rolls
Secondary keywords: 3-ingredient bread rolls, no-yeast dinner rolls, self-rising flour rolls, easy cottage cheese bread, quick bread rolls, cottage cheese recipes
If you have ever wanted fresh, warm bread rolls without waiting for yeast dough to rise, this recipe is for you. These easy 3-ingredient cottage cheese bread rolls have shiny golden tops and a soft, fine crumb, and they come together with just cottage cheese, self-rising flour, and an egg for brushing. There is no yeast, no proofing, and no waiting around. From the moment you turn on the oven, you are about 45 minutes away from a basket of warm rolls.
The trick is to blend the cottage cheese until it is completely smooth, so the curds disappear into the dough. The cottage cheese adds moisture, a gentle tang, and a little extra protein, while the self-rising flour already contains the salt and leavening that make the rolls puff up in the oven. A quick brush of beaten egg gives them that glossy, bakery-style finish.
Whether you need a last-minute side for soup, a bun for mini sandwiches, or a simple roll to slather with butter and jam, this recipe delivers with almost no effort and no special skills.
Table of Contents
- Why you will love these rolls
- Recipe at a glance
- Ingredients
- Ingredient notes and substitutions
- Step-by-step instructions
- Tips for success
- Troubleshooting
- Flavor variations
- Serving suggestions
- Storage, freezing, and reheating
- Why cottage cheese works in bread
- Frequently asked questions
- Final thoughts
Why You Will Love These Rolls
They need only three ingredients. Cottage cheese, self-rising flour, and one egg are all it takes. The shopping list is short, and you may already have everything on hand.
There is no rise time. Because the rolls rely on the leavening already in self-rising flour instead of yeast, you skip the long wait for dough to double. Mix, shape, brush, and bake.
They are ready in about 45 minutes. Between a short prep and a 20 to 24 minute bake, you can have rolls on the table in less time than it takes to order a pizza.
They are beginner-friendly. There is no kneading, no proofing, and no need to judge whether yeast is alive. If you can stir and shape a dough, you can make these rolls.
They have a soft, tender crumb. The cottage cheese keeps the inside moist and fine-textured, while the oven gives the outside a golden crust.
They are versatile. Eat them plain, split them for sandwiches, or serve them next to soups, salads, and pasta dishes.
They keep and freeze well. Store them for a couple of days at room temperature or freeze them for up to two months for easy meal prep.
Recipe at a Glance
- Yield: 6 rolls (about 70 g each)
- Total time: About 45 minutes
- Bake time: 20 to 24 minutes at 400°F (200°C)
- Rise time: None
- Equipment: Blender or food processor, mixing bowl, rimmed baking sheet, parchment paper, pastry brush, wire rack
Ingredients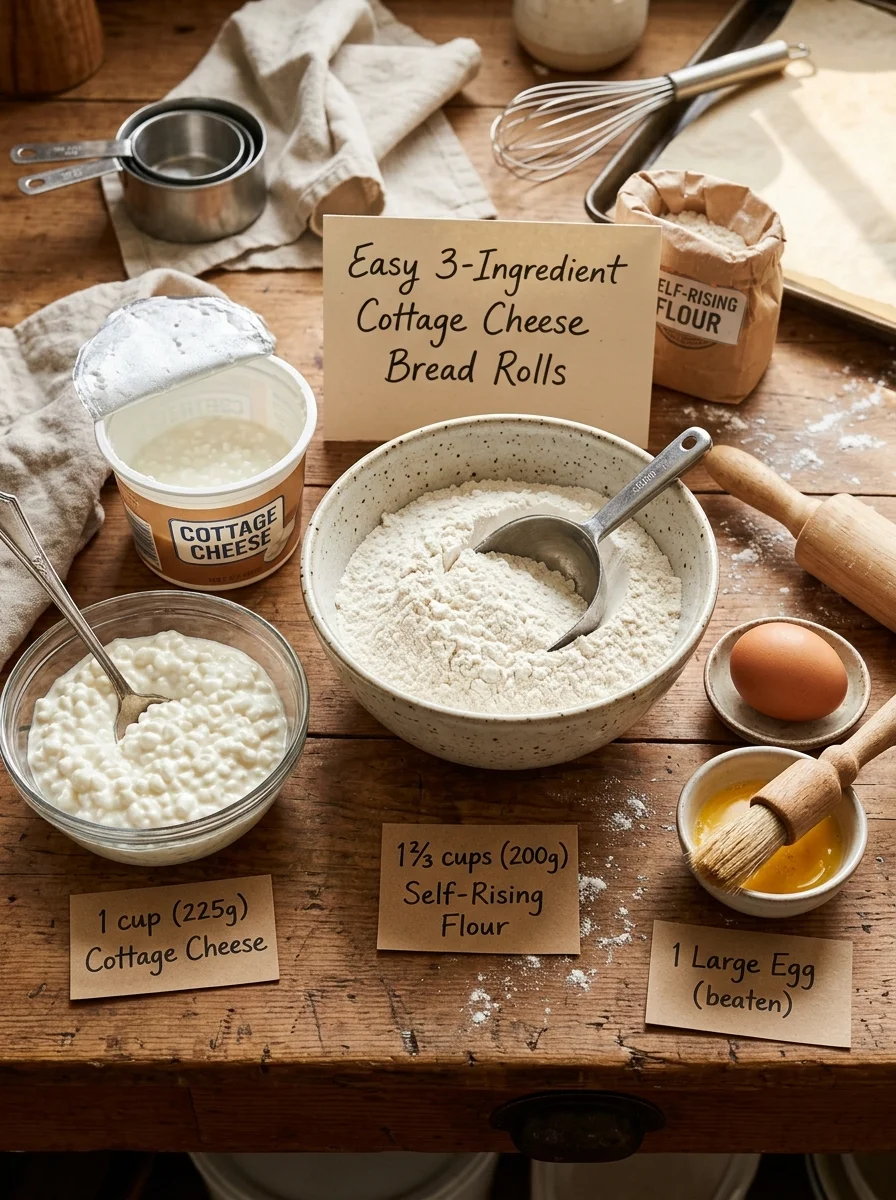
- 1 cup (225 g) small-curd cottage cheese, preferably 2% or full-fat
- 1⅔ cups (200 g) self-rising flour, plus a little for shaping
- 1 large egg, beaten, for brushing
Ingredient Notes and Substitutions
Small-Curd Cottage Cheese
Cottage cheese is the star of this recipe, and it plays several roles. It provides the moisture that hydrates the flour, it adds a mild tang and richness, and it contributes to the soft, tender crumb. Small-curd cottage cheese blends more easily than large-curd, though either will work if you blend it long enough.
Choose 2% or full-fat for the best flavor and texture. Fat-free cottage cheese is often wetter and less rich, so the rolls may be a little less tender. Before measuring, pour off any liquid that has pooled on top of the container. Extra liquid can make the dough too wet and sticky.
For accuracy, weigh the cottage cheese if you have a kitchen scale. One cup is about 225 g in this recipe.
Self-Rising Flour
Self-rising flour is simply flour that already contains baking powder and salt. That is what allows these rolls to rise with no yeast. Use a fresh bag, because baking powder loses its strength over time, and old self-rising flour can produce flat, dense rolls.
If you do not have self-rising flour, you can make a substitute. For every 1 cup of all-purpose flour, whisk in 1½ teaspoons of baking powder and ¼ teaspoon of fine salt. For this recipe, that works out to roughly 1⅔ cups (200 g) of all-purpose flour with about 2½ teaspoons of baking powder and a scant ½ teaspoon of salt. Whisk it well so the leavening is evenly distributed.
For the most reliable results, weigh your flour. Scooping flour straight from the bag can pack in more than intended and lead to a dry dough.
The Egg Wash
The egg is used only for brushing, and it is what gives the rolls their shiny, deep golden tops. Beat the egg until the white and yolk are fully combined, and apply a thin, even layer. If you prefer, you can add a teaspoon of water or milk to the egg to make it easier to brush. For a dairy-free or egg-free shine, brush the tops with a little milk or olive oil, though the color and gloss will be different.
Step-by-Step Instructions
Step 1: Prepare the Pan
Heat the oven to 400°F (200°C). Line a rimmed baking sheet with parchment paper. Parchment prevents sticking and makes cleanup easy, and it helps the bottoms brown evenly. Make sure your oven is fully preheated before the rolls go in so they get a good initial burst of heat.
Step 2: Blend the Cottage Cheese
Pour off any liquid pooled on top of the cottage cheese before measuring. Add the measured cottage cheese to a blender or food processor and blend until smooth, scraping down the sides as needed. This step matters. Blending turns the curds into a creamy puree, so the dough is even and the finished rolls have a smooth, fine crumb with no cottage cheese lumps.
Step 3: Mix the Dough
Place the self-rising flour in a mixing bowl. Stir the blended cottage cheese into the flour just until a soft, slightly tacky dough forms. Turn the dough onto a lightly floured surface and gently press it together. Avoid overworking it. Because the dough contains baking powder rather than yeast, it does not need kneading, and too much handling can make the rolls tough.
Step 4: Shape and Brush
Divide the dough into six pieces, about 70 g each. Tuck the edges of each piece underneath to form a round. Place the rolls seam-side down about 2 inches apart on the baking sheet. Space matters, since the rolls will puff up and spread slightly. Brush the tops lightly with beaten egg, covering the surface evenly but without letting the egg pool around the base.
Step 5: Bake and Cool
Bake for 20 to 24 minutes, until the tops are deep golden and the sides are set. Transfer the rolls to a wire rack and cool for 10 minutes before splitting. The short rest lets the crumb finish setting, which gives you a better texture when you cut into them.
Tips for Success
Dust your hands lightly with flour if the dough sticks. The dough is meant to be soft and slightly tacky. A little flour on your hands is enough. Too much will dry the rolls out.
Work the dough just enough to shape the rolls. Gently pressing it together keeps the texture tender.
Apply a thin egg wash for an even finish. A thick layer can drip down the sides and cause uneven browning or a scrambled-egg look at the base.
Pour off the liquid from the cottage cheese. Excess moisture can make the dough too sticky to shape.
Blend until truly smooth. Smooth cottage cheese blends seamlessly into the flour for a fine, even crumb.
Weigh your ingredients. With only three ingredients, accuracy matters. A scale takes the guesswork out.
Use fresh self-rising flour. Old flour may have lost its leavening power, and the rolls can bake up flat.
Do not skip the cooling time. Cutting into the rolls straight from the oven can make the crumb seem gummy.
Troubleshooting
The dough is too sticky to shape. Cottage cheese brands vary in moisture. Make sure you poured off the liquid, and dust your hands and the work surface lightly with flour. Add a little at a time rather than a large amount.
The dough is too dry or crumbly. This can happen if too much flour was used. Weighing the flour helps, and a spoonful of extra blended cottage cheese can bring a dry dough together.
The rolls did not rise much. The most common culprit is old self-rising flour or an improvised substitute with weak baking powder. Check the date on your flour or baking powder, and make sure the oven was fully heated.
The rolls are dense. Overmixing or heavy handling can make them tough and dense. Stir just until the dough comes together and shape gently.
The tops are pale. Make sure you used the egg wash, and bake until the tops are deep golden. Moving the pan to a slightly higher rack for the last few minutes can help.
The bottoms are too dark. Use parchment paper and a light-colored baking sheet. Dark pans absorb more heat and can brown the bottoms faster.
There are bits of curd in the finished rolls. Blend the cottage cheese longer next time, until completely smooth.
Flavor Variations
The plain rolls are delicious, but they also take well to add-ins and toppings. Try these ideas, keeping the dough consistency soft and tacky.
- Everything-bagel rolls: After brushing with egg, sprinkle with everything bagel seasoning.
- Cheesy rolls: Fold in a handful of shredded cheddar or mozzarella, or sprinkle cheese on top during the last few minutes of baking.
- Garlic and herb: Stir dried herbs into the flour, then brush the baked rolls with garlic butter.
- Rosemary and sea salt: Press fresh rosemary and a pinch of flaky salt into the tops before baking.
- Sesame or poppy seed: Sprinkle seeds over the egg wash for crunch and a bakery look.
- Cinnamon sugar: For a sweeter version, brush the warm rolls with butter and dip the tops in cinnamon sugar.
- Jalapeño cheddar: Add finely chopped pickled jalapeño and cheese for a spicy, savory roll.
Serving Suggestions
With butter and jam. Split a warm roll and spread it with butter and your favorite jam for breakfast or a snack.
As slider buns. These six-roll portions are the perfect size for mini burgers, pulled chicken, or ham and cheese sliders.
With tomato soup. Dunk a warm roll into a bowl of tomato soup for a classic comforting meal.
Alongside pasta or salad. Serve the rolls with lasagna, baked ziti, or a big green salad.
At brunch. Pair with scrambled eggs, fruit, and coffee, or split and fill with egg and cheese for a breakfast sandwich.
As a holiday side. Because they come together so quickly, these rolls are a great last-minute addition to the dinner table.
For lunchboxes. Pack a cooled roll with sliced turkey and cheese for an easy lunch.
Storage, Freezing, and Reheating
Room temperature: Once the rolls are completely cool, store them airtight at room temperature for up to 2 days. Make sure they are fully cooled before storing so condensation does not make them soggy.
Freezing: Freeze the cooled rolls for up to 2 months. Wrap them individually or place them in a freezer-safe bag with as much air removed as possible.
Reheating: Rewarm the rolls at 325°F (165°C) until heated through. The oven refreshes the crust better than a microwave, which can make the bread soft and chewy. If reheating from frozen, allow extra time, covering them loosely with foil if the tops brown too quickly.
Why Cottage Cheese Works in Bread
Using cottage cheese in baking might sound surprising, but it is a smart ingredient for quick breads. Once blended, cottage cheese becomes a smooth, creamy base that behaves much like a thick yogurt or ricotta in a dough.
It adds moisture, so the crumb stays tender instead of drying out. It brings a subtle tang that gives the rolls a pleasant, savory depth without tasting like cheese. It also contributes protein and fat, which help create a soft, fine texture and a golden crust.
Because the leavening in this recipe comes from the baking powder already in the self-rising flour, the moisture and acidity of the cottage cheese work alongside it to help the rolls puff in the oven. That is why you get lift without any waiting.
If you already keep cottage cheese in your refrigerator for snacks, this recipe is also a creative way to use up the rest of a container.
Frequently Asked Questions
Can I make these rolls without self-rising flour?
Yes. Use all-purpose flour and add baking powder and salt. A common ratio is 1½ teaspoons of baking powder and ¼ teaspoon of fine salt for every 1 cup of all-purpose flour. Whisk them together thoroughly before adding the cottage cheese.
Do I have to blend the cottage cheese?
Blending is strongly recommended. It creates a smooth dough and a fine, even crumb. If you skip it, the rolls will contain visible curds and the texture will be less uniform.
Can I use low-fat or fat-free cottage cheese?
You can, but 2% or full-fat gives the best flavor and texture. Fat-free versions tend to be wetter and may produce a slightly less tender roll, so drain off any extra liquid.
Can I use large-curd cottage cheese?
Yes, as long as you blend it until completely smooth.
Is there yeast in this recipe?
No. These rolls rely on the baking powder in self-rising flour, so there is no yeast and no rise time.
Why is my dough so sticky?
The dough is supposed to be soft and slightly tacky. If it is too sticky, make sure you drained the liquid from the cottage cheese and use lightly floured hands for shaping.
Can I skip the egg wash?
Yes, though the rolls will be paler and less glossy. A brush of milk or olive oil can give a bit of color and shine.
Can I make the dough ahead of time?
This dough is best baked right after mixing, because the baking powder begins working as soon as it is moistened. For make-ahead convenience, bake the rolls and freeze them.
Can I double the recipe?
Yes. Mix the dough in a larger bowl, divide it into twelve pieces, and bake on two sheets or in batches. Keep an eye on the bake time.
Are these rolls gluten-free?
No. The recipe uses wheat-based self-rising flour. A gluten-free self-rising flour blend may work, but the texture and results will vary, so expect to experiment.
What can I serve them with?
Soups, salads, pasta dishes, sandwiches, and breakfast spreads all pair beautifully with these rolls.
Final Thoughts
These easy 3-ingredient cottage cheese bread rolls prove that great homemade bread does not have to be complicated. With only cottage cheese, self-rising flour, and an egg, you can bake soft, golden rolls in about 45 minutes, with no yeast, no kneading, and no rise time.
They are ideal for busy weeknights, last-minute dinners, and anyone who wants fresh bread without the fuss. Blend the cottage cheese until smooth, handle the dough gently, brush on a thin egg wash, and let the oven do the rest.
If you give the recipe a try, leave a rating and a comment with your favorite way to enjoy the rolls, and share it with a friend who loves easy baking.
Pin it for later: Easy 3-Ingredient Cottage Cheese Bread Rolls | No-Yeast Quick Rolls 🍞
Print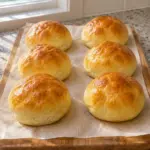
Easy 3-Ingredient Cottage Cheese Bread Rolls
Ingredients
- 1 cup (225 g) small-curd cottage cheese, preferably 2% or full-fat
- 1⅔ cups (200 g) self-rising flour, plus a little for shaping
- 1 large egg, beaten, for brushing
Ingredient Notes and Substitutions
Small-Curd Cottage Cheese
Cottage cheese is the star of this recipe, and it plays several roles. It provides the moisture that hydrates the flour, it adds a mild tang and richness, and it contributes to the soft, tender crumb. Small-curd cottage cheese blends more easily than large-curd, though either will work if you blend it long enough.
Choose 2% or full-fat for the best flavor and texture. Fat-free cottage cheese is often wetter and less rich, so the rolls may be a little less tender. Before measuring, pour off any liquid that has pooled on top of the container. Extra liquid can make the dough too wet and sticky.
For accuracy, weigh the cottage cheese if you have a kitchen scale. One cup is about 225 g in this recipe.
Self-Rising Flour
Self-rising flour is simply flour that already contains baking powder and salt. That is what allows these rolls to rise with no yeast. Use a fresh bag, because baking powder loses its strength over time, and old self-rising flour can produce flat, dense rolls.
If you do not have self-rising flour, you can make a substitute. For every 1 cup of all-purpose flour, whisk in 1½ teaspoons of baking powder and ¼ teaspoon of fine salt. For this recipe, that works out to roughly 1⅔ cups (200 g) of all-purpose flour with about 2½ teaspoons of baking powder and a scant ½ teaspoon of salt. Whisk it well so the leavening is evenly distributed.
For the most reliable results, weigh your flour. Scooping flour straight from the bag can pack in more than intended and lead to a dry dough.
The Egg Wash
The egg is used only for brushing, and it is what gives the rolls their shiny, deep golden tops. Beat the egg until the white and yolk are fully combined, and apply a thin, even layer. If you prefer, you can add a teaspoon of water or milk to the egg to make it easier to brush. For a dairy-free or egg-free shine, brush the tops with a little milk or olive oil, though the color and gloss will be different.
Instructions
Heat the oven to 400°F (200°C). Line a rimmed baking sheet with parchment paper. Parchment prevents sticking and makes cleanup easy, and it helps the bottoms brown evenly. Make sure your oven is fully preheated before the rolls go in so they get a good initial burst of heat.
Step 2: Blend the Cottage Cheese
Pour off any liquid pooled on top of the cottage cheese before measuring. Add the measured cottage cheese to a blender or food processor and blend until smooth, scraping down the sides as needed. This step matters. Blending turns the curds into a creamy puree, so the dough is even and the finished rolls have a smooth, fine crumb with no cottage cheese lumps.
Step 3: Mix the Dough
Place the self-rising flour in a mixing bowl. Stir the blended cottage cheese into the flour just until a soft, slightly tacky dough forms. Turn the dough onto a lightly floured surface and gently press it together. Avoid overworking it. Because the dough contains baking powder rather than yeast, it does not need kneading, and too much handling can make the rolls tough.
Step 4: Shape and Brush
Divide the dough into six pieces, about 70 g each. Tuck the edges of each piece underneath to form a round. Place the rolls seam-side down about 2 inches apart on the baking sheet. Space matters, since the rolls will puff up and spread slightly. Brush the tops lightly with beaten egg, covering the surface evenly but without letting the egg pool around the base.
Step 5: Bake and Cool
Bake for 20 to 24 minutes, until the tops are deep golden and the sides are set. Transfer the rolls to a wire rack and cool for 10 minutes before splitting. The short rest lets the crumb finish setting, which gives you a better texture when you cut into them.