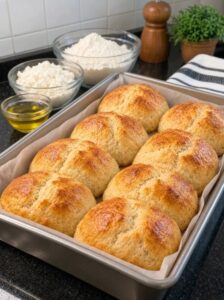
There is something deeply satisfying about pulling a tray of golden dinner rolls out of your own oven. The smell fills the kitchen, the crust crackles slightly as it cools, and suddenly an ordinary weeknight meal feels like a special occasion. The problem, of course, is that traditional bread takes time. Yeast needs to be activated, dough needs to be kneaded, and everything needs to rise, sometimes twice, before a single roll goes into the oven.
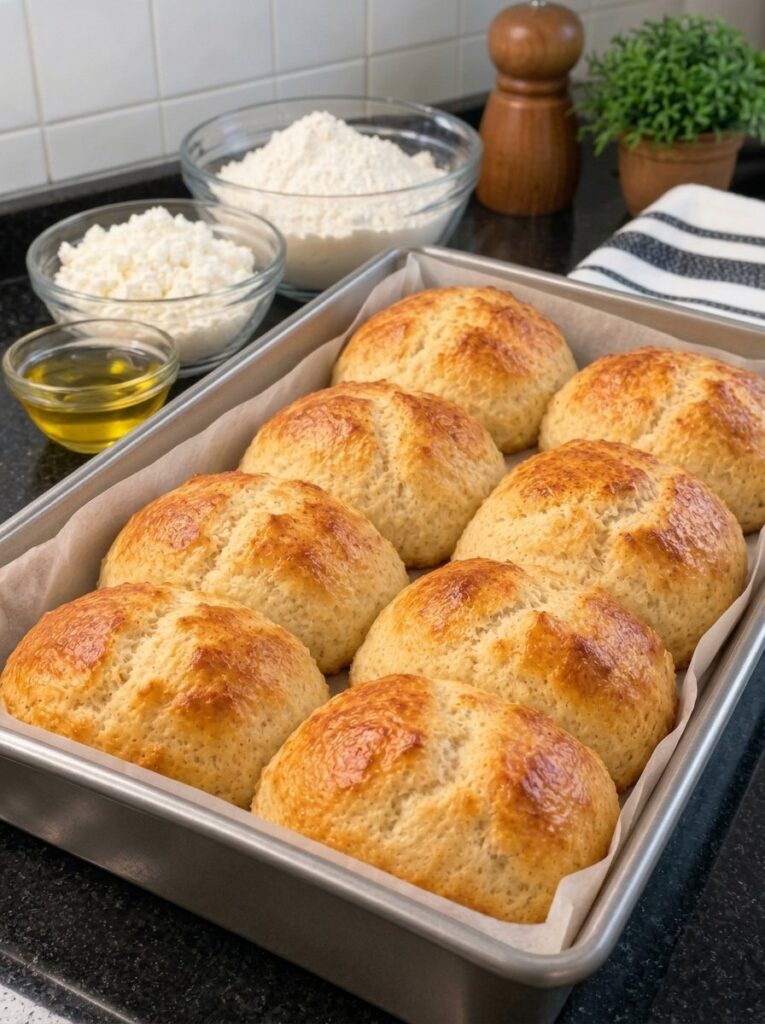
These easy 3-ingredient cottage cheese dinner rolls solve that problem completely. With just cottage cheese, self-rising flour, and olive oil, you can have eight rustic, tender rolls on the table in roughly 35 to 50 minutes. There is no yeast, no kneading, and no proofing. If you can use a blender and a mixing bowl, you can make these rolls.
In this guide, you will learn exactly how the recipe works, why each ingredient matters, how to avoid common mistakes, and how to serve, store, and reheat your rolls so they taste fresh every time.
Why You Will Love These Cottage Cheese Dinner Rolls
Before we get into the details, here is why this recipe has earned a permanent spot in so many home kitchens.
They need only three ingredients. Cottage cheese, self-rising flour, and olive oil are all you need. Most people already have at least two of them in the kitchen, and the third is easy to pick up at any grocery store.
They are completely yeast-free. Without yeast, there is no waiting around for dough to rise. The self-rising flour does the heavy lifting, giving the rolls their structure and lift while they bake.
They require no kneading. You simply mix the dough, fold it gently a few times, and divide it. That makes the recipe beginner-friendly and perfect for anyone who finds traditional bread intimidating.
They are soft and moist inside. Blended cottage cheese adds moisture and a subtle creamy flavor, which helps keep the inside of each roll tender and delicate.
They are fast. From the moment you preheat the oven to the moment you serve warm rolls, you are looking at under an hour.
They are versatile. These rolls pair with soups, salads, pasta, roasted meats, and more. You can also split them for sandwiches or brush them with garlic butter for an extra-special side.
Ingredients You Will Need
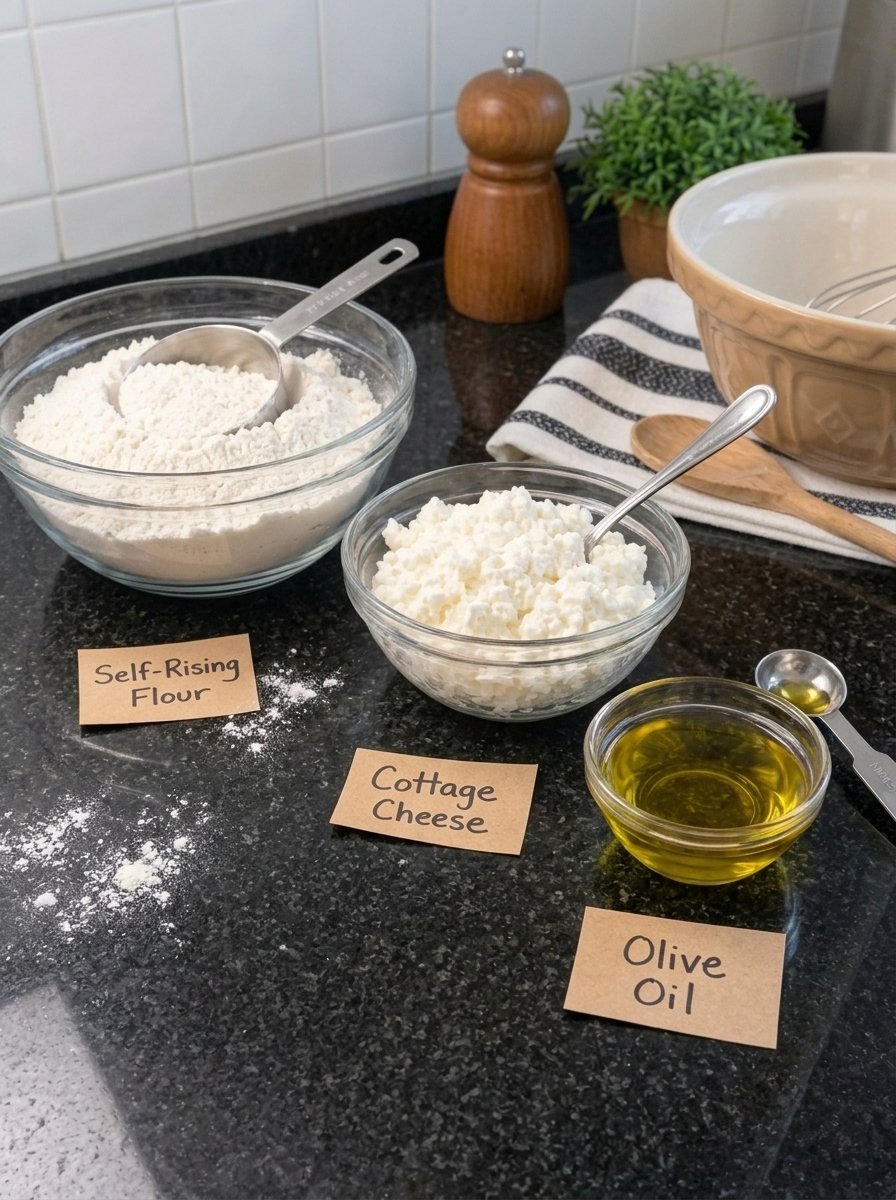
The ingredient list is refreshingly short:
- 2½ cups prepared self-rising flour, spooned and leveled (300 g)
- 1 cup cottage cheese (225 g)
- 2 tablespoons olive oil (30 ml)
That is the entire list. Let’s look at why each one earns its place.
Self-Rising Flour: The Structure and the Rise
Self-rising flour is all-purpose flour that already contains a leavening agent and salt. Because those components are built in, you do not need to add baking powder or salt separately, and you do not need yeast. The flour starts working as soon as it meets moisture, which is why this dough should be mixed and baked without much delay.
It is important to measure the flour correctly. Spoon the flour into your measuring cup and level it off with the back of a knife. Scooping directly from the bag packs the flour down, and you can end up with far more than the recipe calls for. Too much flour is the most common reason quick breads turn out dense. If you own a kitchen scale, weighing out 300 grams is the most reliable method.
Cottage Cheese: The Moisture and Tenderness
Cottage cheese is the secret behind the texture of these rolls. When blended until smooth, it disappears into the dough, leaving behind moisture, a subtle creamy taste, and a soft, tender crumb. You will not see lumps in the finished rolls, and the flavor is mild and pleasant rather than cheesy or tangy.
For the best results, use a thick cottage cheese. If yours looks watery or has a lot of liquid sitting around the curds, drain it briefly before measuring. Excess liquid can make the dough too wet and tempt you to add extra flour, which leads to denser rolls.
Olive Oil: The Richness
A small amount of olive oil adds richness and helps keep the inside of the rolls soft and delicate. It also contributes to the golden color and gentle flavor of the finished rolls. Use a good-quality olive oil that you enjoy the taste of, since there are so few ingredients and each one is noticeable.
Tools and Equipment
You do not need anything fancy for this recipe:
- A blender or food processor
- A large mixing bowl
- A wooden spoon or spatula
- A baking sheet
- Parchment paper or cooking spray
- Measuring cups and spoons (or a kitchen scale)
- A wire cooling rack
How to Make Cottage Cheese Dinner Rolls: Step by Step
Step 1: Preheat the Oven and Prepare the Baking Sheet
Preheat your oven to 375°F (190°C). Line a baking sheet with parchment paper, or lightly grease it with cooking spray. Parchment is ideal because it prevents sticking and makes cleanup effortless.
Step 2: Blend the Cottage Cheese
Place the cottage cheese in a blender or food processor and blend until completely smooth and creamy. Stop to scrape down the sides if needed. Blending thoroughly is worth the extra minute because it helps the cottage cheese mix evenly into the dough and gives the rolls a softer, more even texture.
Step 3: Combine the Ingredients
In a large mixing bowl, add the blended cottage cheese and the olive oil. Stir until combined. Then add the self-rising flour gradually, mixing with a wooden spoon or spatula until a soft dough forms. Adding the flour a little at a time gives you better control over the consistency.
Step 4: Bring the Dough Together
Lightly flour your work surface and your hands. Transfer the dough to the surface and gently fold it a few times until it comes together. This is not the same as kneading yeast bread. You are only shaping the dough, not developing gluten, so keep your handling light.
The dough should be slightly sticky but manageable. If it is very sticky, sprinkle on a little extra flour, just enough to make it workable. Resist the urge to add too much. Extra flour is the quickest route to heavy, dry rolls.
Step 5: Divide the Dough into Eight Portions
Divide the dough into 8 approximately equal portions. Gently roll each piece between your hands to form a round ball. For a rustic, homemade look, do not worry about making every roll perfectly smooth. The slightly uneven surface is part of the charm, and it bakes into those craggy, golden patches that look so appealing.
Step 6: Arrange the Rolls on the Baking Sheet
Place the dough balls on the prepared baking sheet, leaving about 2 inches of space between them. Gently press each one to flatten it slightly so the rolls bake evenly. The space gives them room to expand in the oven without merging into one another.
Step 7: Bake Until Golden
Place the baking sheet on the center rack of the preheated oven. Bake for approximately 20 to 25 minutes, or until the rolls are lightly golden on top and cooked through. The bottoms should be lightly browned, and the centers should no longer look doughy. Ovens vary, so start checking around the 20-minute mark.
Step 8: Cool Slightly and Serve
Remove the rolls from the oven and let them rest on the baking sheet for about 5 minutes. Then transfer them to a wire rack to cool slightly. Serve warm with butter, olive oil, or your favorite savory spread.
Tips for the Best Cottage Cheese Dinner Rolls
Simple recipes still benefit from a few good habits. These tips make the difference between good rolls and great ones.
Blend the cottage cheese until completely smooth. Any leftover curds can create uneven texture. A smooth blend gives a softer, more consistent crumb.
Use thick cottage cheese. If your cottage cheese has excess liquid, drain it briefly before measuring so the dough does not become too wet.
Measure the flour carefully. Spoon and level rather than scooping. This single habit prevents more baking problems than almost any other.
Keep the dough soft. A slightly sticky dough is normal and desirable. Adding too much extra flour will make the rolls dense.
Do not knead. Gently mix and bring the dough together, then stop. Too much handling can make the rolls tough.
Shape with lightly floured hands. This makes dividing and forming the rolls much easier without adding a lot of flour to the dough itself.
Leave space between rolls. Arrange them with room to expand as they bake so each one browns evenly.
Serve them warm. These rolls are at their very best fresh from the oven, with a little butter or a drizzle of olive oil.
Common Mistakes to Avoid
Even a three-ingredient recipe has a few pitfalls. Here is what to watch for.
Adding too much flour. If the dough feels sticky, your instinct may be to keep adding flour until it feels like regular bread dough. Do not. This dough is meant to be soft, and extra flour leads to dense, dry rolls.
Overworking the dough. Because there is no yeast, there is no reason to knead. Handling the dough too much can make the rolls tough instead of tender.
Skipping the blending step. Unblended cottage cheese leaves curds in the dough and changes the texture. Blend it until smooth.
Letting the dough sit too long. Self-rising flour begins working once it becomes wet. For the best rise, shape and bake the rolls soon after mixing.
Crowding the baking sheet. Rolls placed too close together will merge as they expand and may bake unevenly. Leave about 2 inches between them.
Pulling them out too early. The centers should no longer look doughy. If the tops are golden but the rolls feel heavy or underdone, give them a few more minutes.
Serving Ideas: What to Eat with Cottage Cheese Dinner Rolls
These rolls are mild, soft, and savory, which makes them an easy companion to nearly any meal.
Family dinner. Serve them alongside roasted chicken, grilled meat, or baked fish. They are ideal for soaking up pan juices and sauces.
Cozy soups. Pair them with tomato soup, creamy broccoli soup, or homemade chicken soup. A warm roll beside a steaming bowl is hard to beat on a cold evening.
Pasta night. Enjoy them with spaghetti, baked ziti, or creamy Alfredo pasta. They are perfect for wiping the plate clean.
Fresh salads. Serve with a crisp garden salad or a Caesar salad for a light but satisfying meal.
Garlic butter rolls. Brush the warm rolls with melted garlic butter and sprinkle with chopped parsley for a restaurant-style side.
Simple snacks. Split one open and spread it with cream cheese, butter, or hummus for a quick bite any time of day.
Easy Variations to Try
The base recipe is beautifully simple, and it is also a flexible starting point. If you want to experiment, consider a few small additions. Keep in mind that these are optional ideas beyond the original three-ingredient recipe, so add them modestly to protect the soft texture of the dough.
- Garlic and herb rolls: Mix a little garlic powder and dried herbs into the flour, then brush the baked rolls with melted butter.
- Cheesy rolls: Fold a small amount of shredded cheese into the dough before shaping.
- Everything-style rolls: Sprinkle the tops with a seasoning blend before baking.
- Sandwich-style buns: Shape slightly larger, flatter rounds and use them for sliders or breakfast sandwiches.
If you try one of these, make a note of how it turns out so you can repeat your favorite version.
How to Store Cottage Cheese Dinner Rolls
Proper storage keeps your rolls soft and fresh.
Room temperature: Once the rolls have cooled completely, store them in an airtight container for up to 2 days.
Refrigerator: Keep them in an airtight container in the fridge for up to 4 to 5 days.
Freezer: Freeze completely cooled rolls in a freezer-safe bag for up to 2 months. Let them cool fully before freezing so condensation does not form inside the bag.
Reheating: Warm the rolls in a 300°F (150°C) oven for 5 to 7 minutes, or microwave them briefly until soft and warm. The oven brings back a slightly crisper outside, while the microwave is faster.
Make-Ahead Tip
These rolls are best mixed and baked just before serving, because the self-rising flour begins working once it becomes wet. If you want to plan ahead, bake the rolls fully, cool them, and freeze them. Then reheat as needed. This gives you fresh-tasting rolls on demand without mixing dough at the last minute.
Recipe Details at a Glance
- Prep time: 10 to 15 minutes
- Bake time: 20 to 25 minutes
- Cooling time: 5 to 10 minutes
- Total time: Approximately 35 to 50 minutes
- Yield: 8 dinner rolls
- Oven temperature: 375°F (190°C)
- Main ingredients: Cottage cheese, self-rising flour, and olive oil
Frequently Asked Questions
Can I make cottage cheese dinner rolls without a blender?
Blending is strongly recommended because it creates a smooth dough and a more even texture. If you do not have a blender or food processor, you could try mashing the cottage cheese very thoroughly, but the rolls may have a slightly more textured crumb.
Do these rolls taste like cottage cheese?
The flavor is subtle. The blended cottage cheese contributes moisture and a gentle creamy taste rather than a strong cheesy or tangy flavor. Most people simply taste soft, savory bread.
Can I use all-purpose flour instead of self-rising flour?
This recipe is written for self-rising flour, which already contains the leavening and salt that make the rolls rise. If you only have all-purpose flour, you would need to add baking powder and salt yourself, and results may vary. For the most reliable outcome, use self-rising flour as the recipe directs.
Why is my dough so sticky?
A slightly sticky dough is normal. Use lightly floured hands and a lightly floured surface, and add only a small sprinkle of flour if needed. If the dough seems excessively wet, your cottage cheese may have contained extra liquid. Next time, drain it briefly before measuring.
Why did my rolls turn out dense?
Dense rolls usually come from too much flour or too much handling. Measure the flour by spooning and leveling, add extra flour sparingly, and avoid kneading the dough.
Can I freeze the dough before baking?
Because self-rising flour starts working as soon as it becomes wet, this recipe is best baked right after mixing. For make-ahead convenience, bake the rolls, cool them completely, and freeze the baked rolls instead.
How do I know when the rolls are done?
Look for lightly golden tops and lightly browned bottoms. The centers should no longer look doughy. This usually takes about 20 to 25 minutes at 375°F (190°C).
How many rolls does this recipe make?
The recipe yields 8 dinner rolls of roughly equal size.
What is the best way to reheat leftover rolls?
Warm them in a 300°F (150°C) oven for 5 to 7 minutes, or microwave them briefly until soft and warm.
Can I serve these rolls at a holiday meal?
Absolutely. They are quick enough for a busy holiday kitchen, and because they bake in about 25 minutes, they can go into the oven while other dishes rest. Just keep in mind they taste best fresh and warm.
Final Thoughts
Homemade bread does not have to be complicated. These 3-ingredient cottage cheese dinner rolls prove that a handful of simple ingredients and a little attention to technique can produce soft, golden, satisfying rolls without yeast, kneading, or proofing.
Blend the cottage cheese until smooth, measure the flour carefully, keep the dough soft, and handle it gently. Follow those few principles and you will be rewarded with eight rustic rolls that are tender inside, lightly crisp outside, and ready for butter, soup, or whatever is on the table tonight.
Print
Easy 3-Ingredient Cottage Cheese Dinner Rolls
Ingredients
The ingredient list is refreshingly short:
- 2½ cups prepared self-rising flour, spooned and leveled (300 g)
- 1 cup cottage cheese (225 g)
- 2 tablespoons olive oil (30 ml)
That is the entire list. Let’s look at why each one earns its place.
Self-Rising Flour: The Structure and the Rise
Self-rising flour is all-purpose flour that already contains a leavening agent and salt. Because those components are built in, you do not need to add baking powder or salt separately, and you do not need yeast. The flour starts working as soon as it meets moisture, which is why this dough should be mixed and baked without much delay.
It is important to measure the flour correctly. Spoon the flour into your measuring cup and level it off with the back of a knife. Scooping directly from the bag packs the flour down, and you can end up with far more than the recipe calls for. Too much flour is the most common reason quick breads turn out dense. If you own a kitchen scale, weighing out 300 grams is the most reliable method.
Cottage Cheese: The Moisture and Tenderness
Cottage cheese is the secret behind the texture of these rolls. When blended until smooth, it disappears into the dough, leaving behind moisture, a subtle creamy taste, and a soft, tender crumb. You will not see lumps in the finished rolls, and the flavor is mild and pleasant rather than cheesy or tangy.
For the best results, use a thick cottage cheese. If yours looks watery or has a lot of liquid sitting around the curds, drain it briefly before measuring. Excess liquid can make the dough too wet and tempt you to add extra flour, which leads to denser rolls.
Instructions
Preheat your oven to 375°F (190°C). Line a baking sheet with parchment paper, or lightly grease it with cooking spray. Parchment is ideal because it prevents sticking and makes cleanup effortless.
Step 2: Blend the Cottage Cheese
Place the cottage cheese in a blender or food processor and blend until completely smooth and creamy. Stop to scrape down the sides if needed. Blending thoroughly is worth the extra minute because it helps the cottage cheese mix evenly into the dough and gives the rolls a softer, more even texture.
Step 3: Combine the Ingredients
In a large mixing bowl, add the blended cottage cheese and the olive oil. Stir until combined. Then add the self-rising flour gradually, mixing with a wooden spoon or spatula until a soft dough forms. Adding the flour a little at a time gives you better control over the consistency.
Step 4: Bring the Dough Together
Lightly flour your work surface and your hands. Transfer the dough to the surface and gently fold it a few times until it comes together. This is not the same as kneading yeast bread. You are only shaping the dough, not developing gluten, so keep your handling light.
The dough should be slightly sticky but manageable. If it is very sticky, sprinkle on a little extra flour, just enough to make it workable. Resist the urge to add too much. Extra flour is the quickest route to heavy, dry rolls.
Step 5: Divide the Dough into Eight Portions
Divide the dough into 8 approximately equal portions. Gently roll each piece between your hands to form a round ball. For a rustic, homemade look, do not worry about making every roll perfectly smooth. The slightly uneven surface is part of the charm, and it bakes into those craggy, golden patches that look so appealing.
Step 6: Arrange the Rolls on the Baking Sheet
Place the dough balls on the prepared baking sheet, leaving about 2 inches of space between them. Gently press each one to flatten it slightly so the rolls bake evenly. The space gives them room to expand in the oven without merging into one another.
Step 7: Bake Until Golden
Place the baking sheet on the center rack of the preheated oven. Bake for approximately 20 to 25 minutes, or until the rolls are lightly golden on top and cooked through. The bottoms should be lightly browned, and the centers should no longer look doughy. Ovens vary, so start checking around the 20-minute mark.
Step 8: Cool Slightly and Serve
Remove the rolls from the oven and let them rest on the baking sheet for about 5 minutes. Then transfer them to a wire rack to cool slightly. Serve warm with butter, olive oil, or your favorite savory spread.