There is nothing quite like the smell of freshly baked bread filling your kitchen. It is warm, comforting, and instantly makes a house feel like a home. If you have ever wanted to bake bread from scratch but felt intimidated by complicated techniques, specialty equipment, or long ingredient lists, this easy homemade Italian bread loaf is the perfect place to begin.
This recipe produces a beautifully golden crust, a soft and fluffy interior, and the classic bakery-style flavor that makes every slice irresistible. It is made with simple pantry ingredients you probably already have: flour, yeast, warm water, a little sugar, salt, and olive oil. There is no stand mixer required, no sourdough starter to feed, and no baking stone to buy. All you need is a mixing bowl, a wooden spoon, a baking sheet, and a little patience while the dough rises.
In this guide you will find the complete recipe, a detailed step-by-step walkthrough, expert tips for the best results, troubleshooting advice, creative serving ideas, and everything you need to know about storing and reheating your loaf. Whether you are serving it alongside pasta, soups, and salads, or enjoying it warm with butter, this bread delivers.
Why You Will Love This Italian Bread Recipe
Before we get into the details, here is why this loaf deserves a permanent spot in your recipe collection.
- Beginner-friendly: The steps are simple and forgiving. If you have never baked bread before, this is a confidence-building first loaf.
- Simple pantry ingredients: No unusual items. All-purpose flour, yeast, water, sugar, salt, and olive oil do all the work.
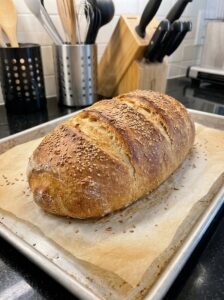
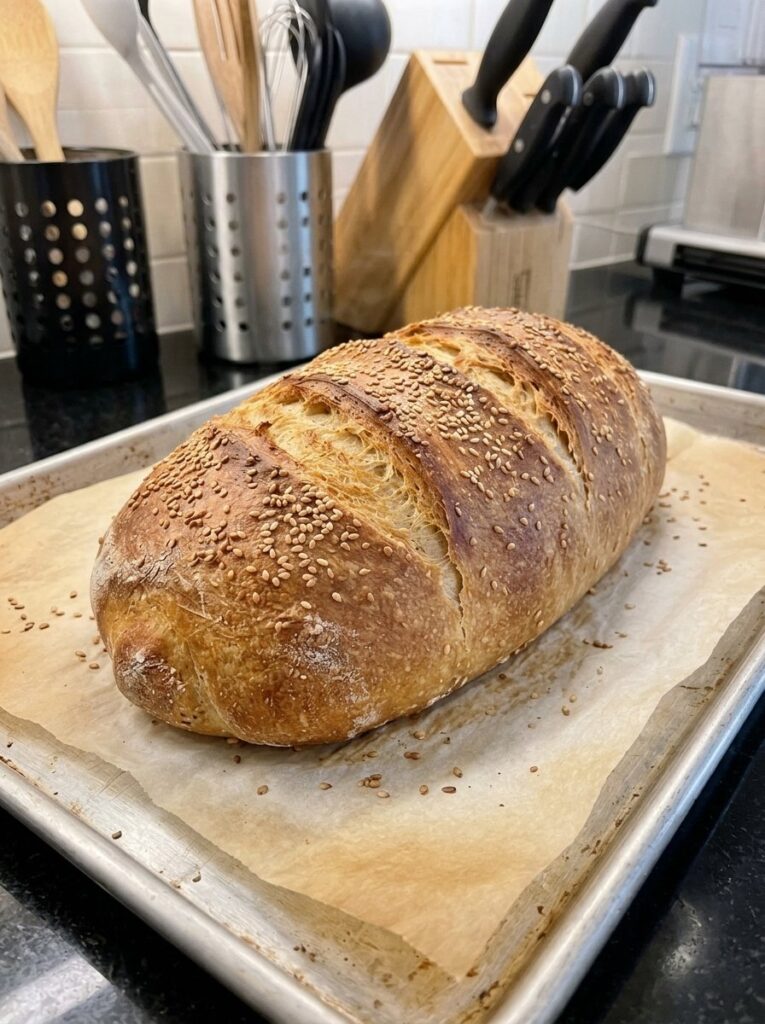
- Bakery-style results at home: The long oval shape, the diagonal slashes across the top, and the sprinkle of sesame seeds give the loaf a professional look.
- Golden crust and soft crumb: The contrast between the crisp, caramelized exterior and the tender, fluffy inside is what makes Italian-style bread so satisfying.
- Incredibly versatile: Slice it for sandwiches, toast it for bruschetta, turn it into garlic bread, or simply dip it in olive oil.
- Great for planning ahead: The loaf freezes beautifully, so you can bake once and enjoy it for weeks.
What Makes Italian Bread Special?
Italian bread is loved around the world for its straightforward character. Unlike enriched breads that contain eggs, milk, or large amounts of butter, Italian-style loaves rely on a short list of ingredients and good technique. The flavor is classic and mildly savory, and the texture is the real star: a thin, golden crust that crackles slightly when you cut it, and an interior that is soft, airy, and slightly chewy.
In many bakeries, a loaf like this is baked in a hot oven with steam, which helps the crust develop its color and crispness. In a home kitchen, you can achieve a very similar result with a few easy tricks, which we cover below. The olive oil in the dough adds subtle richness and keeps the crumb tender, while a touch of sugar feeds the yeast and encourages a deep golden color on the crust.
The sesame seeds on top are optional, but they add a lovely nutty flavor and a rustic, bakery-style finish. They also give the loaf that picture-perfect look that makes people ask, “Did you really make this yourself?”
Ingredients for Easy Homemade Italian Bread
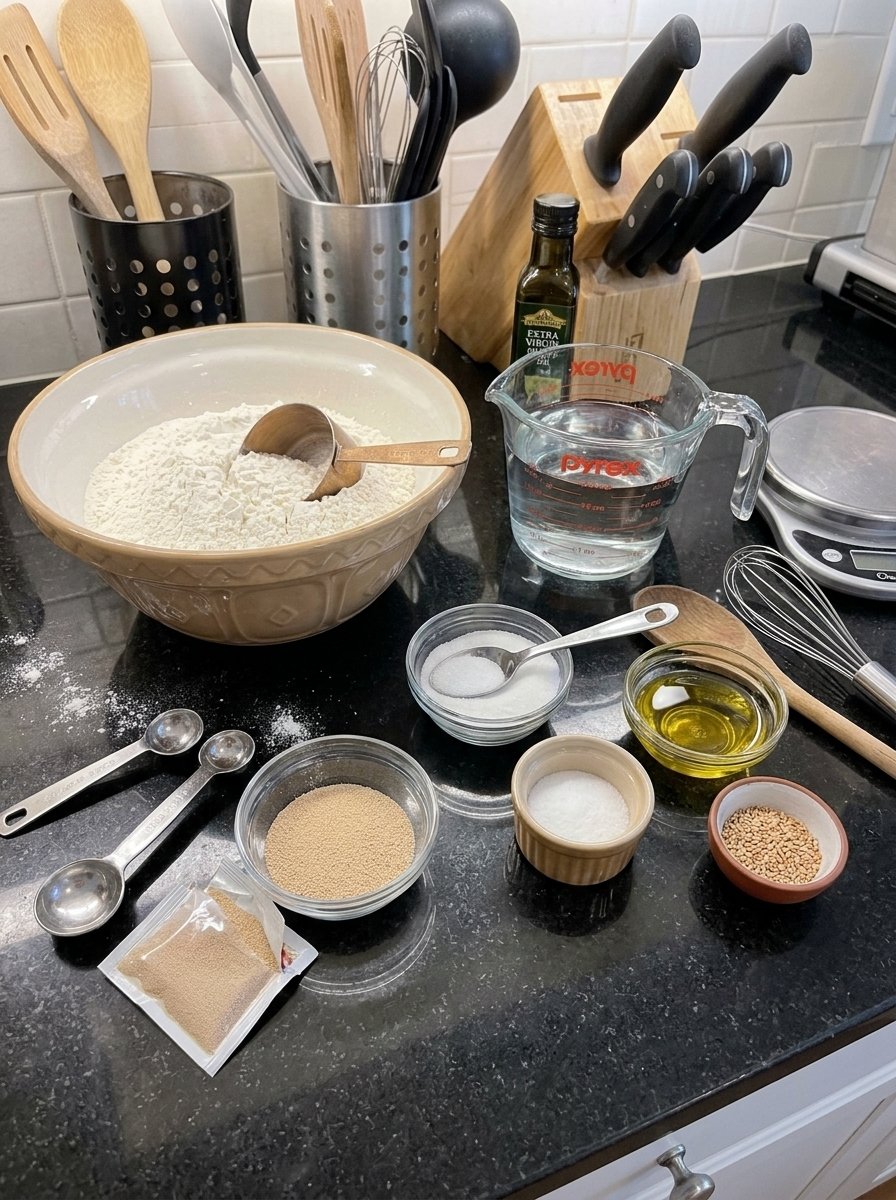
Here is everything you need to make one large loaf.
- 4 cups (480 g) all-purpose flour or bread flour
- 2¼ teaspoons (7 g) active dry yeast or instant yeast
- 1½ cups (360 ml) warm water
- 1 tablespoon granulated sugar
- 1½ teaspoons salt
- 2 tablespoons olive oil
- 1 tablespoon olive oil or water, for brushing the top (optional)
- 1 teaspoon sesame seeds, for topping (optional)
A Closer Look at the Ingredients
Flour. Both all-purpose flour and bread flour work well. All-purpose flour gives a slightly softer, more tender crumb, while bread flour has a higher protein content and creates a chewier, more structured loaf. Choose whichever you have on hand. If you bake bread often, a kitchen scale is the best investment you can make, because weighing your flour is far more accurate than scooping it with a measuring cup.
Yeast. This recipe works with either active dry yeast or instant yeast. Active dry yeast is typically dissolved in warm water with a little sugar until foamy, which also proves that it is alive. Instant yeast can be mixed directly with the dry ingredients. Both give excellent results.
Warm water. The temperature matters. The water should feel comfortably warm, like a pleasant bath, but never hot. Water that is too hot can damage the yeast and prevent your dough from rising properly.
Sugar. One tablespoon is not there to make the bread sweet. It gives the yeast something to feed on and helps the crust brown beautifully.
Salt. Salt controls fermentation and adds flavor. Bread without enough salt tastes flat, so do not skip it.
Olive oil. Two tablespoons in the dough contribute a soft crumb and a faint, pleasant richness. An optional brush of olive oil on top before baking adds a little extra color and flavor.
Sesame seeds. Optional but highly recommended for texture, aroma, and appearance.
Equipment You Will Need
One of the best parts of this recipe is how little equipment it requires.
- A large mixing bowl
- A wooden spoon
- Measuring cups and spoons, or a kitchen scale
- A clean kitchen towel or plastic wrap
- A baking sheet lined with parchment paper
- A sharp bread knife or lame for slashing the top
- A wire cooling rack
- Optional: a heatproof pan for steam, and an instant-read thermometer
How to Make Easy Homemade Italian Bread, Step by Step
Follow these steps for a golden, bakery-style loaf.
Step 1: Activate the Yeast
In a large mixing bowl, combine the warm water, sugar, and active dry yeast. Let the mixture stand for about 5 to 10 minutes, until it becomes foamy. That foam is a sign that the yeast is alive and ready to work. If you are using instant yeast, you can skip this step and mix the yeast directly with the flour instead.
Step 2: Make the Dough
Add the flour, salt, and olive oil to the yeast mixture. Stir with a wooden spoon until a rough dough forms and most of the flour is incorporated. If you are using instant yeast, combine the flour, yeast, sugar, and salt first, then add the warm water and olive oil.
Do not worry if the dough looks shaggy at this stage. It will come together beautifully once you start kneading.
Step 3: Knead Until Smooth
Transfer the dough to a lightly floured surface and knead for about 8 to 10 minutes, until it is smooth, soft, and elastic. To knead, push the dough away from you with the heel of your hand, fold it back over itself, give it a quarter turn, and repeat.
If the dough is very sticky, sprinkle on a little flour at a time, taking care not to add too much. The finished dough should remain soft and slightly tacky. Too much flour is the most common reason homemade bread turns out dense.
Step 4: Let the Dough Rise
Lightly oil a clean bowl and place the dough inside, turning it once to coat. Cover with a clean kitchen towel or plastic wrap and leave it in a warm, draft-free place for about 1 to 1½ hours, or until doubled in size.
Rely on the dough rather than the clock. A cooler kitchen means a slower rise, and a warm kitchen means a faster one. The dough is ready when it looks puffy and has roughly doubled in volume.
Step 5: Shape the Loaf
Gently press the dough to release excess air. Turn it onto a lightly floured surface and shape it into a long oval loaf. Fold the sides inward if needed, then roll the dough gently to create an even shape. Pinch the seam closed and place the loaf seam-side down on a parchment-lined baking sheet.
A tight, even shape helps the bread hold its form and rise upward in the oven instead of spreading flat.
Step 6: Let It Rise Again
Cover the shaped loaf loosely and let it rise for another 30 to 45 minutes, until visibly puffy. Meanwhile, preheat your oven to 400°F (200°C).
Step 7: Prepare the Top
Using a sharp bread knife or lame, make 2 to 3 shallow diagonal slashes across the top of the loaf. These cuts allow the bread to expand as it bakes and give it that classic bakery appearance. If you like, lightly brush the surface with olive oil or water and sprinkle with sesame seeds.
Step 8: Bake Until Golden
Bake for approximately 25 to 35 minutes, or until the loaf develops a golden-brown crust and sounds hollow when tapped on the bottom. If you use a thermometer, the center should reach approximately 190 to 200°F (88 to 93°C).
Step 9: Cool and Slice
Remove the bread from the oven and transfer it to a wire rack. Let it cool for at least 30 minutes before slicing. This is the hardest step, because the aroma is irresistible, but cutting too early can make the inside gummy, even when the bread is fully baked. Waiting helps the interior finish setting while preserving its soft, fluffy texture.
Tips for the Best Easy Homemade Italian Bread
Small details make a big difference in bread baking. Keep these tips in mind.
- Use warm water, not hot. The water should feel comfortably warm to help the yeast work properly. Water that is too hot can harm the yeast.
- Measure the flour carefully. Too much flour can make the loaf dense. If possible, use a kitchen scale for the best results.
- Knead until elastic. A smooth, elastic dough helps create a soft interior with a satisfying texture.
- Give the dough enough time to rise. Let it rise until doubled in size rather than relying only on the clock.
- Create a crispier crust. Place a heatproof pan of hot water on the lower oven rack during baking to create steam. Use care when handling hot water and steam.
- Let the loaf cool before slicing. Cutting too early can make the inside gummy.
Troubleshooting Common Bread Problems
Even simple recipes can have off days. Here is how to solve the most common issues.
My dough did not rise. The most likely culprits are old yeast or water that was too hot or too cold. Check the expiration date on your yeast, and make sure the foam appears in Step 1. Also try moving the dough to a slightly warmer, draft-free spot and giving it more time.
My bread turned out dense. This is usually caused by too much flour, too little kneading, or not letting the dough rise enough. Weigh your flour if you can, knead until the dough is smooth and elastic, and wait for the dough to double.
The crust is too pale. Make sure your oven is fully preheated, and consider brushing the top with olive oil. Baking a few minutes longer can also deepen the color.
The crust is too hard. Steam helps create a crisp but thin crust. If the crust seems too thick or tough, brush the loaf lightly with olive oil or water before baking, and avoid overbaking.
The inside is gummy. This almost always means the bread was sliced while still hot, or it needed a few more minutes in the oven. Let the loaf cool for at least 30 minutes, and check that the center reaches 190 to 200°F (88 to 93°C).
The loaf spread flat instead of rising up. The dough may have over-risen on the second rise, or the shaping was too loose. Shape the loaf with a little more tension and keep a close eye on the second rise.
Serving Ideas for Homemade Italian Bread
This versatile loaf fits into nearly any meal. Here are some of the best ways to enjoy it.
- Classic Italian dinner: Serve thick slices alongside spaghetti, lasagna, or baked ziti. The bread is perfect for soaking up rich tomato sauce.
- Garlic bread: Spread slices with softened butter, minced garlic, and parsley, then toast until fragrant and golden.
- Olive oil dip: Serve warm slices with extra-virgin olive oil, a pinch of salt, and Italian herbs for a simple, elegant appetizer.
- Homemade sandwiches: Fill slices with mozzarella, tomatoes, fresh basil, or your favorite deli fillings.
- Soup and salad: Pair with minestrone, tomato soup, or a fresh Italian salad for a cozy lunch.
- Bruschetta: Toast slices and top with diced tomatoes, garlic, basil, and olive oil.
Easy Variations to Try
Once you are comfortable with the base recipe, it is fun to experiment. Here are a few ideas.
- Herb loaf: Knead in a tablespoon of dried Italian herbs, such as oregano, basil, or rosemary, for an aromatic loaf.
- Garlic and cheese: Fold in grated Parmesan and a little minced garlic during shaping for a savory twist.
- Different toppings: Swap the sesame seeds for poppy seeds, or brush with olive oil and sprinkle with flaky sea salt.
- Two smaller loaves: Divide the dough in half to make two smaller loaves, and reduce the baking time slightly, checking for a golden crust and a hollow sound.
When adding extra ingredients, make small adjustments and keep the dough soft and slightly tacky.
How to Store Homemade Italian Bread
Proper storage keeps your loaf tasting fresh for as long as possible.
- Room temperature: Once completely cool, store the loaf in a bread bag or airtight container for up to 3 days.
- Refrigerator: Refrigeration can dry out homemade bread, so room-temperature storage is generally preferable for short-term use.
- Freezer: Slice the cooled loaf and freeze in a freezer-safe bag for up to 3 months. Slicing first lets you take out only what you need.
- Reheating: Warm slices in a toaster, or heat larger pieces in a 350°F (175°C) oven for several minutes.
- Freshness tip: If the crust softens during storage, briefly warming the loaf in the oven can help refresh it.
Recipe Details at a Glance
- Prep time: 20 minutes
- First rise: 1 to 1½ hours
- Second rise: 30 to 45 minutes
- Bake time: 25 to 35 minutes
- Total time: Approximately 2 hours 15 minutes to 3 hours
- Yield: 1 large loaf, approximately 10 to 12 slices
- Difficulty: Beginner-friendly
- Texture: Golden crust with a soft, fluffy interior
- Flavor: Classic, mildly savory Italian-style bread
Frequently Asked Questions
Can I use all-purpose flour instead of bread flour?
Yes. The recipe works with either. All-purpose flour gives a softer crumb, while bread flour gives a slightly chewier texture.
Can I use instant yeast instead of active dry yeast?
Absolutely. Mix instant yeast directly with the flour, sugar, and salt, then add the warm water and olive oil. You can skip the foaming step.
How do I know when the dough has risen enough?
Look for dough that has roughly doubled in size and looks puffy. Judge by the dough rather than the clock, since kitchen temperature affects timing.
How do I know when the bread is done?
The loaf should be golden brown and sound hollow when tapped on the bottom. If you use a thermometer, the center should reach approximately 190 to 200°F (88 to 93°C).
Why do I need to wait before slicing?
The inside of the bread continues to set as it cools. Slicing too early can make the crumb gummy, even if the loaf is fully baked.
How can I get a crispier crust?
Place a heatproof pan of hot water on the lower oven rack during baking to create steam. Handle the hot water and steam with care.
Can I make this bread without a mixer?
Yes. This recipe is designed for hand mixing with a wooden spoon and hand kneading, so no special equipment is needed.
Can I freeze the dough or the baked bread?
The baked loaf freezes very well. Slice the cooled bread, place it in a freezer-safe bag, and freeze for up to 3 months.
What are the sesame seeds for?
They are optional and add flavor, crunch, and a bakery-style look. You can leave them off or swap them for another topping.
Final Thoughts
Homemade bread has a way of turning an ordinary meal into something special, and this easy homemade Italian bread loaf proves that you do not need to be an expert baker to get impressive results. With a handful of simple ingredients, a little kneading, and some patience while the dough rises, you will be rewarded with a golden, sesame-topped loaf that looks and tastes like it came from a neighborhood bakery.
Serve it warm with butter, dip it in olive oil, pile it with your favorite sandwich fillings, or tear off a piece alongside a big bowl of pasta. However you enjoy it, this beginner-friendly recipe is sure to become a staple in your kitchen.
Print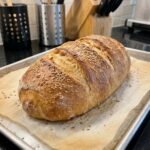
Easy Homemade Italian Bread Loaf
Ingredients
Here is everything you need to make one large loaf.
- 4 cups (480 g) all-purpose flour or bread flour
- 2¼ teaspoons (7 g) active dry yeast or instant yeast
- 1½ cups (360 ml) warm water
- 1 tablespoon granulated sugar
- 1½ teaspoons salt
- 2 tablespoons olive oil
- 1 tablespoon olive oil or water, for brushing the top (optional)
- 1 teaspoon sesame seeds, for topping (optional)
A Closer Look at the Ingredients
Flour. Both all-purpose flour and bread flour work well. All-purpose flour gives a slightly softer, more tender crumb, while bread flour has a higher protein content and creates a chewier, more structured loaf. Choose whichever you have on hand. If you bake bread often, a kitchen scale is the best investment you can make, because weighing your flour is far more accurate than scooping it with a measuring cup.
Yeast. This recipe works with either active dry yeast or instant yeast. Active dry yeast is typically dissolved in warm water with a little sugar until foamy, which also proves that it is alive. Instant yeast can be mixed directly with the dry ingredients. Both give excellent results.
Warm water. The temperature matters. The water should feel comfortably warm, like a pleasant bath, but never hot. Water that is too hot can damage the yeast and prevent your dough from rising properly.
Sugar. One tablespoon is not there to make the bread sweet. It gives the yeast something to feed on and helps the crust brown beautifully.
Salt. Salt controls fermentation and adds flavor. Bread without enough salt tastes flat, so do not skip it.
Olive oil. Two tablespoons in the dough contribute a soft crumb and a faint, pleasant richness. An optional brush of olive oil on top before baking adds a little extra color and flavor.
Sesame seeds. Optional but highly recommended for texture, aroma, and appearance.
Instructions
Follow these steps for a golden, bakery-style loaf.
In a large mixing bowl, combine the warm water, sugar, and active dry yeast. Let the mixture stand for about 5 to 10 minutes, until it becomes foamy. That foam is a sign that the yeast is alive and ready to work. If you are using instant yeast, you can skip this step and mix the yeast directly with the flour instead.
Add the flour, salt, and olive oil to the yeast mixture. Stir with a wooden spoon until a rough dough forms and most of the flour is incorporated. If you are using instant yeast, combine the flour, yeast, sugar, and salt first, then add the warm water and olive oil.
Do not worry if the dough looks shaggy at this stage. It will come together beautifully once you start kneading.
Transfer the dough to a lightly floured surface and knead for about 8 to 10 minutes, until it is smooth, soft, and elastic. To knead, push the dough away from you with the heel of your hand, fold it back over itself, give it a quarter turn, and repeat.
If the dough is very sticky, sprinkle on a little flour at a time, taking care not to add too much. The finished dough should remain soft and slightly tacky. Too much flour is the most common reason homemade bread turns out dense.
Lightly oil a clean bowl and place the dough inside, turning it once to coat. Cover with a clean kitchen towel or plastic wrap and leave it in a warm, draft-free place for about 1 to 1½ hours, or until doubled in size.
Rely on the dough rather than the clock. A cooler kitchen means a slower rise, and a warm kitchen means a faster one. The dough is ready when it looks puffy and has roughly doubled in volume.
Gently press the dough to release excess air. Turn it onto a lightly floured surface and shape it into a long oval loaf. Fold the sides inward if needed, then roll the dough gently to create an even shape. Pinch the seam closed and place the loaf seam-side down on a parchment-lined baking sheet.
A tight, even shape helps the bread hold its form and rise upward in the oven instead of spreading flat.
Cover the shaped loaf loosely and let it rise for another 30 to 45 minutes, until visibly puffy. Meanwhile, preheat your oven to 400°F (200°C).
Using a sharp bread knife or lame, make 2 to 3 shallow diagonal slashes across the top of the loaf. These cuts allow the bread to expand as it bakes and give it that classic bakery appearance. If you like, lightly brush the surface with olive oil or water and sprinkle with sesame seeds.
Bake for approximately 25 to 35 minutes, or until the loaf develops a golden-brown crust and sounds hollow when tapped on the bottom. If you use a thermometer, the center should reach approximately 190 to 200°F (88 to 93°C).
Remove the bread from the oven and transfer it to a wire rack. Let it cool for at least 30 minutes before slicing. This is the hardest step, because the aroma is irresistible, but cutting too early can make the inside gummy, even when the bread is fully baked. Waiting helps the interior finish setting while preserving its soft, fluffy texture.