Introduction: The Easiest Homemade Sandwich Bread You Will Ever Bake
There is something deeply comforting about a golden, oat-topped loaf of bread cooling on the counter. The smell of honey and warm yeast drifts through the kitchen, the crust crackles softly as it sets, and you know that the first slice, still a little warm and spread with butter, is going to be worth the wait. The good news is that you do not need a stand mixer, a bread machine, or years of baking experience to make this happen.
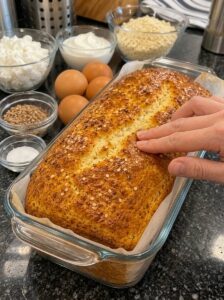
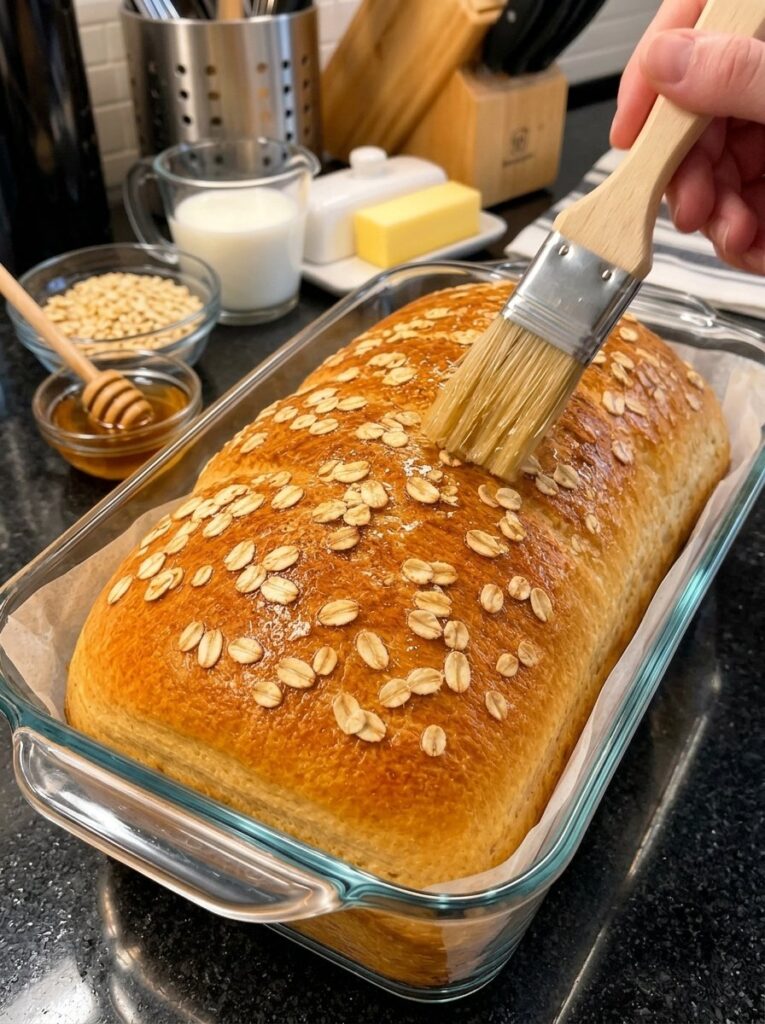
This no-knead honey oat sandwich bread is soft, fluffy, and lightly sweet, with rolled oats adding a hearty touch to a tender crumb. It is made with just a handful of everyday ingredients: bread flour, honey, milk, instant yeast, salt, butter, and old-fashioned rolled oats. A simple oat soaker keeps the loaf moist, and a quick brush of milk with a sprinkle of oats on top gives it that bakery-style finish you can see in the photo above.
Whether you are a first-time bread baker looking for a forgiving recipe or a seasoned home cook who wants a reliable everyday loaf, this honey oat bread delivers. It slices neatly for sandwiches, toasts beautifully for breakfast, and is wonderful alongside a warm bowl of soup. In this guide, you will find the full recipe, step-by-step instructions, practical tips, troubleshooting help, creative variations, storage advice, and answers to the most common questions bakers ask.
Why You Will Love This Honey Oat Bread Recipe
Before getting into the details, here is why this loaf deserves a permanent spot in your baking rotation.
It truly requires no kneading. The dough comes together with a sturdy spoon or spatula in a single bowl. Instead of working the dough by hand for ten minutes, you let time and yeast do the heavy lifting. This makes the recipe approachable for beginners and perfect for anyone with limited kitchen equipment or tired hands.
The texture is soft and tender. Bread flour provides the structure for a good rise, while the soaked oats, milk, honey, and melted butter keep the crumb moist and pillowy. This is the kind of sandwich bread that stays soft enough for lunchboxes yet sturdy enough to hold fillings.
The flavor is mild and balanced. Honey adds a gentle sweetness without turning the loaf into dessert. The oats contribute a subtle, nutty, wholesome note. A hint of butter rounds everything out, so the bread tastes homemade in the best possible way.
The ingredients are simple. There are no specialty flours, dough conditioners, or hard-to-find items. Most of what you need is probably in your pantry already.
It is versatile. Use it for turkey sandwiches, grilled cheese, peanut butter and banana toast, French toast, or simply a thick slice with butter and jam. It freezes well, too, so one bake can cover your breakfasts and lunches for weeks.
Ingredients for No-Knead Honey Oat Sandwich Bread
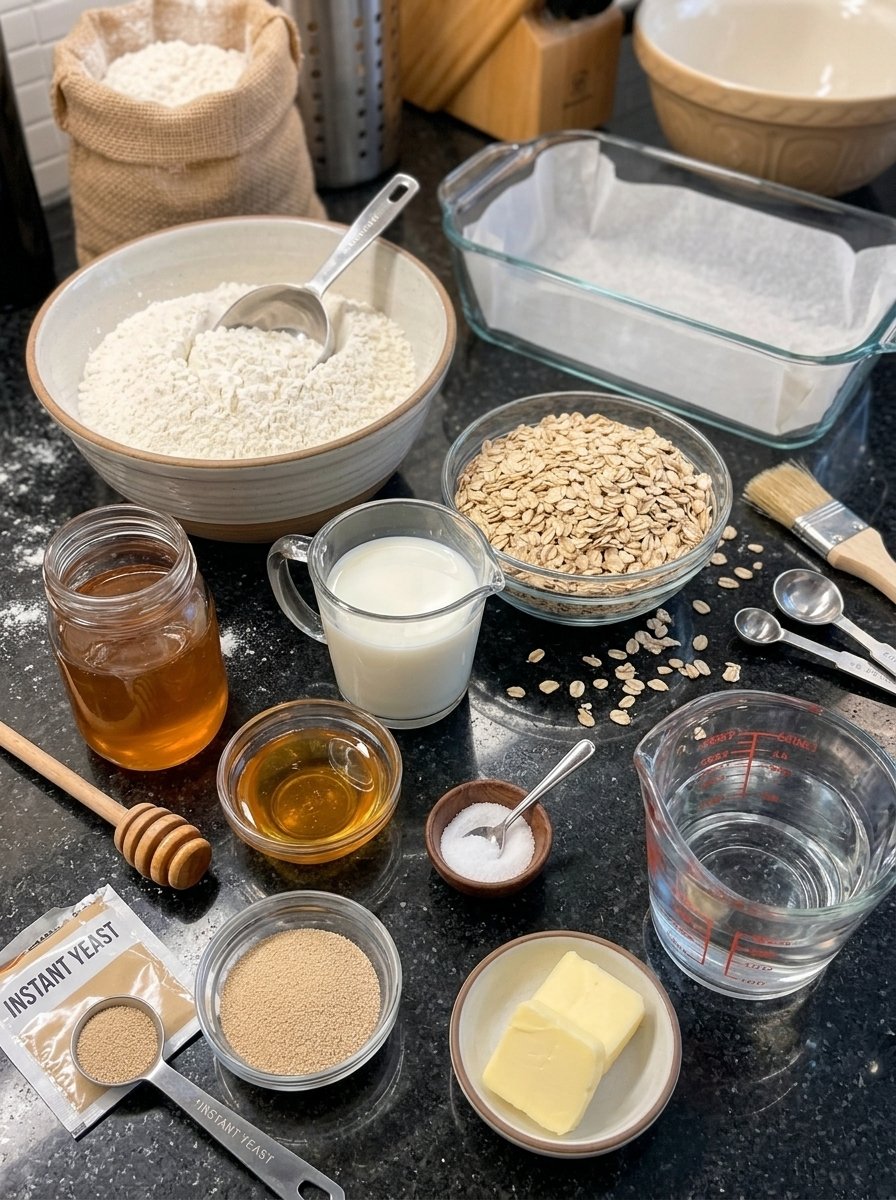
This recipe makes one 9 × 5-inch loaf, or about 10 to 12 slices. Measuring flour by weight is the most accurate way to bake bread, so both cups and grams are provided.
Oat Soaker
- ½ cup old-fashioned rolled oats (approximately 1½ ounces)
- ½ cup boiling water
Bread Dough
- 3 cups bread flour (approximately 360 g)
- ¾ cup warm milk (180 ml)
- ¼ cup honey (85 g)
- 2¼ teaspoons instant yeast (1 packet)
- 1 teaspoon salt
- 2 tablespoons unsalted butter, melted (28 g)
For the Topping
- 1 tablespoon rolled oats
- 1 teaspoon milk or water, for brushing
Understanding the Ingredients: What Each One Does
Knowing why each ingredient is in the bowl helps you bake with confidence and troubleshoot if something goes sideways.
Bread Flour
Bread flour has a higher protein content than all-purpose flour, which means it can form more gluten. In a no-knead recipe, that matters. Instead of developing gluten through physical kneading, the dough develops it gradually during the long rise. Bread flour gives the loaf a strong, stretchy structure so it rises tall and holds its shape, while still baking up soft. If you only have all-purpose flour, you can use it, but expect a slightly less lofty loaf with a softer, more delicate crumb.
Old-Fashioned Rolled Oats
Old-fashioned rolled oats are thick enough to add noticeable texture but soften beautifully when soaked. They bring a mild, nutty flavor and a wholesome look to the loaf. Quick oats will work in a pinch, though they tend to disappear into the crumb, while steel-cut oats are too firm for this method and are not recommended here.
The Oat Soaker
A soaker is simply a mixture of oats and hot liquid that sits until the oats soften. This step is the secret to a moist loaf. Dry oats stirred straight into dough would absorb moisture from the flour and milk, leaving the bread dense and dry. By soaking them first, the oats are already hydrated, so they contribute softness instead of stealing it.
Honey
Honey does more than sweeten. It adds moisture, supports a golden crust, and gives the loaf a subtle floral flavor. It also helps the bread stay soft for longer after baking. With only a quarter cup in the whole loaf, the sweetness stays gentle and sandwich-friendly.
Milk
Milk makes the crumb tender and the crust softer and richer than water would. Warming it helps wake up the yeast. The milk should feel comfortably warm to the touch, not hot.
Instant Yeast
Instant yeast can be mixed directly into the wet ingredients, with no separate proofing step needed. One standard packet, about 2¼ teaspoons, is the right amount for this loaf.
Salt
Salt controls the yeast, strengthens the dough, and makes the flavor of the bread come alive. Do not skip it, even though the loaf is lightly sweet.
Butter
Melted unsalted butter enriches the dough, adding a subtle buttery flavor and a soft, tender crumb. Because it is stirred in melted, there is no need to cream or knead it into the dough.
How to Make No-Knead Honey Oat Sandwich Bread: Step-by-Step Instructions
Step 1: Prepare the Oat Soaker
Place the ½ cup of rolled oats in a small heatproof bowl. Pour the ½ cup of boiling water over them and stir to combine. Let the oats soak for approximately 15 to 20 minutes, until they have absorbed most of the water and softened. Then allow the mixture to cool until lukewarm before adding it to the dough. This cooling step is important, because adding very hot oats to the yeast mixture could harm the yeast.
Step 2: Mix the Wet Ingredients
In a large mixing bowl, combine the warm milk, honey, instant yeast, and melted butter. Stir until the honey is mostly dissolved. Add the cooled oat mixture and stir again so the oats are evenly distributed.
Step 3: Make the Dough
Add the bread flour and salt to the bowl. Mix with a sturdy spoon or spatula until all the flour is incorporated and a rough, sticky dough forms. The dough should look soft and slightly shaggy rather than smooth. There is no kneading required. Cover the bowl with a clean kitchen towel or plastic wrap.
Step 4: Let the Dough Rise
Set the covered bowl in a warm, draft-free spot and let the dough rise for approximately 1 to 1½ hours, or until it has nearly doubled in size. It should look airy and noticeably puffy. Rise times depend on your kitchen temperature, so rely on how the dough looks rather than the clock alone.
Step 5: Shape the Loaf
Lightly grease a 9 × 5-inch loaf pan. Transfer the risen dough to a lightly floured surface and gently shape it into a loaf. Avoid working or pressing the dough too much, since you want to preserve the air bubbles that formed during the rise. Place the dough seam-side down into the prepared pan, and gently spread it toward the corners so it sits evenly.
Step 6: Complete the Second Rise
Cover the loaf pan loosely and let the dough rise for another 35 to 60 minutes, until it is puffy and rises just above the rim of the pan. While it rises, preheat your oven to 350°F (175°C).
Step 7: Add the Oat Topping
Lightly brush the surface of the risen loaf with milk or water. Sprinkle the remaining tablespoon of rolled oats evenly over the top, gently pressing them in so they adhere. This simple step gives the finished loaf its rustic, bakery-style look.
Step 8: Bake Until Golden
Place the loaf in the preheated oven and bake for 35 to 40 minutes, until the top is golden brown and the bread is fully baked. If the top begins browning too quickly, loosely cover it with aluminum foil during the final part of baking. For the most reliable result, use an instant-read thermometer: the center of the loaf should reach approximately 190°F to 200°F (88°C to 93°C).
Step 9: Cool and Slice
Remove the bread from the oven and let it rest in the pan for about 10 minutes. Carefully transfer it to a wire rack and allow it to cool completely before slicing. It is tempting to cut into a warm loaf, but cooling lets the crumb set, which keeps the slices soft and neat instead of gummy.
Pro Tips for the Best Honey Oat Sandwich Bread
These small details make a big difference in the final loaf.
Soak the oats first. Allowing the rolled oats to absorb boiling water softens them and helps create a tender, moist crumb.
Use warm, not hot, milk. The milk should feel comfortably warm to the touch. Very hot milk can damage the yeast and leave you with a flat loaf.
Avoid adding too much flour. The dough should be soft, slightly sticky, and shaggy. Resist the temptation to add extra flour too quickly, because too much flour is the most common cause of dense, dry bread.
Give the dough enough time to rise. Rising times depend on your kitchen temperature. In a cool kitchen, the first rise may take longer than 1½ hours. Look for the dough to become noticeably puffy and approximately double in size.
Let the bread cool completely. Cooling before slicing helps the crumb set and keeps the slices soft and neat.
Weigh your flour if you can. A cup of flour can vary significantly depending on how it is scooped. If you do not have a kitchen scale, spoon the flour into the measuring cup and level it off rather than scooping directly from the bag.
Use a thermometer. Checking for an internal temperature of 190°F to 200°F (88°C to 93°C) removes the guesswork and helps prevent an underbaked center.
Consider your pan. The recipe is written for a standard 9 × 5-inch loaf pan. If you bake in a glass dish, as pictured, keep a close eye on the crust, since glass can brown differently than metal. Lining the dish with parchment paper also makes it easy to lift the loaf out once it has rested.
Troubleshooting: Common Bread Baking Problems and Fixes
My dough did not rise
The most common causes are old yeast, milk that was too hot, or a kitchen that is too cold. Check the date on your yeast, make sure the milk feels only comfortably warm, and move the bowl to a warmer spot, such as inside the oven with just the light on. Give it extra time before deciding something is wrong.
My bread turned out dense
Density usually comes from too much flour, not enough rising time, or deflating the dough during shaping. Measure carefully, wait until the dough looks puffy and nearly doubled, and handle it gently when moving it to the pan.
The top browned too quickly
Honey and milk encourage browning. If the top is deep golden before the bake time is up, loosely tent the loaf with aluminum foil for the remainder of baking.
The center seems gummy
This often means the loaf was underbaked or sliced while still warm. Use a thermometer to confirm the center reaches 190°F to 200°F (88°C to 93°C), and let the bread cool completely before cutting.
The oats fell off the top
Brush the loaf with enough milk or water so the surface is lightly damp, then gently press the oats into the dough before baking.
Delicious Variations to Try
Once you have mastered the base recipe, it is easy to make it your own.
- Whole wheat blend: Replace a portion of the bread flour with whole wheat flour for a heartier, earthier loaf. Start with a small swap, since whole wheat absorbs more liquid and can make the bread denser.
- Seeded oat bread: Stir a tablespoon or two of sunflower seeds, pumpkin seeds, or flaxseed into the dough for added crunch and flavor.
- Cinnamon honey oat bread: Add a teaspoon of cinnamon to the flour for a warm, breakfast-friendly loaf that makes outstanding toast.
- Dried fruit and nuts: Fold in raisins, dried cranberries, or chopped walnuts for a loaf that pairs well with cream cheese.
- Maple oat bread: Swap the honey for maple syrup for a slightly different, cozy sweetness.
- Dinner rolls: Divide the dough into portions after the first rise, shape into rolls, and bake in a greased pan. Baking times will be shorter, so watch them closely.
When changing an ingredient, make one adjustment at a time so you can tell what worked and what you would change next time.
Serving Ideas for Honey Oat Bread
This loaf is a true kitchen workhorse. Here are some of the best ways to enjoy it.
- Breakfast toast: Toast a slice and spread it with butter, honey, or your favorite fruit jam.
- Hearty sandwiches: Use the soft slices for turkey, chicken, ham, cheese, or vegetable sandwiches.
- Sweet snack: Enjoy a slice with peanut butter, almond butter, or sliced bananas.
- Soup companion: Serve alongside tomato soup, vegetable soup, or a warm bowl of homemade chicken soup.
- Simple buttered slices: Enjoy it fresh with a little softened butter for a comforting homemade treat.
It also makes excellent French toast, grilled cheese, and bread pudding, since the lightly sweet, tender crumb absorbs custard and melts beautifully with cheese.
How to Store Honey Oat Sandwich Bread
Proper storage keeps your homemade bread tasting fresh.
Room temperature: Store the completely cooled loaf in an airtight bread bag or container for up to 3 days.
Refrigerator: Refrigeration is generally unnecessary and can make homemade bread dry out faster.
Freezer: Slice the cooled loaf and freeze in a freezer-safe bag for up to 3 months. Separate the slices with parchment paper if you like, so you can pull out only what you need.
To reheat: Toast frozen slices directly from the freezer, or allow them to thaw at room temperature before serving.
Because this bread has no preservatives, it is best enjoyed within a few days, and slicing and freezing is the easiest way to prevent waste.
Frequently Asked Questions
Can I make this honey oat bread without bread flour?
Yes. All-purpose flour can be substituted in equal amounts. The loaf may rise slightly less and have a softer, more tender texture, but it will still be delicious.
Do I really not need to knead the dough?
Correct. The dough is mixed with a spoon or spatula until all the flour is incorporated, and the long rise develops the structure for you. The dough should look soft, slightly sticky, and shaggy, not smooth.
Can I use quick oats instead of old-fashioned rolled oats?
You can, but the texture will be less pronounced because quick oats break down more. Old-fashioned rolled oats give the best look and chew, especially for the topping.
Can I use water instead of milk?
Water will work, but milk gives a softer crumb and richer flavor. If you need a dairy-free option, a plain, unsweetened non-dairy milk can be used, and the butter can be replaced with a neutral oil or dairy-free butter.
Can I use active dry yeast instead of instant yeast?
Active dry yeast can work, but it generally benefits from being dissolved in warm liquid first and may rise a little more slowly. Plan for extra rising time and watch the dough rather than the clock.
How do I know when the bread is done?
Look for a golden-brown top and use an instant-read thermometer. The center should reach approximately 190°F to 200°F (88°C to 93°C).
Why should I let the bread cool before slicing?
The interior is still setting as it cools. Slicing too soon can make the crumb gummy and cause the slices to tear. Waiting gives you clean, soft, even slices.
How long does this recipe take from start to finish?
In total, plan on approximately 2 hours 50 minutes to 3 hours 45 minutes, most of which is hands-off rising time.
Can I double the recipe?
Yes, you can bake two loaves by doubling the ingredients and using two pans. Mix the dough in a larger bowl, and keep in mind that rising and baking times may vary slightly.
Can I freeze the dough?
This recipe is written for baking the loaf the same day, and freezing the baked, sliced loaf is the tested storage method. If you want to experiment with freezing dough, treat it as a trial run.
Recipe Details at a Glance
- Prep time: 25 minutes
- Oat soaking time: 15 to 20 minutes
- First rise: 1 to 1½ hours
- Second rise: 35 to 60 minutes
- Bake time: 35 to 40 minutes
- Total time: Approximately 2 hours 50 minutes to 3 hours 45 minutes
- Yield: 1 loaf (approximately 10 to 12 slices)
- Pan size: 9 × 5-inch loaf pan
- Oven temperature: 350°F (175°C)
Final Thoughts: A Loaf Worth Making Again and Again
Homemade bread has a reputation for being complicated, but this no-knead honey oat sandwich bread proves it does not have to be. With a quick oat soak, a simple stir, and a little patience, you end up with a soft, fluffy, golden loaf that tastes far better than anything from a plastic bag. The honey adds just enough sweetness, the oats add a hearty touch, and the buttery finish makes every slice feel like a small comfort.
Bake it on a lazy weekend, slice it for sandwiches all week, and tuck a few slices into the freezer for busy mornings. Once you see how easy it is, you may never want to buy sandwich bread again. If you try this recipe, leave a comment with how it turned out and any variations you tried, and share it with a friend who thinks they cannot bake bread.
Print
Easy No-Knead Honey Oat Sandwich Bread
Ingredients
This recipe makes one 9 × 5-inch loaf, or about 10 to 12 slices. Measuring flour by weight is the most accurate way to bake bread, so both cups and grams are provided.
Oat Soaker
- ½ cup old-fashioned rolled oats (approximately 1½ ounces)
- ½ cup boiling water
Bread Dough
- 3 cups bread flour (approximately 360 g)
- ¾ cup warm milk (180 ml)
- ¼ cup honey (85 g)
- 2¼ teaspoons instant yeast (1 packet)
- 1 teaspoon salt
- 2 tablespoons unsalted butter, melted (28 g)
For the Topping
- 1 tablespoon rolled oats
- 1 teaspoon milk or water, for brushing
Instructions
Place the ½ cup of rolled oats in a small heatproof bowl. Pour the ½ cup of boiling water over them and stir to combine. Let the oats soak for approximately 15 to 20 minutes, until they have absorbed most of the water and softened. Then allow the mixture to cool until lukewarm before adding it to the dough. This cooling step is important, because adding very hot oats to the yeast mixture could harm the yeast.
Step 2: Mix the Wet Ingredients
In a large mixing bowl, combine the warm milk, honey, instant yeast, and melted butter. Stir until the honey is mostly dissolved. Add the cooled oat mixture and stir again so the oats are evenly distributed.
Step 3: Make the Dough
Add the bread flour and salt to the bowl. Mix with a sturdy spoon or spatula until all the flour is incorporated and a rough, sticky dough forms. The dough should look soft and slightly shaggy rather than smooth. There is no kneading required. Cover the bowl with a clean kitchen towel or plastic wrap.
Step 4: Let the Dough Rise
Set the covered bowl in a warm, draft-free spot and let the dough rise for approximately 1 to 1½ hours, or until it has nearly doubled in size. It should look airy and noticeably puffy. Rise times depend on your kitchen temperature, so rely on how the dough looks rather than the clock alone.
Step 5: Shape the Loaf
Lightly grease a 9 × 5-inch loaf pan. Transfer the risen dough to a lightly floured surface and gently shape it into a loaf. Avoid working or pressing the dough too much, since you want to preserve the air bubbles that formed during the rise. Place the dough seam-side down into the prepared pan, and gently spread it toward the corners so it sits evenly.
Step 6: Complete the Second Rise
Cover the loaf pan loosely and let the dough rise for another 35 to 60 minutes, until it is puffy and rises just above the rim of the pan. While it rises, preheat your oven to 350°F (175°C).
Step 7: Add the Oat Topping
Lightly brush the surface of the risen loaf with milk or water. Sprinkle the remaining tablespoon of rolled oats evenly over the top, gently pressing them in so they adhere. This simple step gives the finished loaf its rustic, bakery-style look.
Step 8: Bake Until Golden
Place the loaf in the preheated oven and bake for 35 to 40 minutes, until the top is golden brown and the bread is fully baked. If the top begins browning too quickly, loosely cover it with aluminum foil during the final part of baking. For the most reliable result, use an instant-read thermometer: the center of the loaf should reach approximately 190°F to 200°F (88°C to 93°C).
Step 9: Cool and Slice
Remove the bread from the oven and let it rest in the pan for about 10 minutes. Carefully transfer it to a wire rack and allow it to cool completely before slicing. It is tempting to cut into a warm loaf, but cooling lets the crumb set, which keeps the slices soft and neat instead of gummy.