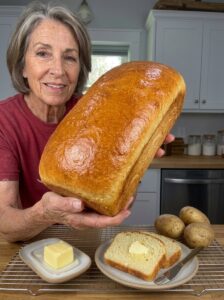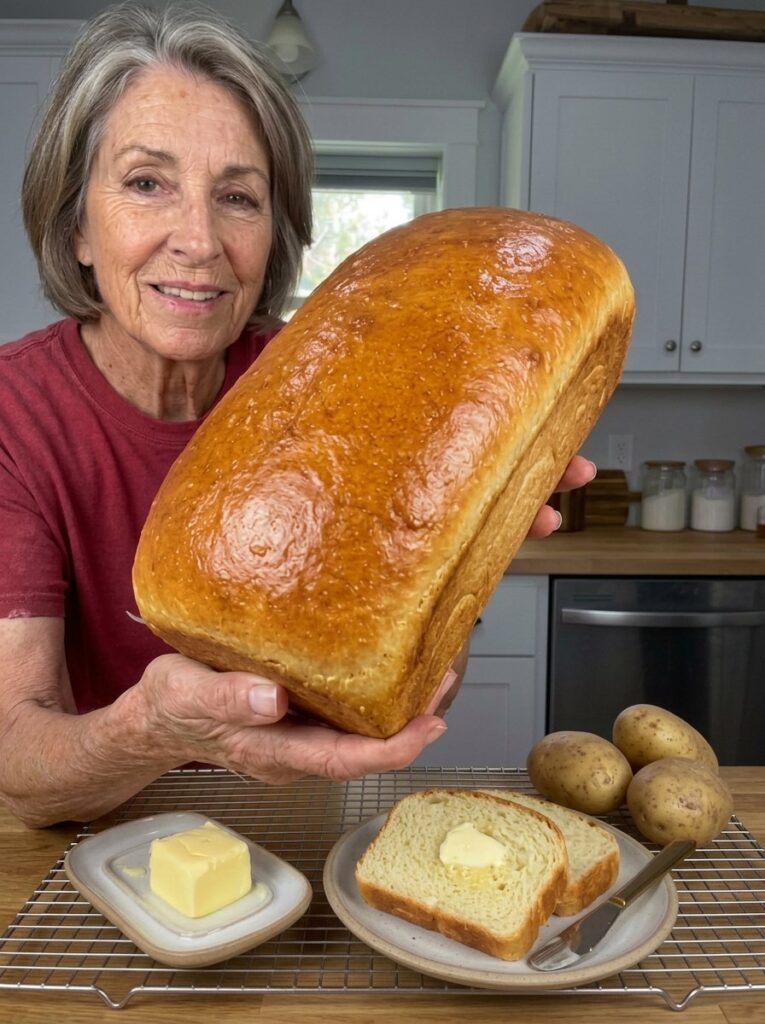
There is something deeply satisfying about slicing into a loaf of bread you made yourself. The smell of yeast and butter drifting through the kitchen, the golden top, the soft crumb that gives just slightly under the knife: it beats any plastic-wrapped loaf from the supermarket. And the best part is that you do not need special skills, a stand mixer or twenty minutes of arm-aching kneading to get there.
This easy no-knead potato sandwich bread is the recipe to try if you have ever wanted to bake bread but felt intimidated. Mashed potatoes are the secret ingredient, giving the loaf a wonderfully tender, moist texture that stays soft for days. You simply stir the dough together, let it rise, shape it in a loaf pan and bake until golden. That is it.
Whether you are packing lunchboxes, making golden buttered toast, building a turkey and cheese sandwich or dunking a slice into a warm bowl of soup, this homemade potato bread fits right in. In this guide you will find the full ingredient list, a detailed step-by-step method, troubleshooting advice, serving ideas, storage tips and answers to the most common questions about baking with potatoes.
Why Potato Bread Is So Soft and Fluffy
Potato bread has been a favorite in home kitchens for generations, and the reason comes down to simple science. Potatoes are rich in starch, and cooked potato starch holds on to water far better than regular flour does. When you add mashed potatoes to a yeast dough, that trapped moisture stays in the crumb during baking and long after the loaf has cooled.
The result is bread that is:
- Tender: the crumb feels pillowy rather than chewy or tough.
- Moist: slices do not dry out as quickly as those from a lean loaf.
- Slightly sweet and rich: the potato adds a subtle, comforting flavor without tasting like potato.
- Longer lasting: the extra moisture helps the bread stay fresh for several days at room temperature.
Combined with milk, an egg and melted butter, the potatoes make this loaf closer to a classic soft sandwich bread than a rustic artisan boule. It slices cleanly, toasts beautifully and holds up to generous fillings.
Why You Will Love This No-Knead Potato Bread Recipe
There are plenty of sandwich bread recipes out there, but this one earns a permanent spot in your rotation for several reasons.
No kneading required. The dough is stirred with a wooden spoon or sturdy spatula. No stand mixer, no dough hook, no floured countertop and no sore wrists.
Simple, affordable ingredients. You probably already have everything in your pantry and refrigerator: potatoes, flour, milk, yeast, sugar, an egg, butter and salt.
Perfect for beginners. The dough is forgiving. It is meant to be soft and a little sticky, so you do not have to worry about getting the texture exactly right.
Great use for leftovers. Have extra plain mashed potatoes from last night’s dinner? This recipe turns them into something new.
Versatile. Use the loaf for sandwiches, toast, French toast, grilled cheese or garlic bread. One batch covers breakfast, lunch and dinner.
Minimal hands-on time. Most of the 3 to 4 hour total time is simply waiting while the dough rises and the bread cools. Active work is only about 20 minutes.
Ingredients for Easy No-Knead Potato Sandwich Bread
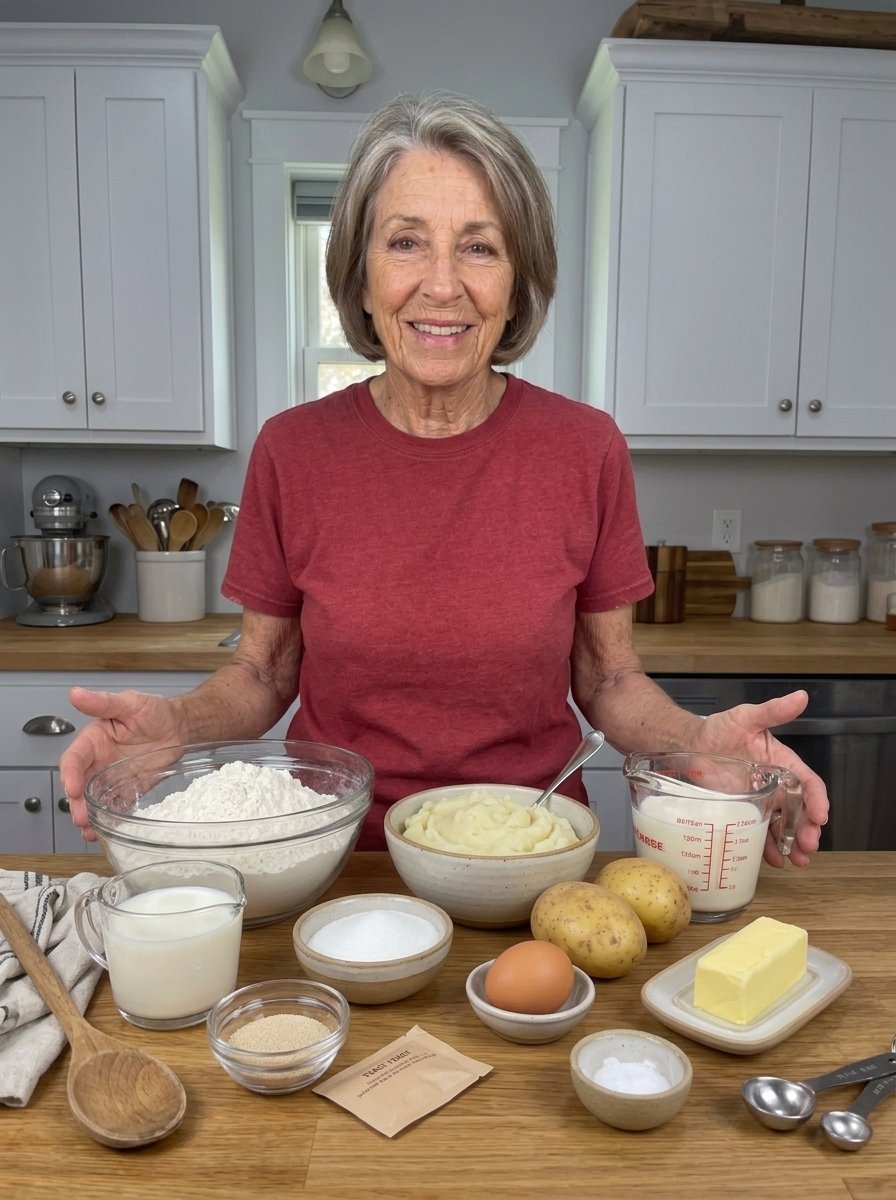
Here is everything you need to make one standard 9 x 5-inch loaf (about 12 to 16 slices):
- 1 cup mashed potatoes, cooled (about 210 to 225 g, or approximately 2 medium potatoes)
- 3½ cups all-purpose flour (approximately 420 to 455 g), plus a little extra if needed
- ¾ cup (180 ml) warm milk, about 105 to 110°F (40 to 43°C)
- 2¼ teaspoons (7 g) active dry yeast, or 1 packet
- 2 tablespoons (25 g) granulated sugar
- 1 large egg, at room temperature
- 3 tablespoons (42 g) unsalted butter, melted and slightly cooled
- 1 teaspoon salt
- 1 to 3 tablespoons additional warm milk, only if needed to adjust the dough
- 1 tablespoon melted butter, for brushing the top (optional)
Ingredient Notes and Smart Substitutions
Potatoes. Russet or Yukon Gold potatoes both work well. Russets are starchier and mash fluffy, while Yukon Golds give a slightly creamier, buttery result. Whichever you choose, mash them until completely smooth and keep them plain. Heavily seasoned or very wet mashed potatoes can throw off the dough, so if you are using leftovers, check that they are not loaded with extra milk, butter, garlic or cheese.
Flour. All-purpose flour gives a soft, tender crumb. Bread flour will make a slightly chewier, taller loaf, but because this is a no-knead dough, all-purpose is the better match. Measure carefully: spoon the flour into your measuring cup and level it off rather than scooping straight from the bag, which packs in too much and leads to a dense loaf. If you have a kitchen scale, weighing is the most accurate method.
Milk. Whole milk gives the richest result, but 2% works too. The milk should feel warm to the touch, not hot. Too-hot liquid can kill the yeast, and too-cold liquid slows it down.
Yeast. This recipe uses active dry yeast, which is activated in warm milk with sugar until foamy. Always check the expiration date on your packet or jar. Old yeast is the most common reason bread fails to rise.
Butter. Unsalted butter lets you control the salt. If you only have salted butter, reduce the added salt slightly.
Egg. The egg adds richness, structure and a golden color. Bringing it to room temperature helps it blend smoothly into the dough.
How to Make No-Knead Potato Sandwich Bread: Step by Step
Step 1: Prepare the Mashed Potatoes
Peel about 2 medium potatoes and cook them in boiling water until they are fork-tender. Drain them very well, then mash until smooth with no large lumps. Measure out 1 cup (roughly 210 to 225 g) and let it cool to room temperature.
Cooling matters. Hot potatoes can damage the yeast and affect how well the dough rises. If you are using leftover mashed potatoes, make sure they are plain or only lightly seasoned.
Step 2: Activate the Yeast
Pour the warm milk into a large mixing bowl. Add the granulated sugar and sprinkle the yeast over the surface. Let it stand for 5 to 10 minutes, until the mixture turns foamy and bubbly.
This step proves the yeast is alive and ready to work. If nothing happens, your yeast may be old, or the milk may have been too hot or too cold. It is better to start again with fresh yeast than to carry on and end up with a flat loaf.
Step 3: Mix the Wet Ingredients
Add the cooled mashed potatoes, egg, melted butter and salt to the yeast mixture. Stir with a wooden spoon or sturdy spatula until mostly combined. The mixture may look a little uneven because of the potatoes, and that is perfectly fine as long as there are no big lumps.
Step 4: Add the Flour
Add the flour gradually, stirring after each addition, until a thick, sticky dough forms. Keep mixing until no dry patches remain. If the dough seems unusually stiff, add warm milk one tablespoon at a time until it becomes soft and easy to stir.
The dough should be moist and slightly sticky, not firm like traditional kneaded dough. Resist the temptation to add lots of extra flour, since that is what makes a finished loaf heavy and dry.
Step 5: Mix Until Cohesive
Continue stirring for 2 to 3 minutes so the potatoes are evenly distributed. There is no need to knead by hand or use a mixer. Just mix thoroughly until the ingredients form a cohesive dough. Scrape down the sides of the bowl, gather the dough into the center and cover the bowl with a clean kitchen towel or plastic wrap.
Step 6: First Rise
Place the covered bowl in a warm, draft-free spot and let the dough rise for 60 to 90 minutes, or until roughly doubled in size. In a cooler kitchen it may need longer. Avoid very hot spots, which can harm the dough’s texture and fermentation.
Step 7: Prepare the Loaf Pan and Shape
Lightly grease a standard 9 x 5-inch (23 x 13 cm) loaf pan with butter or cooking spray. Once the dough has risen, gently stir or fold it over itself with a spatula to release some of the larger air pockets. The dough will be sticky, so use a lightly greased spatula instead of adding more flour. Transfer the dough into the pan and spread it gently toward the corners.
Step 8: Second Rise
Cover the pan loosely with a towel or lightly greased plastic wrap. Let the dough rise another 30 to 45 minutes, until puffy and close to the top of the pan. Keep an eye on it, especially in a warm kitchen. Overproofed dough can collapse or bake unevenly.
Step 9: Preheat the Oven
During the last 15 to 20 minutes of the second rise, preheat your oven to 350°F (175°C) with a rack in the center. If the dough is rising quickly, start preheating a little earlier so the oven is ready when the loaf is properly proofed.
Step 10: Bake Until Golden
Bake for 35 to 45 minutes, until the top is deep golden brown and the loaf is cooked through. If the top darkens too quickly, loosely cover it with aluminum foil for the remaining time.
For a foolproof check, insert an instant-read thermometer into the center. It should read about 190 to 200°F (88 to 93°C), and the loaf should feel set rather than doughy.
Step 11: Brush with Butter
Remove the loaf from the oven and brush the top with melted butter if you like. This adds flavor and softens the crust. Let the bread rest in the pan for about 10 minutes before carefully turning it out.
Step 12: Cool Completely
Transfer the loaf to a wire rack and let it cool for at least 45 to 60 minutes before slicing. It is tempting to cut in right away, but the interior is still setting. Slicing too early can squash the crumb and make it seem gummy. Once cooled, use a serrated bread knife for even slices.
Tips for the Best Potato Sandwich Bread
- Mash the potatoes until smooth. Lumps cause an uneven crumb. Plain mashed potatoes work best.
- Cool the potatoes first. Hot potatoes can harm the yeast and slow the rise.
- Check your milk temperature. Aim for warm, around 105 to 110°F. Hot liquid can prevent the yeast from working.
- Measure flour carefully. Start with the recommended amount and add more only if necessary. Too much flour is the number one cause of dry, dense bread.
- Embrace the sticky dough. No-knead dough is softer than traditional bread dough, and that stickiness is what keeps the loaf tender.
- Mix thoroughly. Even without kneading, make sure everything is fully combined with no dry flour hiding at the bottom.
- Judge the rise by size, not the clock. Kitchen temperature changes rising time, so watch for the dough to double.
- Grease the pan well. This prevents sticking and makes the loaf easy to release.
- Be patient with cooling. A fully cooled loaf slices cleanly and has the best texture.
- Brush with butter. It gives a softer crust and a richer flavor.
Troubleshooting Common Potato Bread Problems
My dough did not rise. The most likely culprits are expired yeast, milk that was too hot or too cold, or a kitchen that is too chilly. Test your yeast in warm milk and sugar first, and move the bowl to a slightly warmer, draft-free spot.
The dough is too sticky to handle. Some stickiness is normal in a no-knead recipe. Use a greased spatula and lightly oiled hands instead of piling on flour. If the dough is truly runny, the mashed potatoes may have contained too much liquid, and a tablespoon or two of extra flour can help.
The loaf is dense or heavy. This usually comes from too much flour, underproofing or old yeast. Weigh your flour if possible and give the dough enough time to rise.
The loaf collapsed in the oven. The dough was probably overproofed during the second rise. Next time, bake as soon as the dough looks puffy and reaches near the top of the pan.
The top browned too fast. Tent the loaf loosely with foil and keep baking. Ovens vary, so an oven thermometer is a handy tool.
The center seems gummy. The bread may be underbaked or sliced too soon. Check that the internal temperature reaches 190 to 200°F and cool the loaf fully before cutting.
Serving Ideas for Homemade Potato Bread
This soft sandwich loaf is endlessly useful. Here are some favorite ways to enjoy it:
- Classic breakfast toast: toast until lightly golden and spread with butter, honey or fruit preserves.
- Turkey and cheese sandwiches: layer sliced turkey, cheese, lettuce, tomato and your favorite sauce between two soft slices.
- Egg breakfast sandwiches: fill toasted slices with scrambled eggs, cheddar and avocado.
- Grilled cheese: use cheddar, mozzarella or any good melting cheese and cook in a buttered skillet until crisp and golden.
- Soup and stew sides: serve alongside tomato soup, creamy potato soup, chicken soup or hearty beef stew.
- Chicken salad sandwiches: pair with creamy chicken salad, crisp lettuce and sliced cucumber.
- French toast: dip thick slices in an egg and milk mixture with cinnamon, then cook until golden brown.
- Garlic butter toast: brush slices with garlic butter and toast until lightly crisp for an easy savory side.
How to Store Potato Sandwich Bread
Proper storage keeps your loaf soft and fresh.
Room temperature. Let the loaf cool completely, then store it in an airtight bag or bread container in a cool, dry place for about 2 to 3 days. This is the best option for short-term storage.
Refrigerator. Refrigeration can make bread go stale faster, so it is not ideal. However, if your kitchen is very warm or humid, keep the bread in an airtight container in the fridge and use it within 4 to 5 days.
Freezer. Slice the cooled loaf and freeze it in a freezer-safe bag for up to 2 to 3 months. Place parchment paper between slices if you want to separate them easily.
Reheating. Toast slices straight from the freezer or warm them in a toaster oven. For a whole or partially thawed loaf, heat in a 300°F (150°C) oven until warmed through.
Keeping it soft. Avoid slicing the whole loaf while it is still warm, since trapped steam can create excess moisture inside the storage bag.
Make-ahead option. You can mix the dough ahead of time and refrigerate it for a slow rise. Cover it well, allow extra time for it to warm up and rise, then shape and bake as directed.
Recipe Details at a Glance
- Prep time: 20 minutes
- First rise: 60 to 90 minutes
- Second rise: 30 to 45 minutes
- Bake time: 35 to 45 minutes
- Cooling time: 45 to 60 minutes
- Total time: approximately 3 hours 10 minutes to 4 hours
- Yield: 1 loaf, about 12 to 16 slices
- Difficulty: easy
Frequently Asked Questions
Do I really not need to knead this potato bread?
Correct. Thorough stirring for a few minutes is enough to combine the ingredients and distribute the potatoes. The long rises give the gluten time to develop on its own, which is why this method works without kneading.
Can I use instant mashed potatoes?
Yes, in a pinch. Prepare them with water, keep them plain and make sure they are cooled and not too loose. Freshly cooked potatoes generally give a better flavor and texture.
Can I use leftover mashed potatoes?
Absolutely, as long as they are plain or lightly seasoned and not very wet. Heavy garlic, cheese or lots of added cream can change the flavor and moisture of the dough.
Can I use instant yeast instead of active dry yeast?
Yes. Instant yeast can usually be swapped in at the same amount, and you can mix it directly with the flour. Still, activating it in warm milk and sugar, as in this recipe, works well and confirms the yeast is alive.
Can I make this recipe dairy-free?
You can substitute a plant-based milk and plant-based butter. The texture may be slightly different, but the loaf will still be soft thanks to the potatoes.
Why is my dough sticky?
No-knead dough is intentionally wetter than kneaded dough. That stickiness is what produces a tender crumb. Use a greased spatula and avoid adding too much extra flour.
How do I know when the bread is done?
Look for a deep golden top and use an instant-read thermometer. The center should reach about 190 to 200°F (88 to 93°C).
Can I freeze the dough?
This recipe is written for refrigerating the mixed dough for a slow rise. For the best results, freeze the baked and sliced loaf rather than the raw dough.
Does the bread taste like potatoes?
No. The potatoes contribute softness and moisture, with just a subtle richness. Most people never guess there is potato in it.
How long does homemade potato bread stay fresh?
About 2 to 3 days at room temperature in an airtight container, 4 to 5 days in the refrigerator, and 2 to 3 months in the freezer when sliced and well wrapped.
Final Thoughts
Homemade bread does not have to be complicated. This easy no-knead potato sandwich bread proves that a few humble ingredients, a wooden spoon and a little patience are all it takes to produce a soft, fluffy, beautifully golden loaf. The mashed potatoes keep every slice tender and moist, the method is friendly enough for first-time bakers, and the finished bread works for everything from sunrise toast to cozy soup suppers.
Give this recipe a try, and once you taste that first warm, buttered slice, you may never go back to store-bought sandwich bread. If you love it, save the recipe, share it with a friend who has been meaning to start baking, and make it again next week. Happy baking!
Print
Easy No-Knead Potato Sandwich Bread
Ingredients
Here is everything you need to make one standard 9 x 5-inch loaf (about 12 to 16 slices):
- 1 cup mashed potatoes, cooled (about 210 to 225 g, or approximately 2 medium potatoes)
- 3½ cups all-purpose flour (approximately 420 to 455 g), plus a little extra if needed
- ¾ cup (180 ml) warm milk, about 105 to 110°F (40 to 43°C)
- 2¼ teaspoons (7 g) active dry yeast, or 1 packet
- 2 tablespoons (25 g) granulated sugar
- 1 large egg, at room temperature
- 3 tablespoons (42 g) unsalted butter, melted and slightly cooled
- 1 teaspoon salt
- 1 to 3 tablespoons additional warm milk, only if needed to adjust the dough
- 1 tablespoon melted butter, for brushing the top (optional)
Ingredient Notes and Smart Substitutions
Potatoes. Russet or Yukon Gold potatoes both work well. Russets are starchier and mash fluffy, while Yukon Golds give a slightly creamier, buttery result. Whichever you choose, mash them until completely smooth and keep them plain. Heavily seasoned or very wet mashed potatoes can throw off the dough, so if you are using leftovers, check that they are not loaded with extra milk, butter, garlic or cheese.
Flour. All-purpose flour gives a soft, tender crumb. Bread flour will make a slightly chewier, taller loaf, but because this is a no-knead dough, all-purpose is the better match. Measure carefully: spoon the flour into your measuring cup and level it off rather than scooping straight from the bag, which packs in too much and leads to a dense loaf. If you have a kitchen scale, weighing is the most accurate method.
Milk. Whole milk gives the richest result, but 2% works too. The milk should feel warm to the touch, not hot. Too-hot liquid can kill the yeast, and too-cold liquid slows it down.
Yeast. This recipe uses active dry yeast, which is activated in warm milk with sugar until foamy. Always check the expiration date on your packet or jar. Old yeast is the most common reason bread fails to rise.
Butter. Unsalted butter lets you control the salt. If you only have salted butter, reduce the added salt slightly.
Egg. The egg adds richness, structure and a golden color. Bringing it to room temperature helps it blend smoothly into the dough.
Instructions
Peel about 2 medium potatoes and cook them in boiling water until they are fork-tender. Drain them very well, then mash until smooth with no large lumps. Measure out 1 cup (roughly 210 to 225 g) and let it cool to room temperature.
Cooling matters. Hot potatoes can damage the yeast and affect how well the dough rises. If you are using leftover mashed potatoes, make sure they are plain or only lightly seasoned.
Pour the warm milk into a large mixing bowl. Add the granulated sugar and sprinkle the yeast over the surface. Let it stand for 5 to 10 minutes, until the mixture turns foamy and bubbly.
This step proves the yeast is alive and ready to work. If nothing happens, your yeast may be old, or the milk may have been too hot or too cold. It is better to start again with fresh yeast than to carry on and end up with a flat loaf.
Add the cooled mashed potatoes, egg, melted butter and salt to the yeast mixture. Stir with a wooden spoon or sturdy spatula until mostly combined. The mixture may look a little uneven because of the potatoes, and that is perfectly fine as long as there are no big lumps.
Add the flour gradually, stirring after each addition, until a thick, sticky dough forms. Keep mixing until no dry patches remain. If the dough seems unusually stiff, add warm milk one tablespoon at a time until it becomes soft and easy to stir.
The dough should be moist and slightly sticky, not firm like traditional kneaded dough. Resist the temptation to add lots of extra flour, since that is what makes a finished loaf heavy and dry.
Continue stirring for 2 to 3 minutes so the potatoes are evenly distributed. There is no need to knead by hand or use a mixer. Just mix thoroughly until the ingredients form a cohesive dough. Scrape down the sides of the bowl, gather the dough into the center and cover the bowl with a clean kitchen towel or plastic wrap.
Place the covered bowl in a warm, draft-free spot and let the dough rise for 60 to 90 minutes, or until roughly doubled in size. In a cooler kitchen it may need longer. Avoid very hot spots, which can harm the dough’s texture and fermentation.
Lightly grease a standard 9 x 5-inch (23 x 13 cm) loaf pan with butter or cooking spray. Once the dough has risen, gently stir or fold it over itself with a spatula to release some of the larger air pockets. The dough will be sticky, so use a lightly greased spatula instead of adding more flour. Transfer the dough into the pan and spread it gently toward the corners.
Cover the pan loosely with a towel or lightly greased plastic wrap. Let the dough rise another 30 to 45 minutes, until puffy and close to the top of the pan. Keep an eye on it, especially in a warm kitchen. Overproofed dough can collapse or bake unevenly.
During the last 15 to 20 minutes of the second rise, preheat your oven to 350°F (175°C) with a rack in the center. If the dough is rising quickly, start preheating a little earlier so the oven is ready when the loaf is properly proofed.
Bake for 35 to 45 minutes, until the top is deep golden brown and the loaf is cooked through. If the top darkens too quickly, loosely cover it with aluminum foil for the remaining time.
For a foolproof check, insert an instant-read thermometer into the center. It should read about 190 to 200°F (88 to 93°C), and the loaf should feel set rather than doughy.
Remove the loaf from the oven and brush the top with melted butter if you like. This adds flavor and softens the crust. Let the bread rest in the pan for about 10 minutes before carefully turning it out.
Transfer the loaf to a wire rack and let it cool for at least 45 to 60 minutes before slicing. It is tempting to cut in right away, but the interior is still setting. Slicing too early can squash the crumb and make it seem gummy. Once cooled, use a serrated bread knife for even slices.