Homemade Farmhouse Loaf: Rustic, Soft & Beautifully Golden (Easy Country Bread Recipe)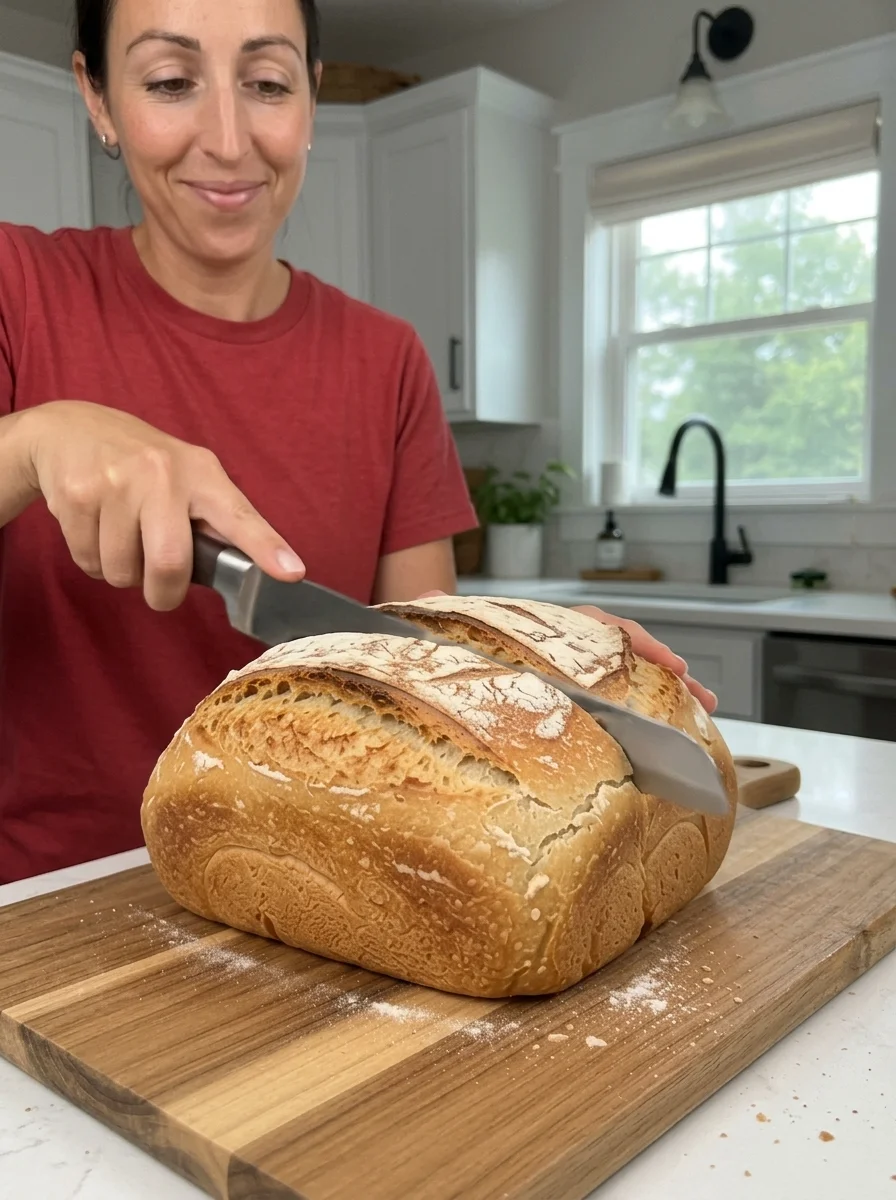
SEO title: Homemade Farmhouse Loaf Recipe (Rustic, Soft & Golden Bread)
Meta description: Bake a rustic homemade farmhouse loaf with a golden crust and soft, fluffy crumb. Easy step-by-step bread recipe with shaping, scoring, steam tips, variations, storage, and FAQ.
Focus keyword: farmhouse loaf
Secondary keywords: homemade farmhouse bread, rustic bread recipe, easy homemade bread, country bread, white bread loaf, how to shape a boule, how to score bread, bread for toast and sandwiches
Nothing beats the comforting smell of freshly baked bread filling the kitchen. This homemade farmhouse loaf has a golden, rustic crust, a soft and fluffy interior, and a tender crumb that is just as good toasted for breakfast as it is piled with fillings for lunch. It is the kind of loaf that looks like it came from a village bakery, yet it uses everyday pantry ingredients and a straightforward method.
The recipe is traditional in spirit: flour, warm water, yeast, a little sugar or honey, butter or olive oil, and salt. Kneading builds structure, two gentle rises build flavor and lightness, and a single bold slash across the top gives the loaf its classic farmhouse look. A little steam during the first part of baking helps produce a crisp, golden crust, and an optional brush of melted butter after baking keeps the crust soft and flavorful.
In this guide you will find the full recipe, step-by-step instructions, an explanation of how each ingredient works, shaping and scoring tips, a safe way to add steam, troubleshooting advice, creative variations, serving ideas, storage and freezing instructions, and answers to the questions bakers ask most often about homemade bread.
Why You’ll Love This Farmhouse Loaf
There are many homemade bread recipes, so what makes this one worth baking? Here are the main reasons it deserves a place in your regular rotation.
- Rustic good looks. A golden crust, a floured top, and a single bold slash give the loaf an authentic bakery appearance.
- Soft, fluffy interior. Kneading and two rises produce a tender crumb that slices cleanly.
- Versatile. It makes excellent thick slices for toast, hearty sandwiches, garlic bread, and dipping into soup.
- Simple ingredients. Flour, water, yeast, sugar or honey, butter or olive oil, and salt are all you need.
- Beginner friendly. The method is classic and forgiving, with plenty of visual cues to tell you when each stage is ready.
- Great for freezing. Slice the cooled loaf, freeze it, and toast slices whenever you like.
- Easy to customize. Add seeds, herbs, whole wheat flour, or swap the water for milk.
Recipe Overview
- Prep time: 20 minutes
- Rise time: 1½ to 2 hours
- Bake time: 30 to 35 minutes
- Total time: Approximately 2½ to 3 hours
- Yield: 1 large loaf, about 10 to 12 slices
- Difficulty: Easy
Ingredients for Homemade Farmhouse Loaf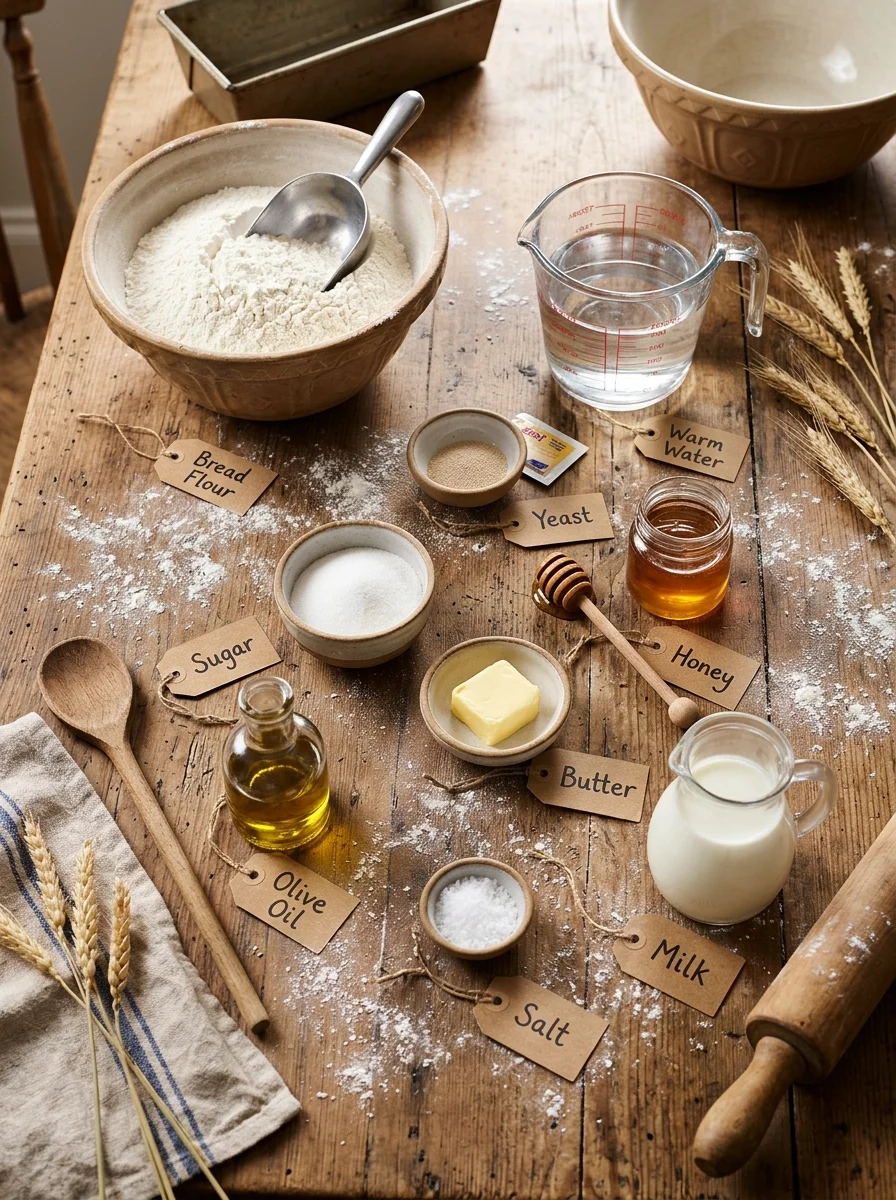
- 3½ cups (440 g) bread flour or all-purpose flour
- 1¼ cups (300 ml) warm water, approximately 100 to 110°F (38 to 43°C)
- 2¼ teaspoons (7 g) instant yeast
- 2 tablespoons (25 g) sugar or honey
- 2 tablespoons (28 g) softened butter or olive oil
- 1½ teaspoons (8 g) salt
- 2 tablespoons milk, for brushing (optional)
- A little flour, for dusting
A Closer Look at the Key Ingredients
Bread flour or all-purpose flour. Bread flour has a higher protein content, which builds more gluten and produces a taller, chewier loaf with a strong structure. All-purpose flour gives a slightly softer, more tender crumb. Either works well in this recipe.
Warm water. Water brings the dough together and activates the yeast. It should be around 100 to 110°F (38 to 43°C), warm rather than hot. Water that is too hot can damage the yeast and keep the dough from rising.
Instant yeast. Instant yeast is the leavening that makes the loaf rise. If you only have active dry yeast, let it stand in the warm water with the sugar for 5 to 10 minutes until foamy before continuing.
Sugar or honey. Two tablespoons feeds the yeast, softens the crumb, and helps the crust brown. Honey adds a subtle sweetness and a pleasant aroma.
Softened butter or olive oil. Fat tenderizes the crumb, adds flavor, and helps the bread stay soft for longer. Butter gives a richer, classic flavor, while olive oil gives a slightly different taste and a tender texture.
Salt. Salt flavors the bread, strengthens the dough, and controls the speed of fermentation. Do not skip it, or the loaf will taste flat.
Milk for brushing (optional). A light brush of milk before baking encourages a softer, lightly golden crust.
Flour for dusting. A light dusting of flour on top before scoring gives the loaf the classic rustic, floury look.
How to Make a Farmhouse Loaf: Step by Step
Step 1: Activate the Yeast
In a large mixing bowl, combine the warm water, sugar, and yeast.
If using active dry yeast, let the mixture stand for 5 to 10 minutes until foamy. If using instant yeast, you can proceed immediately.
Make sure the water is warm rather than hot, as excessive heat can damage the yeast.
Step 2: Mix the Dough
Add the softened butter or olive oil, flour, and salt.
Mix with a wooden spoon until a rough dough forms and all the flour is incorporated.
Transfer the dough to a lightly floured surface and knead for approximately 8 to 10 minutes, until smooth, elastic, and slightly tacky.
If the dough feels too sticky, add flour one tablespoon at a time. Avoid adding too much, as a softer dough produces a fluffier loaf.
A simple way to check your kneading is the windowpane test. Pinch off a small piece of dough and stretch it gently. If it stretches thin enough to become translucent without tearing right away, the gluten is well developed.
Step 3: First Rise
Place the dough in a lightly greased bowl and turn it once to coat the surface.
Cover with a clean kitchen towel or plastic wrap.
Leave in a warm place for 60 to 90 minutes, or until doubled in size.
Rising time depends on the temperature of your kitchen. Watch the dough rather than the clock. It should look puffy and domed, and a gently pressed fingertip should leave an indentation that fills back slowly.
Step 4: Shape the Farmhouse Loaf
Gently press the dough to release excess air.
Transfer it to a lightly floured surface and shape it into a round boule or an oval loaf.
For a traditional farmhouse appearance, gently pull the dough toward yourself to create surface tension and a smooth top.
Place the shaped loaf on a parchment-lined baking tray, seam-side down.
Surface tension is the secret to a loaf that holds its shape. A taut skin on the outside encourages the dough to rise upward rather than spread sideways.
Step 5: Second Rise
Cover loosely with a clean towel and let the loaf rise for another 30 to 45 minutes, until noticeably puffy.
Meanwhile, preheat the oven to 425°F (220°C).
Step 6: Score the Bread
Just before baking, lightly dust the loaf with flour.
Using a sharp bread knife or bread lame, make one long slash across the top, approximately ½ inch (1 cm) deep.
This allows the bread to expand beautifully in the oven and gives it a rustic farmhouse appearance.
Step 7: Bake Until Golden
Place the loaf in the preheated oven.
For a crispier crust, place a small oven-safe dish of hot water on the lower oven rack during the first 10 to 15 minutes of baking. Be careful when handling the hot water and steam.
Bake for 30 to 35 minutes, until the crust is deeply golden brown and the loaf sounds hollow when tapped underneath.
For extra accuracy, the center should reach approximately 200 to 205°F (93 to 96°C).
Step 8: Cool and Serve
Remove the loaf from the oven and transfer it to a wire rack.
For a softer crust, brush the top lightly with melted butter while still warm.
Allow the bread to cool for at least 45 to 60 minutes before slicing. This helps the interior finish setting and keeps the slices from becoming gummy.
Why Scoring and Steam Matter
Two small techniques give a farmhouse loaf its classic look and texture: scoring and steam. When bread enters a hot oven, the yeast produces a final burst of gas and the dough expands rapidly, which is called oven spring. If the surface has no outlet, the loaf can tear unpredictably at its weakest point. A deliberate slash gives the bread a planned place to open, so the loaf expands evenly and looks neat.
Steam works in partnership with scoring. During the first 10 to 15 minutes of baking, a humid oven keeps the surface of the dough soft and flexible, so it can keep expanding before the crust sets. The moisture also helps create a thinner, crispier, golden crust. A small oven-safe dish of hot water on the lower rack is a simple way to add steam at home. Always handle the hot water and steam carefully, keep your face and hands clear, and use oven mitts.
Tips for the Perfect Farmhouse Loaf
A few small habits make a big difference in homemade bread.
- Measure flour carefully. Too much flour can make the bread heavy and dry. Weighing it gives the most reliable results.
- Use warm water. Water that is too hot can prevent the yeast from working properly.
- Knead until elastic. A well-developed dough helps create a soft, even crumb.
- Do not rush the rising. Let the dough rise until visibly doubled rather than relying only on the clock.
- Create surface tension. A properly shaped loaf holds its form and rises more evenly.
- Score just before baking. This helps control expansion and creates an attractive finish.
- Use steam for the crust. Steam during the beginning of baking encourages better oven spring and a crispier crust.
- Cool completely. Cutting too early can compress the soft interior.
- Use a thermometer. An internal temperature of approximately 200 to 205°F (93 to 96°C) is a reliable sign the loaf is fully baked.
Troubleshooting Common Bread Problems
The loaf is dense. The most common causes are too much flour, too little kneading, or not enough rising time. Measure carefully, knead until smooth and elastic, and let the dough double during the first rise.
The dough did not rise. Check that the yeast is fresh and the water was warm, not hot. A cool kitchen can also slow fermentation, so move the dough to a warmer place and give it more time.
The loaf spread out flat. The shaping may not have created enough surface tension, or the dough may have overproofed during the second rise. Pull the dough taut when shaping, and bake when the loaf is noticeably puffy rather than letting it grow too large.
The crust is pale. Make sure the oven is fully preheated, and bake until the crust is deeply golden brown. A little steam at the beginning helps with color and crispness.
The crust is too hard. For a softer crust, brush the top with melted butter while the bread is still warm.
The top browned too quickly. If the crust darkens before the center is done, loosely cover the loaf with foil for the remaining baking time.
The crumb is gummy. The loaf may have been cut before cooling, or it may be underbaked. Use a thermometer to confirm the center reaches approximately 200 to 205°F (93 to 96°C), and allow the loaf to cool for at least 45 to 60 minutes before slicing.
The slash did not open. Use a sharp blade, cut about ½ inch (1 cm) deep, and cut confidently. If the dough has overproofed, it may deflate instead of opening.
Delicious Variations
Whole Wheat Farmhouse Loaf. Replace 1 cup (125 g) of the white flour with whole wheat flour. Add 1 to 2 tablespoons of extra water if needed.
Rustic Honey Bread. Replace the sugar with 2 tablespoons of honey for a subtle sweetness.
Garlic Herb Loaf. Add 1 teaspoon of garlic powder and 1 to 2 teaspoons of dried rosemary, thyme, or mixed herbs.
Seeded Farmhouse Bread. Add 2 tablespoons of sunflower, sesame, or pumpkin seeds to the dough.
Milk Farmhouse Loaf. Replace the water with warm milk for a softer crust and richer crumb. The loaf may brown more quickly, so keep an eye on it.
Olive Oil Farmhouse Bread. Use olive oil instead of butter for a slightly different flavor and tender texture.
Serving Ideas
This versatile loaf suits almost any meal. Try it in these ways:
- Serve warm slices with butter, honey, or homemade jam.
- Make delicious sandwiches with cheese, eggs, chicken, or fresh vegetables.
- Toast thick slices and top with avocado or scrambled eggs.
- Serve alongside homemade soup, stew, or pasta.
- Make rustic garlic bread with butter, garlic, and parsley.
- Enjoy with olive oil and herbs as a simple appetizer.
Because the loaf is sturdy but soft, it slices cleanly into thick pieces, which makes it especially good for toast, open-faced sandwiches, and mopping up soups and stews.
Storage and Freezing
Room temperature. Once completely cool, store in a sealed bread bag or airtight container for 2 to 3 days.
Refrigerator. Refrigeration is generally unnecessary and can make bread stale faster.
Freezer. Slice the cooled loaf and freeze in a sealed freezer bag for up to 3 months. Separate slices with parchment paper for easier serving.
Reheating. Toast slices directly from frozen, or warm the whole loaf in a 300°F (150°C) oven for approximately 8 to 10 minutes.
Frequently Asked Questions
Can I use all-purpose flour instead of bread flour?
Yes. Bread flour makes a taller, chewier loaf, while all-purpose flour gives a softer, more tender crumb. Both work well.
Can I use active dry yeast?
Yes. Let it stand in the warm water with the sugar for 5 to 10 minutes until foamy before adding the other ingredients.
Do I have to knead the dough by hand?
The recipe is written for hand kneading, which takes about 8 to 10 minutes. Knead until the dough is smooth, elastic, and slightly tacky.
Should I use butter or olive oil?
Either works. Butter adds a richer, classic flavor, while olive oil gives a slightly different flavor and a tender texture.
How do I know when the dough has doubled?
It should look visibly larger, puffy, and domed. Watch the dough rather than relying only on the clock, since kitchen temperature affects rising time.
How do I score a farmhouse loaf?
Just before baking, lightly dust the loaf with flour and make one long slash across the top about ½ inch (1 cm) deep, using a sharp bread knife or lame.
How do I add steam in a home oven?
Place a small oven-safe dish of hot water on the lower oven rack during the first 10 to 15 minutes of baking. Handle the hot water and steam carefully.
How do I know when the bread is done?
The crust should be deeply golden brown and the loaf should sound hollow when tapped underneath. For extra accuracy, the center should reach approximately 200 to 205°F (93 to 96°C).
Can I freeze farmhouse bread?
Yes. Slice the cooled loaf and freeze in a sealed freezer bag for up to 3 months, separating slices with parchment paper. Toast slices directly from frozen.
Why shouldn’t I slice the bread while it is hot?
The interior needs time to finish setting. Cutting too early can compress the crumb and make the slices seem gummy.
Final Thoughts
This homemade farmhouse loaf has a beautifully golden crust, a soft and fluffy center, and the wonderful rustic appearance of traditional country bread. Whether served fresh from the oven, toasted for breakfast, or used to make your favorite sandwiches, it is simple, comforting, and absolutely delicious.
Golden on the outside, pillowy on the inside, and made with love. Bake a loaf this weekend, slice it thick, and enjoy it warm with a little butter.
Print
Homemade Farmhouse Loaf – Rustic, Soft & Beautifully Golden
Ingredients
- 3½ cups (440 g) bread flour or all-purpose flour
- 1¼ cups (300 ml) warm water, approximately 100 to 110°F (38 to 43°C)
- 2¼ teaspoons (7 g) instant yeast
- 2 tablespoons (25 g) sugar or honey
- 2 tablespoons (28 g) softened butter or olive oil
- 1½ teaspoons (8 g) salt
- 2 tablespoons milk, for brushing (optional)
- A little flour, for dusting
A Closer Look at the Key Ingredients
Bread flour or all-purpose flour. Bread flour has a higher protein content, which builds more gluten and produces a taller, chewier loaf with a strong structure. All-purpose flour gives a slightly softer, more tender crumb. Either works well in this recipe.
Warm water. Water brings the dough together and activates the yeast. It should be around 100 to 110°F (38 to 43°C), warm rather than hot. Water that is too hot can damage the yeast and keep the dough from rising.
Instant yeast. Instant yeast is the leavening that makes the loaf rise. If you only have active dry yeast, let it stand in the warm water with the sugar for 5 to 10 minutes until foamy before continuing.
Sugar or honey. Two tablespoons feeds the yeast, softens the crumb, and helps the crust brown. Honey adds a subtle sweetness and a pleasant aroma.
Softened butter or olive oil. Fat tenderizes the crumb, adds flavor, and helps the bread stay soft for longer. Butter gives a richer, classic flavor, while olive oil gives a slightly different taste and a tender texture.
Salt. Salt flavors the bread, strengthens the dough, and controls the speed of fermentation. Do not skip it, or the loaf will taste flat.
Milk for brushing (optional). A light brush of milk before baking encourages a softer, lightly golden crust.
Flour for dusting. A light dusting of flour on top before scoring gives the loaf the classic rustic, floury look.
Instructions
In a large mixing bowl, combine the warm water, sugar, and yeast.
If using active dry yeast, let the mixture stand for 5 to 10 minutes until foamy. If using instant yeast, you can proceed immediately.
Make sure the water is warm rather than hot, as excessive heat can damage the yeast.
Add the softened butter or olive oil, flour, and salt.
Mix with a wooden spoon until a rough dough forms and all the flour is incorporated.
Transfer the dough to a lightly floured surface and knead for approximately 8 to 10 minutes, until smooth, elastic, and slightly tacky.
If the dough feels too sticky, add flour one tablespoon at a time. Avoid adding too much, as a softer dough produces a fluffier loaf.
A simple way to check your kneading is the windowpane test. Pinch off a small piece of dough and stretch it gently. If it stretches thin enough to become translucent without tearing right away, the gluten is well developed.
Place the dough in a lightly greased bowl and turn it once to coat the surface.
Cover with a clean kitchen towel or plastic wrap.
Leave in a warm place for 60 to 90 minutes, or until doubled in size.
Rising time depends on the temperature of your kitchen. Watch the dough rather than the clock. It should look puffy and domed, and a gently pressed fingertip should leave an indentation that fills back slowly.
Gently press the dough to release excess air.
Transfer it to a lightly floured surface and shape it into a round boule or an oval loaf.
For a traditional farmhouse appearance, gently pull the dough toward yourself to create surface tension and a smooth top.
Place the shaped loaf on a parchment-lined baking tray, seam-side down.
Surface tension is the secret to a loaf that holds its shape. A taut skin on the outside encourages the dough to rise upward rather than spread sideways.
Cover loosely with a clean towel and let the loaf rise for another 30 to 45 minutes, until noticeably puffy.
Meanwhile, preheat the oven to 425°F (220°C).
Just before baking, lightly dust the loaf with flour.
Using a sharp bread knife or bread lame, make one long slash across the top, approximately ½ inch (1 cm) deep.
This allows the bread to expand beautifully in the oven and gives it a rustic farmhouse appearance.
Place the loaf in the preheated oven.
For a crispier crust, place a small oven-safe dish of hot water on the lower oven rack during the first 10 to 15 minutes of baking. Be careful when handling the hot water and steam.
Bake for 30 to 35 minutes, until the crust is deeply golden brown and the loaf sounds hollow when tapped underneath.
For extra accuracy, the center should reach approximately 200 to 205°F (93 to 96°C).
Remove the loaf from the oven and transfer it to a wire rack.
For a softer crust, brush the top lightly with melted butter while still warm.
Allow the bread to cool for at least 45 to 60 minutes before slicing. This helps the interior finish setting and keeps the slices from becoming gummy.