Homemade Sourdough Ciabatta: Crispy Crust & Beautifully Open Crumb (Step-by-Step Recipe)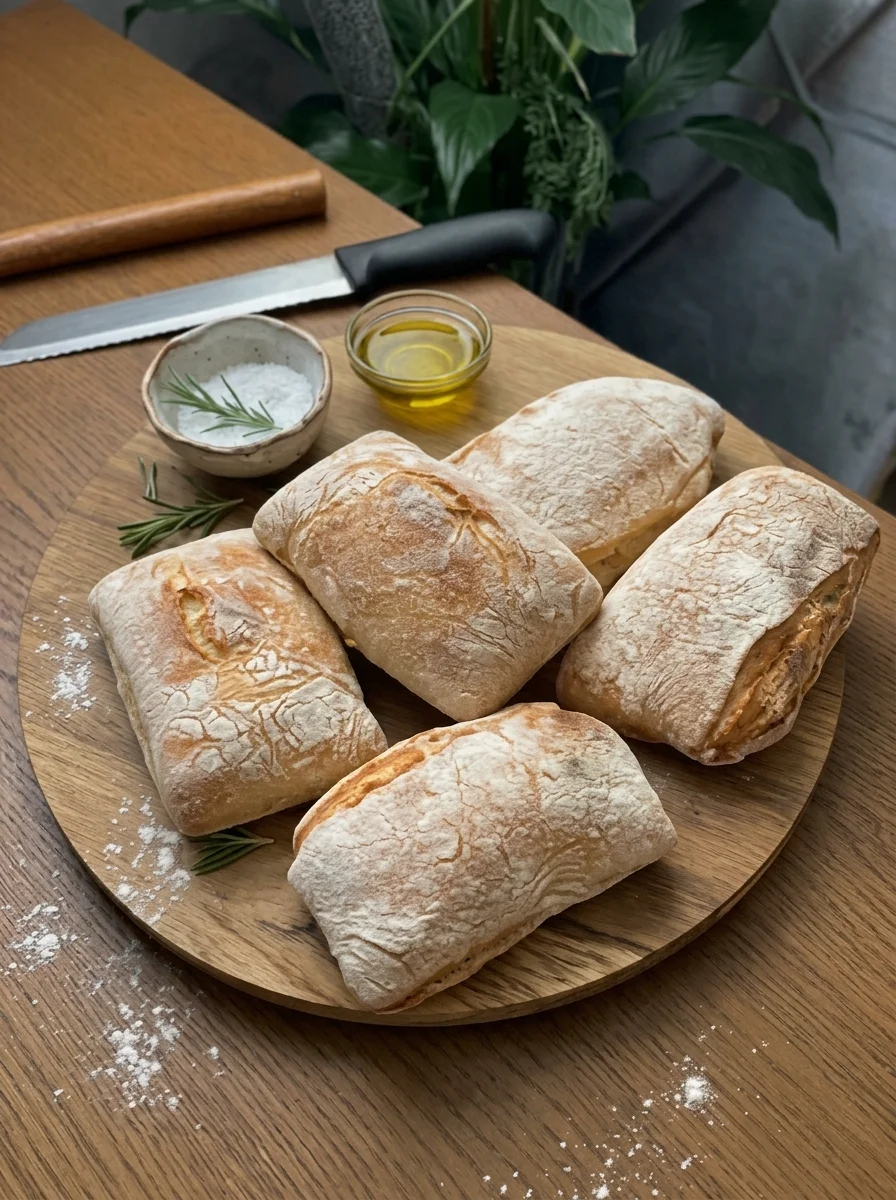
SEO title: Homemade Sourdough Ciabatta Recipe (Crispy Crust & Open Crumb)
Meta description: Learn how to make sourdough ciabatta at home with a thin crispy crust and airy, open crumb. Step-by-step high-hydration recipe with tips, variations, storage, and FAQ.
Focus keyword: sourdough ciabatta
Secondary keywords: homemade ciabatta, sourdough ciabatta recipe, open crumb bread, high-hydration sourdough, stretch and fold, ciabatta with starter, rustic Italian bread, no-knead sourdough, crusty sourdough bread
There is nothing quite like homemade sourdough ciabatta. A thin, golden, crackly crust gives way to a chewy, airy interior full of irregular holes, and the gentle tang of naturally fermented dough ties it all together. It is a true bakery favorite, and with the right approach it is surprisingly achievable in a home kitchen.
This sourdough ciabatta is made with just four ingredients: bread flour, water, active sourdough starter, and salt. The dough is high hydration, which is what creates those gorgeous air pockets, and it is strengthened with gentle stretch-and-folds rather than traditional kneading. The loaves are shaped lightly, proofed briefly, and baked in a hot, steamy oven for a crisp crust and an open crumb.
In this guide you will find the full recipe, step-by-step instructions, an explanation of how each ingredient and technique works, tips for achieving an open crumb, a safe way to create steam, troubleshooting advice, creative variations, serving ideas, storage and freezing instructions, and answers to the questions bakers ask most often about ciabatta.
What Is Ciabatta?
Ciabatta is a rustic Italian bread known for its flat, elongated shape, thin crisp crust, and light, airy, hole-filled crumb. The name means slipper in Italian, a nod to its wide, slightly irregular form. Unlike a tight-crumbed sandwich loaf, ciabatta is deliberately open and chewy, which makes it ideal for soaking up olive oil, holding juicy sandwich fillings, and tearing apart at the table.
Traditional ciabatta uses a very wet dough. That high moisture content turns to steam during baking and inflates the crumb into large, irregular pockets. This version uses a sourdough starter instead of commercial yeast, which adds depth of flavor, a pleasant tang, and extra chew.
Why You’ll Love This Sourdough Ciabatta
There are plenty of ciabatta recipes, so what makes this one worth baking? Here are the main reasons.
- Open, airy crumb. A high-hydration dough and gentle handling preserve the gas that creates large, irregular holes.
- Thin, crispy crust. Steam and a hot oven produce a golden crust with a satisfying crackle.
- Naturally tangy flavor. Sourdough fermentation adds complexity that a quick yeast bread cannot match.
- Simple ingredients. Bread flour, water, starter, and salt are all you need.
- No kneading. Stretch-and-folds build strength gently, with no mixer required.
- Versatile. It makes outstanding sandwiches, garlic bread, bruschetta, and dipping bread.
- Rustic and forgiving. Ciabatta is meant to look irregular, so there is no pressure to shape perfectly.
Recipe Overview
- Prep time: 25 minutes
- Bulk fermentation: 4 to 6 hours
- Final proof: 45 to 75 minutes
- Bake time: 20 to 25 minutes
- Total time: Approximately 7 to 10 hours, depending on starter activity and room temperature
- Yield: 2 medium ciabatta loaves
- Difficulty: Moderate
Ingredients for Sourdough Ciabatta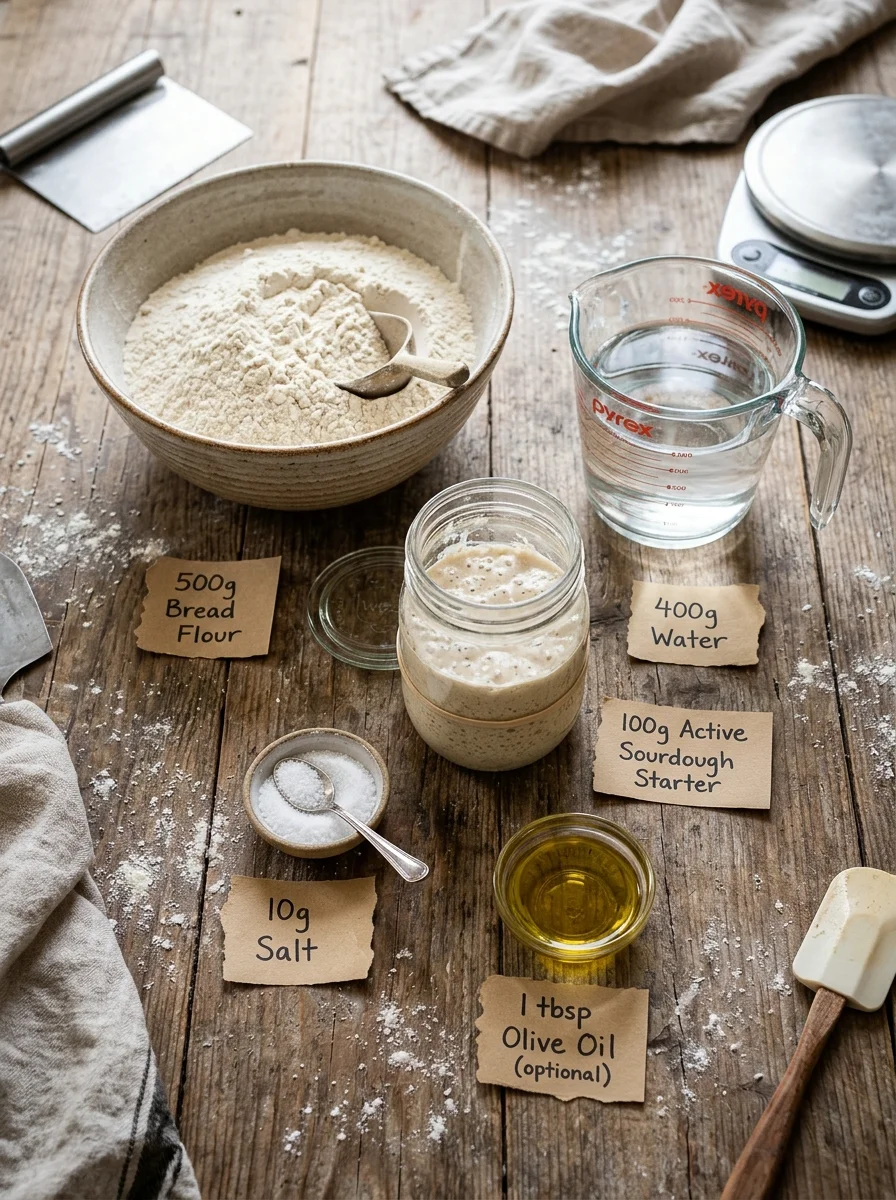
- 500 g bread flour (approximately 4 cups)
- 400 g water (400 ml), at room temperature
- 100 g active, bubbly sourdough starter (100% hydration)
- 10 g salt (about 1¾ teaspoons)
- Extra flour or rice flour, for dusting
Optional: 1 tablespoon of olive oil for lightly greasing the bowl.
A Closer Look at the Key Ingredients
Bread flour. Bread flour has a higher protein content than all-purpose flour, which means it forms a stronger gluten network. That strength is essential for holding the gas in a very wet dough. A flour with approximately 12 to 13 percent protein works best.
Water. At 400 g of water to 500 g of flour, the dough is 80% hydration before counting the water in the starter. That is quite wet, and it is the reason ciabatta has such an open crumb. The dough will feel loose and sticky, which is normal.
Active sourdough starter. The starter provides both the leavening and the flavor. A starter at 100% hydration contains equal weights of flour and water. It should be bubbly and near or at its peak, meaning it has risen noticeably after feeding. A weak starter leads to slow fermentation and dense bread.
Salt. Salt flavors the bread, strengthens the dough, and regulates fermentation. At 10 g for 500 g of flour, it gives well-seasoned bread without overpowering the sourdough tang.
Flour or rice flour for dusting. A generous dusting keeps the sticky dough from clinging to your work surface and towels. Rice flour is especially useful because it does not absorb moisture as readily as wheat flour.
Olive oil (optional). A little oil in the bowl makes it easier to release the dough, although water and a bench scraper also work well.
How to Make Sourdough Ciabatta: Step by Step
Step 1: Prepare Your Sourdough Starter
Feed your sourdough starter and allow it to become active, bubbly, and nearly doubled in size.
For the best results, use it when it is at or near its peak activity.
A healthy starter is essential for good fermentation, oven spring, and an airy ciabatta crumb.
Step 2: Mix the Dough
In a large mixing bowl, combine the water and active sourdough starter.
Stir until the starter is mostly dissolved.
Add the bread flour and mix with a spoon or wet hand until no dry flour remains.
Cover and let the dough rest for 30 to 45 minutes.
This resting period allows the flour to absorb the water and makes the dough easier to handle.
Step 3: Add the Salt
Sprinkle the salt over the dough.
With damp hands, gently pinch and fold the dough until the salt is evenly incorporated.
The dough will feel very sticky and loose. This is normal because ciabatta is a high-hydration bread.
Avoid adding extra flour at this stage.
Step 4: Perform Stretch and Folds
Over the next 2 hours, perform 4 sets of stretch and folds, approximately 30 minutes apart.
For each set:
- Wet your hands lightly.
- Lift one side of the dough.
- Stretch it gently upward without tearing.
- Fold it over the center.
- Rotate the bowl and repeat on all four sides.
Keep the movements gentle to preserve the air developing inside the dough.
With each set, the dough should become smoother, stronger, and more elastic.
Step 5: Bulk Fermentation
After the final fold, cover the bowl and allow the dough to continue fermenting.
Depending on the temperature of your kitchen and the strength of your starter, this may take another 2 to 4 hours.
Look for these signs:
- The dough has increased in volume by approximately 50 to 75 percent.
- Bubbles are visible along the sides and surface.
- The dough looks airy and slightly domed.
- It jiggles gently when the bowl is moved.
- It feels lighter and more elastic.
Do not rely only on the clock. The dough’s appearance and texture are more reliable indicators of fermentation.
Step 6: Prepare the Work Surface
Generously dust your work surface with flour or rice flour.
Carefully turn the dough out onto the surface.
Try not to press or deflate it, as preserving the gas inside is essential for creating the characteristic open ciabatta crumb.
Dust the top lightly with flour.
Step 7: Divide and Shape the Loaves
Using a bench scraper, gently divide the dough into two rectangular portions.
Stretch each portion carefully into a rustic rectangle.
Avoid rolling, kneading, or aggressively shaping the dough.
Ciabatta is traditionally irregular in appearance, so do not worry about making the loaves perfectly symmetrical.
Transfer each loaf onto a piece of parchment paper, keeping enough space between them.
Step 8: Final Proof
Cover the loaves loosely with a lightly floured kitchen towel or plastic wrap.
Let them rest for approximately 45 to 75 minutes, or until visibly puffy and airy.
Meanwhile, preheat your oven to 475°F (245°C).
If using a baking stone or steel, preheat it as well.
Step 9: Prepare the Oven for Steam
Place a sturdy, oven-safe metal pan on the lower rack while the oven preheats.
When ready to bake, carefully add hot water to the pan to create steam, if your oven setup is suitable for this method.
Alternatively, use a covered baking vessel designed for bread baking.
Be extremely careful when handling hot pans and steam. Never pour water onto the oven floor, heating elements, or glass door.
Step 10: Bake the Ciabatta
Transfer the loaves, with their parchment paper, onto the preheated baking stone, steel, or baking tray.
Bake at 475°F (245°C) for approximately 10 minutes with steam.
Carefully remove the steam pan if used, then reduce the oven temperature to 450°F (230°C).
Continue baking for another 10 to 15 minutes, until the crust is deeply golden and crisp.
The loaves should feel light and sound hollow when tapped underneath.
Step 11: Cool Completely
Transfer the ciabatta to a wire rack.
Allow it to cool for at least 45 to 60 minutes before slicing.
This resting period allows the interior crumb to finish setting and helps preserve its beautiful open structure.
The Secrets Behind an Open Crumb
An open crumb is the hallmark of a great ciabatta, and it comes from three things working together: hydration, strength, and gentle handling.
Hydration. The wet dough lets the flour absorb plenty of water. During baking, that water becomes steam, expanding the gas pockets and creating large, irregular holes. It also keeps the interior moist and chewy.
Strength. A very wet dough has little structure on its own, so it relies on well-developed gluten and active fermentation. Stretch-and-folds, strong bread flour, and a lively starter give the dough enough strength to trap gas without collapsing.
Gentle handling. Once fermentation has built up gas inside the dough, rough handling can push it out. Turning the dough onto a well-floured surface, dividing it with a bench scraper, and stretching it carefully into rectangles preserve the bubbles that will become the holes in the finished loaf.
Fermentation also matters. Under-fermented dough produces a tight, dense crumb, while overfermented dough can slump and lose structure. Watch for increased volume, visible bubbles, and a light, jiggly texture rather than relying only on the clock.
Tips for a Beautifully Open Ciabatta Crumb
A few small habits make a big difference to the final loaf.
- Use strong bread flour. A flour with approximately 12 to 13 percent protein helps support the high-hydration dough.
- Use an active starter. A weak or underactive starter can produce dense bread.
- Do not add too much flour. Sticky dough is part of what makes ciabatta special.
- Handle gently. Rough handling can destroy the air pockets created during fermentation.
- Do not under-ferment. Look for bubbles, increased volume, and a light, jiggly texture.
- Use a bench scraper. It makes dividing and transferring the sticky dough much easier.
- Create steam safely. Steam during the early stage of baking helps develop a crisp, thin crust.
- Allow sufficient cooling. Cutting too early can leave the crumb gummy.
Troubleshooting Common Ciabatta Problems
The dough is too sticky to handle. High-hydration dough is meant to be sticky. Use wet hands during folds, a generous dusting of flour or rice flour for shaping, and a bench scraper for dividing. Avoid adding extra flour to the dough itself.
The crumb is dense with small holes. The dough may have been under-fermented, the starter may have been weak, or the dough may have been handled too roughly. Use a bubbly starter at or near its peak, wait for visible signs of fermentation, and handle the dough gently.
The loaves spread flat. The dough may have been overfermented or lacked strength. Make sure to complete the stretch-and-folds, and look for 50 to 75 percent volume increase rather than letting the dough grow far beyond that.
The crust is pale or soft. Make sure the oven and baking surface are fully preheated, use steam safely during the first 10 minutes, and bake until the crust is deeply golden.
The crust is too thick. Too long without steam, or baking at too low a temperature, can create a thick crust. Use steam early and keep the temperature high.
The loaves stuck to the surface. Use a generous dusting of flour or rice flour on the work surface, towel, and parchment, since the dough is very sticky.
The crumb is gummy. The loaf may have been cut too soon, or it may be underbaked. Let the loaves cool for at least 45 to 60 minutes, and bake until they feel light and sound hollow when tapped underneath.
Delicious Variations
Rosemary Olive Ciabatta. Add 2 tablespoons of finely chopped rosemary and ½ cup of chopped olives during the final stretch-and-fold session.
Garlic Herb Ciabatta. Add 1 teaspoon of garlic powder and 1 tablespoon of dried Italian herbs to the flour.
Sun-Dried Tomato Ciabatta. Gently incorporate ⅓ cup of chopped, well-drained sun-dried tomatoes during the folds.
Whole Wheat Ciabatta. Replace up to 100 g of bread flour with whole wheat flour. You may need a little extra water depending on the flour.
Cheese Ciabatta. Add ½ cup of grated Parmesan or mature cheddar during the final fold.
Sesame Ciabatta. Sprinkle sesame seeds over the loaves before baking for a nutty finish.
Serving Ideas
Ciabatta is one of the most versatile breads you can bake. Try it in these ways:
- Make delicious sandwiches with mozzarella, tomato, basil, and pesto.
- Fill with grilled chicken, lettuce, and homemade garlic sauce.
- Serve with olive oil and balsamic vinegar for dipping.
- Make crispy garlic bread with butter, garlic, and parsley.
- Toast slices and top with avocado and eggs.
- Serve alongside soup, pasta, or roasted vegetables.
- Use leftover ciabatta to make homemade croutons or bruschetta.
The open crumb and sturdy crust hold up well to juicy fillings, which makes ciabatta a favorite for panini and sandwiches. Its irregular holes also catch olive oil and sauces beautifully.
Storage and Freezing
Room temperature. Store completely cooled ciabatta in a paper bag or bread bag for up to 2 days. Avoid sealing it while warm, as trapped moisture softens the crust.
Freezer. Slice or cut the cooled loaves into portions, wrap tightly, and freeze for up to 3 months.
Reheating. Lightly sprinkle the crust with water and warm in a preheated 350°F (175°C) oven for 5 to 8 minutes to refresh its crispness.
From frozen. Thaw at room temperature or reheat frozen slices directly in a toaster.
Frequently Asked Questions
Why is my ciabatta dough so wet and sticky?
Ciabatta is a high-hydration bread, and the sticky, loose dough is what creates the open, airy crumb. Use wet hands for folds and flour only the work surface, rather than adding more flour to the dough.
Do I need to knead the dough?
No. Stretch-and-folds develop the gluten gently while preserving the air bubbles. Perform 4 sets about 30 minutes apart during the first 2 hours.
How do I know when the starter is ready?
It should be active, bubbly, and nearly doubled in size after feeding. Use it at or near its peak for the best fermentation and oven spring.
How do I know when bulk fermentation is finished?
Look for roughly a 50 to 75 percent increase in volume, visible bubbles along the sides and surface, a slightly domed top, and a dough that jiggles gently when the bowl is moved.
Can I use all-purpose flour instead of bread flour?
Bread flour is recommended because its higher protein content supports the wet dough. All-purpose flour may produce a softer, flatter loaf, and you may want to reduce the water slightly.
How do I create steam safely at home?
Place a sturdy, oven-safe metal pan on the lower rack while the oven preheats, then carefully add hot water when you load the bread. You can also use a covered baking vessel. Never pour water onto the oven floor, heating elements, or glass door.
Do I need a baking stone?
No. A baking stone or steel helps by holding heat, but a preheated baking tray also works.
Can I make the dough ahead of time?
This recipe is written for same-day baking, with a total time of approximately 7 to 10 hours depending on your starter and room temperature. Rely on the visual signs of fermentation rather than the clock.
Can I freeze sourdough ciabatta?
Yes. Cut the cooled loaves into portions, wrap tightly, and freeze for up to 3 months. Reheat in a 350°F (175°C) oven, or toast frozen slices directly.
Why shouldn’t I slice the loaf right away?
The crumb needs time to finish setting. Cutting too early can leave the interior gummy and compress the open structure.
Final Thoughts
This homemade sourdough ciabatta has a thin, crispy golden crust, a wonderfully chewy texture, and an airy interior filled with irregular, gorgeous holes. Every loaf has its own rustic character, which makes the bread as beautiful as it is delicious.
Crispy outside, light and airy inside, and full of authentic sourdough flavor. Feed your starter, set aside a day, and enjoy a bakery-style loaf from your own oven.
Print
Homemade Sourdough Ciabatta – Crispy Crust & Beautifully Open Crumb
Ingredients
- 500 g bread flour (approximately 4 cups)
- 400 g water (400 ml), at room temperature
- 100 g active, bubbly sourdough starter (100% hydration)
- 10 g salt (about 1¾ teaspoons)
- Extra flour or rice flour, for dusting
Optional: 1 tablespoon of olive oil for lightly greasing the bowl.
A Closer Look at the Key Ingredients
Bread flour. Bread flour has a higher protein content than all-purpose flour, which means it forms a stronger gluten network. That strength is essential for holding the gas in a very wet dough. A flour with approximately 12 to 13 percent protein works best.
Water. At 400 g of water to 500 g of flour, the dough is 80% hydration before counting the water in the starter. That is quite wet, and it is the reason ciabatta has such an open crumb. The dough will feel loose and sticky, which is normal.
Active sourdough starter. The starter provides both the leavening and the flavor. A starter at 100% hydration contains equal weights of flour and water. It should be bubbly and near or at its peak, meaning it has risen noticeably after feeding. A weak starter leads to slow fermentation and dense bread.
Salt. Salt flavors the bread, strengthens the dough, and regulates fermentation. At 10 g for 500 g of flour, it gives well-seasoned bread without overpowering the sourdough tang.
Flour or rice flour for dusting. A generous dusting keeps the sticky dough from clinging to your work surface and towels. Rice flour is especially useful because it does not absorb moisture as readily as wheat flour.
Olive oil (optional). A little oil in the bowl makes it easier to release the dough, although water and a bench scraper also work well.
Instructions
Step 1: Prepare Your Sourdough Starter
Feed your sourdough starter and allow it to become active, bubbly, and nearly doubled in size.
For the best results, use it when it is at or near its peak activity.
A healthy starter is essential for good fermentation, oven spring, and an airy ciabatta crumb.
Step 2: Mix the Dough
In a large mixing bowl, combine the water and active sourdough starter.
Stir until the starter is mostly dissolved.
Add the bread flour and mix with a spoon or wet hand until no dry flour remains.
Cover and let the dough rest for 30 to 45 minutes.
This resting period allows the flour to absorb the water and makes the dough easier to handle.
Step 3: Add the Salt
Sprinkle the salt over the dough.
With damp hands, gently pinch and fold the dough until the salt is evenly incorporated.
The dough will feel very sticky and loose. This is normal because ciabatta is a high-hydration bread.
Avoid adding extra flour at this stage.
Step 4: Perform Stretch and Folds
Over the next 2 hours, perform 4 sets of stretch and folds, approximately 30 minutes apart.
For each set:
- Wet your hands lightly.
- Lift one side of the dough.
- Stretch it gently upward without tearing.
- Fold it over the center.
- Rotate the bowl and repeat on all four sides.
Keep the movements gentle to preserve the air developing inside the dough.
With each set, the dough should become smoother, stronger, and more elastic.
Step 5: Bulk Fermentation
After the final fold, cover the bowl and allow the dough to continue fermenting.
Depending on the temperature of your kitchen and the strength of your starter, this may take another 2 to 4 hours.
Look for these signs:
- The dough has increased in volume by approximately 50 to 75 percent.
- Bubbles are visible along the sides and surface.
- The dough looks airy and slightly domed.
- It jiggles gently when the bowl is moved.
- It feels lighter and more elastic.
Do not rely only on the clock. The dough’s appearance and texture are more reliable indicators of fermentation.
Step 6: Prepare the Work Surface
Generously dust your work surface with flour or rice flour.
Carefully turn the dough out onto the surface.
Try not to press or deflate it, as preserving the gas inside is essential for creating the characteristic open ciabatta crumb.
Dust the top lightly with flour.
Step 7: Divide and Shape the Loaves
Using a bench scraper, gently divide the dough into two rectangular portions.
Stretch each portion carefully into a rustic rectangle.
Avoid rolling, kneading, or aggressively shaping the dough.
Ciabatta is traditionally irregular in appearance, so do not worry about making the loaves perfectly symmetrical.
Transfer each loaf onto a piece of parchment paper, keeping enough space between them.
Step 8: Final Proof
Cover the loaves loosely with a lightly floured kitchen towel or plastic wrap.
Let them rest for approximately 45 to 75 minutes, or until visibly puffy and airy.
Meanwhile, preheat your oven to 475°F (245°C).
If using a baking stone or steel, preheat it as well.
Step 9: Prepare the Oven for Steam
Place a sturdy, oven-safe metal pan on the lower rack while the oven preheats.
When ready to bake, carefully add hot water to the pan to create steam, if your oven setup is suitable for this method.
Alternatively, use a covered baking vessel designed for bread baking.
Be extremely careful when handling hot pans and steam. Never pour water onto the oven floor, heating elements, or glass door.
Step 10: Bake the Ciabatta
Transfer the loaves, with their parchment paper, onto the preheated baking stone, steel, or baking tray.
Bake at 475°F (245°C) for approximately 10 minutes with steam.
Carefully remove the steam pan if used, then reduce the oven temperature to 450°F (230°C).
Continue baking for another 10 to 15 minutes, until the crust is deeply golden and crisp.
The loaves should feel light and sound hollow when tapped underneath.
Step 11: Cool Completely
Transfer the ciabatta to a wire rack.
Allow it to cool for at least 45 to 60 minutes before slicing.
This resting period allows the interior crumb to finish setting and helps preserve its beautiful open structure.