The aroma of fresh bread wafts through the air, drawing you in with its warm embrace. You can almost feel the heavenly crust crackling beneath your fingers, revealing a pillowy soft interior. Every slice holds the promise of nostalgia, comfort, and the satisfaction of creating something extraordinary. Homemade Sourdough Starter from Scratch is not just a recipe; it’s an invitation to an enchanting world where simple ingredients transform into a masterpiece. This recipe awakens your senses and presents a golden opportunity to bond with the baking process, enveloping your kitchen in delightful scents and feelings of accomplishment.
Imagine the moment you slice into a loaf of freshly baked sourdough, the steam rising like wisps of magic. The texture is a harmony of crispiness from the crust and airy softness from the crumb. Each bite releases a tangy, complex flavor profile, rich with depth and character. This delightful experience is rooted in the creation of your sourdough starter, a living culture that breathes life into your bread, producing an artisan loaf that surpasses anything from the bakery. The journey of nurturing this simple mixture captures the essence of baking, teaching patience and rewarding perseverance with each bubbly flourish.
Why You’ll Love This Homemade Sourdough Starter
Many baking enthusiasts, from greenhorns to seasoned pros, discover a love for making their own sourdough starter. It opens the door to endless culinary possibilities, allowing you to create artisan bread, tangy pancakes, and savory pastries from your very own culture. The starter delivers deep, tangy flavors and a delightful rustic texture that store-bought breads often lack. By making it at home, you embrace a rewarding journey, providing a sense of pride each time you bake with it.
Homemade sourdough starter stands out for its freshness and adaptability. Allowing you to customize your starter using different types of flour lends unique flavors and characteristics to your bread. With a little creativity, your kitchen can become your new favorite bakery, teeming with the warm aromas of baking bread. Plus, it’s incredibly easy to maintain, and the rewards are immeasurable – each loaf invites smiles and delight around the table.
Preparation Phase & Tools to Use
Creating a sourdough starter requires just a few essential tools, each pivotal to your success:
- Clean Glass Jar: Use a transparent glass container to observe the bubbling activity in your starter. It should be large enough to accommodate the mixture as it ferments and expands.
- Mixing Spoon: A wooden or silicone spoon works best for mixing. Avoid metal utensils, as they may interfere with the fermentation process.
- Measuring Scale: Accurate measurements are crucial. Using a digital scale helps ensure the correct flour-to-water ratio for a thriving starter.
- Cloth or Loose Lid: Covering the jar with a breathable cloth or a loosely fitted lid helps promote airflow while keeping out debris.
Preparation tips include ensuring all your tools are thoroughly clean, as any residual substances can hinder the growth of your starter. Keep the jar in a draft-free, warm corner of your kitchen – around 70-75°F (21-24°C) is ideal for optimal fermentation.
Ingredients for Homemade Sourdough Starter
- 50g Whole Wheat Flour or Rye Flour: Whole grain flours contain more nutrients and wild yeast, contributing to a more robust fermentation process. Feel free to substitute with all-purpose flour, but expect different flavors and strengths.
- 50g Water: Use filtered or bottled water to avoid chlorine, which can inhibit fermentation. Room temperature is ideal for encouraging yeast activity.
- A Clean Glass Jar: Investing in a transparent glass jar helps you monitor your starter and ensures it remains free of contaminants.
These few ingredients are all you need to begin an incredible baking journey, producing bread that boasts flavor profiles uniquely yours.
How to Make Homemade Sourdough Starter
- In a clean glass jar, combine 50g of whole wheat or rye flour with 50g of room temperature water. Stir well until they form a thick, smooth batter.
- Cover the jar loosely with a cloth or a lid to allow air to circulate, an essential part of the fermentation process.
- Place the jar in a warm spot (around 70-75°F) for 24 hours. Resist the urge to check too often, allowing the magic to unfold.
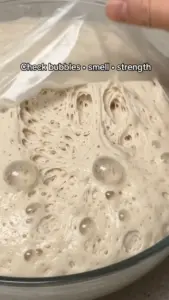
- On the second day, you may notice some bubbles – this is a good sign! Discard half of the mixture, leaving about 50g inside the jar. Feed it with another 50g of flour and 50g of water, stirring until combined.
- Continue this process daily for about a week. Each day, discard half and feed it anew. Watch your starter spring to life, bubbling and growing in size.
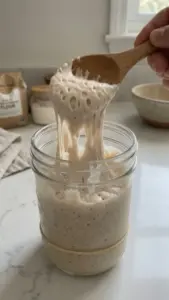
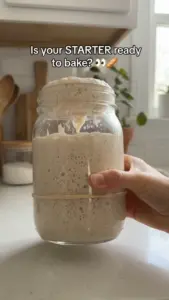
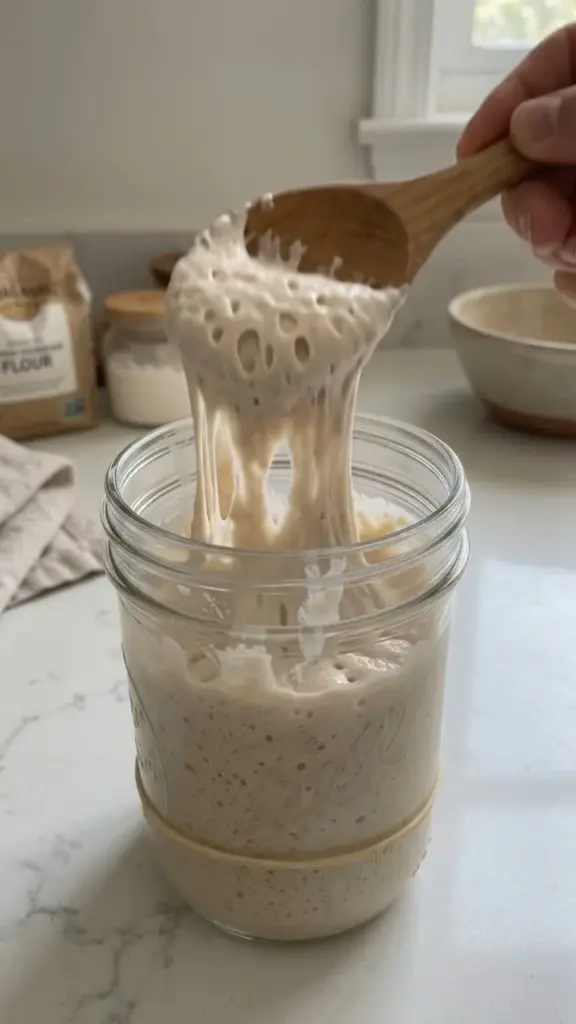
- After about 5-7 days, your starter should become bubbly, have a tangy aroma, and be ready for baking wonders.
As you embark on this journey, be patient and embrace the process; the satisfaction of seeing your starter mature is part of the experience.
Chef’s Notes & Helpful Tips
- Make-Ahead Tips: If you plan to make more sourdough bread in a week, keep your starter fed and active. Otherwise, you can refrigerate your starter, feeding it once a week to maintain its strength.
- Cooking Alternatives: Consider using your starter in a variety of recipes, from pancakes to savory waffles. It provides a unique flavor profile and adds nutritional benefits to your meals.
- Customization Ideas: Experiment with different flours, such as spelt or einkorn, for distinct flavors. Mixing in a little bit of your favorite herbs or spices can also enhance the culinary possibilities.
Common Mistakes to Avoid
Creating a sourdough starter can pose challenges. Here are a few pitfalls and how to navigate around them:
- Not Discarding Enough: Failing to discard half of your starter can lead to an unmanageable amount, preventing it from thriving.
- Using Chlorinated Water: Tap water can stunt yeast growth. Opt for filtered water for optimal results.
- Temperature Fluctuations: If your kitchen is too cold, fermentation slows down. Conversely, if too hot, the starter might develop off-flavors. Aim for consistency!
- Using Metal Utensils: Avoid metal bowls and spoons, as they can interact negatively with the wild yeast.
By recognizing these issues, you can improve your starter’s success right from the get-go.
What to Serve With Homemade Sourdough Starter
Now that you have your starter ready, let your imagination soar as you think about the marvelous recipes ahead. Here are a few flavorful ideas to get started:
- Artisan Sourdough Bread: The classic choice! The crunchy crust and chewy interior will delight your senses.
- Sourdough Pancakes: Light, fluffy, and with a hint of tang; these make for an extraordinary breakfast.
- Sourdough Pizza: Create crispy, flavorful pizza crusts that perfectly hold your favorite toppings.
- Sourdough Crackers: Crunchy, flavorful snacks are a fantastic accompaniment to cheese platters.
- Sourdough Waffles: Imagine serving these warm waffles drizzled with maple syrup for a weekend brunch.
- Savory Sourdough Biscuits: Elevate any meal with buttery, flaky biscuits that pair beautifully with soups.
The culinary possibilities once your starter is alive and flourishing are endless!
Storage & Reheating Instructions
To maintain your sourdough starter:
- Refrigeration: Store your starter in a glass jar in the fridge if you’re not baking regularly. Feed it weekly by removing it from the fridge, discarding half, and adding fresh flour and water.
- Freezing: For longer storage, scoop out portions of your starter and place them in an airtight container or a freezer bag. When you’re ready to bake, thaw in the fridge and resume regular feeding.
- Reheating: If your starter becomes sluggish after freezing or refrigeration, give it a few feedings at room temperature to wake it up before using it in your recipes.
Estimated Nutrition Information
This is a homemade starter; thus, values vary widely based on feeding and usage. However, a serving (1 tablespoon) of sourdough starter generally contains:
- Calories: 20
- Carbohydrates: 4g
- Protein: 0.5g
- Fat: 0g
- Fiber: 0.5g
Note: These figures are estimates based on average nutritional content. Individual results may vary.
FAQs
-
How long does it take to make a sourdough starter?
Typically, it takes about 5-7 days for your starter to become active and ready for bread-making, but this can vary based on temperature and flour types. -
What should my starter smell like?
A healthy starter smells fresh and slightly sour, akin to yogurt. If it emits a foul or off-putting aroma, that’s a sign something has gone wrong. -
Why is my starter not bubbling?
If your starter isn’t bubbling, check to ensure you’re using the right flour, feeding it regularly, and keeping it in the ideal temperature range. -
Can I use all-purpose flour instead of whole wheat or rye?
Yes, you can! However, the starter may take longer to activate and won’t develop as complex flavors compared to whole grain flours. -
How do I know when my starter is ready?
A ready starter should be double its original size, bubbly on the surface, and smell pleasantly tangy. Perform the "float test" by dropping a small spoonful of your starter in water; if it floats, it’s ready!
Conclusion
Baking with a homemade sourdough starter is a deeply gratifying experience, from the initial nurturing of the culture to the glorious loaves that emerge from your oven. Each step envelops you in rich, aromatic delights, guiding you back to the heart of baking. Take the plunge, immerse yourself in the process, and soon, you’ll be tempted to share this incredible craft with friends and family. Happy baking, and may the crust be ever in your favor!
Print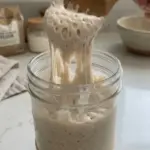
Homemade Sourdough Starter from Scratch
- Total Time: 710 minutes
- Yield: 1 starter 1x
- Diet: Vegetarian
Description
A step-by-step guide to creating your own sourdough starter, perfect for baking artisan bread and other delicious treats.
Ingredients
- 50g Whole Wheat Flour or Rye Flour
- 50g Water
- A Clean Glass Jar
Instructions
- Combine 50g of whole wheat or rye flour with 50g of room temperature water in a clean glass jar.
- Stir well until they form a thick, smooth batter.
- Cover the jar loosely with a cloth or a lid.
- Place the jar in a warm spot (around 70-75°F) for 24 hours.
- On the second day, discard half of the mixture and feed it with another 50g of flour and 50g of water.
- Continue this process daily for about a week.
- Watch your starter spring to life, bubbling and growing in size.
- After about 5-7 days, your starter should be bubbly and ready for baking.
Notes
Make sure to use filtered water and maintain a consistent temperature for best results. You can refrigerate your starter if you’re not baking often, feeding it weekly.
- Prep Time: 10 minutes
- Cook Time: 700 minutes
- Category: Baking
- Method: Fermenting
- Cuisine: American
Nutrition
- Serving Size: 1 tablespoon
- Calories: 20
- Sugar: 0g
- Sodium: 0mg
- Fat: 0g
- Saturated Fat: 0g
- Unsaturated Fat: 0g
- Trans Fat: 0g
- Carbohydrates: 4g
- Fiber: 0.5g
- Protein: 0.5g
- Cholesterol: 0mg
Keywords: sourdough, bread starter, homemade sourdough, baking bread, fermentation