Soft & Fluffy Honey Milk Sandwich Loaf: The Easy Homemade Bread Recipe You’ll Make Again and Again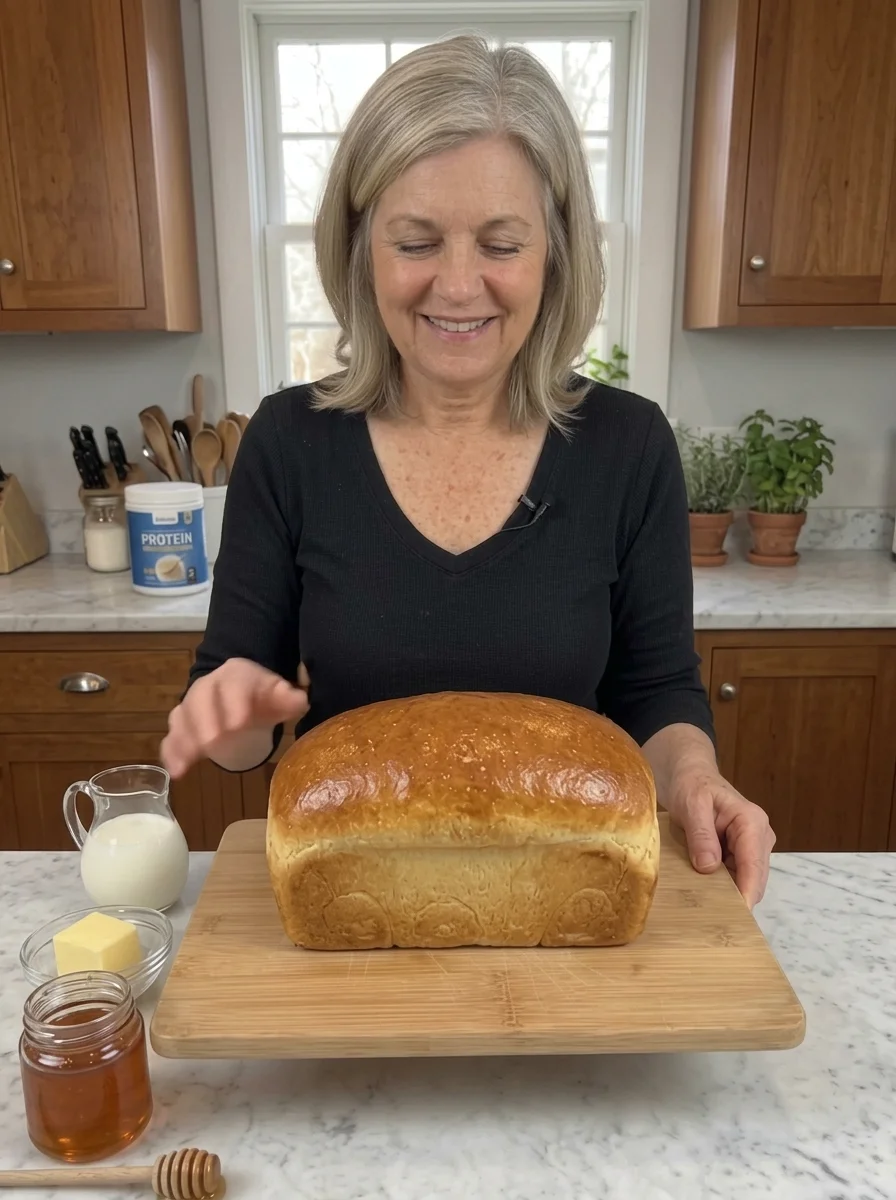
SEO title: Soft & Fluffy Honey Milk Sandwich Loaf Recipe (Easy Homemade Bread)
Meta description: Learn how to make soft, fluffy honey milk bread at home. This easy sandwich loaf has a tender crumb, golden crust, and lightly sweet flavor. Step-by-step recipe, tips, variations, and FAQ.
Focus keyword: honey milk bread
Secondary keywords: homemade sandwich bread, soft sandwich loaf, honey bread recipe, milk bread recipe, easy homemade bread, fluffy bread recipe, honey milk sandwich loaf
There is something deeply satisfying about slicing into a loaf of homemade bread that is still faintly warm, with a golden crust, a pillowy interior, and the gentle aroma of honey and butter rising from the crumb. If you have ever wanted to bake sandwich bread that is genuinely soft, lightly sweet, and good enough to eat plain, this honey milk bread is the recipe to try.
This soft and fluffy honey milk sandwich loaf is made with simple pantry ingredients: flour, milk, honey, butter, yeast, and salt. There are no special tools, no complicated techniques, and no long overnight preparation. In about two and a half to three hours, most of which is hands-off rising time, you can have a fresh loaf that is perfect for breakfast toast, lunchtime sandwiches, French toast, or a quick snack with butter.
In this guide, you will find the full recipe, a clear step-by-step method, troubleshooting advice, ingredient substitutions, creative variations, serving ideas, storage instructions, and answers to the most common questions about making soft homemade bread.
Why You’ll Love This Honey Milk Bread
Store-bought sandwich bread is convenient, but homemade bread offers something it simply cannot: freshness, flavor, and control over what goes into your food. Here is why this particular recipe deserves a place in your regular baking rotation.
- Incredibly soft texture. The combination of milk, butter, and a little honey produces a tender, fluffy crumb that stays soft for days.
- Lightly sweet flavor. Honey adds a gentle, natural sweetness and a hint of floral warmth without making the bread taste like dessert.
- Beginner friendly. The dough is forgiving, uses only a handful of ingredients, and can be mixed by hand or in a stand mixer.
- Versatile. It works equally well for sweet and savory uses, from peanut butter and jam to turkey sandwiches and breakfast egg-and-cheese melts.
- Great for freezing. Slice it, freeze it, and toast a piece whenever you need one.
- Perfect golden crust. An optional milk-and-honey brush gives the top a beautiful bakery-style finish.
Recipe Overview
- Prep time: 20 minutes
- Rise time: 1½ to 2 hours
- Bake time: 30 to 35 minutes
- Total time: Approximately 2½ to 3 hours
- Yield: 1 loaf, about 10 to 12 slices
- Pan size: 9 × 5-inch (23 × 13 cm) loaf pan
- Difficulty: Easy
Ingredients for Honey Milk Sandwich Bread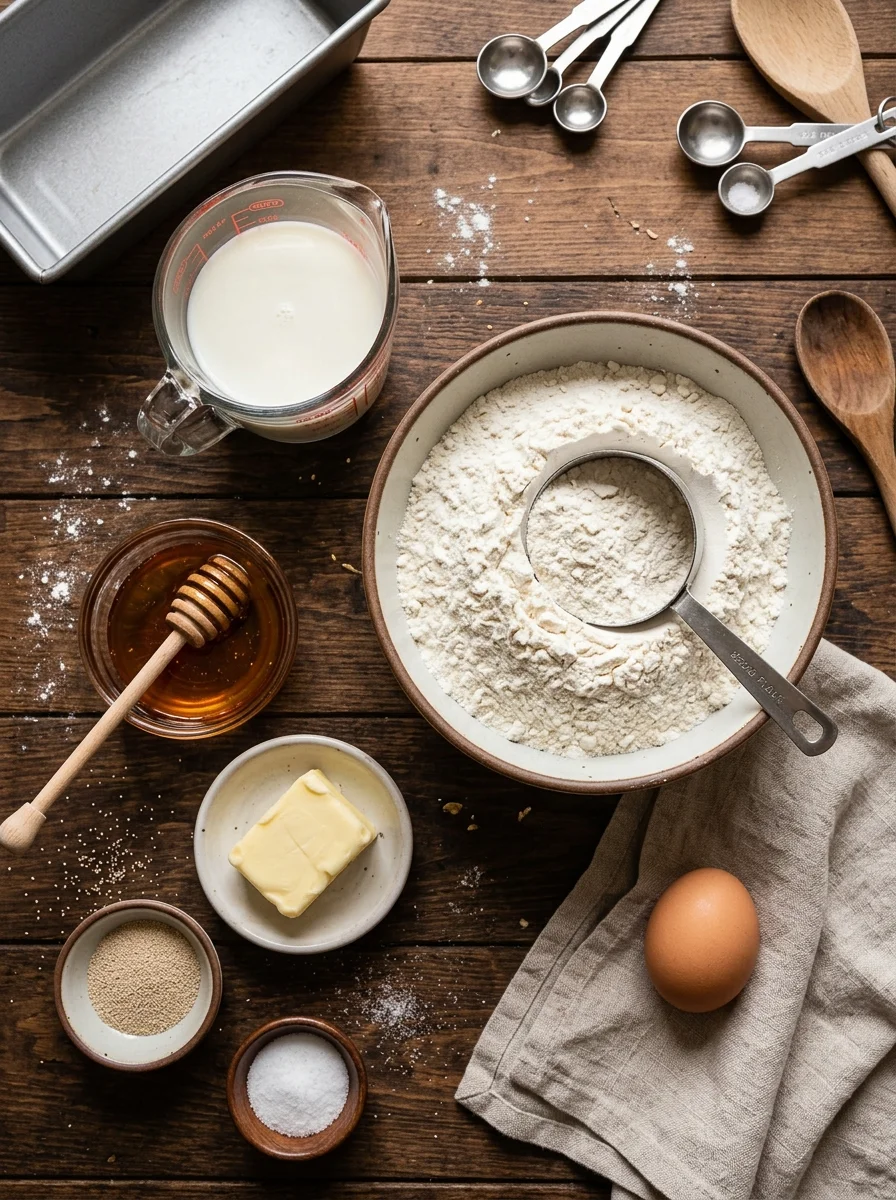
- 3 cups (375 g) all-purpose or bread flour
- ¾ cup (180 ml) warm milk
- 2¼ teaspoons (7 g) instant yeast
- 3 tablespoons (63 g) honey
- 3 tablespoons (42 g) unsalted butter, softened
- 1 teaspoon salt
- 1 large egg, room temperature (optional, for a richer loaf)
For the golden top (optional):
- 1 tablespoon milk
- 1 teaspoon honey
A Closer Look at the Key Ingredients
Understanding what each ingredient does will make you a better baker and help you adjust the recipe with confidence.
Flour. Both all-purpose flour and bread flour work well here. Bread flour has a higher protein content, which builds more gluten and creates a slightly chewier, taller loaf. All-purpose flour gives a softer, more delicate crumb that many people prefer for sandwich bread. Either choice produces excellent results.
Milk. Milk is what makes this a true milk bread. The proteins, fats, and natural sugars in milk soften the crumb, encourage a golden crust, and add subtle richness. Whole milk gives the best flavor and texture, but 2% milk also works.
Honey. Honey sweetens the dough, feeds the yeast, and helps the bread hold moisture. It also contributes a delicate flavor that sets this loaf apart from ordinary white sandwich bread. Mild honeys such as clover or wildflower work best.
Instant yeast. Instant yeast can be mixed directly into the liquid and does not require a separate proofing step. If you only have active dry yeast, that works too; just let it stand in the warm milk and honey for 5 to 10 minutes until foamy.
Butter. Softened unsalted butter enriches the dough, tenderizes the crumb, and adds that unmistakable bakery flavor. Using unsalted butter lets you control the salt level.
Salt. Salt strengthens the dough, balances the sweetness, and brings out the flavor of the flour and honey. Do not skip it.
Egg (optional). One egg makes the loaf a little richer, softer, and more golden. The recipe still works well without it.
How to Make Soft & Fluffy Honey Milk Bread: Step by Step
Step 1: Prepare the Dough
- In a large mixing bowl, combine the warm milk, honey, and instant yeast. Stir until the honey dissolves.
- If you are using active dry yeast instead of instant yeast, let the mixture stand for 5 to 10 minutes until foamy.
- Add the flour, salt, softened butter, and the optional egg.
- Mix with a wooden spoon until a rough dough forms.
The dough should feel soft and slightly tacky. If it is very wet, add flour 1 tablespoon at a time. If it feels dry, add a little milk. Humidity, flour brand, and how you measure can all change how much liquid the dough needs, so trust the feel of the dough rather than following the numbers blindly.
Step 2: Knead Until Smooth
- Transfer the dough to a lightly floured surface.
- Knead for about 8 to 10 minutes, until the dough is smooth, elastic, and stretchy.
- If you prefer, use a stand mixer with a dough hook on low to medium speed for 5 to 7 minutes.
- Place the dough in a lightly greased bowl and cover it.
Kneading develops gluten, the protein network that traps gas from the yeast and gives bread its structure. Properly kneaded dough will feel smooth rather than sticky and will spring back slowly when you poke it gently.
Step 3: Let the Dough Rise
Leave the dough in a warm place for about 60 to 90 minutes, or until it has doubled in size.
The exact time depends on your room temperature. In a warm kitchen the dough may be ready sooner, while a cool kitchen may need extra time. Look for visible puffiness rather than relying only on the clock. A good warm spot might be an oven with only the light on, or a countertop near (but not on) a warm appliance.
Step 4: Shape the Loaf
- Gently press the dough to release excess gas.
- Turn it onto a lightly floured surface and shape it into a rectangle about the width of your loaf pan.
- Roll the rectangle into a snug log, pinching the seam closed.
- Place the log seam-side down in a greased 9 × 5-inch (23 × 13 cm) loaf pan.
Rolling the dough snugly creates surface tension, which helps the loaf rise evenly and produces a neat, uniform slice. A tight seam prevents the loaf from unrolling as it bakes.
Step 5: Second Rise
Cover the pan loosely and let the dough rise for 30 to 60 minutes, until it looks puffy and sits just above the rim of the pan.
Try not to let the dough overproof. If it rises too far, the loaf may collapse in the oven or bake unevenly. A good test is to press a fingertip gently into the dough: if the dent slowly springs back, it is ready to bake.
Step 6: Bake the Bread
- Preheat the oven to 350°F (175°C).
- If desired, gently brush the top with the milk-and-honey mixture.
- Bake for 30 to 35 minutes, until golden brown and cooked through.
- If the top browns too quickly, loosely cover it with foil for the final part of baking.
- For the most reliable doneness check, use an instant-read thermometer. The center of the loaf should reach approximately 190 to 200°F (88 to 93°C).
Because honey and milk both encourage browning, this bread colors beautifully. Keep an eye on the top during the last 10 minutes and tent with foil if needed.
Step 7: Cool Before Slicing
Remove the loaf from the pan after about 5 to 10 minutes and transfer it to a wire rack.
Let it cool completely before slicing. It is tempting to cut into fresh bread right away, but the interior is still setting as it cools. Slicing too early can compress the crumb and leave the texture gummy.
Tips for the Softest Honey Milk Bread
Small details make a big difference in homemade bread. Keep these tips in mind for consistently soft, fluffy results.
- Use warm milk, not hot milk. Aim for about 100 to 110°F (38 to 43°C). Milk that is too hot can damage or kill the yeast, which means a flat, dense loaf.
- Measure flour accurately. Too much flour is the most common reason homemade bread turns out dense and dry. Weigh your flour with a kitchen scale if you can. If you use measuring cups, spoon the flour into the cup and level it off rather than scooping directly from the bag.
- Knead thoroughly. A smooth, elastic dough is the foundation of fluffy sandwich bread. Do not stop kneading too early.
- Keep the dough covered. Covering prevents the surface from drying out and forming a crust during rising, which can restrict the dough’s growth.
- Do not add too much extra flour. A slightly tacky dough generally produces a softer loaf. Add flour only a tablespoon at a time and only when truly necessary.
- Let it rise until puffy. Watch the dough, not the clock. Rising times are guidelines, and your kitchen temperature will change them.
- Cool completely before slicing. Patience gives you cleaner slices and a better crumb.
Troubleshooting Common Bread Problems
My bread is dense. The most likely causes are too much flour, under-kneading, or a dough that did not rise long enough. Measure carefully, knead until the dough is smooth and stretchy, and let it become visibly puffy during both rises.
My dough did not rise. Check that your yeast is fresh and that your milk was warm, not cold or hot. A cool room can also slow things down significantly, so move the dough to a warmer spot and give it more time.
The loaf collapsed in the oven. This usually means the dough overproofed during the second rise. Next time, bake it as soon as it is puffy and just above the rim of the pan.
The top is too dark. Honey and milk brown quickly. Loosely cover the loaf with foil for the final minutes of baking, and make sure your oven temperature is accurate.
The crumb is gummy. The loaf may have been sliced before it cooled, or it may be underbaked. Use a thermometer to confirm the center reaches 190 to 200°F (88 to 93°C), and always cool the loaf completely on a wire rack.
Easy Variations
Once you have mastered the basic recipe, try one of these simple twists.
Cinnamon Honey Bread. Add 1 teaspoon of ground cinnamon to the flour for a warm, cozy flavor that is wonderful toasted with butter.
Honey Oat Bread. Replace ¼ cup of flour with ¼ cup of finely ground oats, and sprinkle rolled oats on top before baking for a rustic look and a slightly nutty taste.
Extra-Buttery Loaf. Increase the butter to 4 tablespoons for an even richer, more tender texture.
Whole-Wheat Honey Bread. Replace up to half of the flour with whole-wheat flour. Add 1 to 2 tablespoons of extra milk if the dough feels dry, since whole-wheat flour absorbs more liquid.
Honey Dinner Rolls. Divide the dough into 10 to 12 equal portions, shape them into balls, and arrange them in a greased baking dish. Bake at 350°F (175°C) for approximately 18 to 22 minutes, until golden and cooked through. These make a lovely side for soups, stews, and holiday meals.
Serving Ideas
This versatile honey milk bread is delicious in countless ways. Try it with:
- Butter and a drizzle of honey
- Peanut butter or almond butter
- Homemade jam or fruit preserves
- Eggs and cheese for breakfast sandwiches
- Turkey, chicken, or vegetable sandwich fillings
- Cinnamon sugar for sweet toast
- French toast topped with berries and yogurt
Because the bread is naturally soft and lightly sweet, it is especially good for French toast and grilled cheese sandwiches, where the tender crumb soaks up flavor and crisps beautifully on the outside.
How to Store Homemade Honey Milk Bread
Proper storage keeps your loaf fresh and soft for as long as possible.
- Room temperature: Store the cooled loaf in an airtight bag or bread container for up to 3 days.
- Refrigerator: Refrigeration is not recommended for everyday storage because it can make bread go stale faster.
- Freezer: Slice the cooled loaf and freeze the slices in a sealed freezer bag for up to 3 months.
- Reheating: Toast slices directly from frozen, or warm them briefly in a toaster oven.
Freezing pre-sliced bread is a smart habit. You can pull out exactly the number of slices you need, and the rest stays fresh for weeks.
Frequently Asked Questions
Can I use bread flour instead of all-purpose flour?
Yes. Both work in this recipe. Bread flour creates a slightly chewier, taller loaf, while all-purpose flour gives a softer, more delicate crumb.
Can I make this honey milk bread without an egg?
Absolutely. The egg is optional. It makes the bread a little richer and more golden, but the loaf is soft and delicious without it.
Can I use active dry yeast instead of instant yeast?
Yes. Mix the active dry yeast with the warm milk and honey and let it stand for 5 to 10 minutes until foamy before adding the remaining ingredients.
Can I make this recipe in a stand mixer?
Yes. Use the dough hook and knead on low to medium speed for 5 to 7 minutes, until the dough is smooth and elastic.
How do I know when the bread is fully baked?
The loaf should be golden brown and sound slightly hollow when tapped. For the most reliable check, use an instant-read thermometer: the center should reach approximately 190 to 200°F (88 to 93°C).
Why should I let the bread cool before slicing?
The inside of the loaf continues to set as it cools. Slicing too early can compress the crumb and make it feel gummy rather than light and fluffy.
Can I freeze honey milk bread?
Yes. Slice the cooled loaf, place the slices in a sealed freezer bag, and freeze for up to 3 months. Toast the slices straight from the freezer.
Can I turn this dough into rolls?
Yes. Divide the dough into 10 to 12 equal pieces, shape into balls, and bake in a greased baking dish for about 18 to 22 minutes at 350°F (175°C).
Can I use a different sweetener?
Honey gives this loaf its signature flavor, but you can experiment with other liquid sweeteners if needed. Keep in mind that the taste and browning may change slightly.
Final Thoughts
This homemade honey milk sandwich loaf is soft, tender, lightly sweet, and wonderfully buttery. The honey adds a gentle sweetness while the milk helps create a delicate crumb that works beautifully for both sweet and savory sandwiches. With simple ingredients, a straightforward method, and plenty of flexibility, it is a recipe that suits beginners and experienced bakers alike.
Best tip: Keep the dough soft, let it rise until properly puffy, and wait until the loaf has cooled before slicing for the fluffiest results.
If you try this recipe, bake a loaf this weekend, slice it thick, and enjoy it with a little butter and a drizzle of honey. Once you taste fresh homemade honey milk bread, store-bought sandwich bread may never feel quite the same again.
Print
Soft & Fluffy Honey Milk Sandwich Loaf
Ingredients
- 3 cups (375 g) all-purpose or bread flour
- ¾ cup (180 ml) warm milk
- 2¼ teaspoons (7 g) instant yeast
- 3 tablespoons (63 g) honey
- 3 tablespoons (42 g) unsalted butter, softened
- 1 teaspoon salt
- 1 large egg, room temperature (optional, for a richer loaf)
For the golden top (optional):
- 1 tablespoon milk
- 1 teaspoon honey
A Closer Look at the Key Ingredients
Understanding what each ingredient does will make you a better baker and help you adjust the recipe with confidence.
Flour. Both all-purpose flour and bread flour work well here. Bread flour has a higher protein content, which builds more gluten and creates a slightly chewier, taller loaf. All-purpose flour gives a softer, more delicate crumb that many people prefer for sandwich bread. Either choice produces excellent results.
Milk. Milk is what makes this a true milk bread. The proteins, fats, and natural sugars in milk soften the crumb, encourage a golden crust, and add subtle richness. Whole milk gives the best flavor and texture, but 2% milk also works.
Honey. Honey sweetens the dough, feeds the yeast, and helps the bread hold moisture. It also contributes a delicate flavor that sets this loaf apart from ordinary white sandwich bread. Mild honeys such as clover or wildflower work best.
Instant yeast. Instant yeast can be mixed directly into the liquid and does not require a separate proofing step. If you only have active dry yeast, that works too; just let it stand in the warm milk and honey for 5 to 10 minutes until foamy.
Butter. Softened unsalted butter enriches the dough, tenderizes the crumb, and adds that unmistakable bakery flavor. Using unsalted butter lets you control the salt level.
Salt. Salt strengthens the dough, balances the sweetness, and brings out the flavor of the flour and honey. Do not skip it.
Egg (optional). One egg makes the loaf a little richer, softer, and more golden. The recipe still works well without it.
Instructions
Step 1: Prepare the Dough
- In a large mixing bowl, combine the warm milk, honey, and instant yeast. Stir until the honey dissolves.
- If you are using active dry yeast instead of instant yeast, let the mixture stand for 5 to 10 minutes until foamy.
- Add the flour, salt, softened butter, and the optional egg.
- Mix with a wooden spoon until a rough dough forms.
The dough should feel soft and slightly tacky. If it is very wet, add flour 1 tablespoon at a time. If it feels dry, add a little milk. Humidity, flour brand, and how you measure can all change how much liquid the dough needs, so trust the feel of the dough rather than following the numbers blindly.
Step 2: Knead Until Smooth
- Transfer the dough to a lightly floured surface.
- Knead for about 8 to 10 minutes, until the dough is smooth, elastic, and stretchy.
- If you prefer, use a stand mixer with a dough hook on low to medium speed for 5 to 7 minutes.
- Place the dough in a lightly greased bowl and cover it.
Kneading develops gluten, the protein network that traps gas from the yeast and gives bread its structure. Properly kneaded dough will feel smooth rather than sticky and will spring back slowly when you poke it gently.
Step 3: Let the Dough Rise
Leave the dough in a warm place for about 60 to 90 minutes, or until it has doubled in size.
The exact time depends on your room temperature. In a warm kitchen the dough may be ready sooner, while a cool kitchen may need extra time. Look for visible puffiness rather than relying only on the clock. A good warm spot might be an oven with only the light on, or a countertop near (but not on) a warm appliance.
Step 4: Shape the Loaf
- Gently press the dough to release excess gas.
- Turn it onto a lightly floured surface and shape it into a rectangle about the width of your loaf pan.
- Roll the rectangle into a snug log, pinching the seam closed.
- Place the log seam-side down in a greased 9 × 5-inch (23 × 13 cm) loaf pan.
Rolling the dough snugly creates surface tension, which helps the loaf rise evenly and produces a neat, uniform slice. A tight seam prevents the loaf from unrolling as it bakes.
Step 5: Second Rise
Cover the pan loosely and let the dough rise for 30 to 60 minutes, until it looks puffy and sits just above the rim of the pan.
Try not to let the dough overproof. If it rises too far, the loaf may collapse in the oven or bake unevenly. A good test is to press a fingertip gently into the dough: if the dent slowly springs back, it is ready to bake.
Step 6: Bake the Bread
- Preheat the oven to 350°F (175°C).
- If desired, gently brush the top with the milk-and-honey mixture.
- Bake for 30 to 35 minutes, until golden brown and cooked through.
- If the top browns too quickly, loosely cover it with foil for the final part of baking.
- For the most reliable doneness check, use an instant-read thermometer. The center of the loaf should reach approximately 190 to 200°F (88 to 93°C).
Because honey and milk both encourage browning, this bread colors beautifully. Keep an eye on the top during the last 10 minutes and tent with foil if needed.
Step 7: Cool Before Slicing
Remove the loaf from the pan after about 5 to 10 minutes and transfer it to a wire rack.
Let it cool completely before slicing. It is tempting to cut into fresh bread right away, but the interior is still setting as it cools. Slicing too early can compress the crumb and leave the texture gummy.