Soft and Fluffy Garlic Pita Bread: Easy Homemade Recipe with Garlic Butter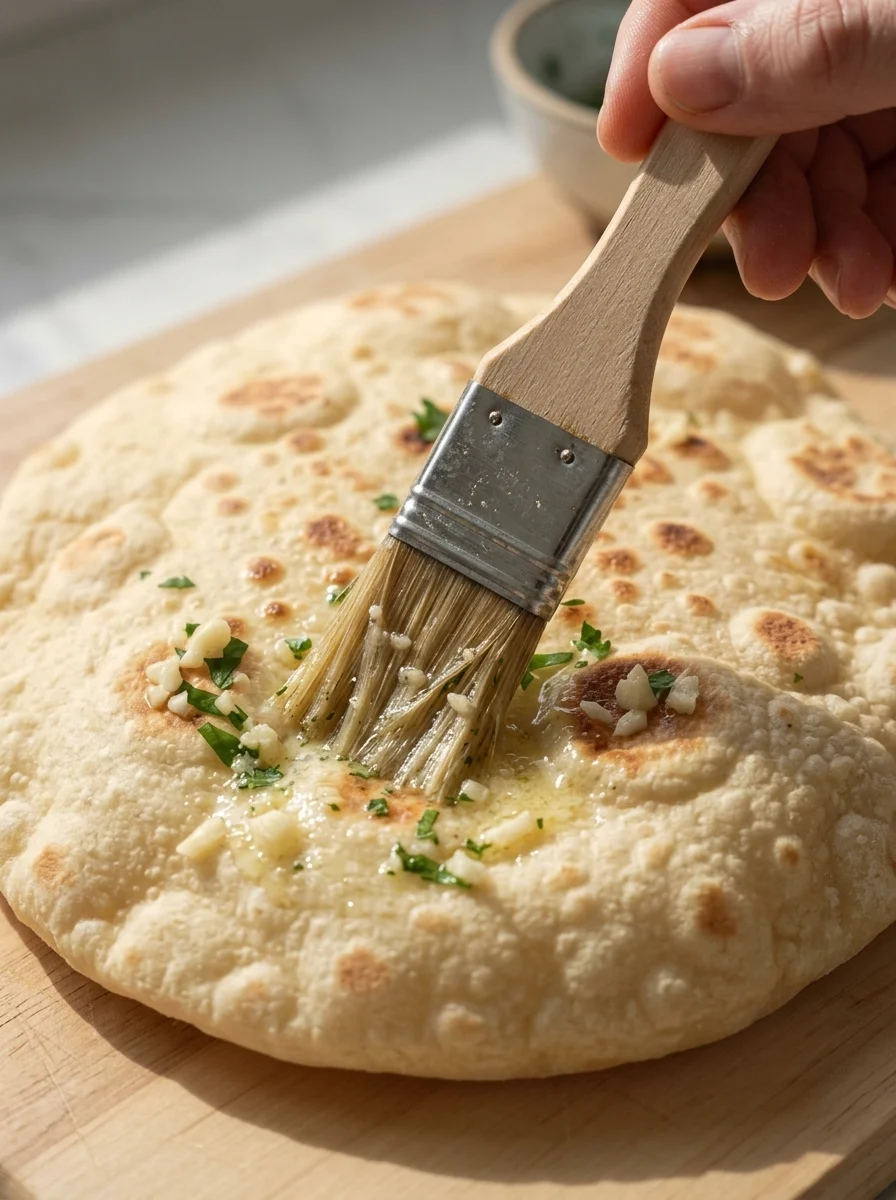
· @oussama
Soft, pillowy homemade pita bread brushed with fragrant garlic butter and fresh herbs is the kind of bread that disappears from the table first. These easy garlic pitas are cooked in a skillet until golden and tender, with beautiful bubbles and pockets that are perfect for stuffing, dipping or serving alongside your favorite Mediterranean meals.
The recipe starts with a simple yeast dough made from flour, warm water, olive oil, sugar and salt. After a short rise, you roll the dough into rounds and cook each one in a hot dry pan. While the pitas are still warm, you brush them with a mixture of melted butter, olive oil, minced garlic and parsley. The warm bread soaks up the garlic butter, which gives every bite a rich, savory flavor.
Why you will love this garlic pita bread
This recipe turns a basic flatbread into something special. Here is what makes it worth baking.
- Soft and pillowy texture. The dough bakes into a tender bread with a gentle chew.
- Garlic butter flavor. Melted butter, olive oil, garlic and parsley give a rich, aromatic finish.
- Pockets and bubbles. When the dough is rolled evenly and the pan is hot, steam puffs each pita up.
- Quick cooking. Each pita cooks in about 1 to 2 minutes in a skillet.
- Simple ingredients. You likely have everything you need in your kitchen.
- Versatile. Use it for sandwiches and wraps, or tear it up for dipping.
- Great for sharing. Warm garlic pita is a crowd-pleaser at family dinners and gatherings.
What is garlic pita bread?
Garlic pita bread is classic pita, a round flatbread that is common across the Middle East and the Mediterranean, finished with a garlic and herb topping. The base is a soft yeast dough that is rolled thin and cooked quickly at high heat. The garlic butter is brushed on after cooking, so the garlic keeps its flavor and does not burn in the pan.
How do pitas puff up?
The pocket in pita bread is created by steam. When a thin round of dough meets a very hot surface, the water inside turns to steam quickly. The steam pushes the top and bottom layers apart and inflates the bread like a balloon. For this to work, you need dough that is rolled to an even thickness, a pan that is properly hot and dough that has risen and rested. This recipe covers all three.
What does garlic pita taste like?
Garlic pita tastes savory, buttery and fragrant, with a soft crumb, golden spots from the pan and a fresh herb finish. The garlic is bold but balanced by the butter and olive oil. It goes well with creamy dips, grilled meats, soups and salads.
Garlic pita bread recipe details
This recipe makes 8 pita breads. Most of the time is hands-off rising.
- Prep time: 20 minutes
- Rise time: 60-90 minutes
- Cook time: 15-20 minutes
- Total time: approximately 1 hour 50 minutes
- Yield: 8 pita breads
Ingredients for garlic pita bread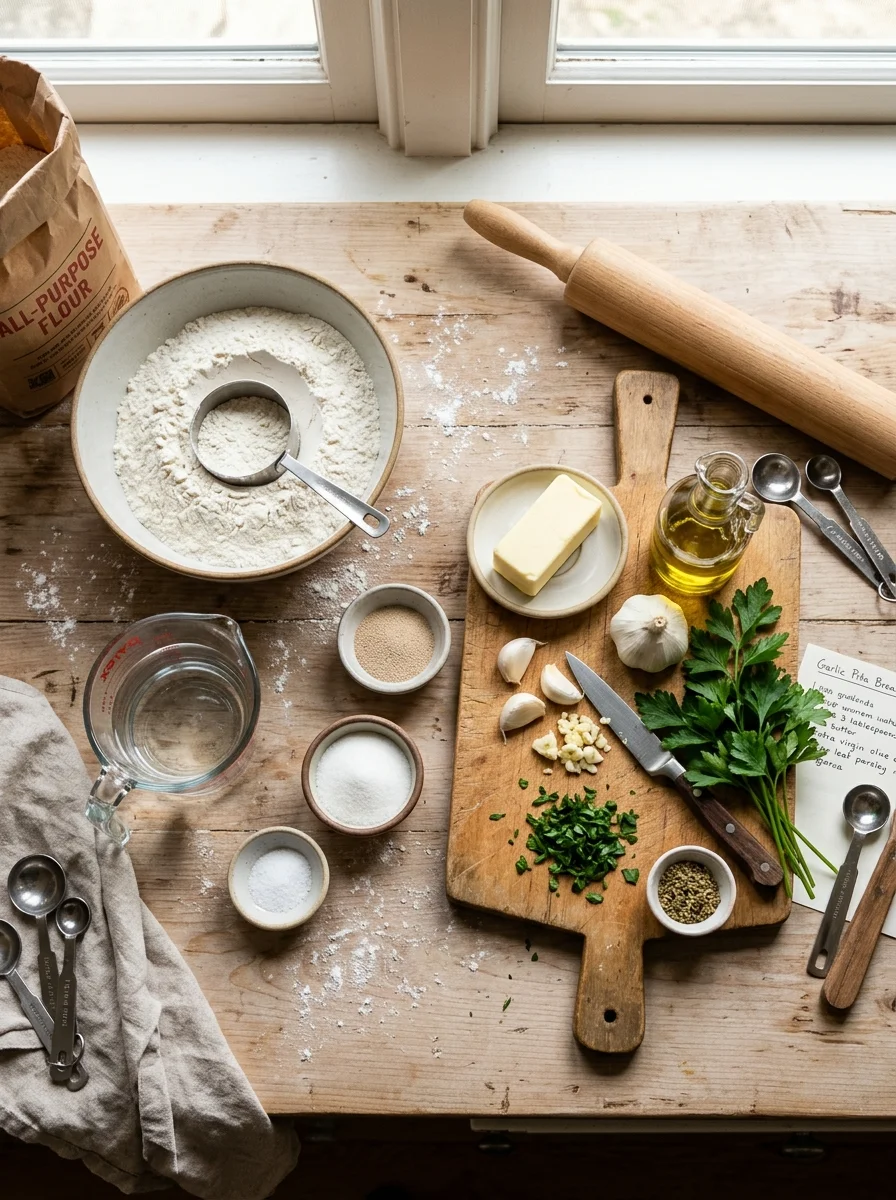
For the pita dough
- 3 cups (375 g) all-purpose flour
- 1 cup (240 ml) warm water
- 2¼ teaspoons (7 g) instant yeast
- 1 tablespoon olive oil
- 1 teaspoon sugar or honey
- 1 teaspoon salt
For the garlic butter topping
- 3 tablespoons (42 g) butter, melted
- 3 cloves garlic, finely minced
- 1 tablespoon olive oil
- 2 tablespoons fresh parsley, chopped
- Pinch of salt
- Optional: ½ teaspoon dried oregano
Equipment you will need
- Large mixing bowl and a wooden spoon
- Heavy skillet or cast-iron pan
- Rolling pin
- Small bowl for the garlic butter
- Pastry brush
- Clean kitchen towel
- Kitchen scale or measuring cups
How to make garlic pita bread, step by step
Follow these six steps for soft, fragrant pitas. Read through them once first, since the pan needs to be hot when the dough is ready.
Step 1: Mix the dough
- In a large bowl, combine the warm water, yeast and sugar. If you are using active dry yeast, let it stand for 5-10 minutes until foamy.
- Add the flour, olive oil and salt.
- Stir with a wooden spoon until a soft, slightly sticky dough forms and no dry flour remains.
- Cover the bowl with a clean towel or reusable cover.
- No kneading is necessary.
Step 2: Let the dough rise
- Leave the dough in a warm place for 60-90 minutes, or until approximately doubled in size.
- If your kitchen is cool, the dough may need additional time.
Step 3: Divide and shape
- Lightly flour your work surface and transfer the dough onto it.
- Divide it into 8 equal pieces.
- Shape each piece into a ball and cover for 10 minutes to relax the dough.
- Roll each ball into a circle about 6-7 inches (15-18 cm) wide and approximately ¼ inch (5-6 mm) thick.
- Roll evenly so the pita can puff properly during cooking.
Step 4: Cook the pita bread
- Heat a heavy skillet or cast-iron pan over medium-high heat until thoroughly hot. Do not add oil.
- Place one pita into the dry skillet.
- Cook for about 30-60 seconds, until bubbles appear and the underside develops light golden spots.
- Flip and cook for another 30-60 seconds.
- Flip once more if needed, allowing the pita to puff.
- Transfer to a clean kitchen towel and cover while cooking the remaining breads.
- If the pita browns too quickly without puffing, reduce the heat slightly.
Step 5: Make the garlic butter
- Melt the butter in a small bowl.
- Stir in the olive oil, minced garlic, parsley, salt and optional oregano.
- Brush the mixture generously over each warm pita as soon as it comes out of the skillet.
- For a milder garlic flavor, briefly warm the garlic in the melted butter over low heat, then let the mixture cool slightly before adding the parsley.
Step 6: Keep the pitas soft
- Stack the cooked pita breads and cover them with a clean kitchen towel for several minutes.
- The trapped warmth helps keep them soft, flexible and fluffy.
How to tell when garlic pita is done
- Color: The surface should have light golden spots, and the pita should look puffed or bubbly.
- Texture: The bread should feel soft and flexible, not stiff.
- Timing: Each side usually needs 30-60 seconds in a properly heated pan.
- Pocket: If the pita puffs, that is a good sign. Gently open it once it has cooled slightly.
Tips for perfect garlic pita
These small habits help you get soft, puffy, flavorful pitas every time.
- Use warm, not hot, water. Very hot water can damage the yeast, and cold water slows it down.
- Preheat the skillet well. A hot surface helps create the steam needed for the pita pocket.
- Roll evenly. Thick centers and thin edges can prevent uniform puffing.
- Avoid too much flour. Excess flour can dry out the surface.
- Brush while warm. The garlic butter soaks into the bread and adds extra flavor.
- Do not worry if every pita does not puff fully. The bread will still be delicious for dipping and wrapping.
- Mince the garlic very finely. Large pieces can taste harsh and fall off the bread.
- Add the topping after cooking. Garlic can burn in a hot dry pan, so brush it on once the pita is cooked.
Ingredient notes and substitutions
- Flour. All-purpose flour gives a soft pita. Bread flour makes a slightly chewier one. Replace up to half with whole wheat if you like.
- Yeast. Instant yeast can be mixed straight in. Active dry yeast should foam in the warm water first.
- Garlic. Fresh garlic gives the best flavor. Garlic powder can replace it, at about ½ teaspoon for 3 cloves.
- Butter. Unsalted butter lets you control the salt. If you use salted butter, skip the pinch of salt in the topping.
- Olive oil. Extra virgin olive oil adds flavor to the topping. A neutral oil can be used in the dough.
- Parsley. Fresh flat-leaf parsley adds color and freshness. Cilantro, dill or chives also work.
- Oregano. It is optional, but it adds a classic Mediterranean note.
Garlic pita troubleshooting
- Pitas did not puff: The dough was rolled too thin or too thick, or the pan was not hot enough. Roll evenly and preheat thoroughly.
- Pitas are dry or crisp: They were overcooked or left uncovered. Cook for less time and cover with a towel right away.
- Pitas are tough: Too much flour was added, or the dough did not rise enough. Keep the dough soft and let it double.
- Dough did not rise: The yeast may be old, or the water was too hot or too cold. Check the expiry date and use warm water.
- Garlic taste is too strong: Warm the garlic gently in the butter first, or use less.
- Garlic butter is not sticking: Brush it on while the pitas are still warm.
- Dough shrinks when rolling: It needs to rest. Cover the balls for 10 more minutes and try again.
- Pitas burn quickly: The heat is too high. Lower it a little.
Delicious variations
Once you have the base recipe, try one of these easy changes.
- Cheesy garlic pita. Sprinkle grated mozzarella or Parmesan over the warm pita immediately after brushing with garlic butter.
- Spicy garlic pita. Add chili flakes or a pinch of cayenne to the topping.
- Garlic Parmesan pita. Mix 2 tablespoons finely grated Parmesan into the garlic butter just before brushing.
- Vegan garlic pita. Replace the butter with olive oil or a plant-based butter alternative.
- Za’atar garlic pita. Sprinkle za’atar over the garlic topping for a savory Mediterranean twist.
- Lemon garlic pita. Add a little lemon zest to the garlic butter for a fresh note.
- Garlic pita chips. Cut the brushed pitas into wedges and bake at 350°F (180°C) for 8-12 minutes until crisp.
Serving ideas
Serve your warm garlic pita with:
- Hummus or baba ganoush
- Tzatziki or garlic yogurt sauce
- Falafel and chopped salad
- Grilled chicken, lamb or beef
- Roasted vegetables and feta
- Lentil soup or tomato soup
- Olive oil and balsamic vinegar for dipping
You can also slice the pitas into wedges and serve them as a side for family dinners.
Storage and reheating
- Room temperature: Store cooled pitas in an airtight bag for up to 2 days.
- Refrigerator: Keep airtight for up to 4-5 days, although the bread may become firmer.
- Freezer: Freeze for up to 3 months in a sealed freezer-safe bag, separating the breads with parchment if desired.
- Reheat: Warm briefly in a dry skillet or wrap in a slightly damp paper towel and microwave for 10-20 seconds.
For the freshest flavor, add the garlic butter shortly before serving.
Make-ahead tips
- Refrigerate the dough. After mixing, cover and refrigerate overnight. Let it warm up for about 30 minutes before dividing and rolling.
- Prepare the garlic butter early. Mix it a few hours ahead, and warm it gently before brushing.
- Cook in batches. Roll and cook as many as you need, since fresh pita is best the same day.
- Freeze plain pitas. Freeze them without the topping, then reheat and brush with fresh garlic butter.
Garlic pita bread FAQ
Why did my pita not puff up? The common causes are uneven rolling, dough rolled too thin or too thick, or a pan that is not hot enough. Roll evenly to about ¼ inch and preheat the pan thoroughly.
Do I need to knead the dough? This recipe does not require kneading. The dough is soft and slightly sticky, and the rise gives it structure.
Can I use active dry yeast instead of instant? Yes. Use the same amount and let it foam in the warm water and sugar for 5-10 minutes before adding the flour.
Can I add the garlic to the dough? You can, but the flavor is stronger and fresher when it is brushed on after cooking. Garlic in the dough can also slow the yeast slightly.
Will the garlic burn? Not if you add it after cooking. Fresh garlic can burn quickly in a hot dry pan, so brush the topping on once the pitas come out of the skillet.
Can I use garlic powder instead of fresh garlic? Yes. Use about ½ teaspoon of garlic powder for 3 cloves. Fresh garlic gives a brighter, more aromatic flavor.
Can I make garlic pita in the oven? Yes. Bake rolled pitas at 475°F (245°C) on a preheated tray or stone for 2-4 minutes, then brush with garlic butter.
How do I keep pita soft? Cover the cooked pitas with a clean towel right away. The trapped steam keeps them soft and flexible.
Can I freeze garlic pita? Yes. Freeze cooled pitas in a sealed bag for up to 3 months. For the best flavor, brush with fresh garlic butter after reheating.
Can I make it dairy-free? Yes. Use olive oil or a plant-based butter in the topping.
Can I make the dough ahead? Yes. Refrigerate it overnight after mixing, then let it warm up for 30 minutes before dividing and rolling.
Final thoughts
Soft, fluffy homemade garlic pita breads have golden spots, a tender texture and a rich garlic-herb butter finish. They are easy enough for everyday meals and delicious alongside dips, grilled meats, soups and fresh salads.
Keep the cooked pitas stacked under a clean towel and brush them with garlic butter while they are still warm for the softest, most flavorful result.
Print
Soft & Fluffy Garlic Pita Bread
Ingredients
For the pita dough
- 3 cups (375 g) all-purpose flour
- 1 cup (240 ml) warm water
- 2¼ teaspoons (7 g) instant yeast
- 1 tablespoon olive oil
- 1 teaspoon sugar or honey
- 1 teaspoon salt
For the garlic butter topping
- 3 tablespoons (42 g) butter, melted
- 3 cloves garlic, finely minced
- 1 tablespoon olive oil
- 2 tablespoons fresh parsley, chopped
- Pinch of salt
- Optional: ½ teaspoon dried oregano
Equipment you will need
- Large mixing bowl and a wooden spoon
- Heavy skillet or cast-iron pan
- Rolling pin
- Small bowl for the garlic butter
- Pastry brush
- Clean kitchen towel
- Kitchen scale or measuring cups
Instructions
Follow these six steps for soft, fragrant pitas. Read through them once first, since the pan needs to be hot when the dough is ready.
Step 1: Mix the dough
- In a large bowl, combine the warm water, yeast and sugar. If you are using active dry yeast, let it stand for 5-10 minutes until foamy.
- Add the flour, olive oil and salt.
- Stir with a wooden spoon until a soft, slightly sticky dough forms and no dry flour remains.
- Cover the bowl with a clean towel or reusable cover.
- No kneading is necessary.
Step 2: Let the dough rise
- Leave the dough in a warm place for 60-90 minutes, or until approximately doubled in size.
- If your kitchen is cool, the dough may need additional time.
Step 3: Divide and shape
- Lightly flour your work surface and transfer the dough onto it.
- Divide it into 8 equal pieces.
- Shape each piece into a ball and cover for 10 minutes to relax the dough.
- Roll each ball into a circle about 6-7 inches (15-18 cm) wide and approximately ¼ inch (5-6 mm) thick.
- Roll evenly so the pita can puff properly during cooking.
Step 4: Cook the pita bread
- Heat a heavy skillet or cast-iron pan over medium-high heat until thoroughly hot. Do not add oil.
- Place one pita into the dry skillet.
- Cook for about 30-60 seconds, until bubbles appear and the underside develops light golden spots.
- Flip and cook for another 30-60 seconds.
- Flip once more if needed, allowing the pita to puff.
- Transfer to a clean kitchen towel and cover while cooking the remaining breads.
- If the pita browns too quickly without puffing, reduce the heat slightly.
Step 5: Make the garlic butter
- Melt the butter in a small bowl.
- Stir in the olive oil, minced garlic, parsley, salt and optional oregano.
- Brush the mixture generously over each warm pita as soon as it comes out of the skillet.
- For a milder garlic flavor, briefly warm the garlic in the melted butter over low heat, then let the mixture cool slightly before adding the parsley.
Step 6: Keep the pitas soft
- Stack the cooked pita breads and cover them with a clean kitchen towel for several minutes.
- The trapped warmth helps keep them soft, flexible and fluffy.