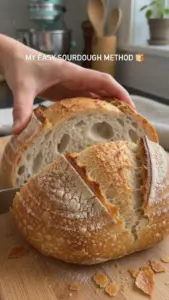
There’s something magical about the act of baking. It envelops you in the warmth of a kitchen filled with enticing aromas, textures that beckon for a touch, and the promise of delicious bites as the result of your labor. When it comes to sourdough, this experience intensifies as you interact with a living culture. The bubbling sourdough starter holds within it the power to transform mere flour and water into a flavorful loaf that boasts a symphony of taste—a soft, airy crumb that is both chewy and crisp at the edges. Each slice of homemade sourdough greets you with an artisanal touch, igniting your senses with its tangy aroma and inviting you to partake in the labor of love that is baking.
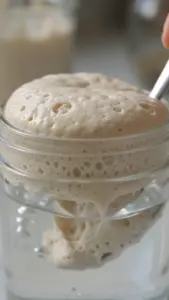
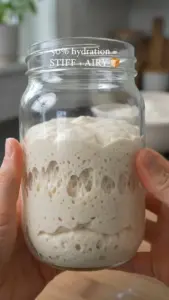
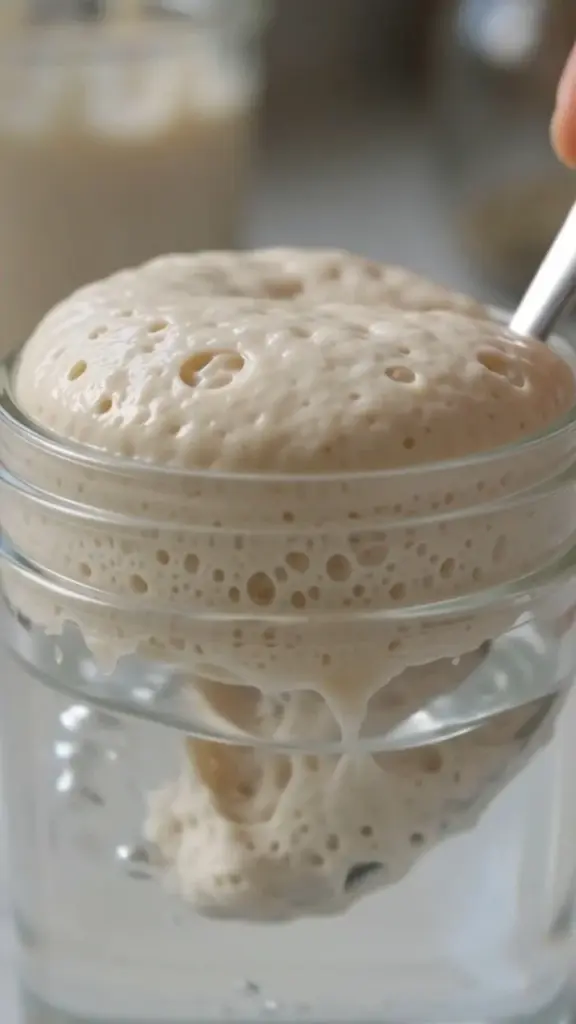
Before you dive into the baking realm, there’s one crucial element you must master: knowing when your sourdough starter is ready. Picture yourself lifting the lid of that clear glass jar, the warmth radiating from within, and being greeted by a gentle, effervescent symphony. The surface bubbles with giddy anticipation, and as you tip the jar slightly, that creamy, almost airy texture comes into view, glistening with a promise of deliciousness. Understanding this readiness transforms the science of baking into an art form that captivates your heart and palate.
Why You’ll Love This Guide
Knowing when your sourdough starter is ready enhances your baking game profoundly. Each day spent nurturing this culture transforms your kitchen into a lively, aromatic haven. Here are just a few reasons why you’ll cherish this knowledge:
-
Inviting Flavor Profile: A healthy sourdough starter infuses your bread with a vibrant, tangy flavor that simply cannot be replicated by commercial yeasts. The shifts in flavor as the starter matures create an engaging complexity, making every loaf uniquely delightful.
-
Artisan Experience: Crafting your own sourdough elevates your baking experience to an art form. You become a steward of fermentation, rejoicing in the small victories as your starter flourishes under your care.
-
Perfect Occasions: Freshly baked sourdough pairs beautifully with morning coffee, makes for an indulgent toasted cheese sandwich for lunch, and glides gracefully into your evening meals alongside soups or hearty stews.
-
Wholesome and Natural: Embracing sourdough gives you a wholesome bread option, packed with probiotic benefits that invite a healthy gut and a satisfied appetite.
This knowledge stands out, not just for the bread itself, but for the process—a ritual that nourishes both body and spirit.
Preparation Phase & Tools to Use
Diving into the world of sourdough doesn’t require fancy gadgets, but a few essential tools do enhance the process:
-
Glass Jar: Use a clear container for monitoring your starter’s bubbles and growth. The glass offers visibility and is non-reactive, ensuring a healthy environment for your fermentation.
-
Digital Kitchen Scale: Precision is vital when measuring flour and water for feeding your starter. A scale takes the guesswork out.
-
Wooden Spoon or Dough Whisk: Mixing your starter requires gentle handling, and a wooden spoon offers the perfect touch without disrupting the delicate cultures.
-
Plastic Wrap or Cheesecloth: Cover your jar with something breathable yet protective. Use a rubber band to secure the cheesecloth or wrap it loosely with plastic, allowing your starter to breathe.
Preparation is all about patience. Begin with a daily feeding routine, offering your starter fresh flour and water, and soon you will witness the delightful transformation begin to unfold.
Ingredients for the Sourdough Starter
Creating the perfect sourdough starter is as simple as two necessary ingredients, with opportunities for delightful variations.
-
Flour: Use a quality all-purpose or whole wheat flour. These options are rich in nutrients, fueling your starter. For a gluten-free alternative, consider using a blend of rice and almond flour.
-
Water: Filtered water helps promote a healthy starter, eliminating any chemicals that may interfere with fermentation. The water’s temperature can affect the speed at which your starter develops, so aim for a lukewarm temperature.
How to Make Your Sourdough Starter Ready
-
Initiate the Culture: Combine 100 grams of flour and 100 grams of water in your glass jar. Mix until you have a smooth, thick paste. Scrape down the sides to encourage the cultures to attach to the jar.
-
Let It Rest: Cover the jar loosely to allow air circulation. Let it sit at room temperature (around 70°F – 75°F) for 24 hours.
-
Daily Feedings: Each day begins with a gentle stir. Discard half of the mixture (approximately 100 grams). Add another 100 grams of flour and 100 grams of water, mixing until fully incorporated.
-
Observe the Magic: Within 3-5 days, bubbles will appear, and you’ll notice the starter begins to rise in volume, showcasing its liveliness. This is the moment to get excited!
-
Check the Float Test: The best indicator of readiness is the float test. Take a spoonful of your starter and gently drop it into a glass of room-temperature water. If it floats, it’s ready to bake!
Chef’s Notes & Helpful Tips
-
Make-ahead Tips: If you’re not ready to bake, refrigerate your active starter after the float test. Feed it once a week, always ensuring it’s at room temperature before using.
-
Cooking Alternatives: Besides traditional oven baking, consider using a Dutch oven for that perfect crust and airy crumb. Even an air fryer can work wonders for a smaller batch!
-
Customization Ideas: Adjust your feedings! Experiment with different flours to infuse unique flavors. Rye flour often enhances sourness, while whole wheat flour gives a deeper flavor profile.
Common Mistakes to Avoid
One of the joys of creating your own sourdough is learning from the process. Avoid these common pitfalls to ensure your starter thrives:
-
Overfeeding: Too much flour and water can dilute beneficial yeasts. Stick to the recommended feed ratio for balance.
-
Temperature Control: Drafty kitchens can hinder your starter’s growth. Find a warm spot, like on top of a refrigerator or in an unlit oven, to promote fermentation.
-
Neglecting to Discard: Skipping the discard step can lead to an overly acidic and unmanageable starter. Consistency is key!
What to Serve With Your Sourdough
Once you’ve nurtured your starter to perfection, it’s all about the delicious accompaniments. Here are a few delightful pairings:
-
Avocado Toast: The creamy texture of perfectly ripe avocado beautifully contrasts the crispy texture of toasted sourdough.
-
Roasted Garlic Butter: A spread of roasted garlic butter packed with fragrant herbs turns each slice into an addictive treat.
-
Homemade Soups: Serve your warm loaves with rich, hearty soups, where the bread soaks up flavorful broth while providing a satisfying crust.
-
Charcuterie Platter: The tangy notes of sourdough pair wonderfully with cured meats and aged cheeses.
-
Fig Jam or Honey: Sweet toppings complement the sour notes of the bread, creating a divine snack that balances flavors beautifully.
-
Eggs in any form: Whether poached on toast or scrambled beside the crusty slice, eggs bring richness that pairs naturally with your sourdough.
Storage & Reheating Instructions
After the joy of your baking comes the satisfaction of storing your delightful loaves. Here’s how to keep the goodness alive:
-
Fridge: Store your sourdough loaf in a breathable bag or wrapped loosely in parchment. This method preserves moisture while preventing it from getting too dense.
-
Freezer: For longer storage, slice your sourdough and wrap each slice tightly in plastic wrap followed by aluminum foil. This ensures minimal freezer burn. Thaw slices as needed for quick toasting.
-
Reheating: For the best experience, don’t microwave! Instead, pop that beautiful loaf back into a preheated oven at 350°F (175°C) for about 10-15 minutes to regain a crunchy crust and soft crumb.
Estimated Nutrition Information
Estimated values per slice (about 60 grams) may vary based on flour type and serving size:
- Calories: 150
- Total Fat: 0.5g
- Carbohydrates: 32g
- Fiber: 2g
- Protein: 4g
Disclaimer: These values are approximations and can vary based on your specific ingredients and methods.
FAQs
1. How long does it take to make a sourdough starter?
Typically, it takes about 5-7 days to cultivate a healthy sourdough starter. Each day’s feeding brings you closer to the bubbly mix you’re eager to bake with.
2. Can I use tap water for my starter?
While you can, it’s better to use filtered or bottled water. Chlorine and chemicals in tap water can stunt yeast growth, slowing down fermentation.
3. Why is my starter not bubbling?
Insufficient warmth or infrequent feedings can keep bubbles at bay. Ensure your starter stays in a warm spot and try feeding it more regularly.
4. How do I know my starter is overly acidic?
If your starter exhibits a sharp vinegar smell and creates an overly sour taste, it’s time to discard more of the mixture to balance acidity with fresh feedings.
5. Can I still use my starter if it sinks in the water test?
If it sinks, it may need more time. Give it a couple more feedings before testing again, and remember to keep it in a warmer environment for lively fermentation.
Conclusion
Embracing the world of sourdough is a rewarding journey laden with vibrant flavors and the sweet patience of nurturing a living culture. As you learn how to identify the perfect time when your sourdough starter is ready, remember you are not just baking—you’re creating a connection to the essence of traditional bread-making. As your starter bubbles with life and transforms your kitchen into a haven of delightful aromas, take pride in your new skill. Gather your ingredients, channel your creativity, and let the magic of sourdough fill your home with love and comfort. Your future loaves await!
Print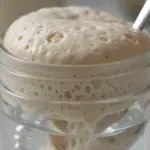
Sourdough Starter Guide
- Total Time: 5-7 days
- Yield: Variable based on use
- Diet: Vegan
Description
Learn how to create and maintain a bubbly sourdough starter that enhances your baking experience.
Ingredients
- 100 grams All-purpose or Whole Wheat Flour
- 100 grams Filtered Water
Instructions
- Combine 100 grams of flour and 100 grams of water in a glass jar. Mix until smooth.
- Cover the jar loosely to allow air circulation. Let it rest at room temperature for 24 hours.
- Discard half of the mixture and add another 100 grams of flour and 100 grams of water daily.
- Observe for bubbles and rising volume within 3-5 days.
- Test the starter’s readiness using the float test.
Notes
Consistency in feedings and maintaining a warm environment are key for a thriving starter.
- Prep Time: 5 minutes
- Cook Time: 0 minutes
- Category: Bread
- Method: Fermentation
- Cuisine: International
Nutrition
- Serving Size: 1 slice
- Calories: 150
- Sugar: 0g
- Sodium: 0mg
- Fat: 0.5g
- Saturated Fat: 0g
- Unsaturated Fat: 0g
- Trans Fat: 0g
- Carbohydrates: 32g
- Fiber: 2g
- Protein: 4g
- Cholesterol: 0mg
Keywords: sourdough, starter, baking, fermentation, homemade bread