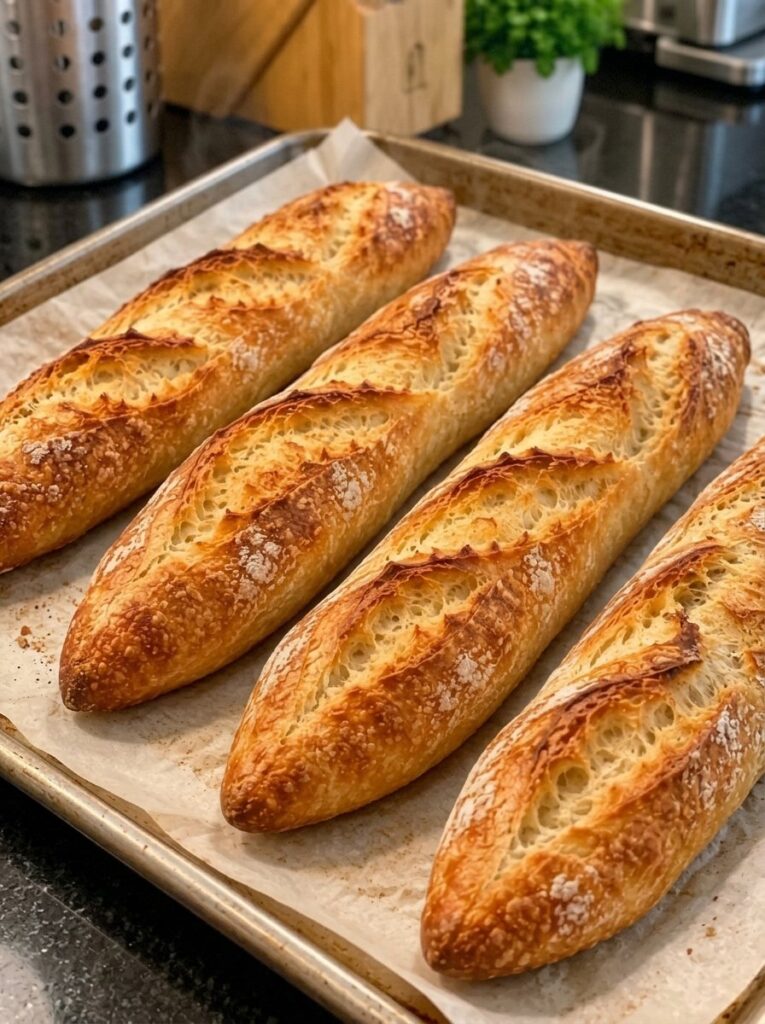
There is something almost magical about pulling a tray of golden baguettes out of your own oven. The crackle of the crust as it cools, the warm, yeasty aroma drifting through the kitchen, and that first tear into a soft, airy center all feel like a little piece of a Parisian bakery brought home. The good news is that you do not need special equipment, a professional oven, or years of baking experience to get there. These easy homemade mini French baguettes prove that bakery-style bread can be wonderfully approachable.
This recipe uses just four simple dough ingredients: bread flour, lukewarm water, instant yeast, and salt. There is no sourdough starter to maintain, no overnight pre-ferment to plan around, and no baking stone required. You will knead the dough, let it rise, shape six slender loaves, and bake them on a regular baking sheet. With a little steam in the oven, you will end up with baguettes that are crispy and deeply golden on the outside, and soft, chewy, and full of tiny air pockets on the inside.
In this guide, you will find the complete ingredient list, a clear step-by-step method, troubleshooting advice, serving ideas, storage and freezing instructions, and answers to the most common baguette questions. Whether you are a first-time bread baker or someone who simply wants a reliable weeknight loaf, this is the recipe to bookmark.
Why You Will Love These Mini French Baguettes
Before getting into the details, here is why this recipe deserves a regular spot in your baking rotation.
Only four dough ingredients. Bread flour, water, yeast, and salt are all you need. Most of them are already in your pantry, and the short list keeps the flavor clean, wheaty, and classic.
No special equipment. A mixing bowl, a baking sheet, parchment paper, a sharp knife, and an empty metal pan for steam are enough. If you own a stand mixer, it can handle the kneading, but your hands work just as well.
Mini size, big payoff. Dividing the dough into six small portions makes the loaves easier to shape, easier to fit on a standard baking sheet, and perfect for individual servings. They are ideal for mini sandwiches, dinner baskets, and sharing.
Bakery-style crust at home. The secret is steam. A cup of hot water poured into a preheated pan creates a humid oven environment that helps the crust stay flexible during the first minutes of baking, so the loaves expand fully before setting into a crisp, golden shell.
Beginner friendly. The dough is forgiving, the timeline is straightforward, and the shaping method is simple. Even if your first batch is not perfectly uniform, it will still taste incredible.
Versatile. These baguettes work for breakfast, lunch, dinner, snacks, and entertaining. Slice them, toast them, stuff them, dip them, or simply eat them warm with butter.
Recipe at a Glance
- Prep time: 25 minutes
- First rise: 60 to 90 minutes
- Second rise: 30 to 45 minutes
- Bake time: 20 to 25 minutes
- Cooling time: 20 to 30 minutes
- Total time: approximately 2 hours 35 minutes to 3 hours 35 minutes
- Yield: 6 mini French baguettes
- Oven temperature: 450°F (230°C)
Ingredients You Will Need
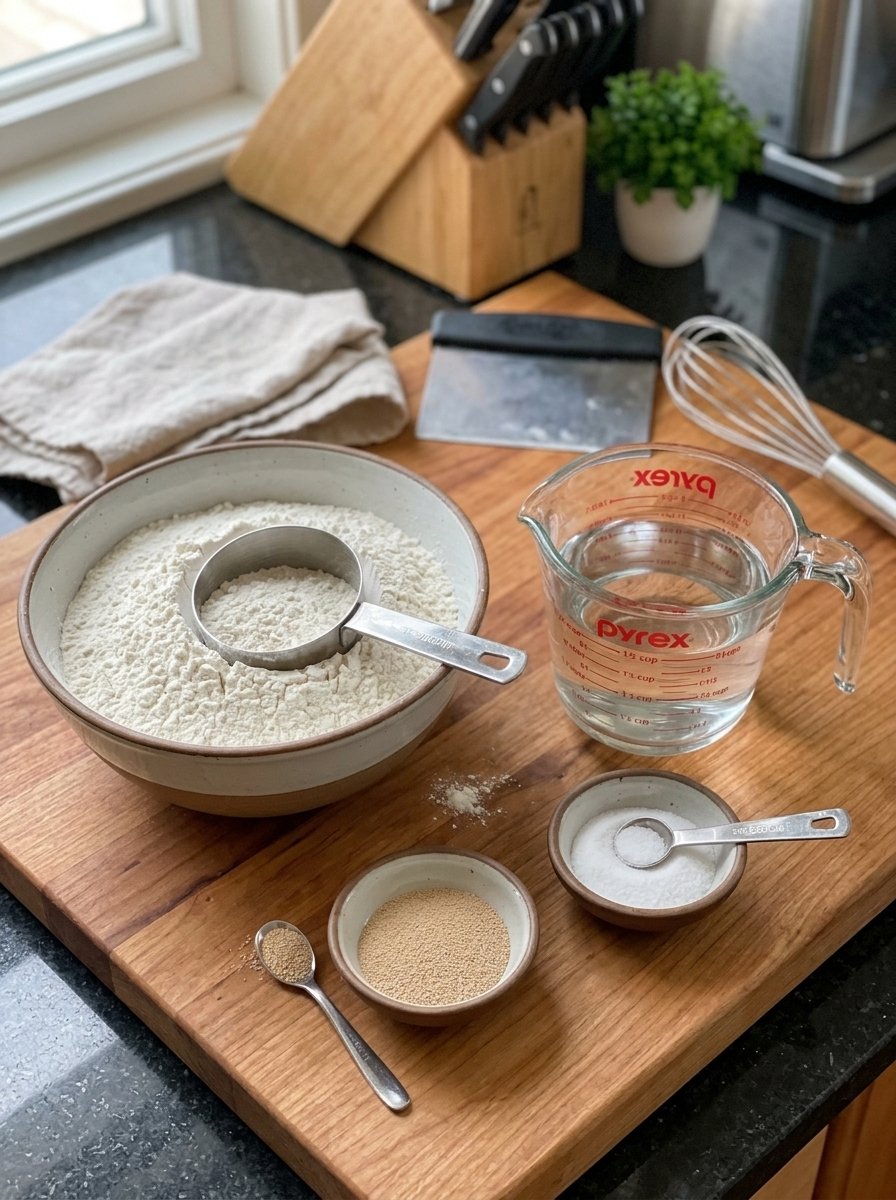
- 4 cups bread flour, spooned and leveled (480 g)
- 1½ cups lukewarm water (360 g)
- 2¼ teaspoons instant yeast (7 g)
- 2 teaspoons salt (10 g)
You will also need a little extra flour for dusting your work surface, a small amount of oil or butter to grease the rising bowl, and parchment paper to line your baking sheet.
A Closer Look at Each Ingredient
Bread flour. Bread flour has a higher protein content than all-purpose flour, which means it develops more gluten when kneaded. Gluten is what gives baguettes their signature chew and helps the dough trap the gas produced by yeast, creating that open, airy crumb. If you only have all-purpose flour, you can still make decent baguettes, but the texture will be a little softer and less chewy.
Lukewarm water. Water around 100°F (38°C) is ideal. It should feel comfortably warm to the touch, not hot. Water that is too hot can damage or kill the yeast, while water that is too cold will slow fermentation and extend your rising time.
Instant yeast. Instant yeast can be mixed directly into the flour without proofing first, which makes this recipe especially convenient. It is also reliable and fast acting. Check the expiration date on your package, since old yeast is one of the most common reasons bread fails to rise.
Salt. Salt does far more than add flavor. It strengthens gluten, regulates yeast activity, and helps the crust brown beautifully. Do not skip it, and measure it accurately.
Tips for the Best Mini French Baguettes
These small details make a big difference between an average loaf and a great one.
1. Measure the flour carefully. Spoon the flour into your measuring cup and level it off with a knife instead of scooping directly from the bag. Scooping packs the flour down and can add far too much, resulting in dense baguettes. If you have a kitchen scale, weigh the flour at 480 grams for the most consistent results.
2. Use lukewarm water. Aim for roughly 100°F (38°C). This temperature wakes up the yeast gently without overheating it.
3. Keep the dough slightly tacky. French bread dough should feel soft and a little sticky. It is tempting to keep adding flour while kneading, but too much will make the bread dry and heavy. Dust lightly and trust the process. As the gluten develops, the dough will become smoother and easier to handle.
4. Allow enough rising time. Let the dough double in size during the first rise, then let the shaped baguettes become visibly puffy before baking. Rushing either stage can lead to dense, tight-crumbed loaves.
5. Create steam in the oven. Steam during the first part of baking is the key to a crisp, golden crust. We will cover exactly how to do this safely below.
6. Score just before baking. A very sharp knife or bread lame makes clean cuts that allow the dough to expand in a controlled way. Dull blades drag and deflate the dough.
7. Cool before slicing. It is hard to wait, but letting the baguettes rest on a wire rack allows the crumb to finish setting and keeps the interior airy rather than gummy.
How to Make Easy Homemade Mini French Baguettes
Step 1: Mix the Dough
In a large mixing bowl, combine the bread flour and instant yeast. Add the lukewarm water and mix until a rough, shaggy dough forms. Add the salt and continue mixing until all the ingredients are evenly combined. Adding the salt after the dough starts coming together keeps it from sitting directly on the yeast, which is a simple way to protect fermentation.
Step 2: Knead Until Smooth
Transfer the dough to a lightly floured work surface. Knead for approximately 8 to 10 minutes, until the dough becomes smooth, elastic, and slightly tacky. To knead by hand, push the dough away from you with the heel of your hand, fold it back over itself, give it a quarter turn, and repeat.
If you are using a stand mixer fitted with a dough hook, knead on medium-low speed for about 6 to 8 minutes. The dough is ready when it pulls away from the sides of the bowl and springs back slowly when you gently press it with a fingertip.
Step 3: Let the Dough Rise
Place the dough in a lightly greased bowl and cover it with a clean kitchen towel or plastic wrap. Leave it in a warm place for approximately 60 to 90 minutes, or until doubled in size. A turned-off oven with the light on, or a spot near a warm (not hot) appliance, can work well if your kitchen is cool.
Step 4: Divide the Dough
Gently press the dough to release excess air. Transfer it to a lightly floured surface and divide it into 6 equal portions for mini baguettes. For the most even results, use a kitchen scale and weigh each portion, or cut the dough in half, then cut each half into three pieces.
Step 5: Shape the Mini Baguettes
Working with one portion at a time, gently flatten the dough into a small rectangle. Fold the upper edge toward the center and press to seal, then fold the lower edge over it and seal again. Fold the dough in half lengthwise and pinch the seam closed.
Roll each piece gently with your hands to form a slender baguette, tapering the ends slightly. Aim for an even thickness along the length so the loaves bake consistently. Keep the pieces you are not working on covered so they do not dry out.
Step 6: Let the Shaped Baguettes Rest
Arrange the baguettes seam-side down on a parchment-lined baking sheet, leaving space between each loaf. Cover loosely with a clean kitchen towel and let them rise for 30 to 45 minutes, or until slightly puffy. They should look a bit larger and feel airy, but not overinflated.
Step 7: Preheat the Oven
Preheat your oven to 450°F (230°C). Position one rack in the center and, if desired, place an empty oven-safe metal pan on a lower rack to create steam during baking. Let the oven fully preheat so the pan is hot when you add water.
Step 8: Score the Baguettes
Just before baking, use a very sharp knife or bread lame to make 2 to 3 shallow diagonal slashes along the top of each baguette. These cuts help the bread expand as it bakes and give the loaves their classic French baguette appearance. Hold the blade at a slight angle and cut with quick, confident strokes, keeping the cuts shallow.
Step 9: Add Steam and Bake
Place the baking sheet in the preheated oven. Carefully pour about 1 cup of hot water into the preheated metal pan on the lower rack, avoiding splashes and steam. Close the oven door immediately to trap the moisture.
Bake for 20 to 25 minutes, or until the baguettes develop a deep golden-brown crust and sound hollow when tapped on the bottom. Carefully remove the steam pan once it is safe to do so, following your oven’s instructions.
Safety note: Steam can cause serious burns. Wear oven mitts, pour away from your face and arms, and stand back as you close the oven door.
Step 10: Cool Before Serving
Transfer the baked baguettes to a wire rack and let them cool for at least 20 to 30 minutes. This allows the interior to finish setting while the crust stays crisp. You may hear the crust gently crackle as it cools, which is a sign you have done it right.
Step 11: Slice and Enjoy
Use a serrated bread knife to slice the baguettes. Serve them fresh with butter, make mini sandwiches, or tear off pieces to enjoy alongside your favorite homemade meals.
Why Steam Matters for a Crispy Baguette Crust
If there is one technique that separates bakery bread from ordinary homemade bread, it is steam. When dough first enters a hot oven, it experiences a burst of expansion known as oven spring. If the surface of the dough dries and hardens too early, the loaf cannot expand fully, and the crust can crack in the wrong places.
Steam keeps the outer layer of the dough moist and flexible during the first part of baking, allowing the loaf to rise to its full potential. The moisture also helps starches on the surface gelatinize, which contributes to that thin, glossy, golden crust and its satisfying crunch.
In a home oven, the easiest method is the one used in this recipe: preheat an empty metal pan on a lower rack, then pour hot water into it right after the baguettes go in. Be sure to use an oven-safe metal pan, and avoid glass, which can crack from sudden temperature changes.
Troubleshooting Common Baguette Problems
My baguettes turned out dense. The most common culprits are too much flour, too little kneading, or insufficient rising time. Spoon and level your flour or weigh it, knead until the dough is smooth and elastic, and let it truly double during the first rise.
The crust is pale or soft. Check that your oven is fully preheated and that you are using steam. Baking a few minutes longer, until the crust is a deep golden brown, will also help. An oven thermometer can reveal if your oven runs cooler than the dial suggests.
The dough is too sticky to handle. Slightly tacky is correct, but if it is unmanageable, lightly flour your hands and surface rather than adding a lot of flour to the dough. Kneading longer also helps, because gluten development makes dough less sticky over time.
The baguettes spread out instead of rising. This can happen if the shaped dough was not tightly sealed or if it over-proofed. Pinch the seams firmly and bake the loaves as soon as they look slightly puffy.
The scoring did not open up. A dull blade is the usual cause. Use a very sharp knife or a bread lame, and make shallow, confident cuts just before the loaves go into the oven.
The bread went stale quickly. Homemade bread has no preservatives, so it is best enjoyed fresh. Follow the storage tips below, and use day-old baguettes for toast, croutons, or garlic bread.
Delicious Ways to Serve Mini French Baguettes
The real joy of these little loaves is how many ways you can enjoy them.
Classic French breakfast. Serve with butter, jam, or honey and a cup of coffee or tea. It is a simple pleasure that never gets old.
Mini sandwiches. Fill with ham, cheese, lettuce, tomatoes, or grilled chicken. The individual size makes them perfect for lunchboxes, picnics, and casual gatherings.
Soup companion. Pair with tomato soup, French onion soup, or a hearty vegetable soup. The crisp crust and tender crumb are ideal for dunking.
Garlic bread. Slice lengthwise, brush with garlic butter, and toast until golden. It is a crowd-pleasing side for pasta night.
Cheese board. Serve with your favorite cheeses, olives, fresh fruit, and spreads. Slice the baguettes thinly on a diagonal for an elegant presentation.
Dinner bread. Place warm baguettes in a bread basket to accompany pasta, roasted chicken, or a fresh salad.
Easy Flavor Variations
Once you have mastered the basic recipe, try small twists to make it your own.
- Everything-style: Brush the shaped loaves lightly with water and sprinkle with sesame seeds, poppy seeds, or dried onion before baking.
- Herb-infused: Mix a teaspoon or two of dried herbs, such as rosemary or thyme, into the flour.
- Cheesy: Tuck shredded cheese into the folds during shaping for pockets of melted flavor.
- Garlic butter finish: Brush warm baguettes with melted garlic butter right out of the oven.
If you add ingredients to the dough itself, keep quantities modest so the structure and rise are not compromised.
How to Store Homemade Baguettes
Room temperature. Once completely cooled, store the baguettes in a paper bread bag or loosely wrapped in a clean kitchen towel for up to 2 days. This helps preserve the crust. Avoid sealing them in plastic at room temperature, which traps moisture and softens the crust.
Freezer. Freeze fully cooled baguettes in a freezer-safe bag for up to 2 months. Because the loaves are mini, they thaw quickly, and you can pull out just what you need.
Reheating. Lightly mist the crust with water and warm in a 350°F (175°C) oven for 5 to 8 minutes to refresh the crisp exterior. This brings back the just-baked texture remarkably well.
Make-Ahead Tips
If you want fresh baguettes without a long afternoon in the kitchen, plan ahead. Shape the baguettes and refrigerate them covered overnight for a slower rise. Before baking, allow them to sit at room temperature until slightly puffy, then score, add steam, and bake as directed. The cooler, slower rise can even deepen the flavor a little, which is a nice bonus.
Frequently Asked Questions
Can I make these baguettes with all-purpose flour?
Yes, though bread flour is recommended. Bread flour has more protein, which creates a chewier texture and a more open crumb. All-purpose flour will produce a softer, slightly less chewy loaf. If you substitute, you may need a touch less water, so add it gradually and watch the dough consistency.
Do I need a baking stone?
No. This recipe is designed for a regular baking sheet lined with parchment paper. A baking stone can improve bottom crust browning, but it is not necessary for delicious results.
How do I know when the dough has doubled?
The dough should look noticeably larger, about twice its original volume, with a puffy, domed surface. You can also gently poke it with a floured finger. If the indentation fills back slowly, it is ready.
What if I do not have a bread lame?
A very sharp knife works well. Serrated knives can be used for scoring as long as they are sharp, though a smooth, razor-sharp blade gives the cleanest cuts.
How can I tell when the baguettes are fully baked?
Look for a deep golden-brown crust, and tap the bottom of a loaf. It should sound hollow. If the crust is pale, give them a few more minutes.
Can I make the dough ahead of time?
Yes. Shape the baguettes and refrigerate them covered overnight, then let them come to room temperature until slightly puffy before baking.
Why are my baguettes tough instead of crisp and tender?
Over-baking, adding too much flour, or skipping steam can all lead to a tough crust. Measure carefully, use steam, and watch the bake time closely.
Can I freeze the baguettes?
Absolutely. Cool them fully, place them in a freezer-safe bag, and freeze for up to 2 months. Refresh in a 350°F (175°C) oven for a few minutes before serving.
Can I make full-size baguettes with this dough?
Yes. Divide the dough into fewer, larger portions and shape longer loaves. Keep in mind that larger loaves may need extra baking time, so rely on the visual and sound cues: a deep golden crust and a hollow sound when tapped.
Final Thoughts
Homemade bread has a way of turning an ordinary day into something special, and these easy homemade mini French baguettes are one of the most rewarding places to start. With just bread flour, lukewarm water, instant yeast, and salt, you can create loaves with a crackly golden crust and a soft, airy, chewy center, all on a regular baking sheet in your home oven.
Remember the essentials: measure your flour carefully, keep the dough soft and slightly tacky, give it enough time to rise, score with a sharp blade, and bake with steam. Do those things, and you will be rewarded with a tray of beautiful baguettes that look and taste like they came from a neighborhood bakery.
Serve them warm with butter, stuff them with your favorite sandwich fillings, dunk them in a bowl of soup, or set them out on a cheese board. However you enjoy them, these mini baguettes are sure to disappear fast. Give the recipe a try, and do not be surprised if it becomes a regular in your kitchen.
Print
Easy Homemade Mini French Baguettes
Ingredients
- 4 cups bread flour, spooned and leveled (480 g)
- 1½ cups lukewarm water (360 g)
- 2¼ teaspoons instant yeast (7 g)
- 2 teaspoons salt (10 g)
You will also need a little extra flour for dusting your work surface, a small amount of oil or butter to grease the rising bowl, and parchment paper to line your baking sheet.
A Closer Look at Each Ingredient
Bread flour. Bread flour has a higher protein content than all-purpose flour, which means it develops more gluten when kneaded. Gluten is what gives baguettes their signature chew and helps the dough trap the gas produced by yeast, creating that open, airy crumb. If you only have all-purpose flour, you can still make decent baguettes, but the texture will be a little softer and less chewy.
Lukewarm water. Water around 100°F (38°C) is ideal. It should feel comfortably warm to the touch, not hot. Water that is too hot can damage or kill the yeast, while water that is too cold will slow fermentation and extend your rising time.
Instant yeast. Instant yeast can be mixed directly into the flour without proofing first, which makes this recipe especially convenient. It is also reliable and fast acting. Check the expiration date on your package, since old yeast is one of the most common reasons bread fails to rise.
Salt. Salt does far more than add flavor. It strengthens gluten, regulates yeast activity, and helps the crust brown beautifully. Do not skip it, and measure it accurately.
Instructions
In a large mixing bowl, combine the bread flour and instant yeast. Add the lukewarm water and mix until a rough, shaggy dough forms. Add the salt and continue mixing until all the ingredients are evenly combined. Adding the salt after the dough starts coming together keeps it from sitting directly on the yeast, which is a simple way to protect fermentation.
Transfer the dough to a lightly floured work surface. Knead for approximately 8 to 10 minutes, until the dough becomes smooth, elastic, and slightly tacky. To knead by hand, push the dough away from you with the heel of your hand, fold it back over itself, give it a quarter turn, and repeat.
If you are using a stand mixer fitted with a dough hook, knead on medium-low speed for about 6 to 8 minutes. The dough is ready when it pulls away from the sides of the bowl and springs back slowly when you gently press it with a fingertip.
Place the dough in a lightly greased bowl and cover it with a clean kitchen towel or plastic wrap. Leave it in a warm place for approximately 60 to 90 minutes, or until doubled in size. A turned-off oven with the light on, or a spot near a warm (not hot) appliance, can work well if your kitchen is cool.
Gently press the dough to release excess air. Transfer it to a lightly floured surface and divide it into 6 equal portions for mini baguettes. For the most even results, use a kitchen scale and weigh each portion, or cut the dough in half, then cut each half into three pieces.
Working with one portion at a time, gently flatten the dough into a small rectangle. Fold the upper edge toward the center and press to seal, then fold the lower edge over it and seal again. Fold the dough in half lengthwise and pinch the seam closed.
Roll each piece gently with your hands to form a slender baguette, tapering the ends slightly. Aim for an even thickness along the length so the loaves bake consistently. Keep the pieces you are not working on covered so they do not dry out.
Arrange the baguettes seam-side down on a parchment-lined baking sheet, leaving space between each loaf. Cover loosely with a clean kitchen towel and let them rise for 30 to 45 minutes, or until slightly puffy. They should look a bit larger and feel airy, but not overinflated.
Preheat your oven to 450°F (230°C). Position one rack in the center and, if desired, place an empty oven-safe metal pan on a lower rack to create steam during baking. Let the oven fully preheat so the pan is hot when you add water.
Just before baking, use a very sharp knife or bread lame to make 2 to 3 shallow diagonal slashes along the top of each baguette. These cuts help the bread expand as it bakes and give the loaves their classic French baguette appearance. Hold the blade at a slight angle and cut with quick, confident strokes, keeping the cuts shallow.
Place the baking sheet in the preheated oven. Carefully pour about 1 cup of hot water into the preheated metal pan on the lower rack, avoiding splashes and steam. Close the oven door immediately to trap the moisture.
Bake for 20 to 25 minutes, or until the baguettes develop a deep golden-brown crust and sound hollow when tapped on the bottom. Carefully remove the steam pan once it is safe to do so, following your oven’s instructions.
Safety note: Steam can cause serious burns. Wear oven mitts, pour away from your face and arms, and stand back as you close the oven door.
Transfer the baked baguettes to a wire rack and let them cool for at least 20 to 30 minutes. This allows the interior to finish setting while the crust stays crisp. You may hear the crust gently crackle as it cools, which is a sign you have done it right.
Use a serrated bread knife to slice the baguettes. Serve them fresh with butter, make mini sandwiches, or tear off pieces to enjoy alongside your favorite homemade meals.